Jump to content


Photo
- - - - -

Mini Virgin Rebuild Of 83 Mayfair.


  • Please log in to reply
1006 replies to this topic

#271 Brams96

Brams96

    Up Into Fourth

  • Members
  • PipPipPipPipPipPipPipPipPip
  • 2,308 posts
  • Local Club: Kentish Mini Club

Posted 30 October 2011 - 09:48 AM

Hi grahama.
Can I just ask what brand of Red Oxide have you been using & what battery charger you used for the electrolysis? My battery charger is an automatic one so cuts out due to circuitry gubbins! Great progress by the way, I'm just about to start stripping & repairing my car & will definitely be refering back to your blog for advice/examples ;)

#272 grahama

grahama

    Up Into Fourth

  • Members
  • PipPipPipPipPipPipPipPipPip
  • 2,442 posts
  • Location: Warrington
  • Local Club: None in my area !!

Posted 30 October 2011 - 10:53 AM

Hi,

the primer I am using on the underside at least is not a type of red oxide but is micaceous iron oxide, (bridge paint/primer), I tried something else as the redoxide I had used in the past was already rusting through !! The battery charger was an ebay special, about £12 delivered. Put this number in ebay to see it 140506818019.

Graham

#273 087dave

087dave

    One Carb Or Two?

  • Members
  • PipPipPipPipPipPipPip
  • 952 posts
  • Location: In the living room

Posted 30 October 2011 - 12:03 PM

Hi Graham

good work keep it up

oh i think i never said THANKS for the template you sent for the fuel tank bracket

Dave

Edited by 087dave, 30 October 2011 - 12:03 PM.


#274 Brams96

Brams96

    Up Into Fourth

  • Members
  • PipPipPipPipPipPipPipPipPip
  • 2,308 posts
  • Local Club: Kentish Mini Club

Posted 30 October 2011 - 02:16 PM

Ok, thanks, do you have the name of it please or a product code/link to it. Cheers.

#275 grahama

grahama

    Up Into Fourth

  • Members
  • PipPipPipPipPipPipPipPipPip
  • 2,442 posts
  • Location: Warrington
  • Local Club: None in my area !!

Posted 30 October 2011 - 06:12 PM

Brams,

tried to send a pm but it wouldn't let me. put this number in ebay 140506818019 scroll down to see it then search to find one . sorry can't help anymore as old link.

Pm me if any more info wanted and can take a pic of mine for u

#276 Brams96

Brams96

    Up Into Fourth

  • Members
  • PipPipPipPipPipPipPipPipPip
  • 2,308 posts
  • Local Club: Kentish Mini Club

Posted 31 October 2011 - 04:42 PM

Hi graham,

Again many thanks but my mistake though, i should have said I meant the paint not the charger. Sorry. :shy: What brand are you using?

#277 grahama

grahama

    Up Into Fourth

  • Members
  • PipPipPipPipPipPipPipPipPip
  • 2,442 posts
  • Location: Warrington
  • Local Club: None in my area !!

Posted 02 November 2011 - 05:07 PM

Bram96 have pm'd you.


Hi all,

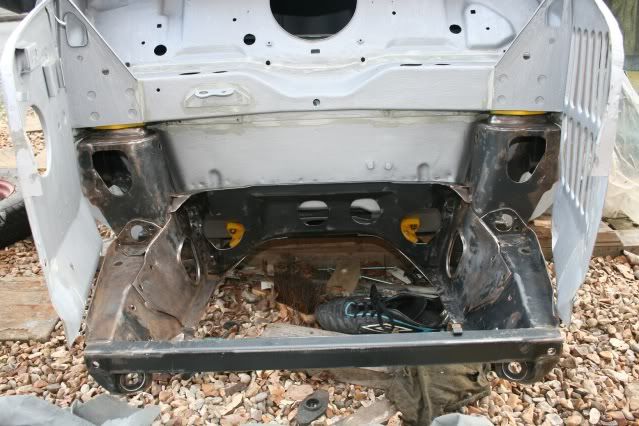
a small but very significant update. I have no rust left on the shell :D :D :D

Not that all is done as you will see but rust free for now. Sent the head and block to Dunright auto engineers near me for a block and head skim and a ckeck of the components. All fine, cam, crank, pistons, rings, bearings, maybe the 10k miles is reasonable as he says it's in great nick for nearly 30 years, no wear really.

So onto the last bits of rust....

Posted Image

Posted Image

Posted Image

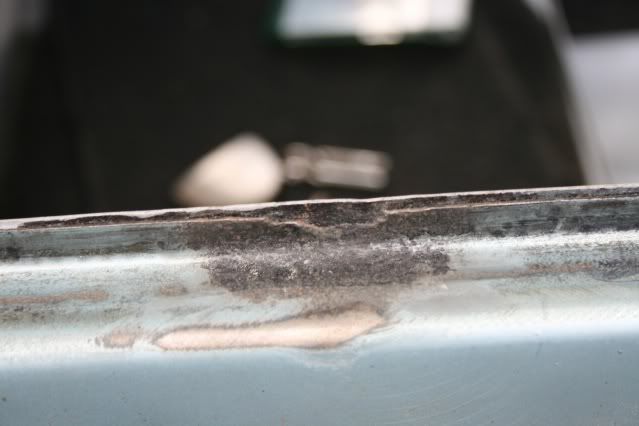
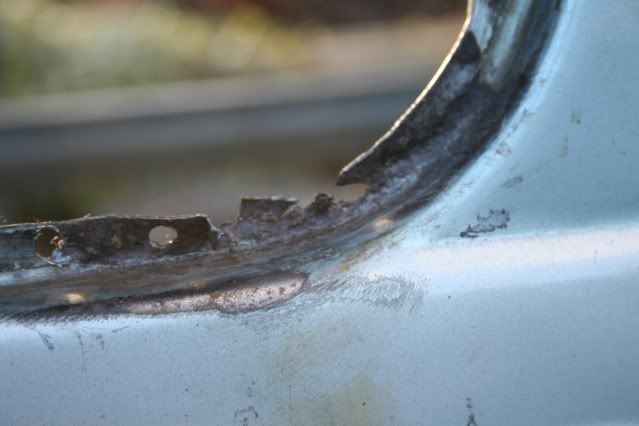
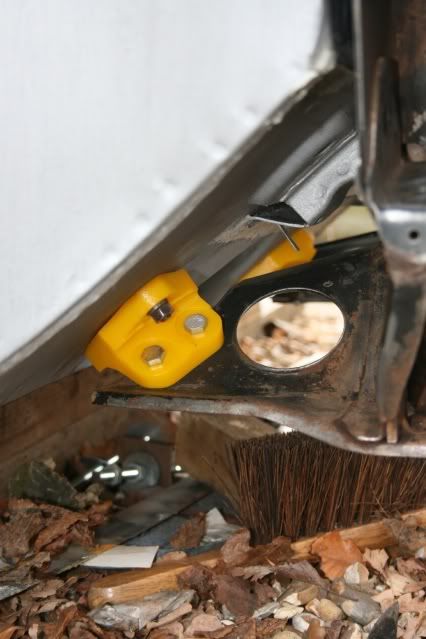
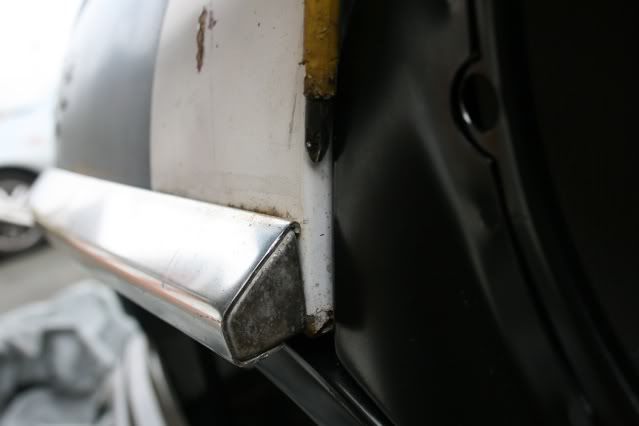
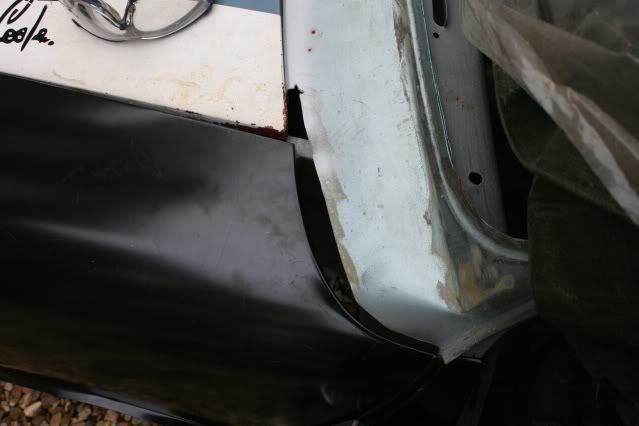
Inbetween the two skins of the window frame was a little rust and some of the outer had gone altogether. Just to be thorough I took off the internal strengthener to get at the rot, may aswell as gone this far doing it thoroughly !! Came out fine, inside rot free but as you can see outside a few patches required.

Posted Image

Posted Image

Posted Image

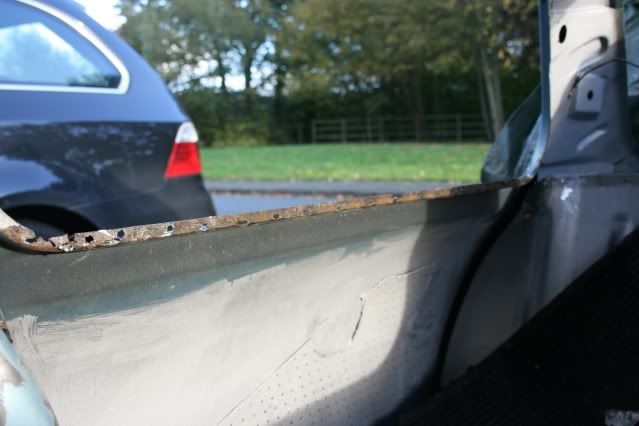
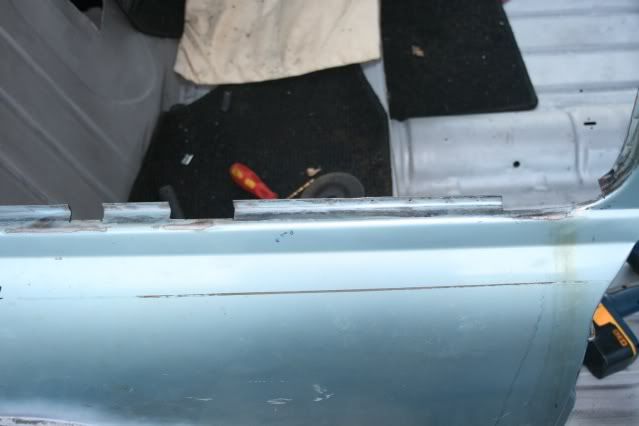
Not too much bad metal so a days work to fix this. There was a small bit like this on the scuttle lip near the stamped vin number but that doesn't need pics.

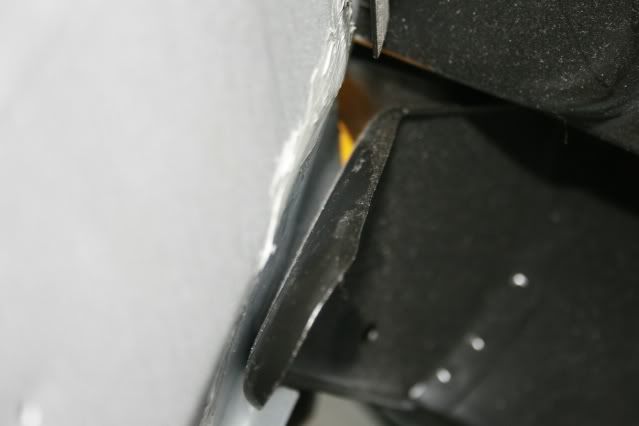
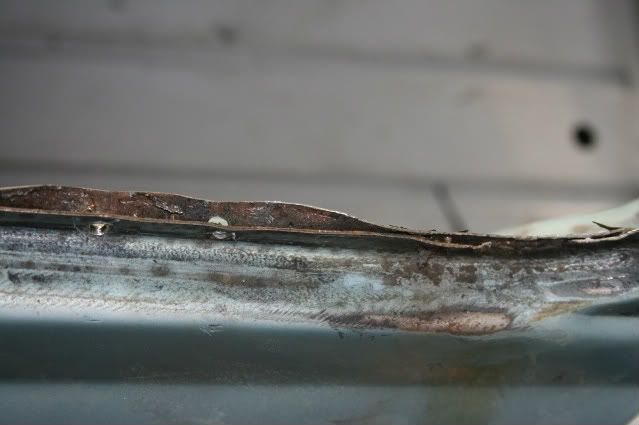
All cut out I made pieces to fit in and welded them in place.

Posted Image

Posted Image

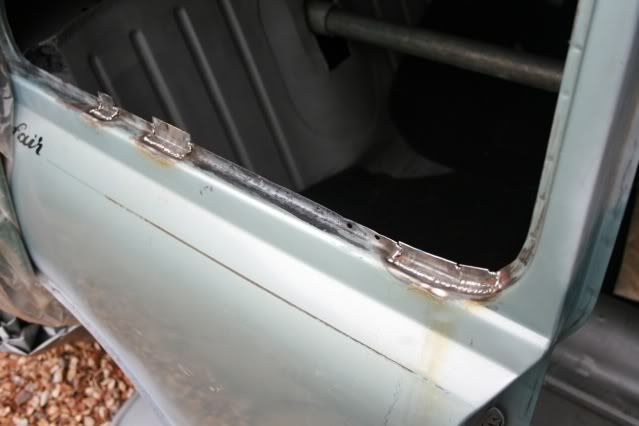
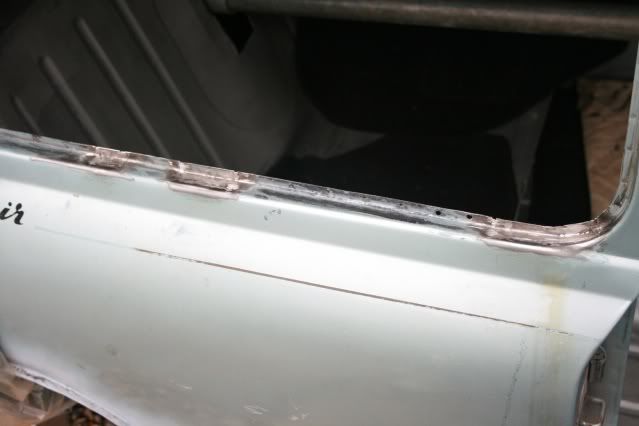
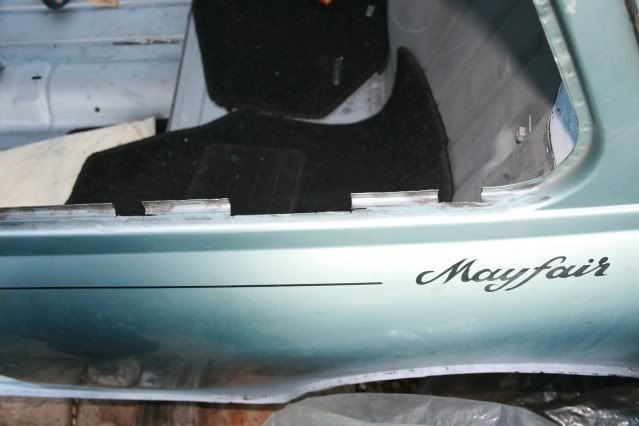
All done both sides but no point in too many pics is there !! All ground down and waiting for a skim of filler, primed and put to bed. Nice !!

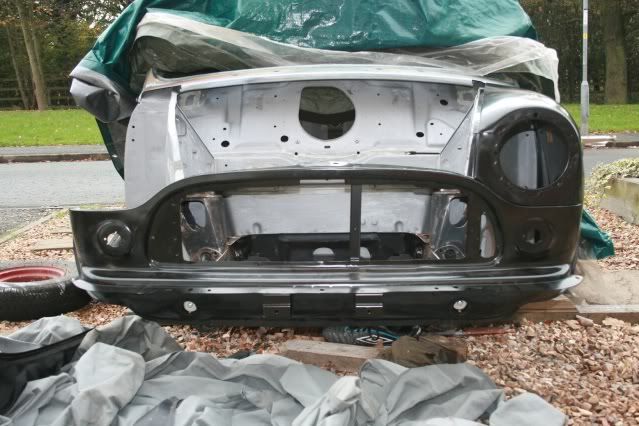
Getting the block and head back on Saturday and then I can paint that and start the rebuild. Had to send it off for a skim as my grinder, although useful, is not up to the job this time !!

Getting closer !!

Graham

Edited by grahama, 02 November 2011 - 05:10 PM.


#278 minimuk

minimuk

    Camshaft & Stage Two Head

  • Members
  • PipPipPipPipPipPipPipPip
  • 1,946 posts
  • Location: Midlands

Posted 02 November 2011 - 07:41 PM

nice job Graham, still a lot to do b4 the winter set's in? Keep iot going, by the way is the dog giving you insperation??

engine good idea to do over cold spel.

#279 grahama

grahama

    Up Into Fourth

  • Members
  • PipPipPipPipPipPipPipPipPip
  • 2,442 posts
  • Location: Warrington
  • Local Club: None in my area !!

Posted 02 November 2011 - 09:40 PM

Inspiration no definately not, most loyal dog ever, but bonkers, maybe desperation is a better word when talking about Peanut !!!

Yea, lots to do, waxoiling in cavities when I get paid again, and starting the front end. I have the waist rails / qtr panel stiffeners, they were cut off an old mini at a local breakers so just need a prep and they can go on. Glad I took the time to replace them even though they were mint, but the dreaded rot was behind so no option really.

Want to get another coat or primer on underneath before it gets too cold too. Soooo much to do but pleased so far this year, good progress for outdoor work.

Really pleased having had the engine looked over by an expert in Warrington. As I said all in great nick so no extra bits to buy except cam followers andmaybe the crank case bearings, (the semi circular ones in the in the block). Getting some enamel paint and rebuilding lube after payday too !!

Graham

Edited by grahama, 02 November 2011 - 09:44 PM.


#280 hughJ

hughJ

    Soldiering Along

  • Members
  • PipPipPipPipPipPipPip
  • 727 posts
  • Location: Highlands, Scotland

Posted 03 November 2011 - 11:01 AM

Graham - that is a sweet repair. You are so competent at the old metalwork now. Keep it going but not too fast!!

Hugh

#281 minimuk

minimuk

    Camshaft & Stage Two Head

  • Members
  • PipPipPipPipPipPipPipPip
  • 1,946 posts
  • Location: Midlands

Posted 03 November 2011 - 11:10 AM

Those are the mains bearings,...also check for scorin, bald partches scratching etc on the Big-end bearings, check out cam too and cam bearings, replace oil pump, hone your cylinders and check the piston rings(replace) while all is out, these are paramount jobs to be done, it might cost a few bob now but it will be cheaper in the long run,.......

Edited by minimuk, 03 November 2011 - 11:16 AM.


#282 grahama

grahama

    Up Into Fourth

  • Members
  • PipPipPipPipPipPipPipPipPip
  • 2,442 posts
  • Location: Warrington
  • Local Club: None in my area !!

Posted 09 November 2011 - 02:37 PM

Hi all,

little taster for you, but being a numpty I have the wrong bits !!

Wire brushed the front subby so I can for the front end and fitted the new poly bushes and then onto the mini.

Posted Image

Posted Image

The rear subframe mounts are too short really for the poly bushes and will have to be replaced when all done. However it fitted fine and will be painted soon.

Posted Image

However the angled flange does not meet the home made patches on the inner wing, the angle is all wrong so plenty of fettling comming up I feel.

Posted Image

Posted Image

Heritage panels so the fit was spot on really. A little jiggling round to do, but seams on front / wing and A panel slot together nicely. Bonet will need some work as it is too long at the moment but that could be sorted out with the jiggling. Also the gap will need fixing.

Posted Image

Posted Image

Posted Image

The scuttle on the NS need a piece as I made for the OS many months ago but that's not a problem.

Like I said, numptyness has struck again and I have ordered two NS wings so must wait till next week now before I can test fit that side but all looked fine on the NS. Wanted to get some tacking in done today but can't without all the panels as don't want to weld and then the other wing not fit. Pleased with the fit so far though.

Getting cold working outside now too !!

Graham

#283 hughJ

hughJ

    Soldiering Along

  • Members
  • PipPipPipPipPipPipPip
  • 727 posts
  • Location: Highlands, Scotland

Posted 09 November 2011 - 06:41 PM

Too fast man! That looks super and its reaching a more exciting stage!! For so long we've inched along. Good one Graham.

All the best

Hugh

#284 minimuk

minimuk

    Camshaft & Stage Two Head

  • Members
  • PipPipPipPipPipPipPipPip
  • 1,946 posts
  • Location: Midlands

Posted 09 November 2011 - 07:27 PM

looks like your nearside wing is to tight hence bonnet sticking out a bit at the front, how are your Apanels to the doorpost, what is the gap between a-panel and door, door and rear quarter?

you get there, finish your scuttle bit first, I think it looks ace sofar, just don''t rush anything ;D

#285 grahama

grahama

    Up Into Fourth

  • Members
  • PipPipPipPipPipPipPipPipPip
  • 2,442 posts
  • Location: Warrington
  • Local Club: None in my area !!

Posted 09 November 2011 - 07:45 PM

Too tight, yea sounds about right looking at it today, loose at the back. Have not got the doors on at the moment, will have to order some bolts to fit them before the other wing comes. Won't be rushing this stage for sure, too complicated to get right even with all the bits to hand !!


3 user(s) are reading this topic

0 members, 3 guests, 0 anonymous users