Graham while the gearbox is in bits fit a centre oil pick up pipe for any future high speed cornering shenanigans. Liking your progress getting a tad jealous now. I need the house move over and done with.


Mini Virgin Rebuild Of 83 Mayfair.
Started by
grahama
, May 22 2010 05:09 PM
1006 replies to this topic
#361

sonikk4
-

- Admin
-

- 16,168 posts
Twisted Paint Polisher!!!
- Name: Neil
- Location: Cotwolds.
Posted 28 January 2012 - 09:52 PM
#362
grahama
-
- Members
-
- 2,442 posts
Up Into Fourth
- Location: Warrington
- Local Club: None in my area !!
Posted 28 January 2012 - 10:56 PM
Hi,
Neil, a centre oil pick up is on the list, but high speed cornering with a 40bhp 998 mini, now you jest !!! But fitting one anyway, just need some cash first!!
Hugh, precision engineer, definately not, lol, but my work seems to tell me that everything is close enough!! Talent is being gained 'on the job', would describe myself as an enthusiastic amateur !!
Thanks for the encouragement, greatly appreciated but nagging in the back of my head is a front end thast needs fitting and then paint !!! Hope to start rebuilding the engine this week, just finishing re painting the head, and then the assembly lube will flow, head first, then when my engine mount adapter is made the rest! Getting it done for free so can't keep nagging him about it !
Am also rebuilding hubs, brakes as a bad weather time filler.
Roll on Spring and outside fun !! Will update soon!
Graham
Edited by grahama, 28 January 2012 - 10:58 PM.
#363
grahama
-
- Members
-
- 2,442 posts
Up Into Fourth
- Location: Warrington
- Local Club: None in my area !!
Posted 02 February 2012 - 04:18 PM
Hi all,
small update time, moving on but slowly !!
Started yesterday cleaning up my altenator, messy job but it came apart easily enough.
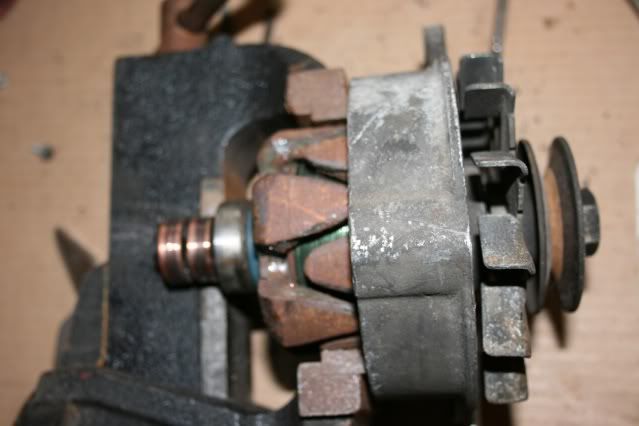
Wire brushed it for an hour or so and then bloody well broke the brushes off putting it together again, ahhhhhhhhhhhhhhhhh time. Not sure if I can replace them, but if I have to get a new one then will upgrade to a 70A one.
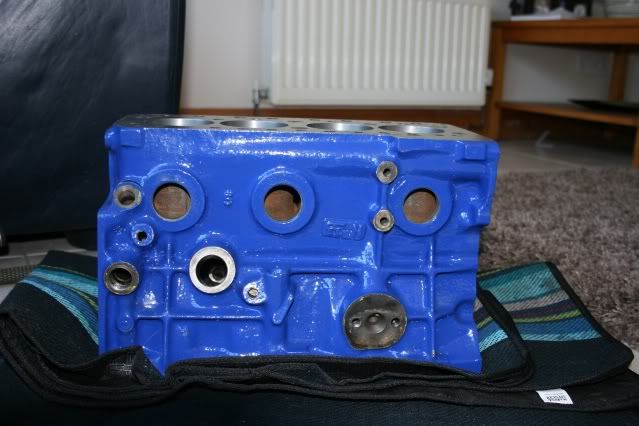
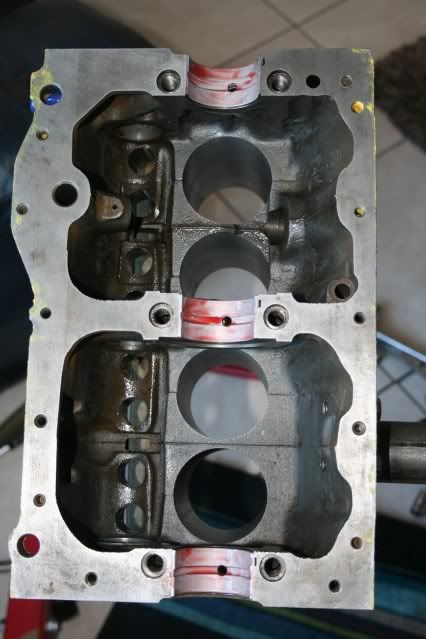
Then moved onto my freshly RE painted block, (thanks Matt), to start rebuilding it.
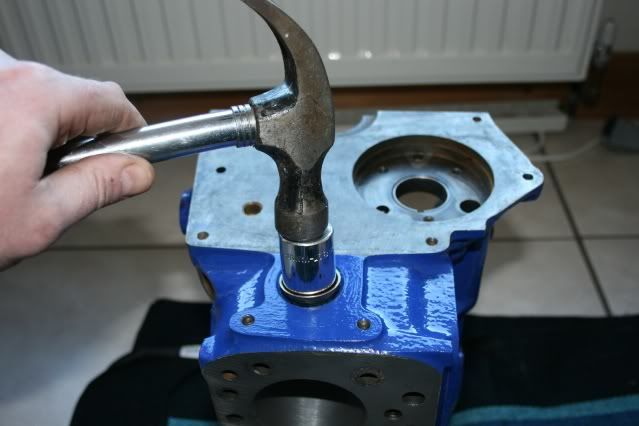
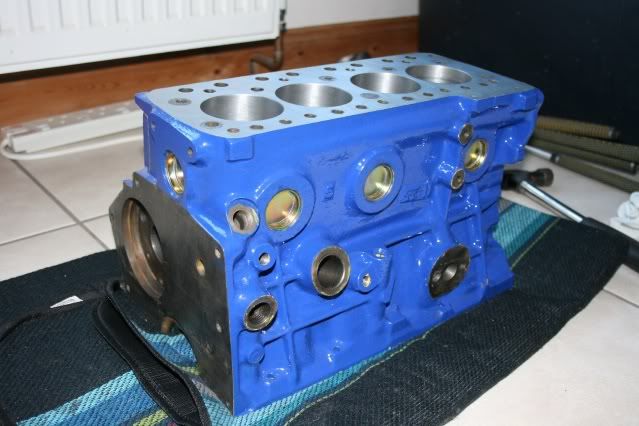
Started with the core plugs, hammered carefully in with a suitable sized socket. I put some Blue Hymolar gasket sealant on before fitting to try and seal them. First job done.
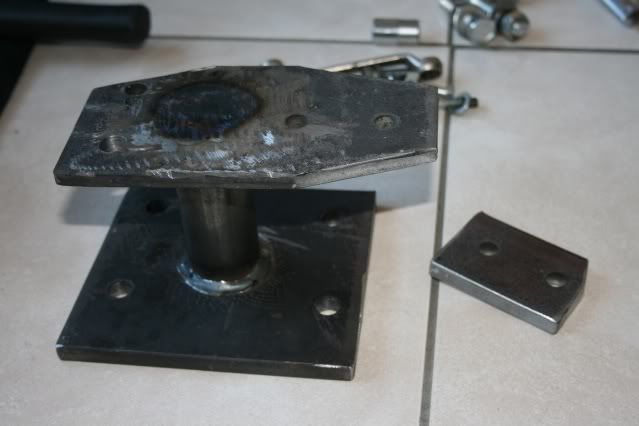
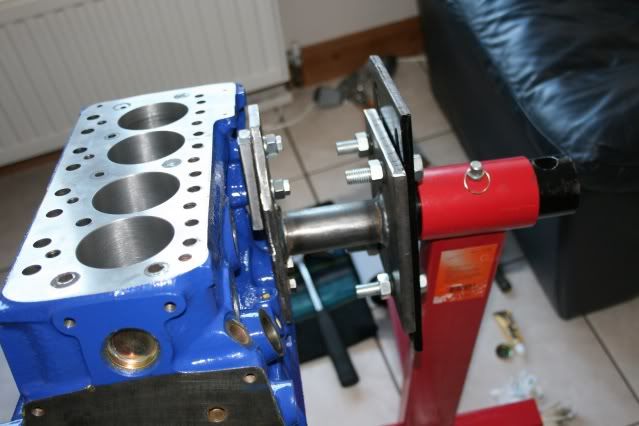
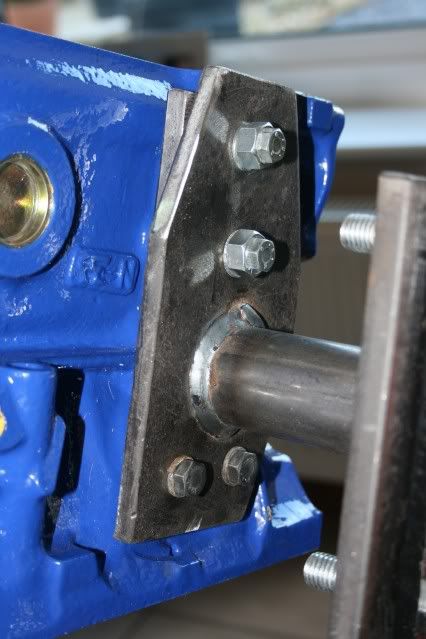
Next was to get it onto the engine stand, not an easy job as the mounts were too big for a mini block. A work mate knocked up an adapter plate for me and on it went, just hope it stays on now or it's new tiles for the misses !!
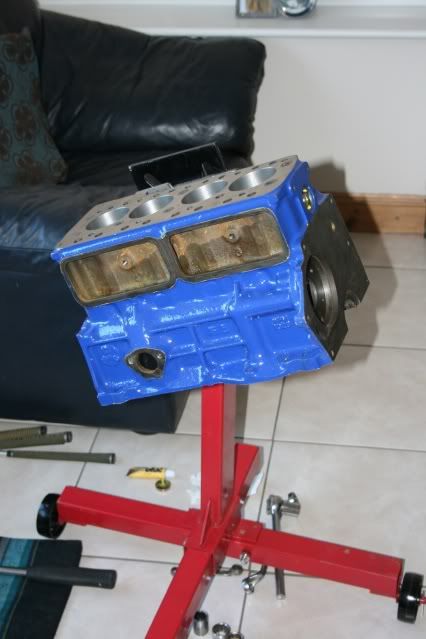
Crank and can were the first jobs inside, fitted with copius amounts of assembly lube to stop rust during build and help with the initial start, if I ever get there!!

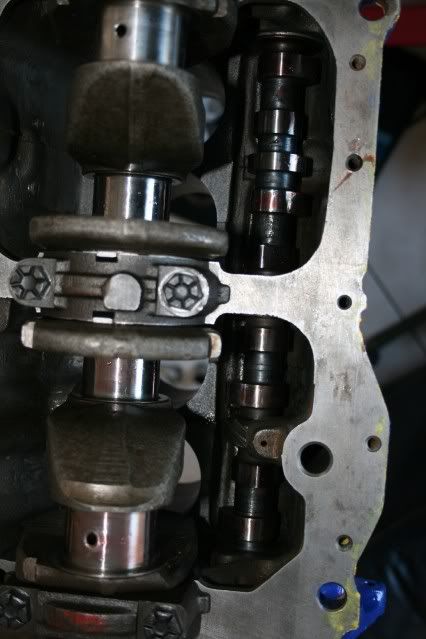
Putting the cam in was an easy job really, new main bearings, thrust washers, lube, and in it slotted. Cam went the same way, held in place by the oil pump which I filled with oil again for the first start up. I had a couple of questions though which I have asked in the technical section.
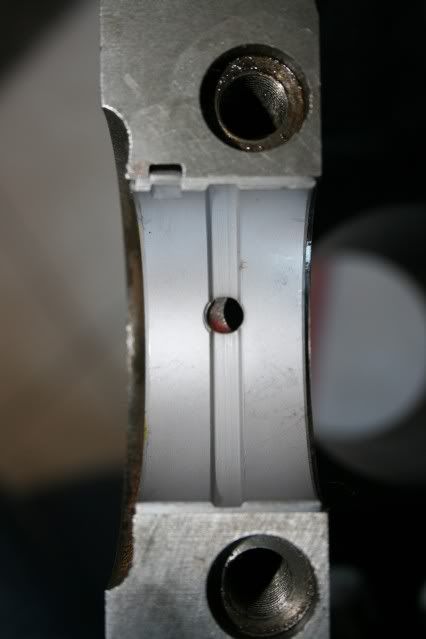
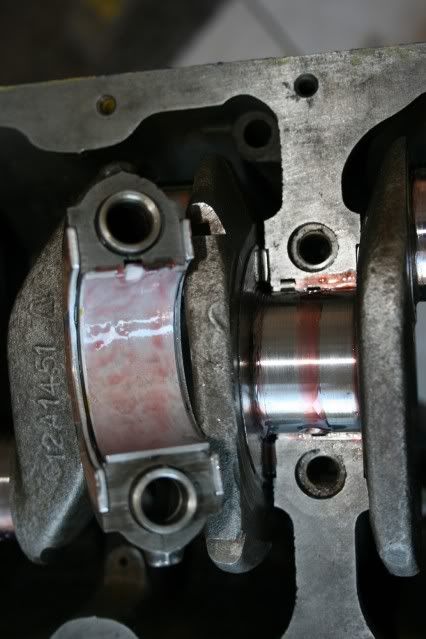
Questions were, does the miss alignment of oil hole matter, and is it tab to tab on the main bearings?
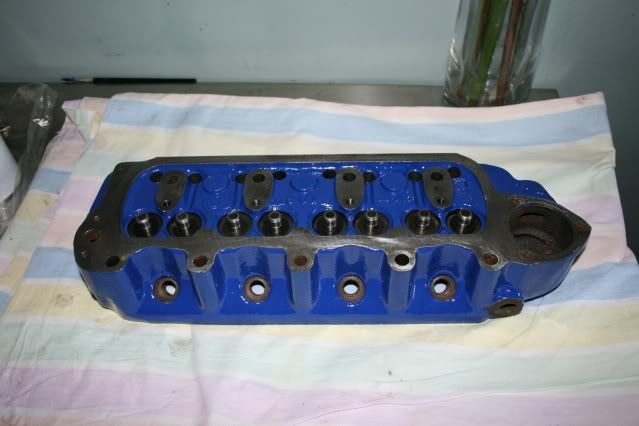
Wraped it up till I can get together with Phil Cauldwell from near me who is going to go through end float with his DTI with me. So moved onto my freshly RE painted head, (thanks again Matt) !!
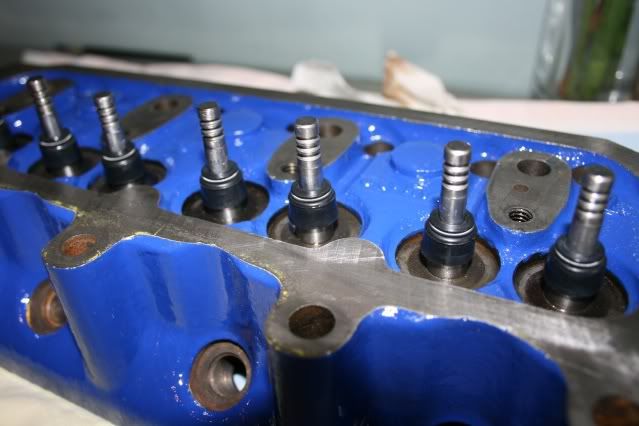
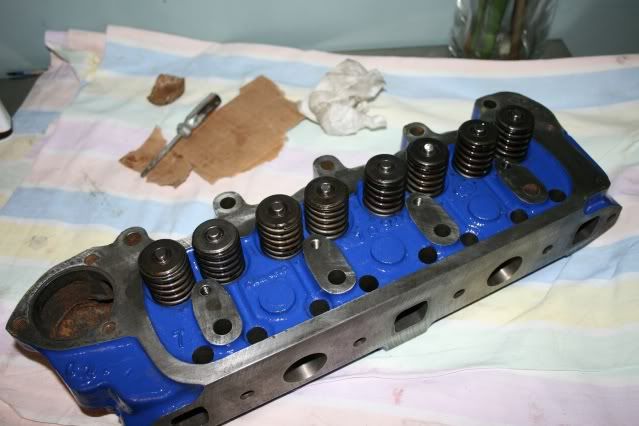
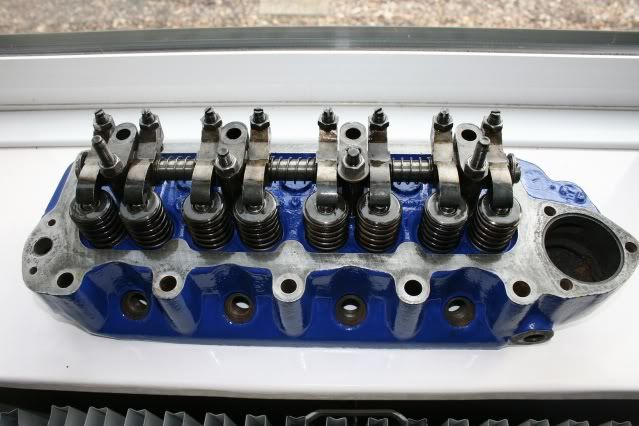
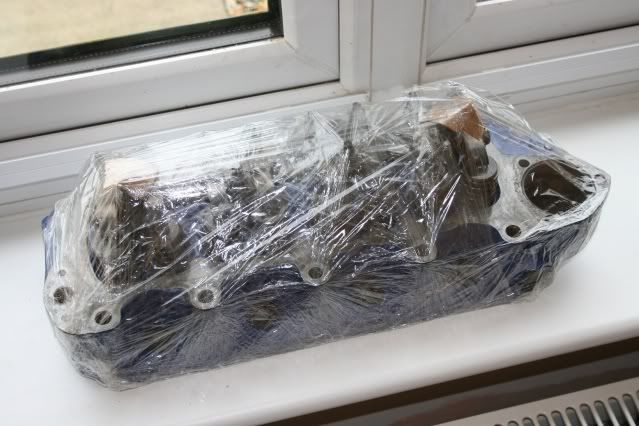
Quick photo book of the process so far, new stem seals, springs and collets refitted and rocker on.
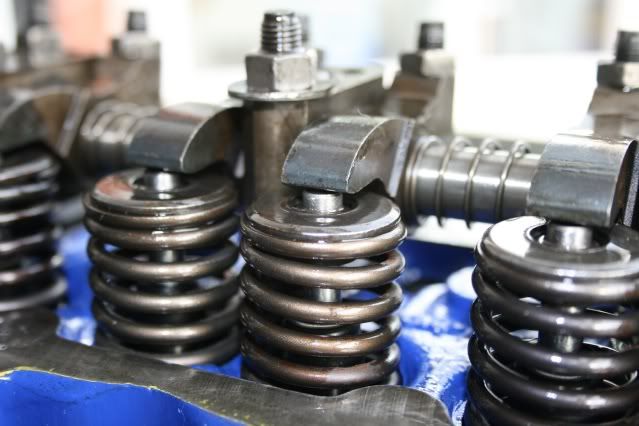
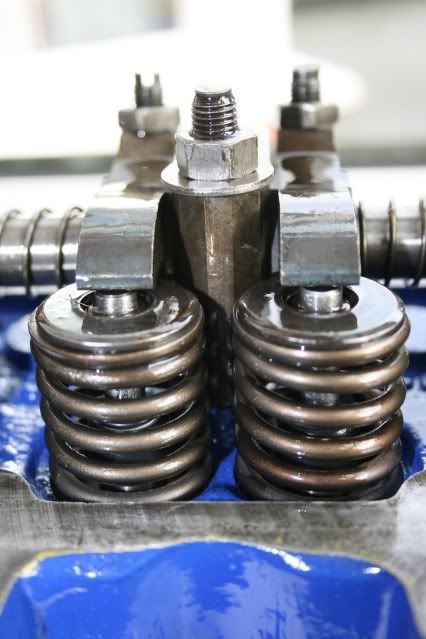
Just a couple of the rocker assembly close up because I am chuffed !!
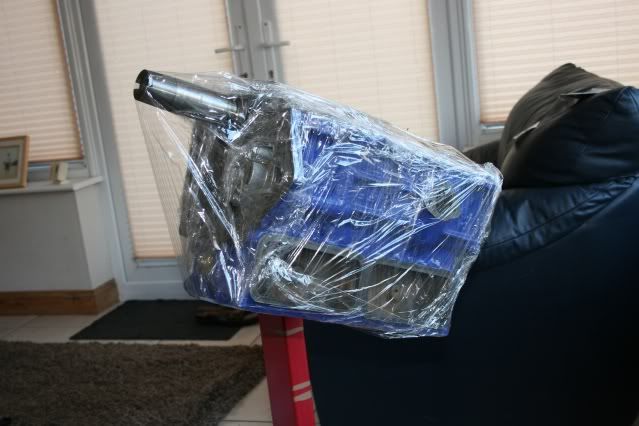
Then as I said wrapped them up in clingfilm to stop crap getting in there till I can move on.
Hope you enjoyed,
Graham
small update time, moving on but slowly !!
Started yesterday cleaning up my altenator, messy job but it came apart easily enough.
Wire brushed it for an hour or so and then bloody well broke the brushes off putting it together again, ahhhhhhhhhhhhhhhhh time. Not sure if I can replace them, but if I have to get a new one then will upgrade to a 70A one.
Then moved onto my freshly RE painted block, (thanks Matt), to start rebuilding it.
Started with the core plugs, hammered carefully in with a suitable sized socket. I put some Blue Hymolar gasket sealant on before fitting to try and seal them. First job done.
Next was to get it onto the engine stand, not an easy job as the mounts were too big for a mini block. A work mate knocked up an adapter plate for me and on it went, just hope it stays on now or it's new tiles for the misses !!
Crank and can were the first jobs inside, fitted with copius amounts of assembly lube to stop rust during build and help with the initial start, if I ever get there!!
Putting the cam in was an easy job really, new main bearings, thrust washers, lube, and in it slotted. Cam went the same way, held in place by the oil pump which I filled with oil again for the first start up. I had a couple of questions though which I have asked in the technical section.
Questions were, does the miss alignment of oil hole matter, and is it tab to tab on the main bearings?
Wraped it up till I can get together with Phil Cauldwell from near me who is going to go through end float with his DTI with me. So moved onto my freshly RE painted head, (thanks again Matt) !!
Quick photo book of the process so far, new stem seals, springs and collets refitted and rocker on.
Just a couple of the rocker assembly close up because I am chuffed !!
Then as I said wrapped them up in clingfilm to stop crap getting in there till I can move on.
Hope you enjoyed,
Graham
Edited by grahama, 02 February 2012 - 04:32 PM.
#364
minifcd
-

- Members
-
- 246 posts
Mini Mad
- Location: Stamford
Posted 02 February 2012 - 08:00 PM
Really interesting work Graham. To answer some of your questions, did you ever get the copy of Mini Magazines - Mini Expert issue1? In it Keith Calver explained how opening up the main bearing oil feed hole dramatically improves oil flow. Fit a bearing shell and scribe around the hole in the shell. Then remove the shell and using a file or a dremel type tool, open the hole up to the scribed mark by removing metal at an angle as required. Remember to clean filings from oil ways after.
Bearing shells should be fitted tab to tab.
Do you mean the carbon brushes in the alternator? If so I got my replacement brushes from our local Lucas dealer, Parkinsons but you could also try eBay. Your alternator looks like a Lucas 16ACR so try searching that for parts.
Bearing shells should be fitted tab to tab.
Do you mean the carbon brushes in the alternator? If so I got my replacement brushes from our local Lucas dealer, Parkinsons but you could also try eBay. Your alternator looks like a Lucas 16ACR so try searching that for parts.
#365
minimuk
-

- Members
-
- 1,947 posts
Camshaft & Stage Two Head
- Location: Midlands
Posted 02 February 2012 - 08:03 PM
Graham, I must say what a pretty sexy head that one, must be your impeccable photography 
#366
elliott1905
-

- Noobies
-
- 38 posts
On The Road
Posted 02 February 2012 - 09:26 PM
All this work looks amazing! Hopefully I can get my (future) mini just as good looking as yours, I will definitely be keeping an eye on this thread
#367
grahama
-
- Members
-
- 2,442 posts
Up Into Fourth
- Location: Warrington
- Local Club: None in my area !!
Posted 02 February 2012 - 09:51 PM
Thanks all,
alternator is an A115 - 45amp. Will try for some spares as it will save me £70 if I can fix it.
Might take the file out to the hole in the block to enlarge it so the oil will flow better, will see the work involved as it will really be with a file !!
Chuffed with the head, went a bit ocd with the paint though, you wont see the inside bits but I just got carried away lol !! All went back together nicely and my new best mate Phil is comming over in his fsat 998 to look at the end float on the crank.
Matt very interested to see a fast 998 as he now thinks his stock will be too slow. Unlucky I said, buy a 1275 and mod it !!!
More soon.
Graham
#368
Shifty
-

- Admin
-
- 13,154 posts
Sponsored by Fosters (tm)
- Name: Sean
- Location: Shropshire(sunny)
- Local Club: TMF
Posted 02 February 2012 - 09:54 PM
Looks nice Graham, should I save you TMF stand place this year?
#369
minifcd
-
- Members
-
- 246 posts
Mini Mad
- Location: Stamford
Posted 02 February 2012 - 09:56 PM
Ok Graham. What brand is the paint you used on the engine and where did you get it? It has a nice looking finish to it.
#370
grahama
-
- Members
-
- 2,442 posts
Up Into Fourth
- Location: Warrington
- Local Club: None in my area !!
Posted 02 February 2012 - 09:57 PM
Probably next year to be safe, but don't put my name down till the final product is done, there's probably going to be disasters in the pipeline yet, lol
#371
Brams96
-

- Members
-
- 2,308 posts
Up Into Fourth
- Local Club: Kentish Mini Club
Posted 03 February 2012 - 07:18 AM
Hey Graham, looking good as usual. You can get replacement brushes for the A115 (LINK) but why not just get an A127 like THIS 65A one or get a cheap second hand A127 at one of the shows & upgrade the regulator to a 70A version.
#372
PhilipGCaldwell
-

- Members
-
- 870 posts
One Carb Or Two?
Posted 03 February 2012 - 06:26 PM
Im going to see this terrific handy work first hand tomorrow
#373
minimuk
-
- Members
-
- 1,947 posts
Camshaft & Stage Two Head
- Location: Midlands
Posted 03 February 2012 - 08:27 PM
Graham , have you got a template of the adapter plate for the engine stand, I like the look of that, seen it on Guess-works but no template on his tread.
#374
minimuk
-
- Members
-
- 1,947 posts
Camshaft & Stage Two Head
- Location: Midlands
Posted 03 February 2012 - 09:02 PM
Graham, I must say what a pretty sexy head that one, must be your impeccable photography
only thing that i did not see on the sexy beast is the rocker post spacer and plug (2A515 and 2A258) on the second post is there any reason you left that one of?
#375
grahama
-
- Members
-
- 2,442 posts
Up Into Fourth
- Location: Warrington
- Local Club: None in my area !!
Posted 03 February 2012 - 09:17 PM
Hi Muk,
not entirely sure what you are on about but is this it??

If not then could you explain for me please?
The spacers you refer to seem to be to fit under each 'leg' of the rocker assy where the studs pass through, to raise the whole assembly up, is that right? If so, there weren't any on removal, should there have been ??
Graham
not entirely sure what you are on about but is this it??
If not then could you explain for me please?
The spacers you refer to seem to be to fit under each 'leg' of the rocker assy where the studs pass through, to raise the whole assembly up, is that right? If so, there weren't any on removal, should there have been ??
Graham
Edited by grahama, 03 February 2012 - 09:28 PM.


7 user(s) are reading this topic
0 members, 3 guests, 0 anonymous users
-
Bing (4)


