Jump to content


Photo
- - - - -

Mini Virgin Rebuild Of 83 Mayfair.


  • Please log in to reply
1006 replies to this topic

#391 benjy_18

benjy_18

    One Carb Or Two?

  • TMF+ Member
  • PipPipPipPipPipPipPip
  • 1,038 posts
  • Local Club: LSMOC

Posted 20 February 2012 - 06:44 PM

glad to hear it was just the offsets that were causing your problem!

your going along so well now im a tad jealous :(

keep it up! cant be too long now

Ben

#392 grahama

grahama

    Up Into Fourth

  • Members
  • PipPipPipPipPipPipPipPipPip
  • 2,442 posts
  • Location: Warrington
  • Local Club: None in my area !!

Posted 20 February 2012 - 08:12 PM

Orangeboy, believe me I have thought about keeping it to be honest, but would have to buy it off him, that's after buying it for him and doing it up lol.

Ben, looooooooooong way to go. Engine coming along nicely though, head back on and have to fiddle with the rockers next. Gearbox should only take a couple of days at my speed so should have a nice lump soon as a decorative feature in the lounge !!

Then I will have to brave the rest of the bodywork !!

Graham

#393 grahama

grahama

    Up Into Fourth

  • Members
  • PipPipPipPipPipPipPipPipPip
  • 2,442 posts
  • Location: Warrington
  • Local Club: None in my area !!

Posted 12 March 2012 - 07:14 PM

Hi all,

I had slipped down to page 8 of the building section so wayyyyyyy over due for a small update. Only small as it's all been pretty mundane stuff really.

Posted Image

Posted Image

Posted Image

The engine is pretty much built up, head is on but forgot the pic, (next time), timed dot to dot which should be good enough to get it started in the future and valve gaps set. That's if it's not seized up before then lol. I had a few issues on the way, trying to fit the wrong bolts in the end of the crank and searching for the proper one for a couple of hours, only to find it in the other end of the crank, doh !!!

Posted Image

As you can see Jan banned me from painting the subframe in the kitchen, so I have set a little painting room up in the loft. It has been a start / stop process as the cold temps have made the paint go very thick at times and I have stopped till it warms up. It's primed so protected, however I went outside to uncover the little darling today and was pleasantly surprised when I found that the only surface rust to arrive over Winter was on the unprotected front subby.

Posted Image

I then started to prep for fitting the front end. First job was the scuttle closing plates, and as ever, too tight to buy ones that wouldn't fit properly anyway so made one for the driver's side.

Posted Image

Posted Image

Posted Image

I am quite pleased with it really, except for the end of the pattern scuttle end piece that I used, it doesn't even come close to closing the scuttle gap, so will have to weld a piece in there. Also there is a small hole at the top of where the A panel fits, open to the inside, so will have to close this up too.

Posted Image

Posted Image

The driver's wing isn't too bad a fit but the Passenger side needed a little tweeking at the scuttle so while I was out I cut my heritage panel, nooooooooooooooooo, but it was needed.

Posted Image

Posted Image

Banged and bodged it will be fine, will weld it up tomorrow. I am thinking of drilling a hole into the scuttle end closed area and spraying waxoil in there, What do you think of this idea ??

Also on th go in the conservatory is the gearbox rebuild. It has cost me £50 a month for a cleaner, as Jan was about to divorce me yet again, but I can now carry on if I keep things tidy.

All went well and to be honest putting the main gearbox together should have only taken about two hours for an amateur. Got to this stage first

Posted Image

Posted Image

Posted Image

Looking fine I thought and the gear selectors moved nicely into position after I fitted the piece of metal over the detent spring, nice Tip from Mini Mania U tube vids

Posted Image

Anyway slotted in the main shaft, feeling good and thinking how like a pro gearbox builder I was, I had a look at the Guess works build vid too. Mmmmmmmmmmmmmmmmmmmmm forgot to put a spring clip on the third motion bearing which seats it properly to the correct depth in the box.

This one..

Posted Image

Bugger, ****, bugger, **** !!! Bust one of the bearings getting it apart first time and at £50 a go didn't want to do it again, but it had to come out so I set about it as I did before first time round. Only this time I was swearing at the box, Jan and kicking the cat in frustration. Half way through, disaster, the synchro hub burst apart spraying the living room with springs and ball bearings. I have tiled floors but deep pile rugs on top of them and the bearings dissapeared as you would expect.

Found 5 sets pretty quickly but Jan was on her hands and knees with me doing an inch by inch search of the living room till an hour later she found them. S that's another job to re do, tomorrow maybe after the passenger side closer.

Frustrating progress and I don't think the closers are 'as they should be' position wise, but they will be fine and all they do is stop water flying around so they stay as built, lol.

Very much inching along !!

Graham

Edited by grahama, 12 March 2012 - 07:15 PM.


#394 hughJ

hughJ

    Soldiering Along

  • Members
  • PipPipPipPipPipPipPip
  • 727 posts
  • Location: Highlands, Scotland

Posted 12 March 2012 - 08:46 PM

Graham its great to see you posting here again. That is a fantastic closing panel!! I bought mine! Its great to see your work again. You are more far seeing than me and plan things better. You also seem to see what is being a problem and sort it before hand. With me its always too late. Really sorry about the gearbox. Isn't that life?

As I say great to see an old friend back.

Hugh

#395 minifcd

minifcd

    Mini Mad

  • Members
  • PipPipPipPip
  • 246 posts
  • Location: Stamford

Posted 12 March 2012 - 08:49 PM

Thats hilarious! I do feel sorry for Jan and the cat! All that you put her through by working on gearboxes and engines in the house, and then you go and loose those small ball bearings and get her searching for them!! I know how hard they can be to find because I did the same thing!! Great stuff! Thats cheered me up reading this!

#396 grahama

grahama

    Up Into Fourth

  • Members
  • PipPipPipPipPipPipPipPipPip
  • 2,442 posts
  • Location: Warrington
  • Local Club: None in my area !!

Posted 12 March 2012 - 09:08 PM

Scott, wasn't funny at the time but how we laugh when we look back at it now, not !! Ready to go with it again now tho.

Hugh, you are much better than you think, and I have proof !! If you google scuttle closing pannel and look on images you are there onthe first page !!! Now that is recognition lol !!

#397 minimuk

minimuk

    Camshaft & Stage Two Head

  • Members
  • PipPipPipPipPipPipPipPip
  • 1,946 posts
  • Location: Midlands

Posted 12 March 2012 - 09:09 PM

Graham, like the start off yr gearbox, looking good,lower and upper lever rods the right way round?Have fun with your front end, good luck ;D

#398 grahama

grahama

    Up Into Fourth

  • Members
  • PipPipPipPipPipPipPipPipPip
  • 2,442 posts
  • Location: Warrington
  • Local Club: None in my area !!

Posted 12 March 2012 - 09:17 PM

Muk,

yea, think they are the right way round, labelled them as I took them out and when playing with the selector rod as if changing gear, the selector forks move the right way at the right time so think so !!!

Graham

#399 Carlos W

Carlos W

    Mine is purple, but I have been told that's normal

  • TMF+ Member
  • PipPipPipPipPipPipPipPipPipPipPip
  • 10,114 posts
  • Location: Sittingbourne, Kent

Posted 12 March 2012 - 09:19 PM

That engine is going to look lovely in the car!

#400 sonikk4

sonikk4

    Twisted Paint Polisher!!!

  • Admin
  • PipPipPipPipPipPipPipPipPipPipPip
  • 16,037 posts
  • Name: Neil
  • Location: Oxfordshire

Posted 12 March 2012 - 09:29 PM

Graham there is no to drill any holes into the close off area of the scuttle. If you look in the engine bay up and under the scuttle at each side where the inner wing goes under the scuttle there is a gap which is where you can inject Waxoyl / Dinotrol etc.

#401 grahama

grahama

    Up Into Fourth

  • Members
  • PipPipPipPipPipPipPipPipPip
  • 2,442 posts
  • Location: Warrington
  • Local Club: None in my area !!

Posted 20 March 2012 - 09:20 PM

Hi,

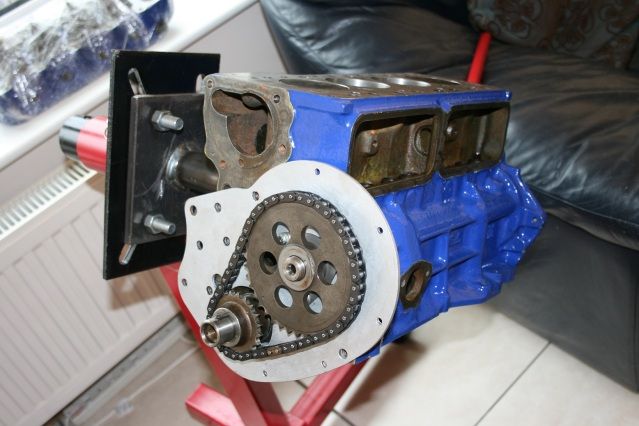
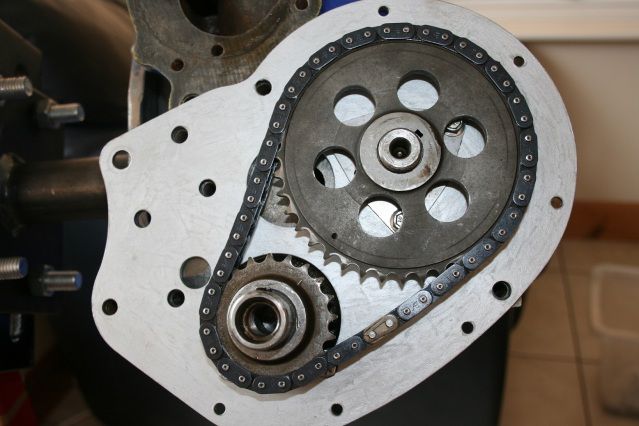
been at it again, inside stuff and outside. Will do the inside first as shorter !! Got the engine to a near finished state apart from ancilaries.

Posted Image

Posted Image

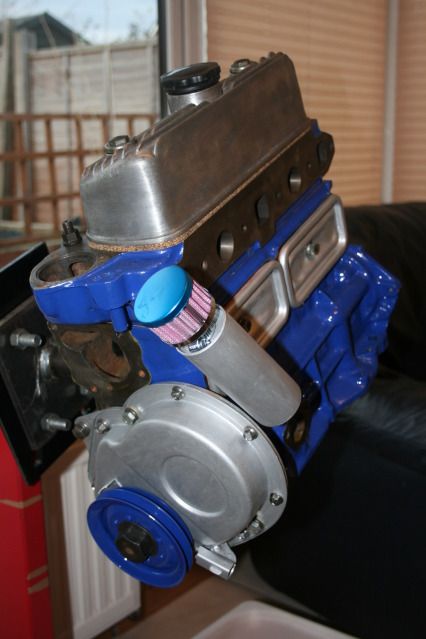
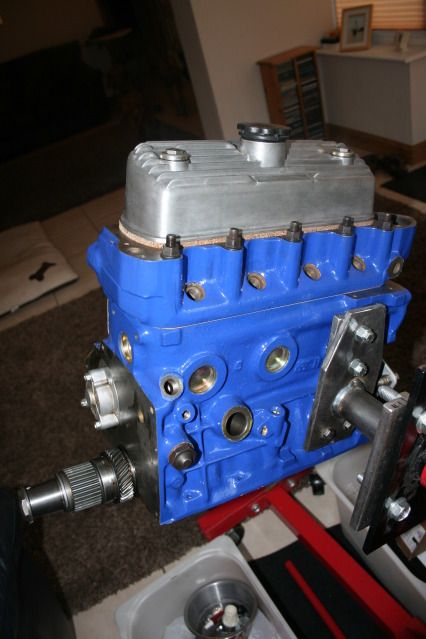
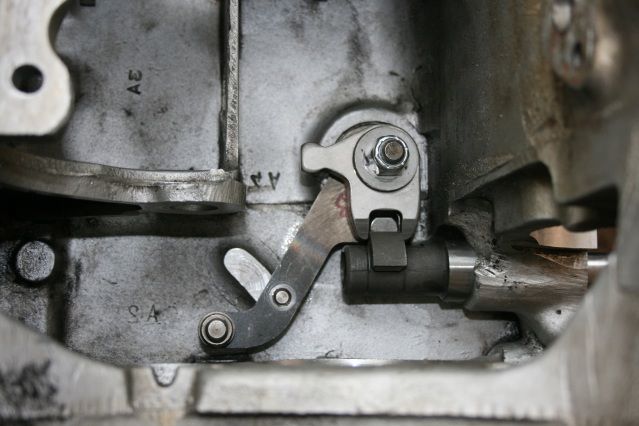
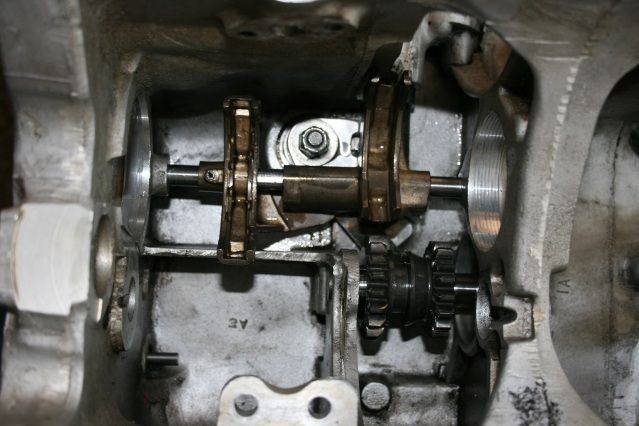
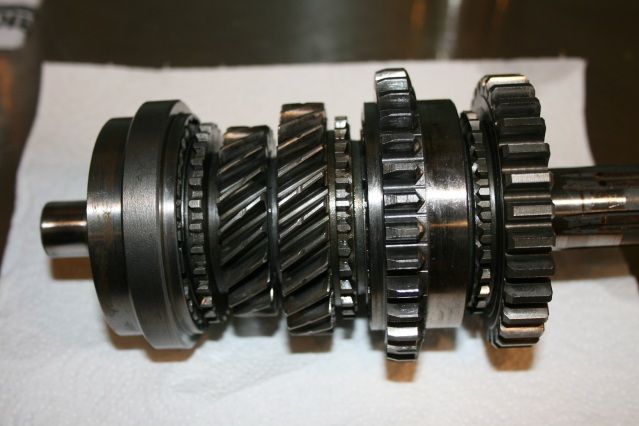
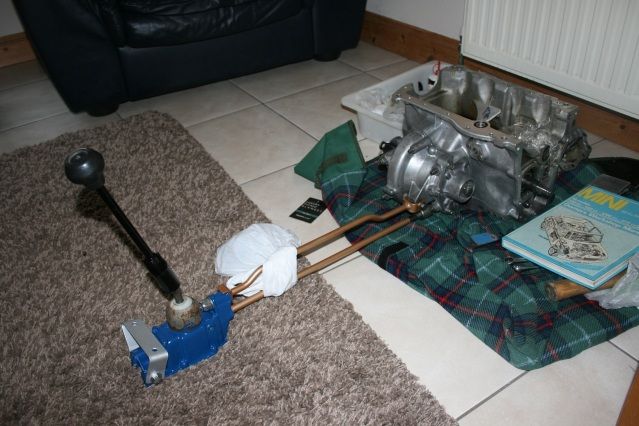
All timed up, torqued up and rerady for the gearbox which is up to here...

Posted Image

Posted Image

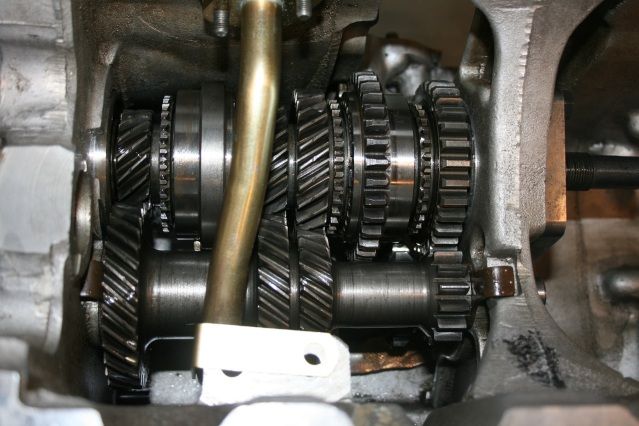
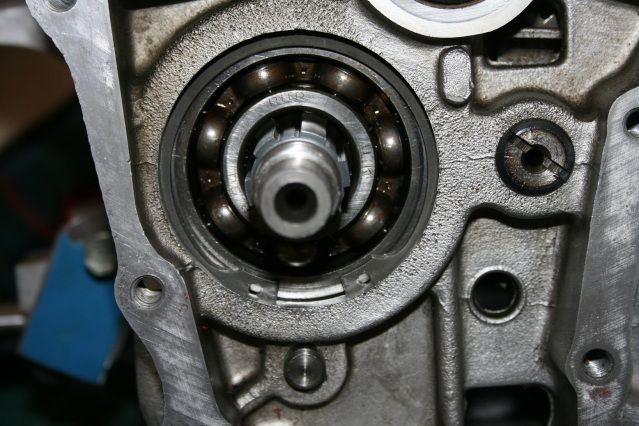
Got the circlip back in with a little persuasion from my less than adequate tool set and tried the gears using the temporary gear changer, an allen key. It was way too tight, all gears stiff, so I pulled the first motion shaft onto the back of the circlip using my slide tool from a few pages back and they freed up nicely. I have a worry though with the selection of 4th gear. The selector rod moves too far forward and the synchro hub ends up hitting the lay gear. I rang John at Guessworks for some advice and he said it would inprove with the box torqued up properly and with the gearlinkage, so I tried.

Posted Image

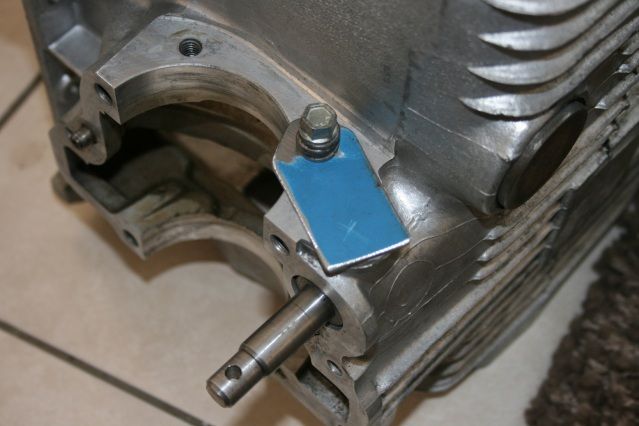
Still too much movement, all other gears fine, so may put a modification into the box where the gear stick goes in to stop the rod moving too much. Will have to think about that one though and maybe talk to John again.

"" Just a not for you all, John at Guessworks is a brilliant bloke, lots of free help and tips if thing going a little wrong. I have bought my gearbox bits from him so thought he wouldn't mind, but I think he's like that anyway, great fella and great service ""

Anyway, sun, sun, sun here in Warrington so outside it was, after changing the shower trap for Jan, (kitcken ceiling holed now so another job to finish), but she's happy now !!

Posted Image

Posted Image

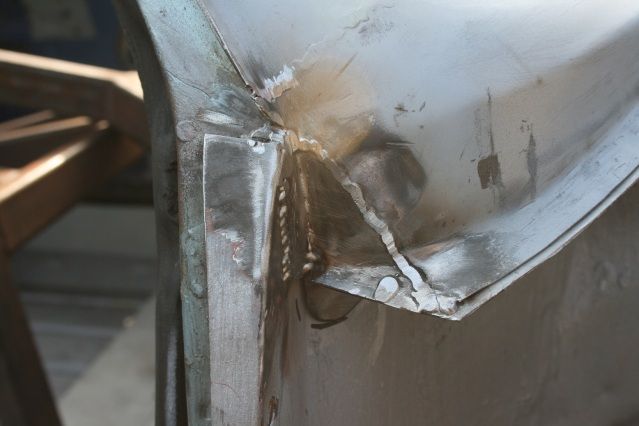
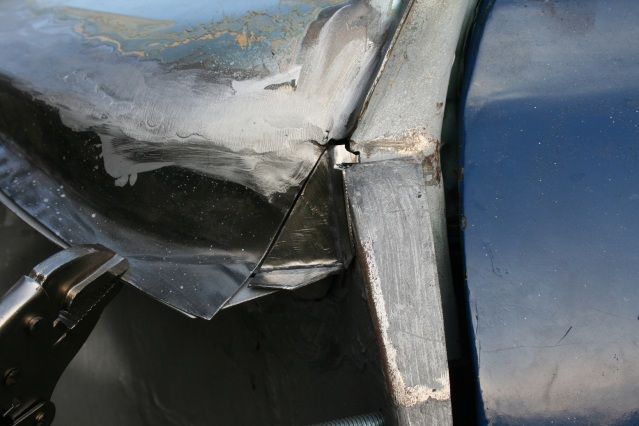
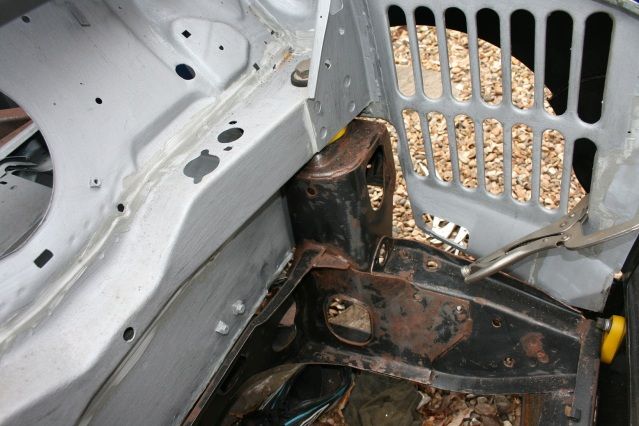
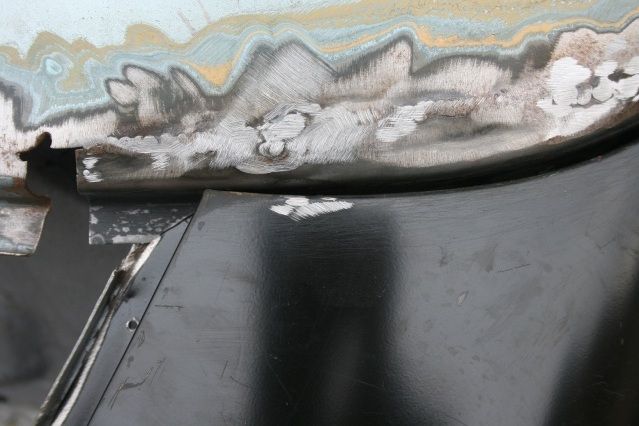
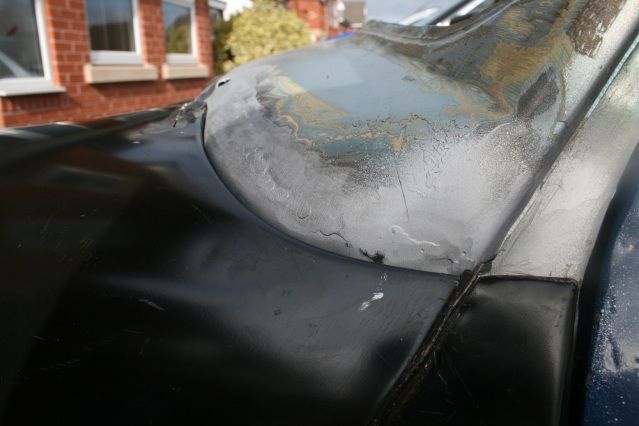
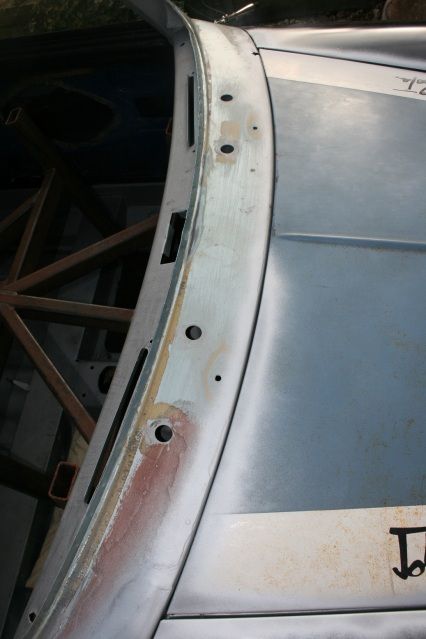
I closed the ends of the scuttle to make the closed ends underneath just that, closed, and plopped some weld into the top of the A post holes so all water tight now hopefully.

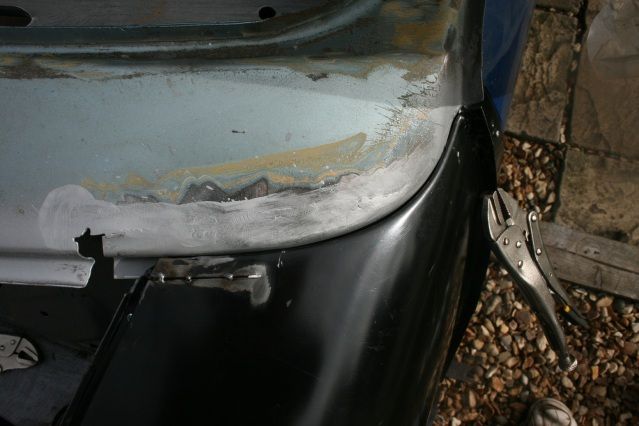
Yet again, I tried the a panels and wings, sorry for more pics the same, and asked a question in the tech section. Ok fit of driver wing but the a panel was way too far forward, same the pass side, so I had to start fitting again.

Posted Image

Posted Image

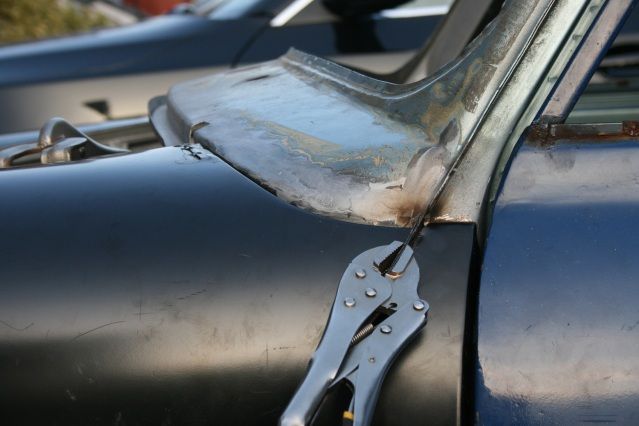
As mentioned by Hugh on his thread, releif cuts to the wing helped the fit so I did this too and put some self tappers into the a panels in a better position.

Posted Image

Posted Image

Posted Image

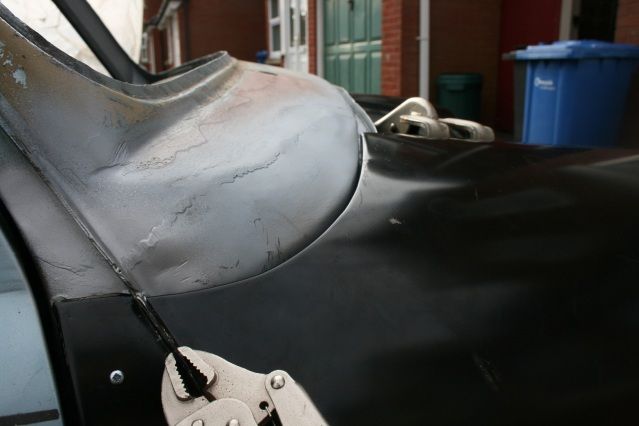
Looking better now, the relief cuts worked to bring the wing down into position along the scuttle gap. I also had to shave some off where both wings met the inner wings to allow for the relief cuts, but this helped out with the bonnet gaps.

Posted Image

Posted Image

Posted Image

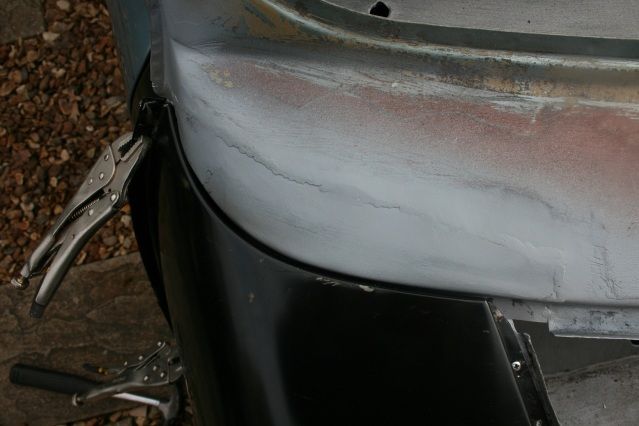
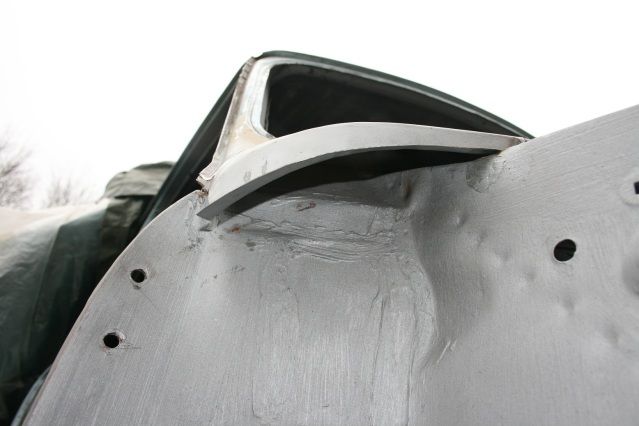
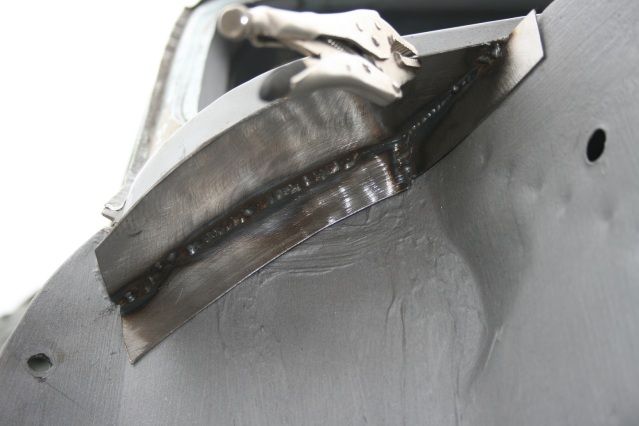
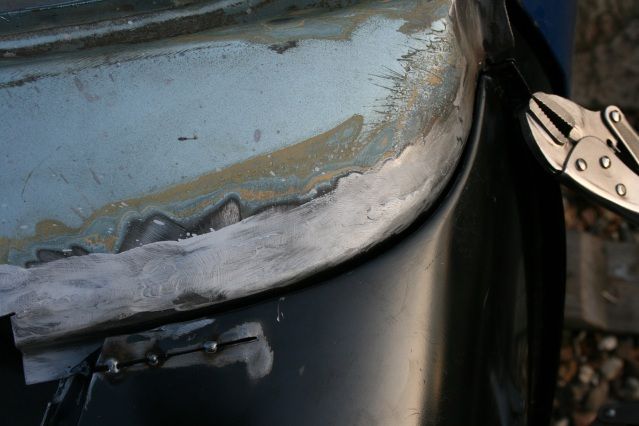
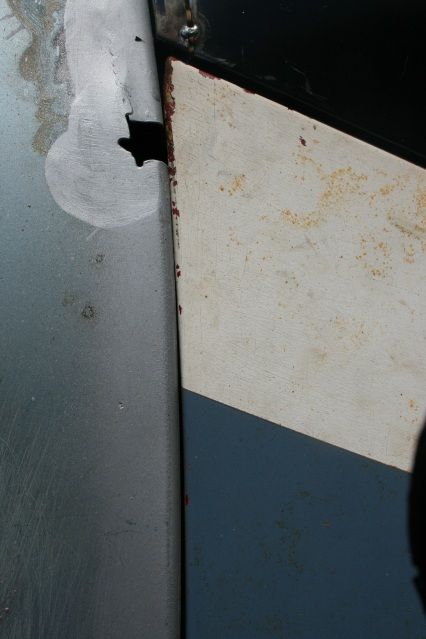
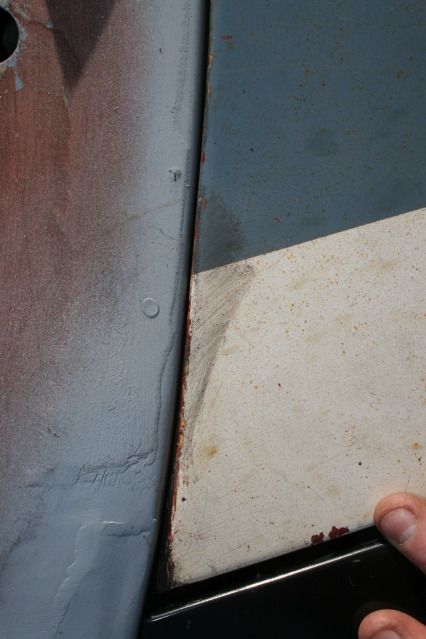
On the passenger side the a panel and wing still didn't meet, and when pulled to fit the result was to pull the wing and a panel in and it just didn't look right so I cut a slot to take up the slack.

Posted Image

Posted Image

Posted Image

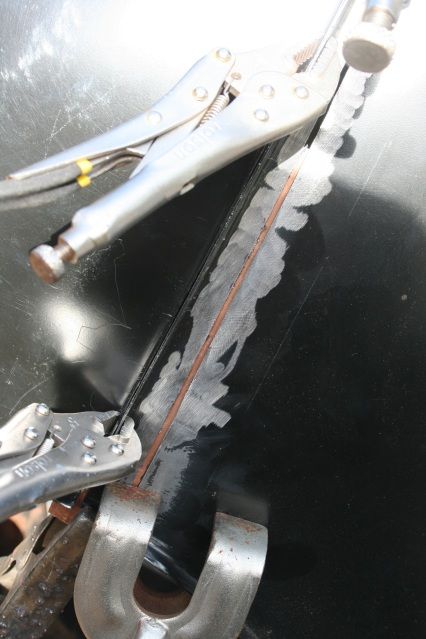
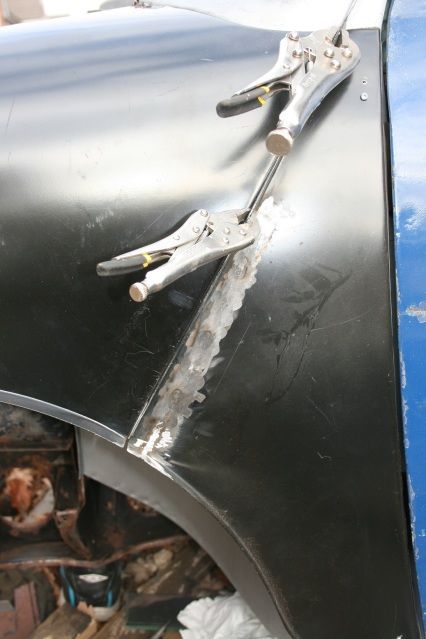
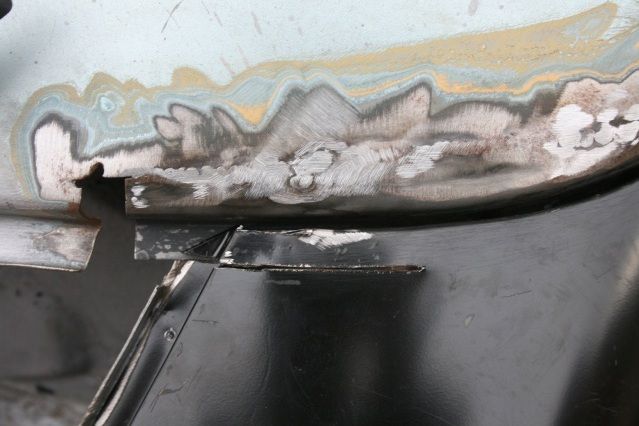
I used a much practiced technique for the first time, copper strip to bridge gaps for welding and it was a great trick. Never thought it would work as well as it did.

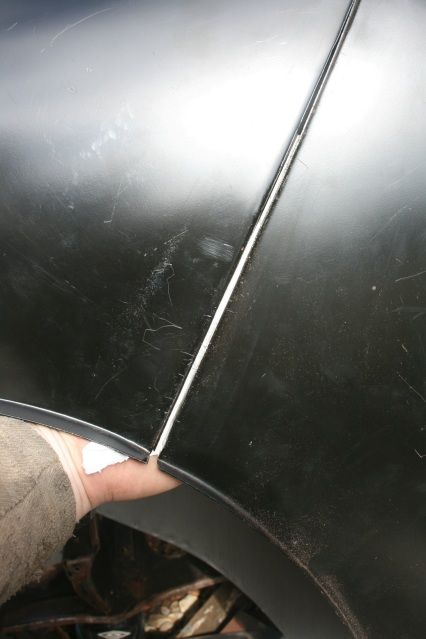
The door gaps ended up like this

Posted Image

Posted Image

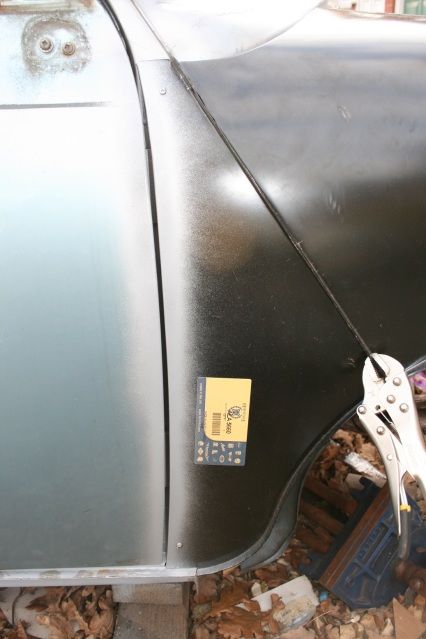
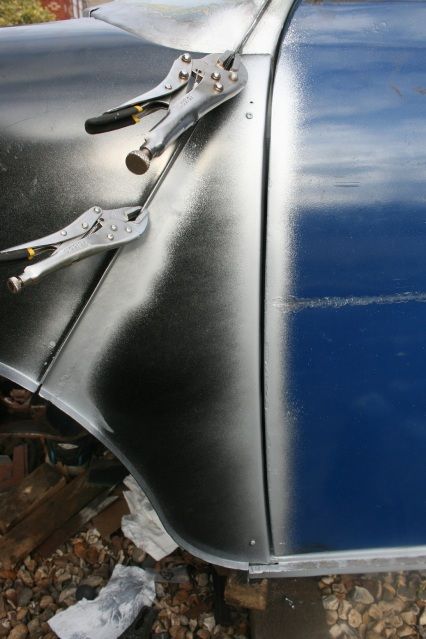
and the bonnet side gaps

Posted Image

Very pleased with these, worth another day of fiddling about with the panels. However the bonnet is tight at the back in both corners and will need some adjustment there, but will ask in bodywork section first. But here it is

Posted Image

Posted Image

Posted Image

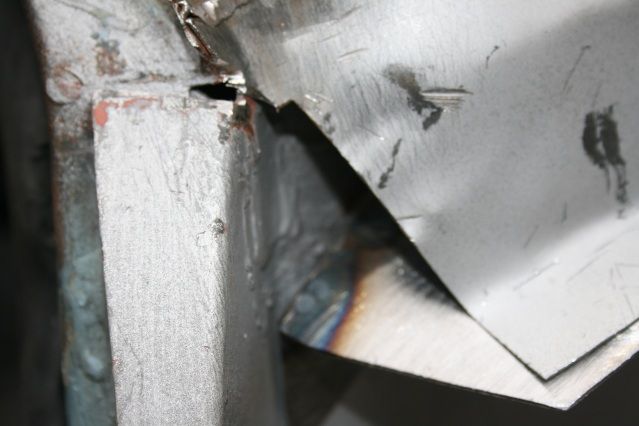
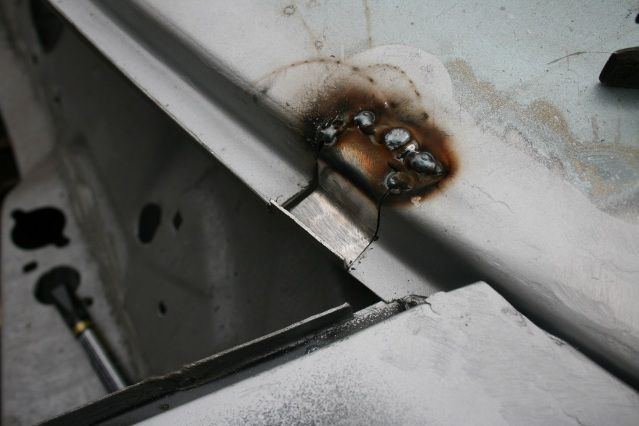
I had a gap in the scuttle I wanted to fill so set about making a patch, all was going well till the power cut, very rare in sunny Warrington, so out fot tea it was as all we have gas for is heating and the kids turned thier noses up at butties !! This is as far as I got

Posted Image
Well thats all for now, feel like I am getting somewhere for a change !

Graham

Edited by grahama, 20 March 2012 - 09:28 PM.


#402 Saxo-Fiesta-Mini

Saxo-Fiesta-Mini

    Up Into Fourth

  • Members
  • PipPipPipPipPipPipPipPipPip
  • 2,889 posts
  • Local Club: LCMOC

Posted 20 March 2012 - 09:24 PM

nice work

#403 minimuk

minimuk

    Camshaft & Stage Two Head

  • Members
  • PipPipPipPipPipPipPipPip
  • 1,946 posts
  • Location: Midlands

Posted 20 March 2012 - 09:27 PM

looking well good there Graham, impressed indeed and a few jell people on here I suspect. well done, but one thingy,....do you weld those relief cuts and sand them back? what are the door gaps like at the B-posts?

#404 sonikk4

sonikk4

    Twisted Paint Polisher!!!

  • Admin
  • PipPipPipPipPipPipPipPipPipPipPip
  • 16,037 posts
  • Name: Neil
  • Location: Oxfordshire

Posted 20 March 2012 - 09:37 PM

That's come up really well Graham. Worth being patient with.

#405 grahama

grahama

    Up Into Fourth

  • Members
  • PipPipPipPipPipPipPipPipPip
  • 2,442 posts
  • Location: Warrington
  • Local Club: None in my area !!

Posted 20 March 2012 - 09:37 PM

Ta SFM, and Muk, I will be welding the cuts up, but the power cut meant I couldn't do it !! Tomorrow maybe. The gaps at the B posta are tighter, but the doors won't go any further forward so may just have to live with them. If I decide to reskin the doors then I will adjust, unless you have any ideas before hand ??


1 user(s) are reading this topic

0 members, 1 guests, 0 anonymous users