Jump to content


Photo
- - - - -

Mini Virgin Rebuild Of 83 Mayfair.


  • Please log in to reply
1006 replies to this topic

#376 minimuk

minimuk

    Camshaft & Stage Two Head

  • Members
  • PipPipPipPipPipPipPipPip
  • 1,946 posts
  • Location: Midlands

Posted 03 February 2012 - 09:37 PM

Hi Muk,

not entirely sure what you are on about but is this it??

Posted Image

If not then could you explain for me please?

The spacers you refer to seem to be to fit under each 'leg' of the rocker assy where the studs pass through, to raise the whole assembly up, is that right? If so, there weren't any on removal, should there have been ??

Graham

Yes there should have been one, possibly slightly longer with 3 holes (1 for stud 1 for plug and 1 for oil) prior to removal, thats it ( pointer in red) sorry could not see in the other pictures, all good :gimme:

Edited by minimuk, 03 February 2012 - 09:42 PM.


#377 AndyMiniMad.

AndyMiniMad.

    Up Into Fourth

  • Members
  • PipPipPipPipPipPipPipPipPip
  • 3,295 posts
  • Location: Under The Bonnet.

Posted 05 February 2012 - 07:43 PM

There are two different types of spacer thingys...This is the three hole one that I think minimuk is refering to..the one you have fitted is perfectly fine tho'

Posted Image

#378 grahama

grahama

    Up Into Fourth

  • Members
  • PipPipPipPipPipPipPipPipPip
  • 2,442 posts
  • Location: Warrington
  • Local Club: None in my area !!

Posted 05 February 2012 - 09:13 PM

Thanks for the extra input and confirmation, but I think that I have to take it apart. I have been looking over my pics and one of the stem seals looks on at an angle so will check them on Tuesday when I get a spare 1/2 hour.

I will be putting in an order for a set of oversize thrust washers soon as endfloat on crank was 7 tho, 1 tho over top tollerence. Not too expensive, but will check a few other things first before the order, primary gear shims, cam shims etc to see if I need any. So build could take longet than expected!!

Graham

#379 minimuk

minimuk

    Camshaft & Stage Two Head

  • Members
  • PipPipPipPipPipPipPipPip
  • 1,946 posts
  • Location: Midlands

Posted 05 February 2012 - 10:36 PM

Thanks for the extra input and confirmation, but I think that I have to take it apart. I have been looking over my pics and one of the stem seals looks on at an angle so will check them on Tuesday when I get a spare 1/2 hour.

I will be putting in an order for a set of oversize thrust washers soon as endfloat on crank was 7 tho, 1 tho over top tollerence. Not too expensive, but will check a few other things first before the order, primary gear shims, cam shims etc to see if I need any. So build could take longet than expected!!

Graham


Take your time, I am sure you will make the right decision, better make sure before puting all toghether and have to do it again in 5 month time. We are here to help, just in case....

#380 hughJ

hughJ

    Soldiering Along

  • Members
  • PipPipPipPipPipPipPip
  • 727 posts
  • Location: Highlands, Scotland

Posted 06 February 2012 - 09:55 PM

You are good! Even the photos you take are of high quality. Makes me sick someone who is good at everything!!!

All the best Graham - glad I'm leaving my engine!! Out of sight you know!

Hugh

#381 grahama

grahama

    Up Into Fourth

  • Members
  • PipPipPipPipPipPipPipPipPip
  • 2,442 posts
  • Location: Warrington
  • Local Club: None in my area !!

Posted 19 February 2012 - 08:04 PM

Hi all,

small progress here, got some engine parts through and so cracked on, but not without problems and worries !!

Got the crank in and torqued up with half a set of oversize thrust washers to take down the end float. Used Phil Cauldwell's DTI to check it all again and happy.

Posted Image

Posted Image

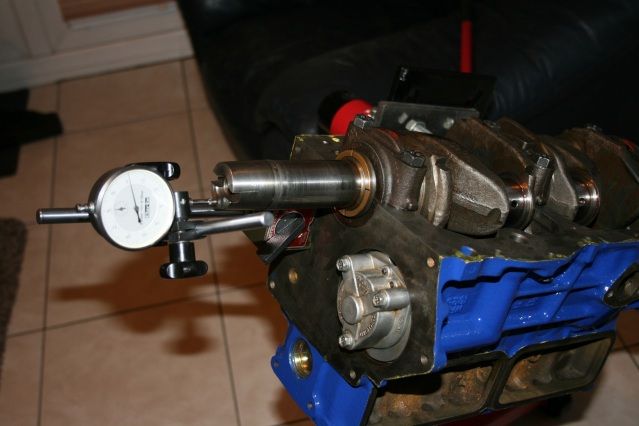
The primary end gear also had too much play and when the new thrust washer arrived from John at Guessworks that was re checked and the C washer turned round as it had a ridge one side and turning it round takes the play down aswell.

Posted Image

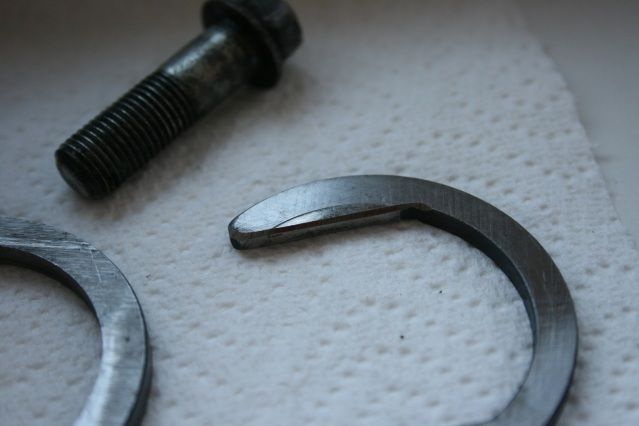
As you can see the ridge was quite pronounced.

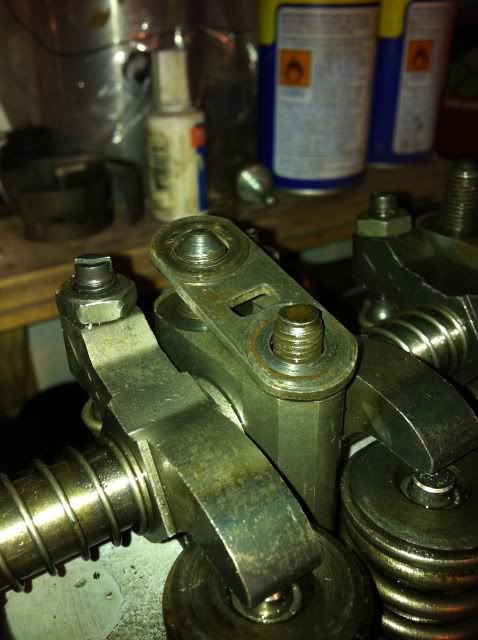
Then it was onto these buggers !!

Posted Image

We were visiting friends over Sat night so I thought I'd just pop them in with my new spring compressor before we left at 2. I started at 11, and gave up at 2.30 with a flea in my ear to have a shower quick or there would be a beer ration later, so I did !!! I just couldn't get the big end bearings to slide over the crank journals, they just kept fouling, I thought the deglazing may have pushed the cylinders out of line, or the crank was damaged, so I asked a question on the mobile whilst traveling.

Who the bloody hell puts offsets on piston conrods, ahhhhhhhhhhhhh !! Looking at it it makes sense, but I didn't even think to look that there may be a problem with the rods. Anyway we got back at 3 today and looked them over and yes there are offsets as the answers to me Q suggested, Haynes said so too lol .

Anyway this was the result a while later

Posted Image

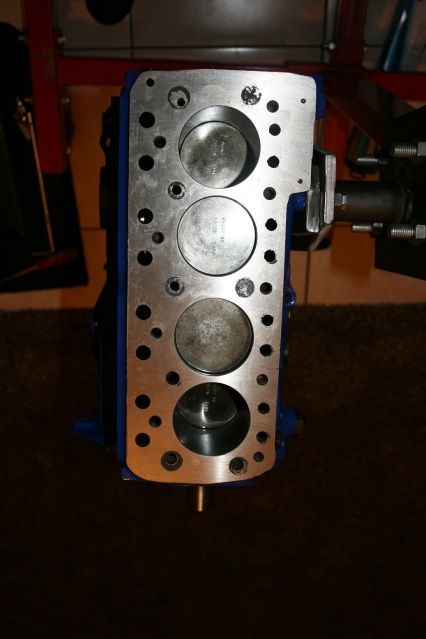
The crank got progressively harder to turn as I fitted each piston, I have asked the question as usual, but think it is merely the new rings, bearings and related friction. It turns freely, if stiffly, using a socket on the crank end bolt, think this is ok but it is still a little worrying for a novice builder, thought the turning should be easier than it is.

Well that's all as I have a stinker of a hangover which is slowly easing and Jan has made a raspberry clafoutis for pud !!

Graham

Edited by grahama, 19 February 2012 - 08:09 PM.


#382 Andrew O

Andrew O

    Previously known as Andrewo330.

  • Members
  • PipPipPipPipPipPipPip
  • 1,425 posts

Posted 19 February 2012 - 08:25 PM

Looking lovely
Is this all for your son ?

#383 grahama

grahama

    Up Into Fourth

  • Members
  • PipPipPipPipPipPipPipPipPip
  • 2,442 posts
  • Location: Warrington
  • Local Club: None in my area !!

Posted 19 February 2012 - 08:28 PM

Thanks Andrew,

yea, all for him although he is not putting much into the project at the moment. Am saving his soft hands for rubbing down the bodywork and paint lol !! I am really enjoying it to be honest, but as I said worry about the correctness of my work !

Graham

#384 Andrew O

Andrew O

    Previously known as Andrewo330.

  • Members
  • PipPipPipPipPipPipPip
  • 1,425 posts

Posted 19 February 2012 - 08:29 PM

Thanks Andrew,

yea, all for him although he is not putting much into the project at the moment. Am saving his soft hands for rubbing down the bodywork and paint lol !! I am really enjoying it to be honest, but as I said worry about the correctness of my work !

Graham

Well hes one lucky kid
Keep up the good work

#385 minimuk

minimuk

    Camshaft & Stage Two Head

  • Members
  • PipPipPipPipPipPipPipPip
  • 1,946 posts
  • Location: Midlands

Posted 19 February 2012 - 08:37 PM

Graham, I am just doing an 1300 block and yes when you have new piston rings it will be harder to turn, but was the crank before that turning freely with your new big ends,... that is the importand bit, allowing for a kinda friction of your oversized trust bearings,...

#386 grahama

grahama

    Up Into Fourth

  • Members
  • PipPipPipPipPipPipPipPipPip
  • 2,442 posts
  • Location: Warrington
  • Local Club: None in my area !!

Posted 19 February 2012 - 08:47 PM

Muk,

It was turning freely by hand, allbit with a little resistance before the pistons went in. There is the sound of the rings running up the cylinder walls now which I assume is the source of the friction and therefore tightness. The new rings are tighter in the cylinder and the deglazing cross hatching will also add to the friction, so hoping all ok.

Graham

#387 minimuk

minimuk

    Camshaft & Stage Two Head

  • Members
  • PipPipPipPipPipPipPipPip
  • 1,946 posts
  • Location: Midlands

Posted 19 February 2012 - 09:00 PM

Muk,

It was turning freely by hand, allbit with a little resistance before the pistons went in. There is the sound of the rings running up the cylinder walls now which I assume is the source of the friction and therefore tightness. The new rings are tighter in the cylinder and the deglazing cross hatching will also add to the friction, so hoping all ok.

Graham


all good then, get the gaskets and sealant ready and put the 3 toghether, clutch bit and yr nearly there,....get it ready for a bench test.....

#388 grahama

grahama

    Up Into Fourth

  • Members
  • PipPipPipPipPipPipPipPipPip
  • 2,442 posts
  • Location: Warrington
  • Local Club: None in my area !!

Posted 19 February 2012 - 09:45 PM

WHOA there Muk, lol. Gearbox in bits, although I now have everything, but the head and engine should be together this week for a clearance test. Panic time that will be as the head and block have had a light skim as from two different engines !!

I have been looking through threads and I had the big end caps on the wrong way round. It is now turning with 14 lb/ft on a torque wrench so pretty easily really. Happy with that now.

How easy is a bench test then ???

#389 minimuk

minimuk

    Camshaft & Stage Two Head

  • Members
  • PipPipPipPipPipPipPipPip
  • 1,946 posts
  • Location: Midlands

Posted 19 February 2012 - 10:09 PM

WHOA there Muk, lol. Gearbox in bits, although I now have everything, but the head and engine should be together this week for a clearance test. Panic time that will be as the head and block have had a light skim as from two different engines !!

I have been looking through threads and I had the big end caps on the wrong way round. It is now turning with 14 lb/ft on a torque wrench so pretty easily really. Happy with that now.

How easy is a bench test then ???


solid work bench that can take the weight of the engine or pallet on floor, strap it down with truck straps kinda and get all the neccesary bits on engine,..dizzy coil carb etc and wire up the sparks and all set up as it would be already in engine, jerry can with petrol and pipe into carb oil in engine and fire it up with a battery, bit of splutter and coughing and away he goes.

#390 orangeboy

orangeboy

    Mini Mad

  • Noobies
  • PipPipPipPip
  • 161 posts
  • Location: derby
  • Local Club: www.dcmoc.co.uk

Posted 20 February 2012 - 05:15 PM

inspiring rebuild Graham, sat up till 2am reading from start to finish. For a first timer you seem to be romping along, keep it up.
I rekon you should buy your lad a corsa for £500 and keep this little beauty for yourself.
I thoroughly enjoy the fabrication posts, wish i had a bit more fab work to do on my van, but im trying to put it back to a near original so using a lot of complete panels.
It sure is a shock when you remove a bit of panel to then find the worm has beat you to it :ohno:
i'll keep my eye on this one


0 user(s) are reading this topic

0 members, 0 guests, 0 anonymous users