A subtle approach with a block of wood and a hammer on the A post may let you move the door forward slightly.


Mini Virgin Rebuild Of 83 Mayfair.
Started by
grahama
, May 22 2010 05:09 PM
1006 replies to this topic
#406

sonikk4
-

- Admin
-

- 16,168 posts
Twisted Paint Polisher!!!
- Name: Neil
- Location: Cotwolds.
Posted 20 March 2012 - 09:40 PM
#407
hughJ
-

- Members
-
- 727 posts
Soldiering Along
- Location: Highlands, Scotland
Posted 20 March 2012 - 09:53 PM
Graham my old friend - brilliant, brilliant. So much better than mine. I know you will get this right, You are a thinker. Great to see you on body work again.
Hugh
Hugh
#408
minimuk
-

- Members
-
- 1,947 posts
Camshaft & Stage Two Head
- Location: Midlands
Posted 20 March 2012 - 10:41 PM
Ta SFM, and Muk, I will be welding the cuts up, but the power cut meant I couldn't do it !! Tomorrow maybe. The gaps at the B posta are tighter, but the doors won't go any further forward so may just have to live with them. If I decide to reskin the doors then I will adjust, unless you have any ideas before hand ??
are the hinges old ones or new ones, older ones are thicker than the newer ones( you could take a 1mm of them if they are older ones), left all shims out?, cleaned any surplus paint drops between hinge and post? or even between hinge fitting and door, all helps before going heavy at it,
#409
grahama
-
- Members
-
- 2,442 posts
Up Into Fourth
- Location: Warrington
- Local Club: None in my area !!
Posted 20 March 2012 - 11:00 PM
They are the original ones, so a mm off with a flap disc could make things better at the rear of the door, good idea, thanks.
#410
minimuk
-
- Members
-
- 1,947 posts
Camshaft & Stage Two Head
- Location: Midlands
Posted 20 March 2012 - 11:31 PM
They are the original ones, so a mm off with a flap disc could make things better at the rear of the door, good idea, thanks.
give it a go, if your door skins are ok, no need to change them, less costly too, door fitting on a restore is always a lot of tweeking before it sits right, be aware that if moving to the front your gap between a-panel and door is still wide enough so it don't scrape and,... allowe for paint,.......

#411
myredmini
-

- TMF+ Member
-
- 3,211 posts
My Mummy Says It's OK
- Name: Dan
- Location: Teesside
- Local Club: BOG MOG
Posted 20 March 2012 - 11:38 PM
Looking fantastic!!! Keep it up
#412
AndyMiniMad.
-

- Members
-
- 3,295 posts
Up Into Fourth
- Location: Under The Bonnet.
Posted 21 March 2012 - 01:44 PM
Well done...its really looking great..just prooves that taking your time to get it right is well worth it. Im verry impressed with how your panel gaps turned out...Mine were no where near as good as yours...My better half Jill would never get down on her hands and knees to help me look for my balls...you are a lucky man...And being allowed to build an engine and gear box in the house as well..Id never get away with that..
#413
grahama
-
- Members
-
- 2,442 posts
Up Into Fourth
- Location: Warrington
- Local Club: None in my area !!
Posted 25 March 2012 - 02:24 PM
Hi all,
a small scruffy update, but progress !!
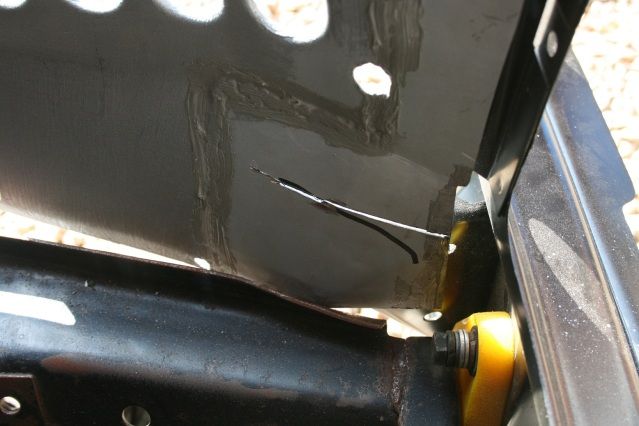
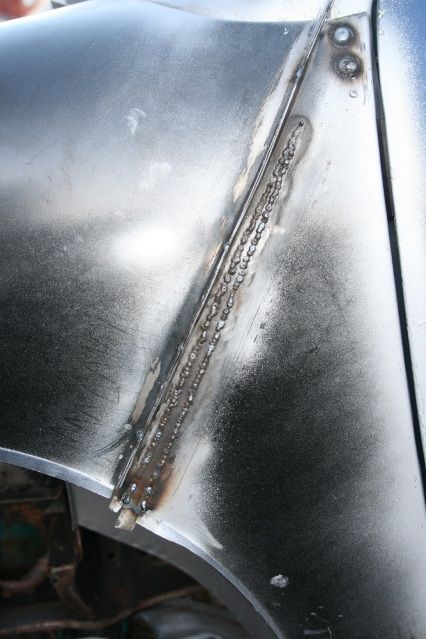
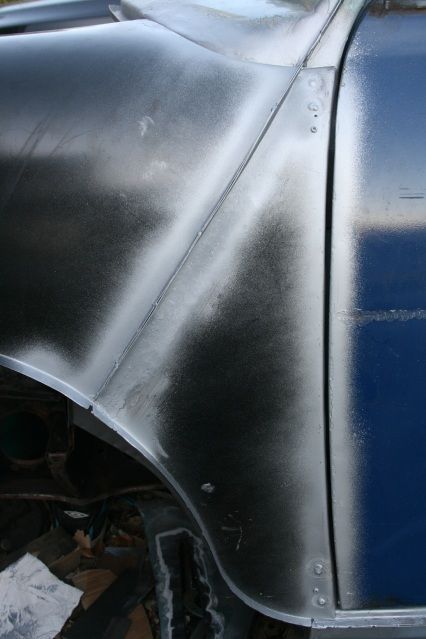
The electric came back on so I finnished off the small repair on the scuttle. It had to be forced into position due probably to me welding in the end section in the wrong place slightly.
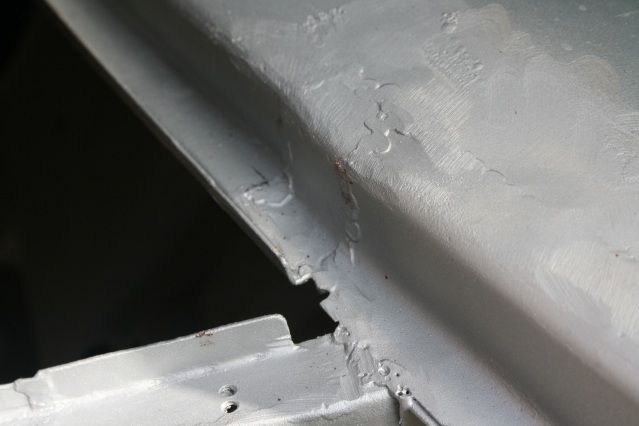
I don't have the tool set to get into the small section where the weld was blobbed into. I say blobbed as the wind was up and blowing my gas away, so not an entirely pleasurable patch. It's done and will skim with a little filler to finish off if it doesn't annoy me and make me re do it. I also tacked the scuttle to the inner wing both sides which only leaves the two flanges on the scuttle and inner wing to join up so the water can run off correctly.
Next at the bottom of the A posts were gaps where the sills meet the doorsteps which needed closing up so water doesn't gush in. Again the wind didn't help and I had to re do this both sides a couple of times as the welds ended up like areo bars.
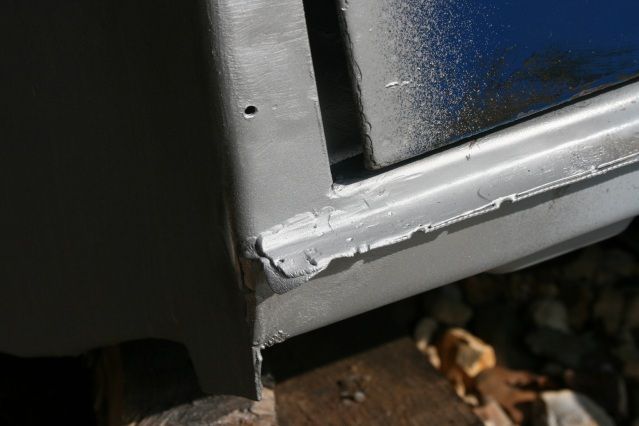
The last two repairs although scruffy, as I mentioned before lol, will not be seen so I am not too concerned about them. I also got the scuttle closers in place properly both sides and just have the underside plugs to do when I next have the car on the spit. This will be after the wings are on as I don't want to disturb the front panel position before I fit the wings and A panels.
Lots of seam sealer to go on shortly.
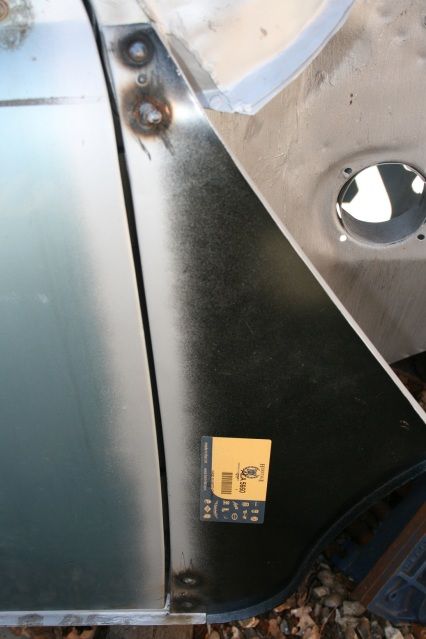
I prepped the a panels and wings for fitting with Matt's help. He is reving up for paint prep and the hope that after this we can do a track car !!!
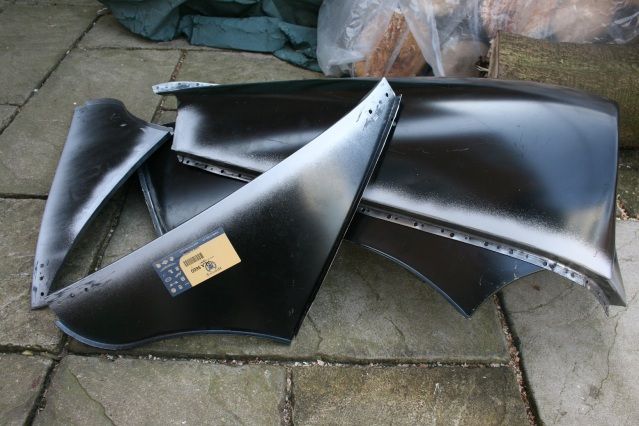
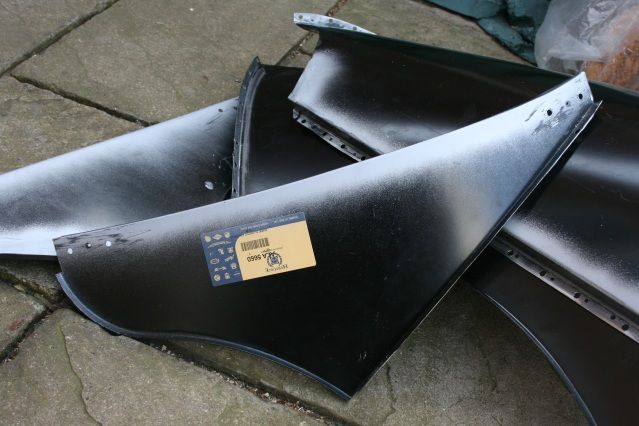
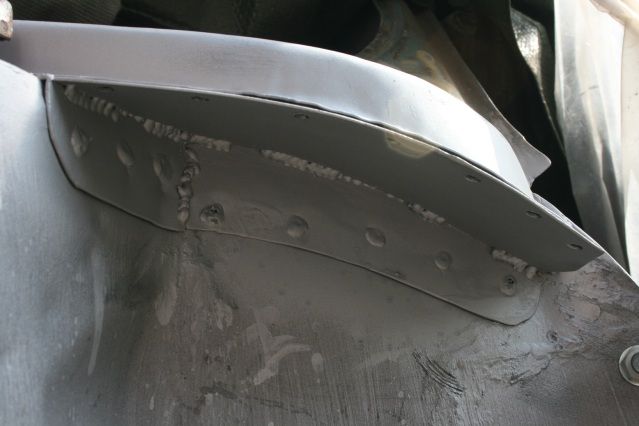
Lots of holes for the plugs and two top and bottom for the a panels, some say no plugs, some say plugs all the way so I am going to do two top and two bottom as they are drilled now. They should be plenty as the wings and folded flange will keep them in place without any plugs.
I was also looking at the inner wings and how they meet the front panel and they don't, very well, where the plug welds are to go so both sides I have cut reliefs so I can bend the new section I put on to meet the front panel properly.
Again, after the wings are on so not to change my panel location. Was in the zone and as always something gets you, and the gas ran out, so no welding till Monday.
I mentioned in my last post that 4th gear ran over too far and was touching the laygear, not good, so I made a bush to fit inside the selector box under the gear stick.
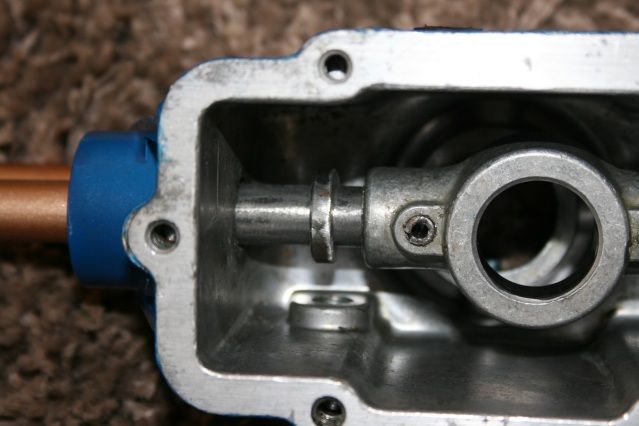
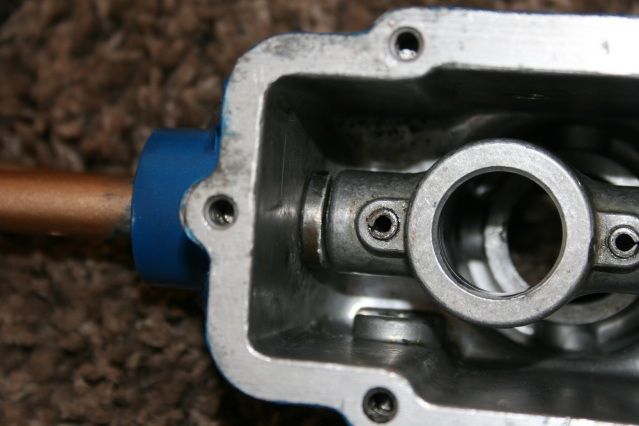
I put it all back together and fitted the selector rods to the diff. Works a treat by physically stopping the selector shaft running past the most forward position in the gearbox, a job the selector and ball bearing should be doing. I asked John at guess works about it all and he said it would be fine, although he would change the detent spring and ball too so Monday they are being ordered but I will leave the bush in place for peace of mind. I will probably take it a little thinner too before I leave it, just so 2nd gear is definately not being impeeded.
Well it's gas and wings over the next couple of days and hopefully front end totally by week's end.
Graham
a small scruffy update, but progress !!
The electric came back on so I finnished off the small repair on the scuttle. It had to be forced into position due probably to me welding in the end section in the wrong place slightly.
I don't have the tool set to get into the small section where the weld was blobbed into. I say blobbed as the wind was up and blowing my gas away, so not an entirely pleasurable patch. It's done and will skim with a little filler to finish off if it doesn't annoy me and make me re do it. I also tacked the scuttle to the inner wing both sides which only leaves the two flanges on the scuttle and inner wing to join up so the water can run off correctly.
Next at the bottom of the A posts were gaps where the sills meet the doorsteps which needed closing up so water doesn't gush in. Again the wind didn't help and I had to re do this both sides a couple of times as the welds ended up like areo bars.
The last two repairs although scruffy, as I mentioned before lol, will not be seen so I am not too concerned about them. I also got the scuttle closers in place properly both sides and just have the underside plugs to do when I next have the car on the spit. This will be after the wings are on as I don't want to disturb the front panel position before I fit the wings and A panels.
Lots of seam sealer to go on shortly.
I prepped the a panels and wings for fitting with Matt's help. He is reving up for paint prep and the hope that after this we can do a track car !!!
Lots of holes for the plugs and two top and bottom for the a panels, some say no plugs, some say plugs all the way so I am going to do two top and two bottom as they are drilled now. They should be plenty as the wings and folded flange will keep them in place without any plugs.
I was also looking at the inner wings and how they meet the front panel and they don't, very well, where the plug welds are to go so both sides I have cut reliefs so I can bend the new section I put on to meet the front panel properly.
Again, after the wings are on so not to change my panel location. Was in the zone and as always something gets you, and the gas ran out, so no welding till Monday.
I mentioned in my last post that 4th gear ran over too far and was touching the laygear, not good, so I made a bush to fit inside the selector box under the gear stick.
I put it all back together and fitted the selector rods to the diff. Works a treat by physically stopping the selector shaft running past the most forward position in the gearbox, a job the selector and ball bearing should be doing. I asked John at guess works about it all and he said it would be fine, although he would change the detent spring and ball too so Monday they are being ordered but I will leave the bush in place for peace of mind. I will probably take it a little thinner too before I leave it, just so 2nd gear is definately not being impeeded.
Well it's gas and wings over the next couple of days and hopefully front end totally by week's end.
Graham
Edited by grahama, 25 March 2012 - 02:33 PM.
#414
AndyMiniMad.
-
- Members
-
- 3,295 posts
Up Into Fourth
- Location: Under The Bonnet.
Posted 25 March 2012 - 04:12 PM
When I tried to remove those roll pins in my rod change mecanism they simply would not budge. I ended up cutting the rod itself and welding it back together...I assume yours must have come out quite easily? I think your car will look great once you are done..and so it should with the effort you are putting into it..
#415
minimuk
-
- Members
-
- 1,947 posts
Camshaft & Stage Two Head
- Location: Midlands
Posted 25 March 2012 - 07:38 PM
looking good Graham, need a bit of grease in selector box, good luck with the wings etc. 
#416
hughJ
-
- Members
-
- 727 posts
Soldiering Along
- Location: Highlands, Scotland
Posted 26 March 2012 - 12:28 PM
Hi Graham - it must be awful having to always weld outside. I am fortunate to have my garage. The fit of your whole front is far better than mine. Very nice closing plate under the scuttle. All the best
Hugh
Hugh
#417
grahama
-
- Members
-
- 2,442 posts
Up Into Fourth
- Location: Warrington
- Local Club: None in my area !!
Posted 26 March 2012 - 12:34 PM
Thanks fellas,
The selector box pins were in there pretty stiff, but I was lucky enough to have a small screwdriver with a metal shoulder on that fitted perfectly. Grease, grease and more grease to be applied everywhere on final fit, it was a dry test run for the bush !!
I do seem to go through a lot extra gas I think being outside but that's life till I get another garage. It's sunny now so out I go !!
Graham
#418
minimuk
-
- Members
-
- 1,947 posts
Camshaft & Stage Two Head
- Location: Midlands
Posted 26 March 2012 - 02:08 PM
Thanks fellas,
The selector box pins were in there pretty stiff, but I was lucky enough to have a small screwdriver with a metal shoulder on that fitted perfectly. Grease, grease and more grease to be applied everywhere on final fit, it was a dry test run for the bush !!
I do seem to go through a lot extra gas I think being outside but that's life till I get another garage. It's sunny now so out I go !!
Graham
don.t forget yr sunblock!!! all will burn
#419
grahama
-
- Members
-
- 2,442 posts
Up Into Fourth
- Location: Warrington
- Local Club: None in my area !!
Posted 26 March 2012 - 06:36 PM
Hi,
Again, thanks for the comments, they do encourage me to get on with it !!
forgot the sunblock, and being dark auburn, I have caught it a little, but the welding mask was on so most damage was to my lilly white arms !!
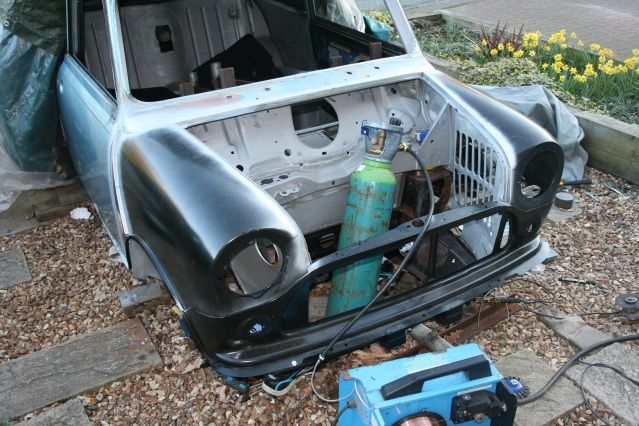
A momentus day today, front end !!!
As I said before I used the holes I had already drilled and plugged them, definately no going back now !! In no time the wing was on too.
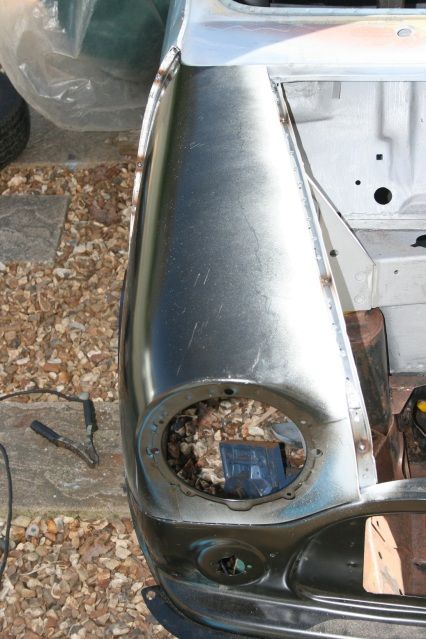
I have only done three plugs along the wing just incase I have to remove it till I am totally happy, same along the wing / a panel join.
I slotted the passenger A panel a few days ago, but it was still pulling in the wing when I tried to join the a panel and wing up with clamps. So I did it again, this time a larger slot and put in a filler piece.
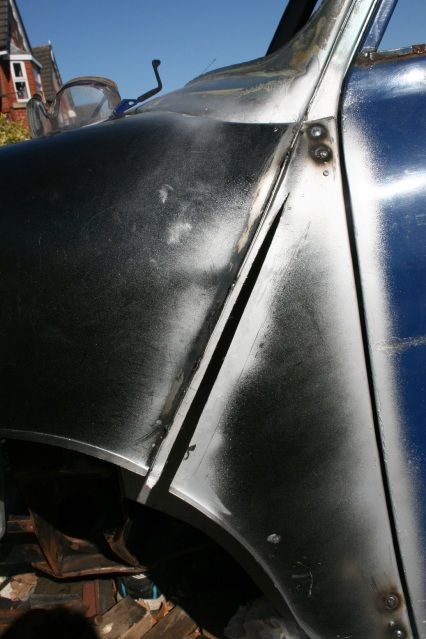
Ground down and fitted the passenger wing. Perfect it is not, but with a little skim of filler it will be fine.
A great feeling when the car is at this stage, but when I tried the bonnet it had tightened up a touch.
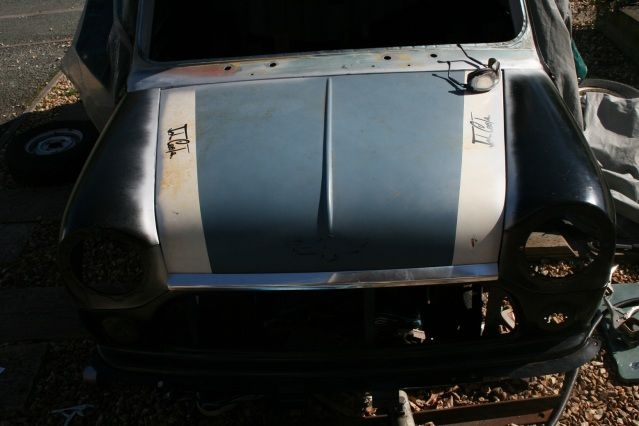
Not sure why, I test fitted before plug welding anything and the gaps were a little larger, but I shall just slot the bonnet with a 1mm disk and re weld it up to reduce where I need to, which is along the passenger side. I also need to shrink the bonnet front to back so will do it all at the same time.
The doors at the back seem fine, following on from my last chat about them, but they are very tight at the bottom rear corner. Having looked at the skins, they need a reskin, so that's another job for the list. Front panel can now come off and be drilled for plug welding to the wings and inner wings.
Matt came home from a long day in the office and gave me a huge smile, so I guess he liked the progress !!!
Nearly there !!
Graham
Again, thanks for the comments, they do encourage me to get on with it !!
forgot the sunblock, and being dark auburn, I have caught it a little, but the welding mask was on so most damage was to my lilly white arms !!
A momentus day today, front end !!!
As I said before I used the holes I had already drilled and plugged them, definately no going back now !! In no time the wing was on too.
I have only done three plugs along the wing just incase I have to remove it till I am totally happy, same along the wing / a panel join.
I slotted the passenger A panel a few days ago, but it was still pulling in the wing when I tried to join the a panel and wing up with clamps. So I did it again, this time a larger slot and put in a filler piece.
Ground down and fitted the passenger wing. Perfect it is not, but with a little skim of filler it will be fine.
A great feeling when the car is at this stage, but when I tried the bonnet it had tightened up a touch.
Not sure why, I test fitted before plug welding anything and the gaps were a little larger, but I shall just slot the bonnet with a 1mm disk and re weld it up to reduce where I need to, which is along the passenger side. I also need to shrink the bonnet front to back so will do it all at the same time.
The doors at the back seem fine, following on from my last chat about them, but they are very tight at the bottom rear corner. Having looked at the skins, they need a reskin, so that's another job for the list. Front panel can now come off and be drilled for plug welding to the wings and inner wings.
Matt came home from a long day in the office and gave me a huge smile, so I guess he liked the progress !!!
Nearly there !!
Graham
Edited by grahama, 26 March 2012 - 06:37 PM.
#420
minimuk
-
- Members
-
- 1,947 posts
Camshaft & Stage Two Head
- Location: Midlands
Posted 26 March 2012 - 07:17 PM
Great 'step by step' progress there Graham, all looking snug, and tidy. I remember that feeling ever so well when MUK was at that stage,.... few more month and will be on the road I guess,.....well pending what you will be up to in the Summer I guess.
Edited by minimuk, 26 March 2012 - 07:18 PM.


1 user(s) are reading this topic
0 members, 1 guests, 0 anonymous users


