
good progress I cant wait to be at that stage, few more weeks yet!


Mini Virgin Rebuild Of 83 Mayfair.
Started by
grahama
, May 22 2010 05:09 PM
1006 replies to this topic
#422

hughJ
-

- Members
-

- 727 posts
Soldiering Along
- Location: Highlands, Scotland
Posted 27 March 2012 - 10:09 AM
Graham that is fantastic!! I just wish mine was a fraction of how good your fit is. Funny how your bonnet is tight and mine needs filler pieces. That's also a lot of work you've got through very quickly. Most impressed. Looking really great Graham. I thought I was getting ahead of you but now you seem to have surged on. Glad you are reskinning the doors. I'm not!! There's nothing wrong with that welding - looks superb to me. I think doors are often tight at the bottom rear corner. My passenger one is but its good enough.
Great job Graham. You don't seem to let things get you down like me. I'm terrible for that.
Hugh
Great job Graham. You don't seem to let things get you down like me. I'm terrible for that.
Hugh
#423
sonikk4
-

- Admin
-
- 16,168 posts
Twisted Paint Polisher!!!
- Name: Neil
- Location: Cotwolds.
Posted 27 March 2012 - 10:41 AM
That's certainly a lot better Graham. Its a pain having to slit new panels but its one of those things.
#424
grahama
-
- Members
-
- 2,442 posts
Up Into Fourth
- Location: Warrington
- Local Club: None in my area !!
Posted 27 March 2012 - 07:01 PM
Hi all,
Muk, definately won't be in a few months, just don't tell Matthew !! Neil, agree cutting panels, especially heritage ones is a funny one, they shouldn't need it but sometimes you have to bite the bullet. And Hugh, bloody hell this does get me down, it's the time taken theat does it really, solutions to my problems pop into my head when I step away from the problem for a while, that's how my mind works ! However the solution doesn't always work, lol.
Anyway on a roll with a full bottle of gas, sun and no wind, life for the outside car restorer just doesn't get much better !!
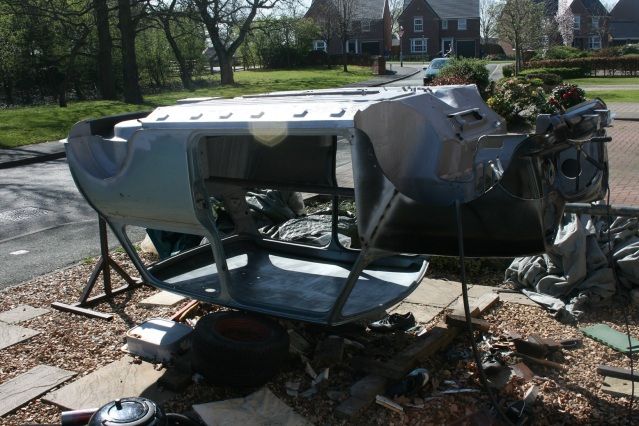
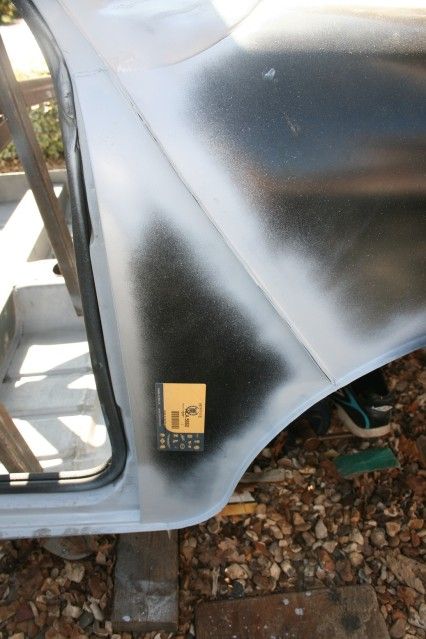
Out with all the tools again and off with the front panel for plug weld drilling and a rough up with a scotch pad for a primer key. Then a frustrating 3/4 hour trying to get it back into the position it was in 20 mins earlier !! I put it back but the bonnet was very tight all of a sudden so I had a cup of tea and sawed up a table leg to jam inbetween the inner wings to make the gap back. (please done tell Jan about the table leg lol) I plug welded a couple either side to hold the gap then this happened again.
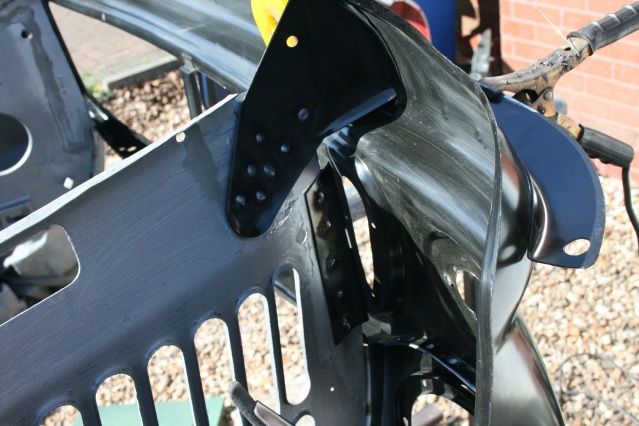
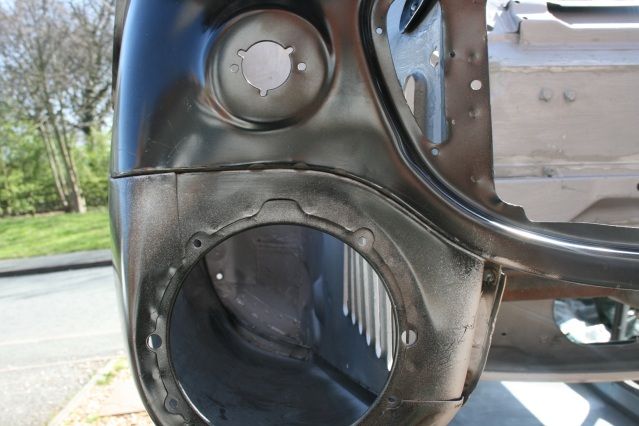
Not been here for a while but it gave me better access to all the plug welds that needed doing. First I clamped the relief cuts on the inner wing to the front panel and plug welded them both sides. Also finished off the scuttle closers, they just need a large dolop of seam sealer !
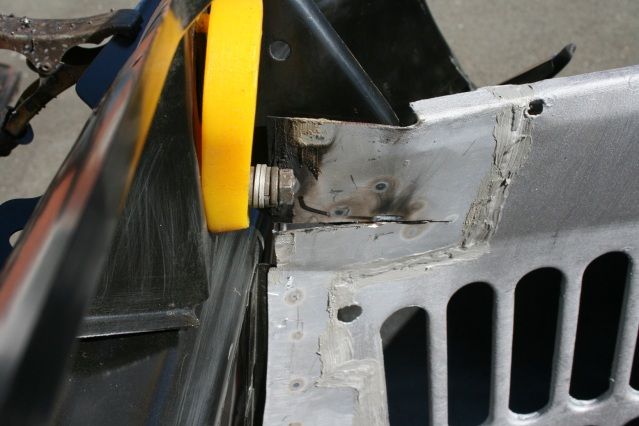
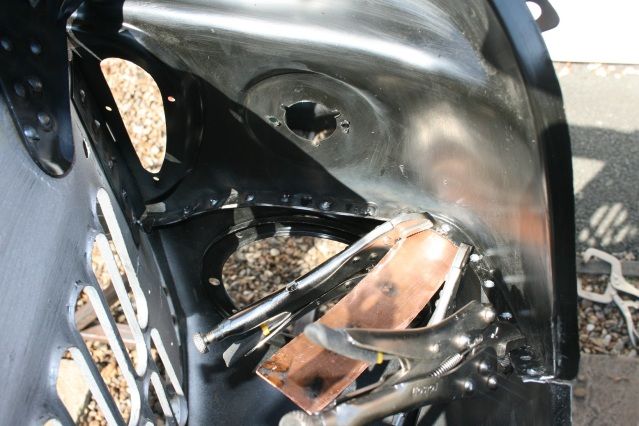
The drilled front panel all lined up didn't line up perfectly on the wing joins for the drilled holes so I used the copper sheet again to help bridge the gap and make those plugs stronger.
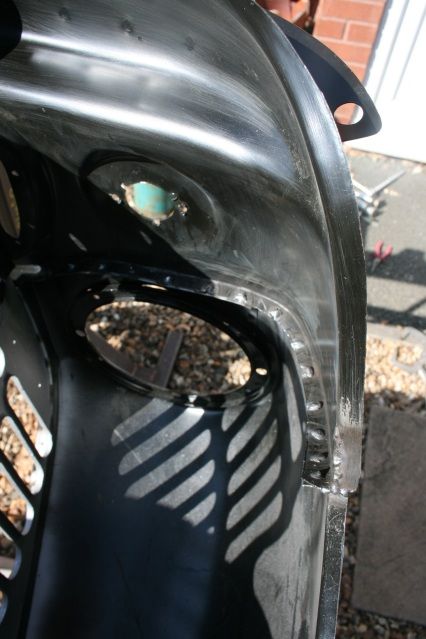
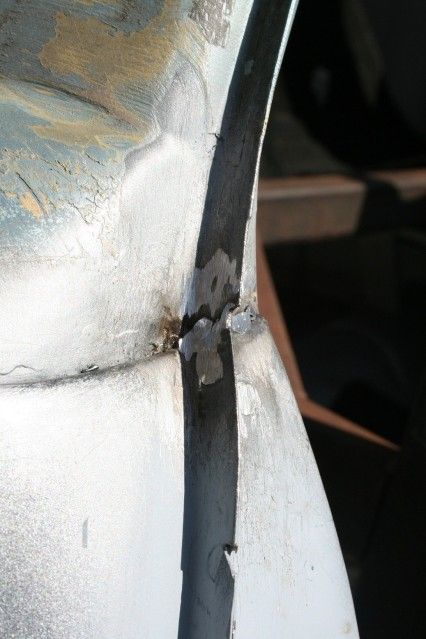
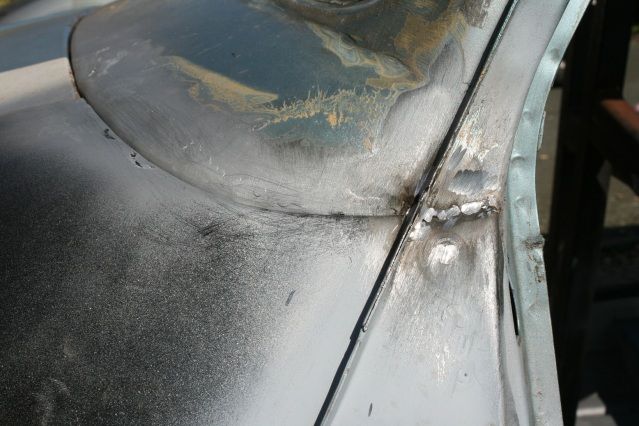
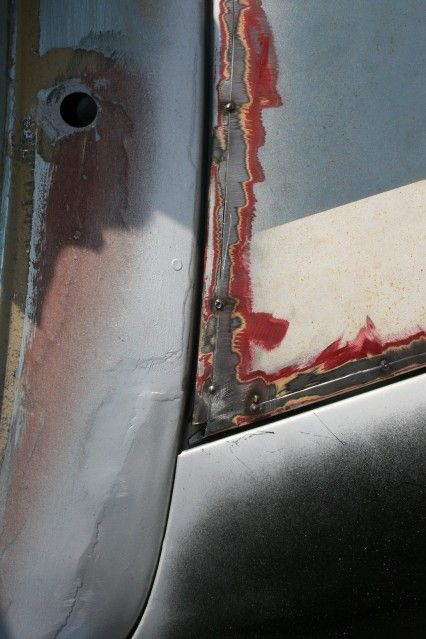
Both sides fixed, I finished the plugs along the wings and a panel joins. More slotting too, this time the front panel to allow the edge flange run in line alongthe side.
The front panel to wing joins came out fine.

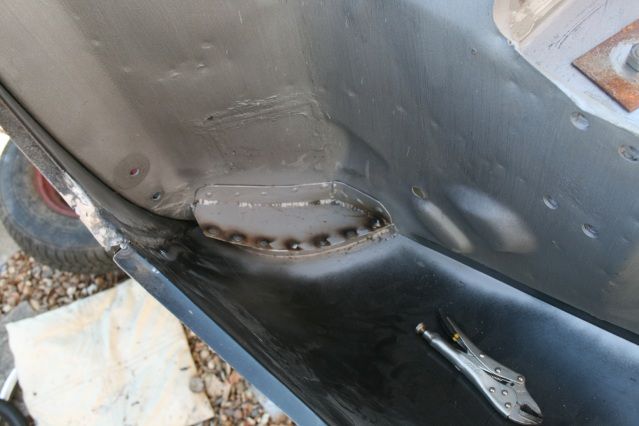
Both sides had a gap between the upper and lower seam so I used the copper to let me blob in some weld to join them up. Much grinding back and re welding later I had this both sides.

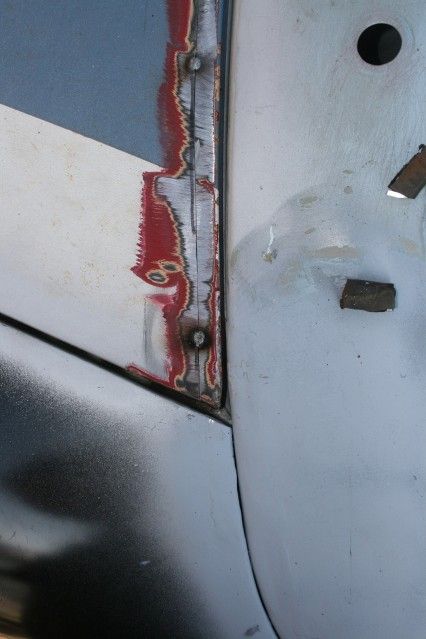
Not completely happy with the tacks along the top of the a panel to the a post, but my limited toolset just isn't intricate enough for the small areas. I am getting the compressor ready to use a die grinder to sort these areas out, more cash unfortunately !!
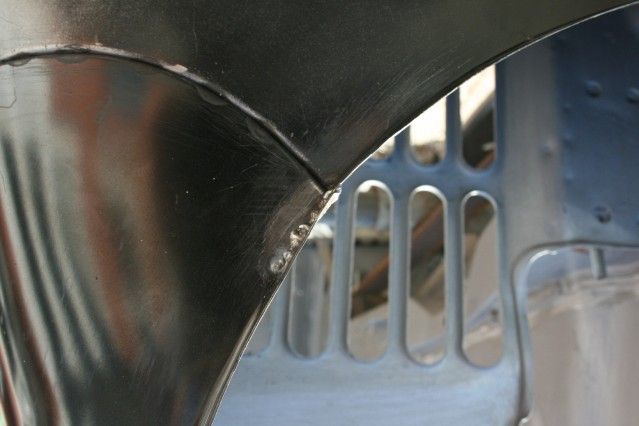
I have seen on a few threads a continuous edge flange with no gaps, and I liked it, so I had a go. Blobbed in some weld, ground back, blobbed in some weld, ground back, you get the picture and ended up with this
and drivers

Looks ok on pics but the welds will look better when covered up by the trim edging lol !!!
So a final look to the front, bonnet needs some adjustment but the gaps are pretty good really following the table leg incident !!

Front end all in place, finally, it seems like months in the planning, just the relief cuts on inner wings to sort out and the extra wiper holes and done !!
On a roll this week !!!!!
Graham
Muk, definately won't be in a few months, just don't tell Matthew !! Neil, agree cutting panels, especially heritage ones is a funny one, they shouldn't need it but sometimes you have to bite the bullet. And Hugh, bloody hell this does get me down, it's the time taken theat does it really, solutions to my problems pop into my head when I step away from the problem for a while, that's how my mind works ! However the solution doesn't always work, lol.
Anyway on a roll with a full bottle of gas, sun and no wind, life for the outside car restorer just doesn't get much better !!
Out with all the tools again and off with the front panel for plug weld drilling and a rough up with a scotch pad for a primer key. Then a frustrating 3/4 hour trying to get it back into the position it was in 20 mins earlier !! I put it back but the bonnet was very tight all of a sudden so I had a cup of tea and sawed up a table leg to jam inbetween the inner wings to make the gap back. (please done tell Jan about the table leg lol) I plug welded a couple either side to hold the gap then this happened again.
Not been here for a while but it gave me better access to all the plug welds that needed doing. First I clamped the relief cuts on the inner wing to the front panel and plug welded them both sides. Also finished off the scuttle closers, they just need a large dolop of seam sealer !
The drilled front panel all lined up didn't line up perfectly on the wing joins for the drilled holes so I used the copper sheet again to help bridge the gap and make those plugs stronger.
Both sides fixed, I finished the plugs along the wings and a panel joins. More slotting too, this time the front panel to allow the edge flange run in line alongthe side.
The front panel to wing joins came out fine.
Both sides had a gap between the upper and lower seam so I used the copper to let me blob in some weld to join them up. Much grinding back and re welding later I had this both sides.
Not completely happy with the tacks along the top of the a panel to the a post, but my limited toolset just isn't intricate enough for the small areas. I am getting the compressor ready to use a die grinder to sort these areas out, more cash unfortunately !!
I have seen on a few threads a continuous edge flange with no gaps, and I liked it, so I had a go. Blobbed in some weld, ground back, blobbed in some weld, ground back, you get the picture and ended up with this
and drivers
Looks ok on pics but the welds will look better when covered up by the trim edging lol !!!
So a final look to the front, bonnet needs some adjustment but the gaps are pretty good really following the table leg incident !!
Front end all in place, finally, it seems like months in the planning, just the relief cuts on inner wings to sort out and the extra wiper holes and done !!
On a roll this week !!!!!
Graham
Edited by grahama, 27 March 2012 - 07:06 PM.
#425
AndyMiniMad.
-

- Members
-
- 3,295 posts
Up Into Fourth
- Location: Under The Bonnet.
Posted 27 March 2012 - 08:00 PM
Great work as usual...The bonnet gaps look quite tight. Have you allowed for the thickness of the paint? sounds silly I know but once you build up a few layers of primer and paint on both surfaces its quite thick..Only mentioning this as I made exactly this mistake when fitting the bonet on Haggis and ended up bending the lip back to compensate.
#426
grahama
-
- Members
-
- 2,442 posts
Up Into Fourth
- Location: Warrington
- Local Club: None in my area !!
Posted 27 March 2012 - 08:11 PM
Ta Andy, a good couple of days have brought me along nicely.
I am hoping to have about 1/8th in along the sides which should be ok, will take that into account when I have a closer look at it, but thanks for the advice. Minimuk also mentioned it on the door gaps, but I thought paint can't be that thick, two warnings is now making me think properly about it !!
Graham
#427
hughJ
-
- Members
-
- 727 posts
Soldiering Along
- Location: Highlands, Scotland
Posted 27 March 2012 - 08:17 PM
Graham that is a great job. To use the word jealous is understating it. The gaps are fantastic. The profile of the bonnet is great. Well done. The car just looks smashing. Fantastic plug welds.
Hugh
Hugh
#428
minifcd
-

- Members
-
- 246 posts
Mini Mad
- Location: Stamford
Posted 27 March 2012 - 08:18 PM
Nice work Graham, you've got those gaps between the front panel and wings looking spot on.
#429
minimuk
-

- Members
-
- 1,947 posts
Camshaft & Stage Two Head
- Location: Midlands
Posted 27 March 2012 - 08:48 PM
ding dong the front is on,...what a milestone,... I am happy for you, now a bvit of seam sealing, at least 1/2kg under the wings etc and all is good the stone chip and paint Go 4 it!!! 
#430
grahama
-
- Members
-
- 2,442 posts
Up Into Fourth
- Location: Warrington
- Local Club: None in my area !!
Posted 29 March 2012 - 05:45 PM
Hi all,
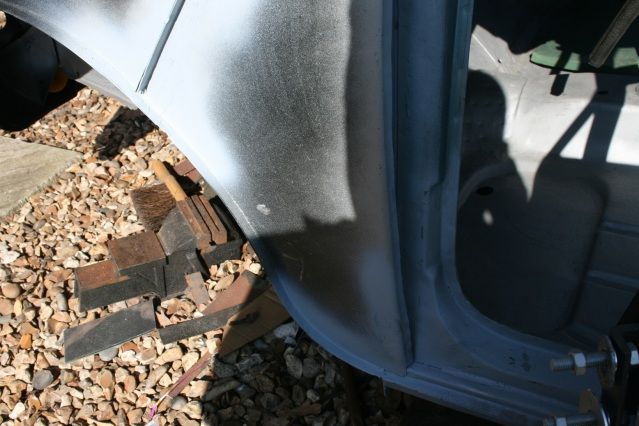
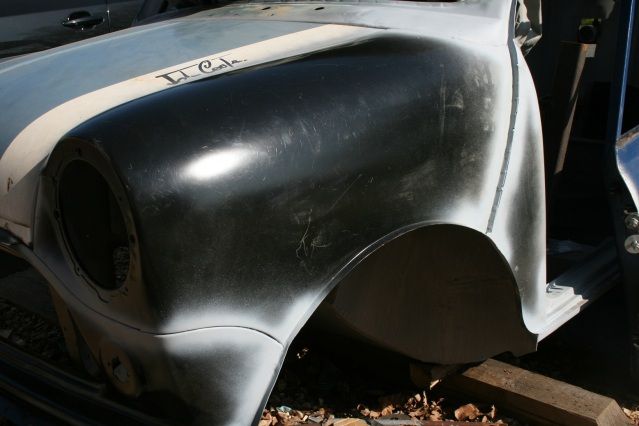
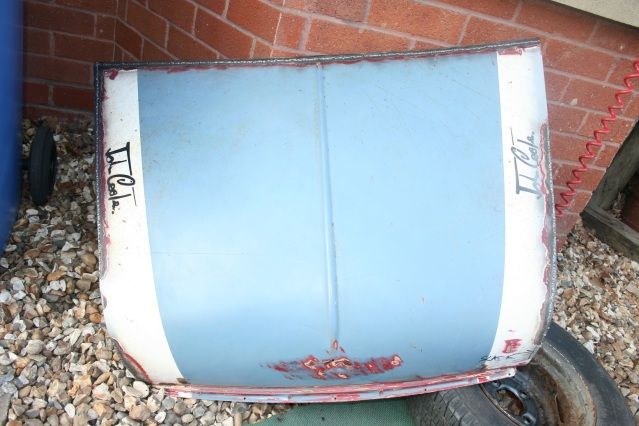
Bonnet day today. Not a bad initial fit but tight at the back and on parts along the wings and after warnings about paint I thought I'd get it right. Where I started.
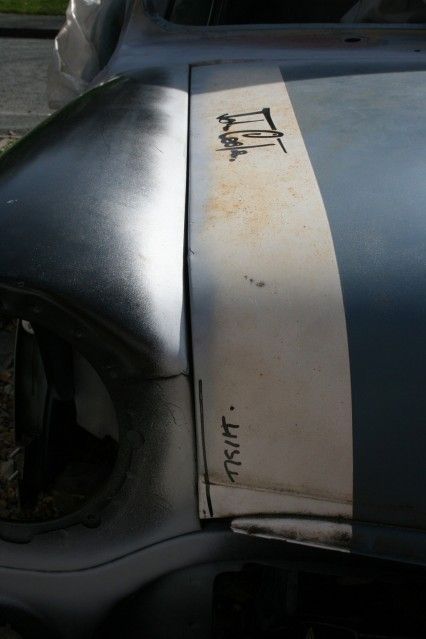

I simply slotted the bonnet with a 1mm cutting disk and hammered it into place and masking taped it to have a look, the forst trial
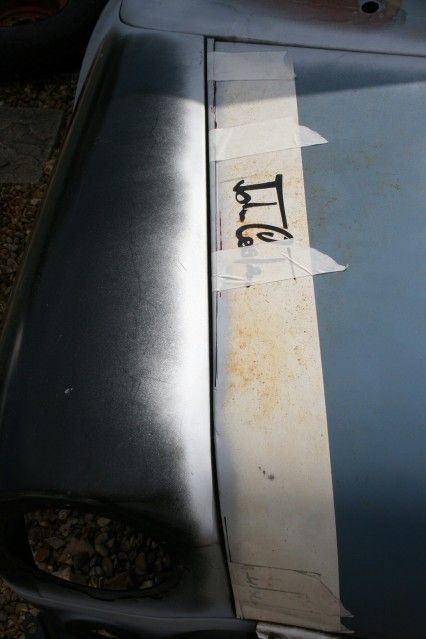

Looking ok so I put some initial tacks in to hold it all in place, and had a better look at the gaps. It was touching the scuttle when I started and with some slotting all across the back and some flap disking in places I got this at the back
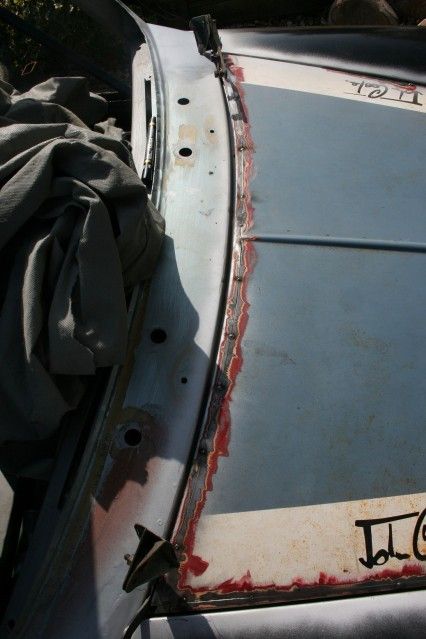
More than happy as at one poing I struggled to get the strip I had cut off the back to line up as it twisted. Spots held it in place for fitting tests after using loads of masking tape to get it roughly in place.
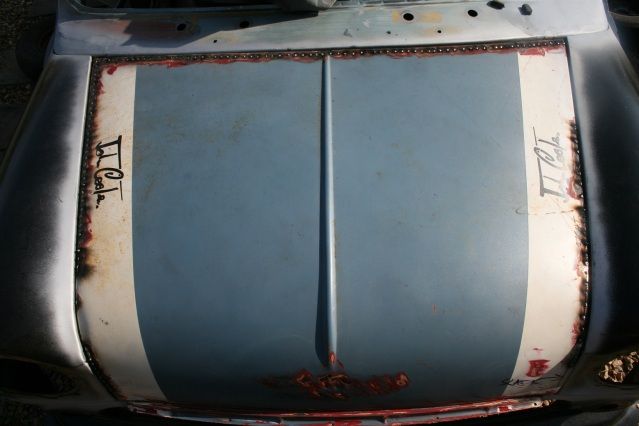
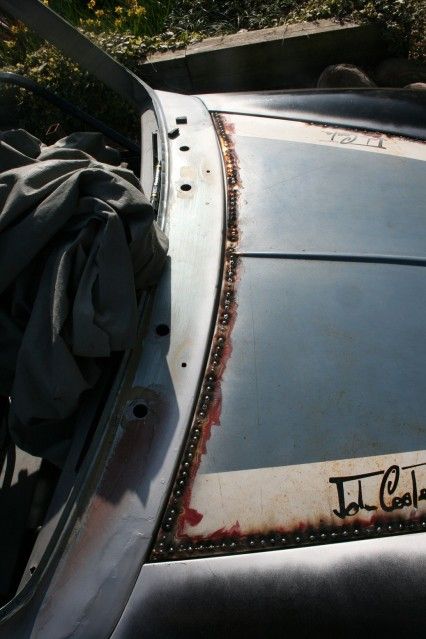
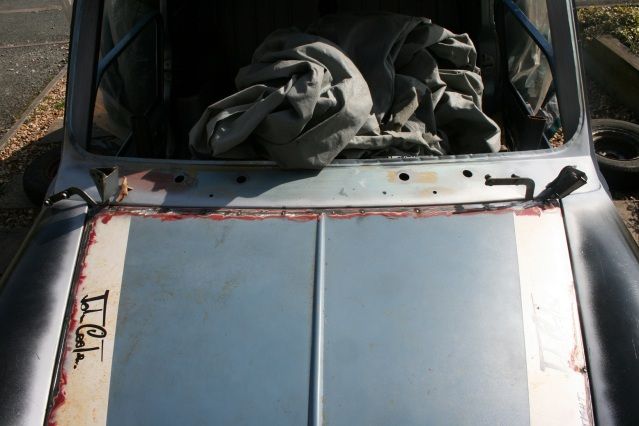
I built up the spot welds around the bonnet over an hour to allow it to cool and avoid distortion, very frustrating having to wait to finish it but get there I did
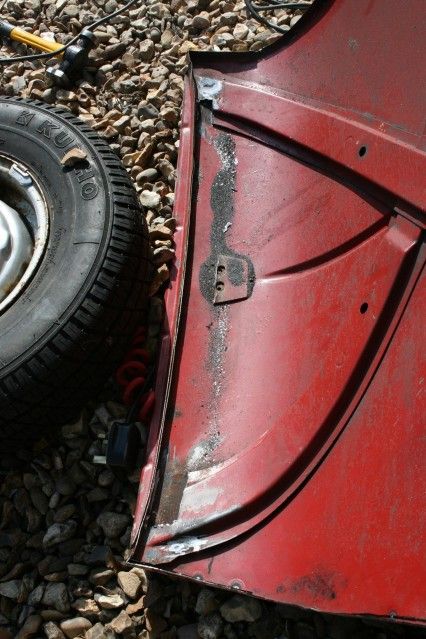
However inside the bonnet there were problems too. Firstly, when I cut the back off the bonnet I also cut free the strengthener in one corner and so it had to be repaired
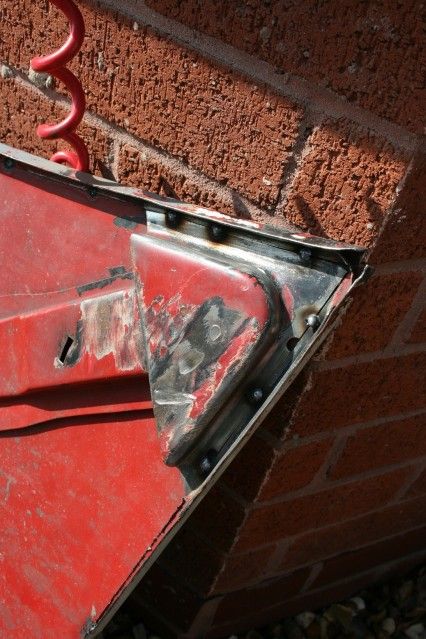
Secondly there was some rust at the front on both strengtheners so I cut it out and welded new metal in.
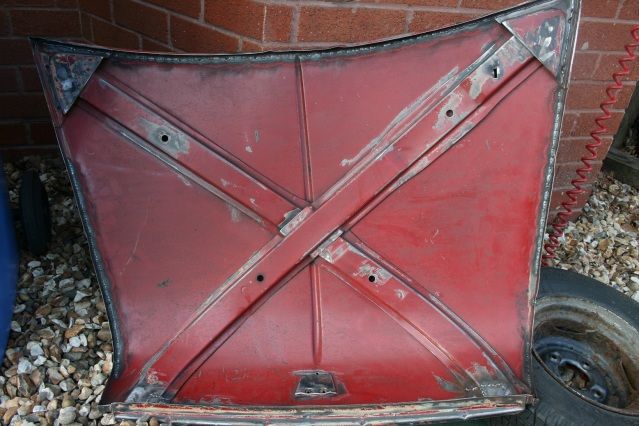
After all that welding it still fitted, glad I took the time to allow it to cool as I didn't want to have to start it all again !!
Epic week for me, something done every day in the sun, going back to work a happy chapie with the front end on !!!
Graham
Bonnet day today. Not a bad initial fit but tight at the back and on parts along the wings and after warnings about paint I thought I'd get it right. Where I started.
I simply slotted the bonnet with a 1mm cutting disk and hammered it into place and masking taped it to have a look, the forst trial
Looking ok so I put some initial tacks in to hold it all in place, and had a better look at the gaps. It was touching the scuttle when I started and with some slotting all across the back and some flap disking in places I got this at the back
More than happy as at one poing I struggled to get the strip I had cut off the back to line up as it twisted. Spots held it in place for fitting tests after using loads of masking tape to get it roughly in place.
I built up the spot welds around the bonnet over an hour to allow it to cool and avoid distortion, very frustrating having to wait to finish it but get there I did
However inside the bonnet there were problems too. Firstly, when I cut the back off the bonnet I also cut free the strengthener in one corner and so it had to be repaired
Secondly there was some rust at the front on both strengtheners so I cut it out and welded new metal in.
After all that welding it still fitted, glad I took the time to allow it to cool as I didn't want to have to start it all again !!
Epic week for me, something done every day in the sun, going back to work a happy chapie with the front end on !!!
Graham
Edited by grahama, 29 March 2012 - 05:47 PM.
#431
minimuk
-
- Members
-
- 1,947 posts
Camshaft & Stage Two Head
- Location: Midlands
Posted 29 March 2012 - 09:52 PM
I hope the rear of the bonnet will not catch on the windscreen whipers, when opening the bonnet, you could check that without the window in......... yes you can move it forward a bit but then you might be out on the front panel....
#432
sonikk4
-
- Admin
-
- 16,168 posts
Twisted Paint Polisher!!!
- Name: Neil
- Location: Cotwolds.
Posted 29 March 2012 - 09:59 PM
Nice job with the bonnet Graham. Looking good.
#433
grahama
-
- Members
-
- 2,442 posts
Up Into Fourth
- Location: Warrington
- Local Club: None in my area !!
Posted 29 March 2012 - 09:59 PM
Muk, I am securing it with bonnet pins, as being 6' 1 tall, and Matt 6 '3, working under a half open bonnet is a task in itself !! So when open it will definately not hit the wipers, lol.
Thanks for the heads up though, there are so many experienced people on here that spot the errors as they happen and make solving them easier.
Graham
Ta Neil, a long day getting it all sorted but worth the hastle.
Thanks for the heads up though, there are so many experienced people on here that spot the errors as they happen and make solving them easier.
Graham
Ta Neil, a long day getting it all sorted but worth the hastle.
Edited by grahama, 29 March 2012 - 10:02 PM.
#434
minimuk
-
- Members
-
- 1,947 posts
Camshaft & Stage Two Head
- Location: Midlands
Posted 29 March 2012 - 10:20 PM
Muk, I am securing it with bonnet pins, as being 6' 1 tall, and Matt 6 '3, working under a half open bonnet is a task in itself !! So when open it will definately not hit the wipers, lol.
Thanks for the heads up though, there are so many experienced people on here that spot the errors as they happen and make solving them easier.
Graham
Ta Neil, a long day getting it all sorted but worth the hastle.
that's all good then,.... just to make longer seat brackets,.....
#435
grahama
-
- Members
-
- 2,442 posts
Up Into Fourth
- Location: Warrington
- Local Club: None in my area !!
Posted 30 March 2012 - 06:48 AM
Yea, that's on the list for Lerch !!! lol.


0 user(s) are reading this topic
0 members, 0 guests, 0 anonymous users


