
I'm affraid I can't provide much advice on the doors either Graham, as I haven't done my ones yet and our bodyshop did the skins on my first project for me. I want to have a go at the doors myself this time though so will be watching how yours turn out. That lower door repair looks like it will work out well though.


Mini Virgin Rebuild Of 83 Mayfair.
Started by
grahama
, May 22 2010 05:09 PM
1006 replies to this topic
#452

grahama
-
- Members
-

- 2,442 posts
Up Into Fourth
- Location: Warrington
- Local Club: None in my area !!
Posted 03 April 2012 - 12:31 PM
Have some more to take off the frame yet, pitted stuff, just put the skin on to see about flexing. The skin is very easy to fit, surprisingly so, taking the old one off was worse. Just have to make sure the lines run level along the side.
I say easy, may just have been lucky !!!
I say easy, may just have been lucky !!!
#453
sonikk4
-

- Admin
-
- 16,169 posts
Twisted Paint Polisher!!!
- Name: Neil
- Location: Cotwolds.
Posted 03 April 2012 - 02:28 PM
Without the skin the door does flex a lot Graham. Yours does seemed to have a dropped quite significantly though which looks alarming but once you have tacked the skin on then you can see if things are different. Are you using a Heritage skin?? much better than the other skins out there in my view.
#454
grahama
-
- Members
-
- 2,442 posts
Up Into Fourth
- Location: Warrington
- Local Club: None in my area !!
Posted 03 April 2012 - 03:05 PM
Hi Neil,
Not a heritage skin, good old magnum!! The door has firmed up significantly with it just held at the corners. I am going to change the hinges though to stop the wobbling at the hinges. This could reduce the ships needed too but the fit is fine.
Not a heritage skin, good old magnum!! The door has firmed up significantly with it just held at the corners. I am going to change the hinges though to stop the wobbling at the hinges. This could reduce the ships needed too but the fit is fine.
#455
BusheyTrader
-

- TMF+ Member
-
- 484 posts
Speeding Along Now
- Location: Bushey
- Local Club: Nope
Posted 09 April 2012 - 11:00 AM
Glad to see it worked out for you in the end.
I'm now thinking I should have reskinned and re-hung both of my doors before tackling the sills, doorstep panels and A posts.
Everything I've done on the driver's side has used the door fit as a reference point and I've yet to strip and refurbish it. It looks pretty good on the outside but there's plenty of stuff rattling around inside it so it'll have to be done.
Adam
#456
Badchilli
-
- Noobies
-
- 99 posts
Stage One Kit Fitted
- Location: Derby
Posted 09 April 2012 - 02:56 PM
Going well Graham . Just a few tips for when you finally fit the skin, you need to keep the dolly tight on the outside of the skin and use a a hammer with a slight crown not a flat face,don't be tempted to knock too much over in one go , take it a bit at a time(will make your arms burn by the time you finish) . I then use a bodyfile to knock down the high spots . A did a reskin on my project have a look it may help.
#457
grahama
-
- Members
-
- 2,442 posts
Up Into Fourth
- Location: Warrington
- Local Club: None in my area !!
Posted 09 April 2012 - 06:37 PM
Took alot of worried brow scratching but yes it did indeed come good.
What's your thread badchil?? Also , what is a bodyfile, or am I thick in assuming it is anything more than the name suggests, lol !!
I have to say that the corners I bent over were quite hard to move, due to thickness I assume, and had to get a pair of pipe grips on them to get the bend tight. Hope when I do the bit by bit method it will be a little easier.
Graham
#458
Badchilli
-
- Noobies
-
- 99 posts
Stage One Kit Fitted
- Location: Derby
Posted 09 April 2012 - 07:16 PM
yaffy mk1 rebuild . It's as the name suggests looks like this 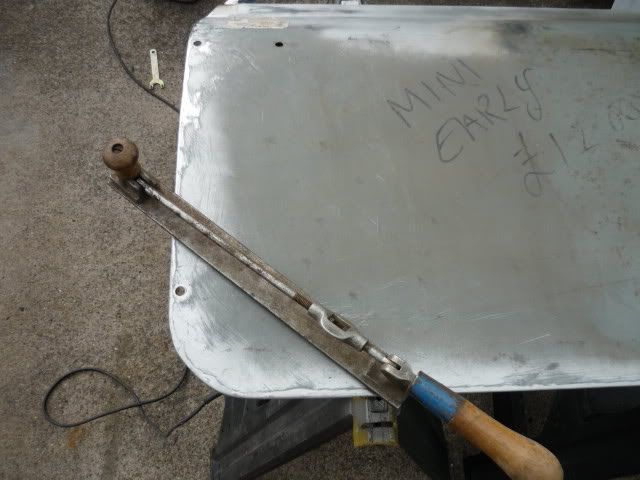
Very good for removing high spots
Very good for removing high spots
#459
minimuk
-

- Members
-
- 1,947 posts
Camshaft & Stage Two Head
- Location: Midlands
Posted 10 April 2012 - 10:47 PM
Going well Graham . Just a few tips for when you finally fit the skin, you need to keep the dolly tight on the outside of the skin and use a a hammer with a slight crown not a flat face,don't be tempted to knock too much over in one go , take it a bit at a time(will make your arms burn by the time you finish) . I then use a bodyfile to knock down the high spots . A did a reskin on my project have a look it may help.
Graham, I use a hard rubber dolly when doing that kinda job, it will absorb each hit and wont damage the outside of the door by bouncing back to it,....if you got my drift,....
Badchilli, I do like that file though

Edited by minimuk, 10 April 2012 - 10:48 PM.
#460
AndyMiniMad.
-

- Members
-
- 3,295 posts
Up Into Fourth
- Location: Under The Bonnet.
Posted 30 April 2012 - 02:32 PM
Hellooooo!! hows progress?
#461
grahama
-
- Members
-
- 2,442 posts
Up Into Fourth
- Location: Warrington
- Local Club: None in my area !!
Posted 30 April 2012 - 05:07 PM
Hi all,
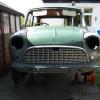
That was a well times request Andy, just finished for the day and uploaded some pics. Progress from a few weeks, not much, and none except for today from the last few weeks due to bl*&dy rain and bathroom battles involving trading standards !!! So a bit wound up today !!
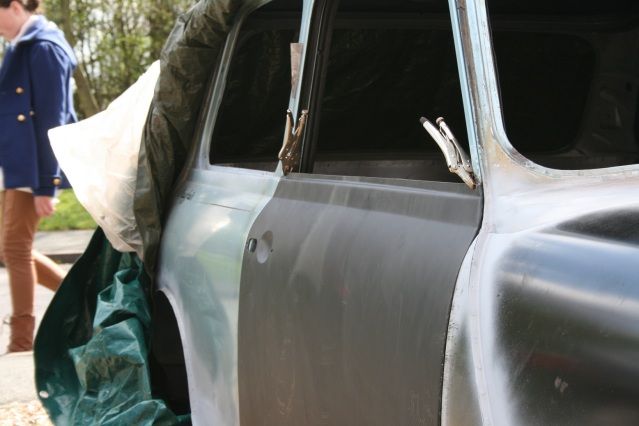
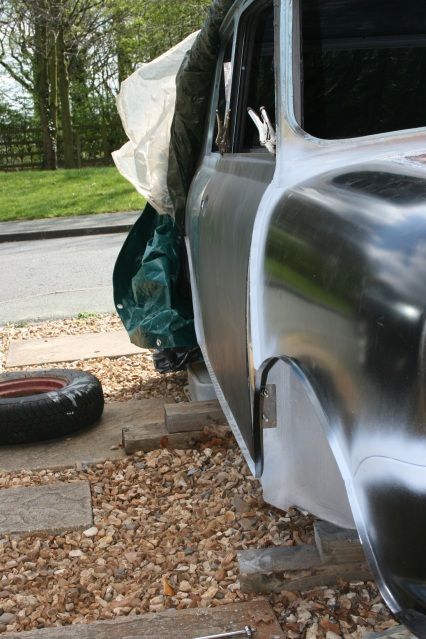
Anyway, the driver door.
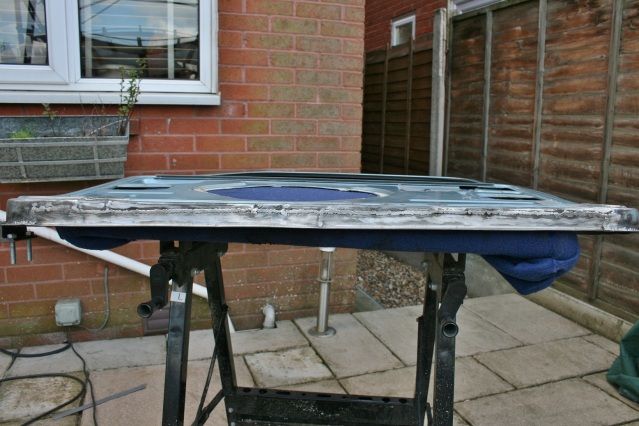
Welded up the repair section fully, not too neat though, I am getting worse / impatient or probably both which is making me a bit naffed off. But it wont be seen so not too bad. Clamped back up and put a new hinge on and this is the lineup
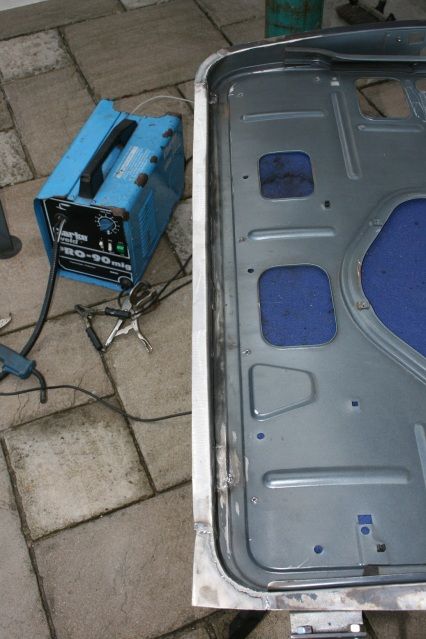
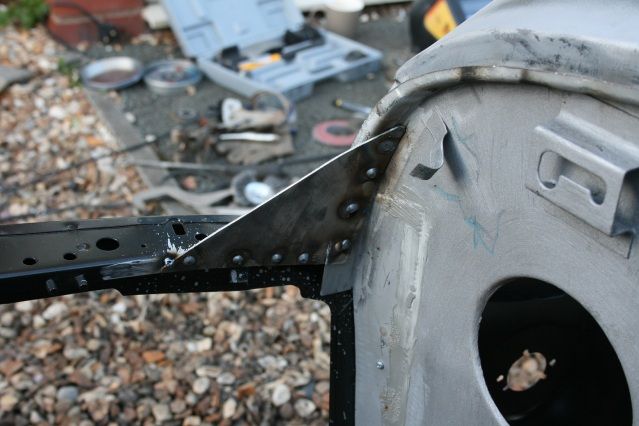
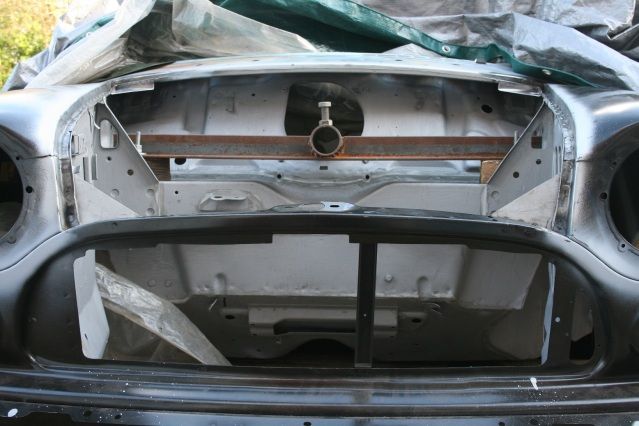
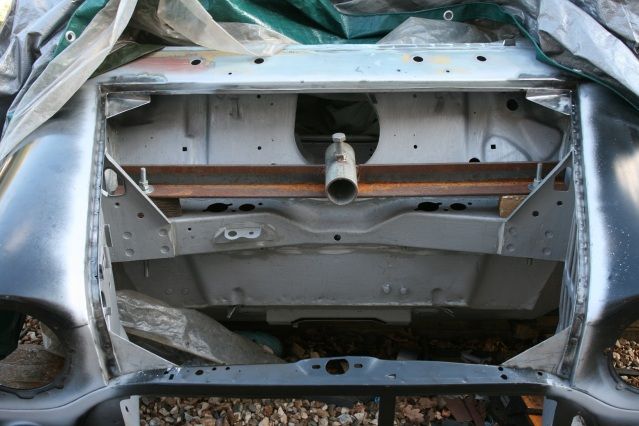
That'll do me. Still some movement but it is I think the fact that I haven't knocked the skin on fully, due to needing sound deadening and some paint for inside, but wanted to move on with the last few welding jobs. I got my aluminium bonnet pics the other day so decided to make the mounts for them. Took a leaf out of Steeve's thread and angled the lips on the rears so the pins sat more parallel with the bonnet, you'll see...
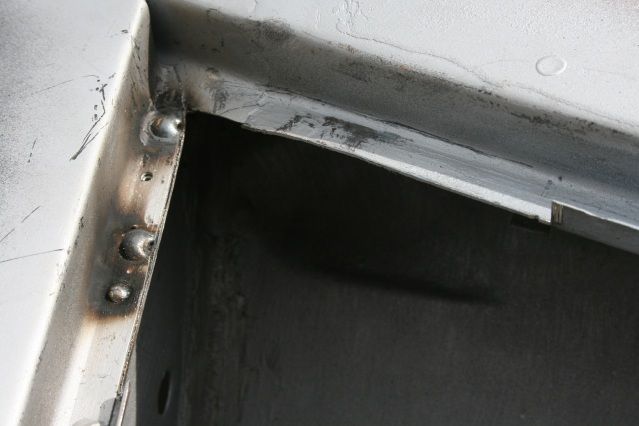
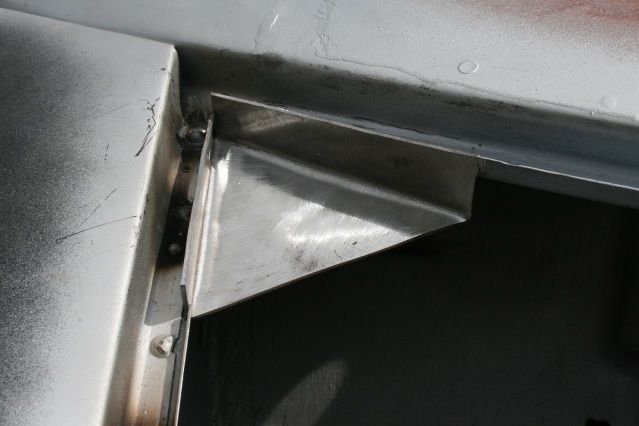
I needed to close up the water drain channels either side of the bonnet so I made mounts that did the two jobs in one go. Roughly positioned and all was well.
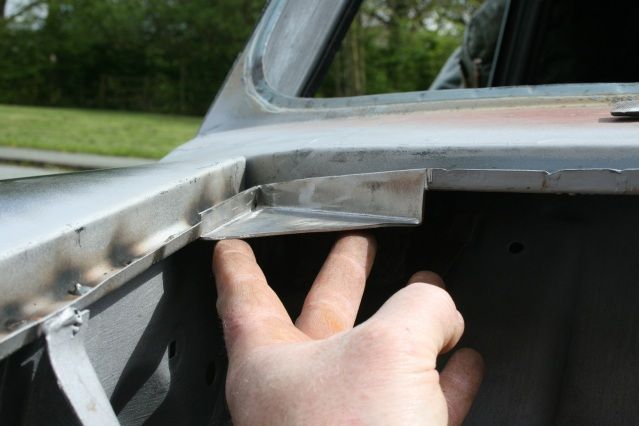
I had to weld on the inside of the scuttle lip and it's not pretty in the corner to be honest, ground most out but will have to get a die grinder to do the last bits. Seam sealer will hide the rest eventually !!!
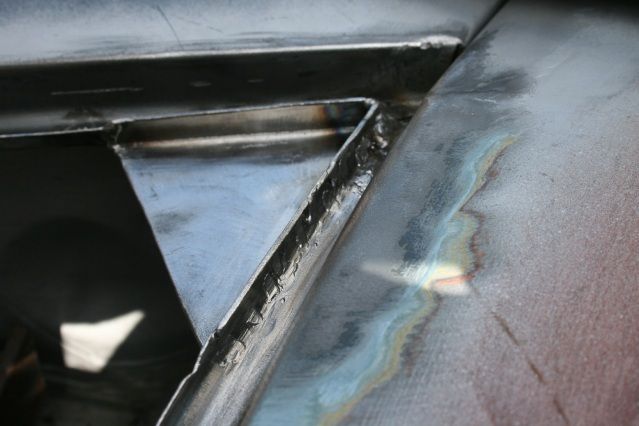
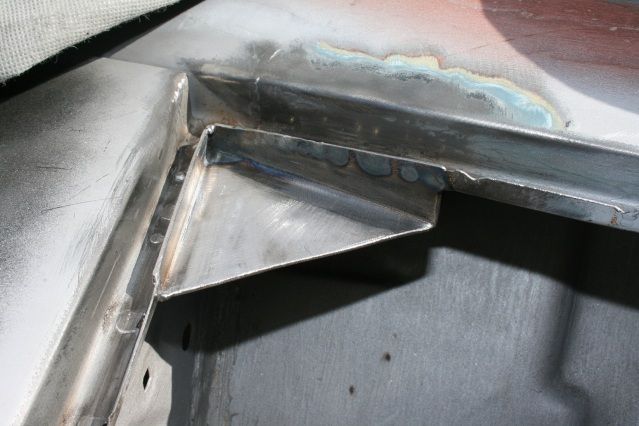
Quite happy with the result, just the welds to tidy up, and rerpeated on the other side.

The wind was howling all day too so had some aero welds to re do which kept setting me back. I do hate working at the mercy of the elements !
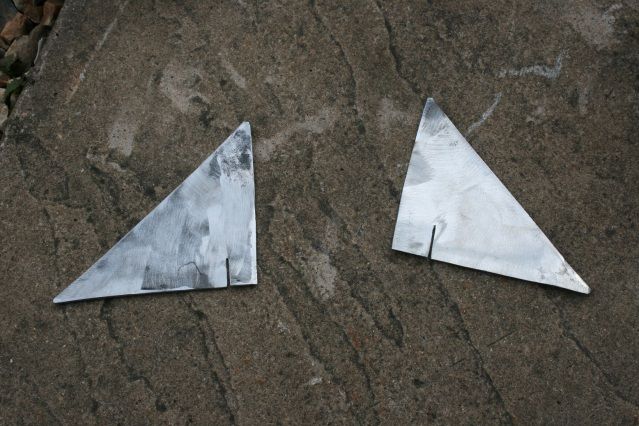
The fronts were a simple affair, triangle plates plug welded on.
Quite an easy job compared to the rear mounts. The rear mounts require some aditional welding from underneath to fully close the drain channels but not today in this wind, far too difficult even under my welding sheet !!
The result
As I said, not too much due to rain and bathroom crap, which is now sorted and I had my first bath in 3 weeks yesterday, bliss !!!
I have got a sultz gun now too so stone chip soom for the underneath, Matt is very excited, so much so that he has been painting things so he can be ready for the refit in two years time, lol
Graham
That was a well times request Andy, just finished for the day and uploaded some pics. Progress from a few weeks, not much, and none except for today from the last few weeks due to bl*&dy rain and bathroom battles involving trading standards !!! So a bit wound up today !!
Anyway, the driver door.
Welded up the repair section fully, not too neat though, I am getting worse / impatient or probably both which is making me a bit naffed off. But it wont be seen so not too bad. Clamped back up and put a new hinge on and this is the lineup
That'll do me. Still some movement but it is I think the fact that I haven't knocked the skin on fully, due to needing sound deadening and some paint for inside, but wanted to move on with the last few welding jobs. I got my aluminium bonnet pics the other day so decided to make the mounts for them. Took a leaf out of Steeve's thread and angled the lips on the rears so the pins sat more parallel with the bonnet, you'll see...
I needed to close up the water drain channels either side of the bonnet so I made mounts that did the two jobs in one go. Roughly positioned and all was well.
I had to weld on the inside of the scuttle lip and it's not pretty in the corner to be honest, ground most out but will have to get a die grinder to do the last bits. Seam sealer will hide the rest eventually !!!
Quite happy with the result, just the welds to tidy up, and rerpeated on the other side.
The wind was howling all day too so had some aero welds to re do which kept setting me back. I do hate working at the mercy of the elements !
The fronts were a simple affair, triangle plates plug welded on.
Quite an easy job compared to the rear mounts. The rear mounts require some aditional welding from underneath to fully close the drain channels but not today in this wind, far too difficult even under my welding sheet !!
The result
As I said, not too much due to rain and bathroom crap, which is now sorted and I had my first bath in 3 weeks yesterday, bliss !!!
I have got a sultz gun now too so stone chip soom for the underneath, Matt is very excited, so much so that he has been painting things so he can be ready for the refit in two years time, lol
Graham
#462
hughJ
-

- Members
-
- 727 posts
Soldiering Along
- Location: Highlands, Scotland
Posted 30 April 2012 - 06:49 PM
You are good Graham. That looks pretty nice welding to me! You can't really get the torch in there. I like a weld about waste height with lots of space round it - never happens. The car looks smashing. You've done a much tidier job than me. The plug welds along the top of the wings are great!!
Keep on going Graham
Hugh
Keep on going Graham
Hugh
#463
minimuk
-
- Members
-
- 1,947 posts
Camshaft & Stage Two Head
- Location: Midlands
Posted 30 April 2012 - 09:09 PM
Nice work Graham, door sit's good they are a pain but you done very well indeed
#464
grahama
-
- Members
-
- 2,442 posts
Up Into Fourth
- Location: Warrington
- Local Club: None in my area !!
Posted 30 April 2012 - 09:18 PM
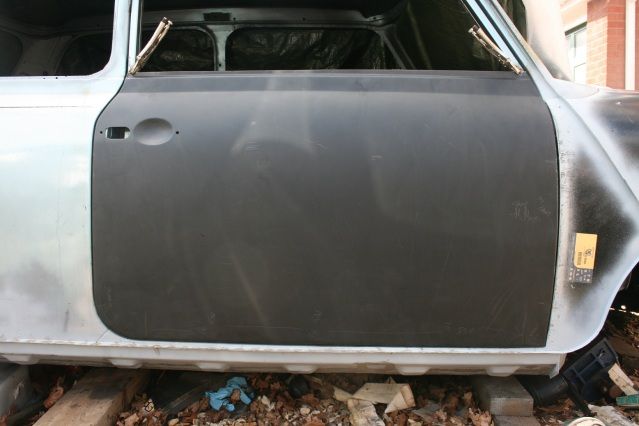
Paint inside door tomoz and sound deaden next day. Skin properly and see if it still fits!!
Edited by grahama, 01 May 2012 - 09:50 AM.
#465
J4C
-

- Noobies
-
- 42 posts
On The Road
- Location: Bristol
- Local Club: no
Posted 01 May 2012 - 08:26 AM
This is one of the best threads i have read (haven't got through it all yet).
Started to get the itch after going through it, most of the jobs you have been doing are the ones i have been trying to pluck up the guts (and free time) to get on with.
Love the way you just get stuck in even though you weren't to confident to begin with.
Keep up the good work and the great info.
Regards
Jack


1 user(s) are reading this topic
0 members, 1 guests, 0 anonymous users


