Thanks, they came out better than I thought from when I got them, working perfectly but cruddy !! The end is coming closer but getting to paint is proving harder than I thought. It will be nice putting all the nice clean bits back in, and trying to get it all working !!


Mini Virgin Rebuild Of 83 Mayfair.
Started by
grahama
, May 22 2010 05:09 PM
1006 replies to this topic
#541

grahama
-
- Members
-

- 2,442 posts
Up Into Fourth
- Location: Warrington
- Local Club: None in my area !!
Posted 26 June 2012 - 09:51 PM
#542
grahama
-
- Members
-
- 2,442 posts
Up Into Fourth
- Location: Warrington
- Local Club: None in my area !!
Posted 27 June 2012 - 06:57 PM
Hi all,
were off at last with the spraying part of the project. Stone chip anyway !!
I used UPOL Gravitex in the 1L pots for the scultz gun. I asked in the bodywork section and set my pressure on the ancient compressor to 50 psi.
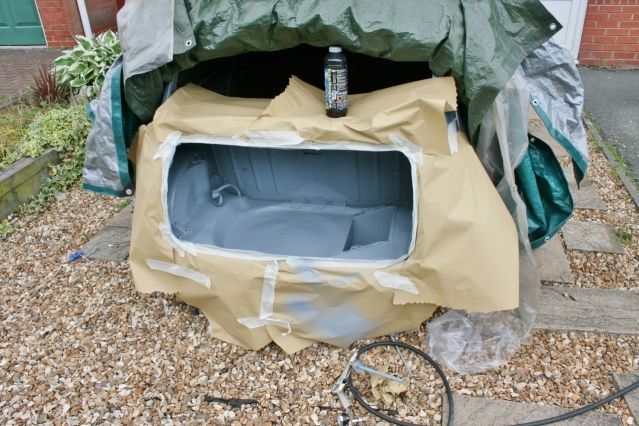

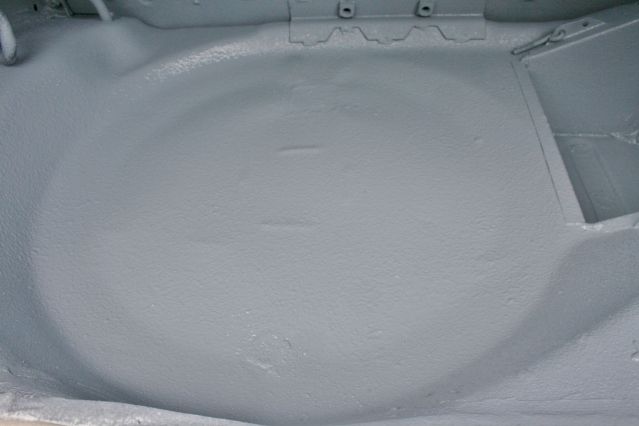
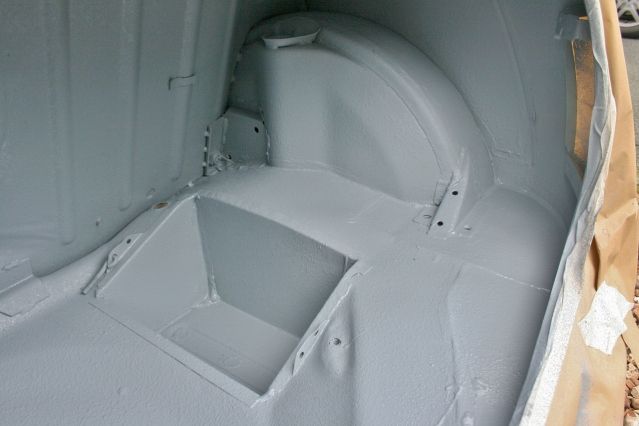
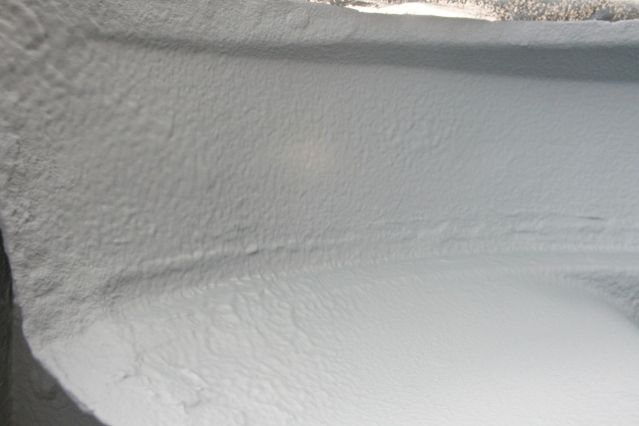
Quite pleased with the results in the boot, tried there first as a test run. It seemed fine in places ripply but flat in others, not sure why. Took longer to dry than I thought though, touch dry soon enough but the thicker stuff took ages.
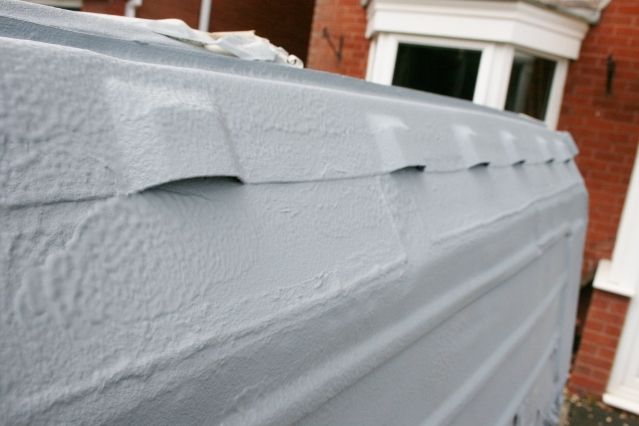
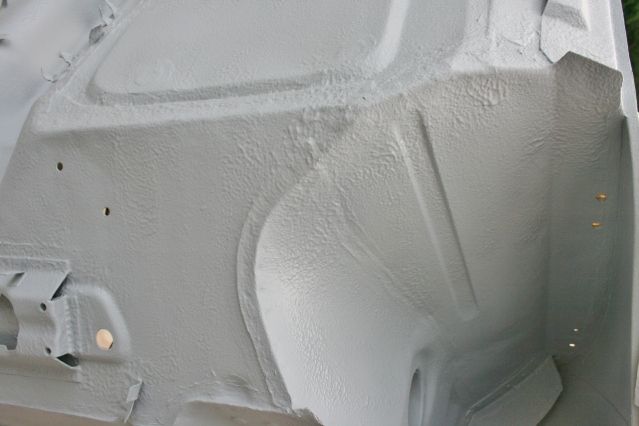
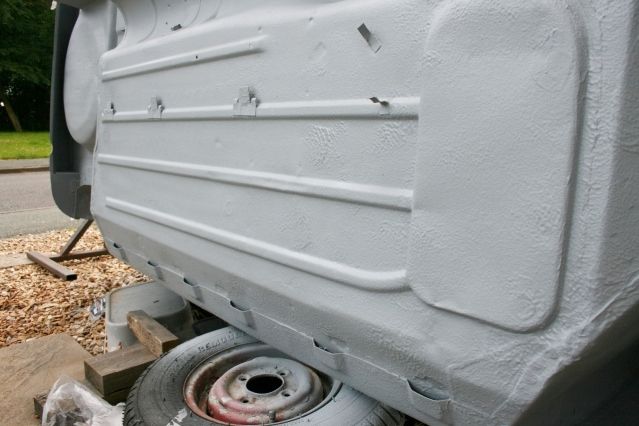
I decided to do the rest of the underneath as rain is forecast for tomorrow. Same set up and on it went, deep and crip and not even !! Slathered it on in the important areas, arches, sills, flitces and as much as possible on the floor. I used 5 bottles in total at 5.99 + vat so quite pleased.
I still had some thinner areas which had thicker ripply bits next to thinner 'dryer' areas.
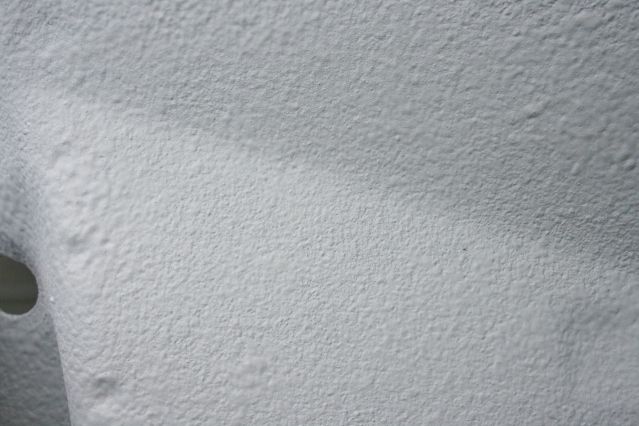
No idea why this happened as I passed over the area in the same sweep, but not the same. Any ideas why??


OOps !! dropped some steel bar fron the spit in the boot so a repair already needed and missed a couple of bits too because of access mainly. Will have to get a rattle can to fill in these bits I think. I masked up some what but still had some over spray onto the body panels I have just etched.
Hopefully when dry it will sand off !! Well chuffed and hopefully no reactions when dry tomorrow, or it's all off !!
Graham
were off at last with the spraying part of the project. Stone chip anyway !!
I used UPOL Gravitex in the 1L pots for the scultz gun. I asked in the bodywork section and set my pressure on the ancient compressor to 50 psi.
Quite pleased with the results in the boot, tried there first as a test run. It seemed fine in places ripply but flat in others, not sure why. Took longer to dry than I thought though, touch dry soon enough but the thicker stuff took ages.
I decided to do the rest of the underneath as rain is forecast for tomorrow. Same set up and on it went, deep and crip and not even !! Slathered it on in the important areas, arches, sills, flitces and as much as possible on the floor. I used 5 bottles in total at 5.99 + vat so quite pleased.
I still had some thinner areas which had thicker ripply bits next to thinner 'dryer' areas.
No idea why this happened as I passed over the area in the same sweep, but not the same. Any ideas why??
OOps !! dropped some steel bar fron the spit in the boot so a repair already needed and missed a couple of bits too because of access mainly. Will have to get a rattle can to fill in these bits I think. I masked up some what but still had some over spray onto the body panels I have just etched.
Hopefully when dry it will sand off !! Well chuffed and hopefully no reactions when dry tomorrow, or it's all off !!
Graham
Edited by grahama, 27 June 2012 - 07:09 PM.
#543
Andrew O
-

- Members
-
- 1,425 posts
Previously known as Andrewo330.
Posted 27 June 2012 - 07:36 PM
Excellent stuff, and no it doesn't sand of as I have done the same aha.
May I ask why you used stone chip inside the boot ?
Andrew.
May I ask why you used stone chip inside the boot ?
Andrew.
#544
grahama
-
- Members
-
- 2,442 posts
Up Into Fourth
- Location: Warrington
- Local Club: None in my area !!
Posted 27 June 2012 - 07:43 PM
Doesn't sand off, bugger, how did u get yours off or is it the wire wheel again ??
Just did it as a test area to be honest and it gets a few knocks when in use, it won't be seen too much so not really concearned.
Graham
Just did it as a test area to be honest and it gets a few knocks when in use, it won't be seen too much so not really concearned.
Graham
Edited by grahama, 27 June 2012 - 07:43 PM.
#545
Andrew O
-
- Members
-
- 1,425 posts
Previously known as Andrewo330.
Posted 27 June 2012 - 08:52 PM
Im stripping the whole car back to bare metal so I used one of those paint strippers on a grinder that only removes paint and doesn't damage the metal.
You never know if you spend some time with some 80 grit you might get it of.
Andrew
You never know if you spend some time with some 80 grit you might get it of.
Andrew
#546
grahama
-
- Members
-
- 2,442 posts
Up Into Fourth
- Location: Warrington
- Local Club: None in my area !!
Posted 29 June 2012 - 08:04 PM
Hi all,
Had a look at the stone chip today after it had dried for a day of so and I have had some reaction !! It is around the sill vents and think it is waxoil contamination so will have to wire brush off and re do those bits but no stock at the auto paint shop till Monday. Bit annoyed to be honest but better to fix now than rust later.
So on with a couple of jobs I have been putting off for ages. Getting the petrol tank and bonnet ready for paint.
Petrol tank first and it was surface rusty inside so I went down the low tech route and filled with stones and shook for ages. Lots of rusty powder came out so it did it's job nicely. For some added protection I poured some kurust inthere to give a coating. Will be fitting an inline filter on set up to catch any loose stuff !! So started to strip the tank, full of little rust spots on the outside but solid.
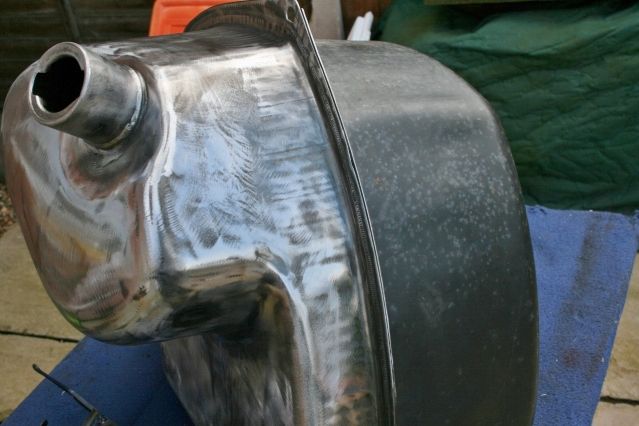
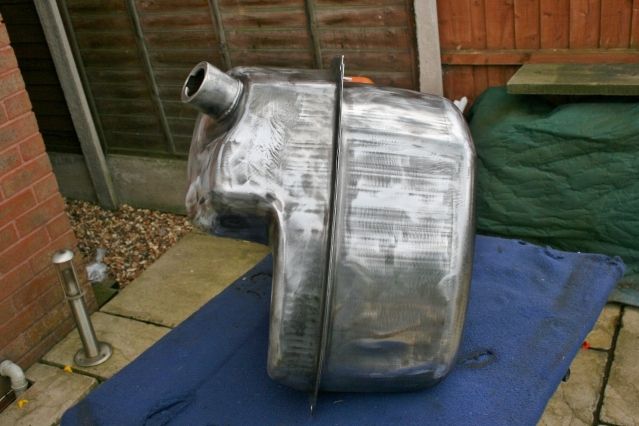
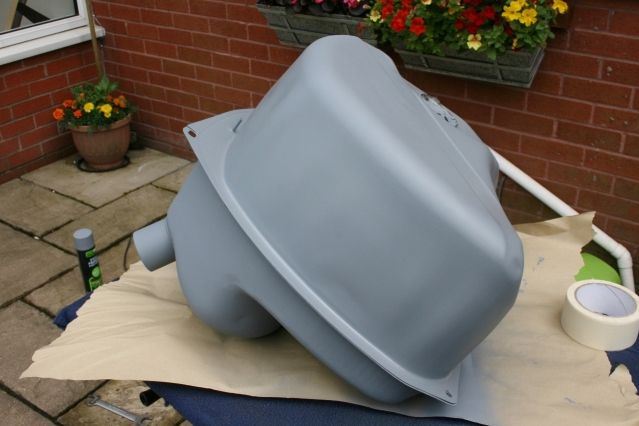
All stripped back to bare metal and etched ready for primer and paint.
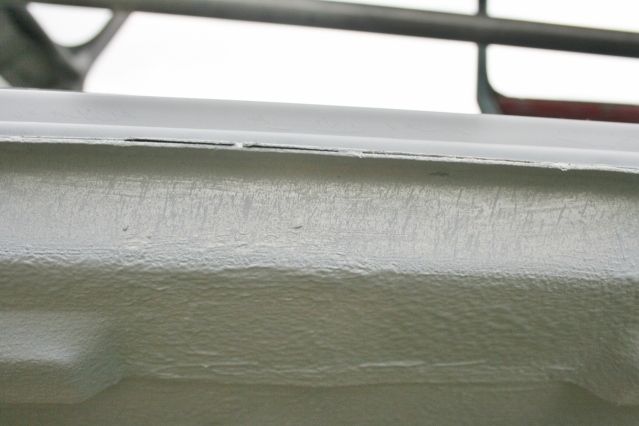
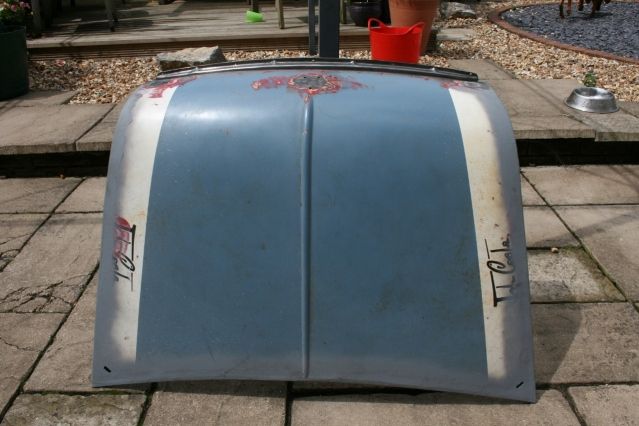
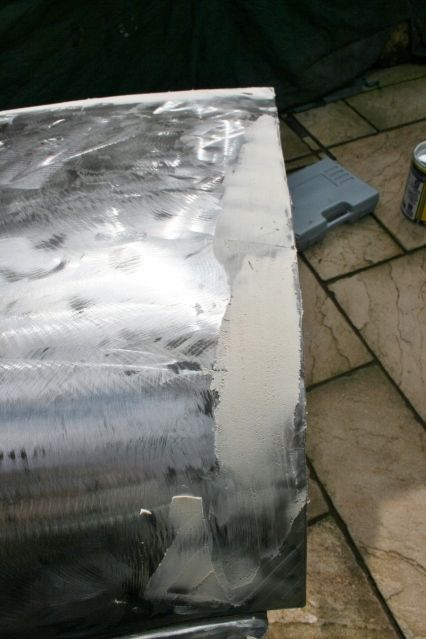
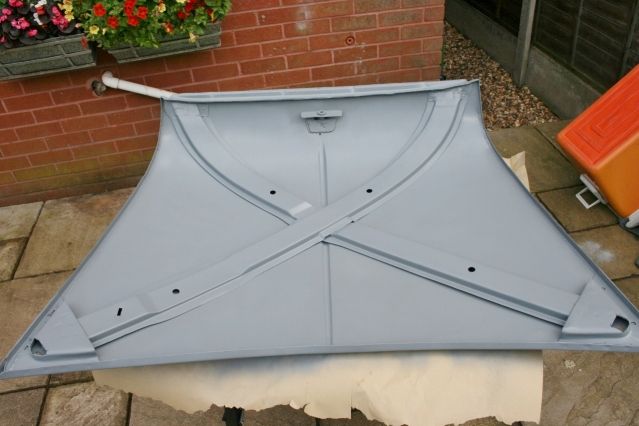
Then to the bonnet which I had cut about to get nicer fit and welded back up.
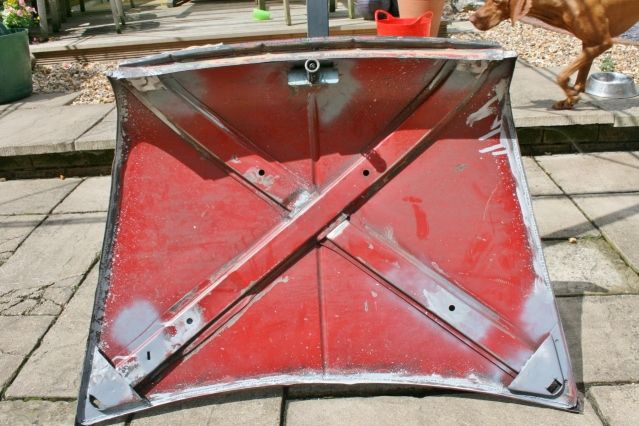
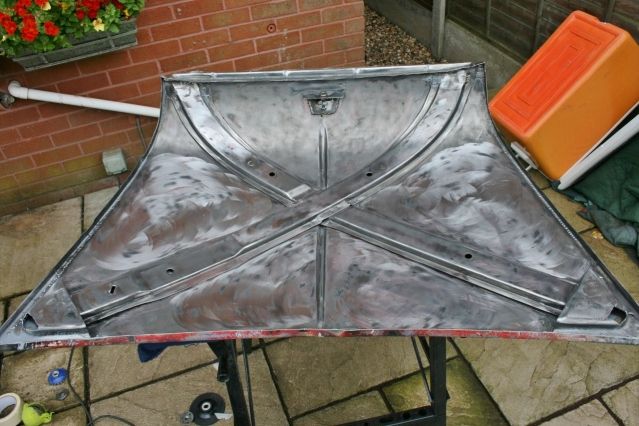
I have ground down the welds on the outside but a skim of filler was required, the inside needed stripping and etching before seam sealing over the weld backs.
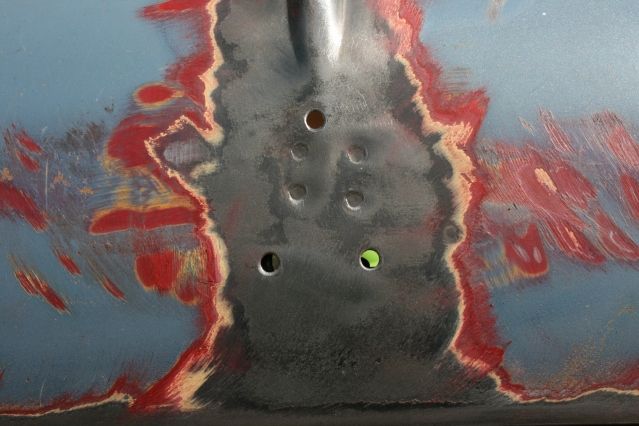
It took a while to strip the inside with a wire wheel and flexible 80 grit disc on the grinder but had to resort to a stanley knife blade to get the tight cornets done. Came out nicely though. The front was easier except for the really hard and what seemed flexible paint that kept clogging my strip discs. It was a second hand bonnet so don't know what had been done to it before but off the paint came.
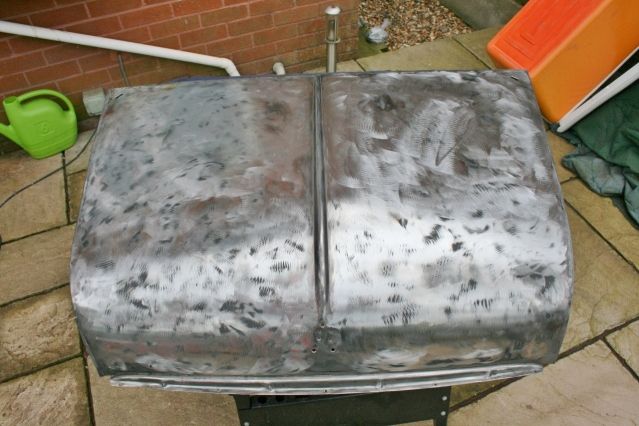
Then the filling, never done it and was dreading it as I hate sanding.
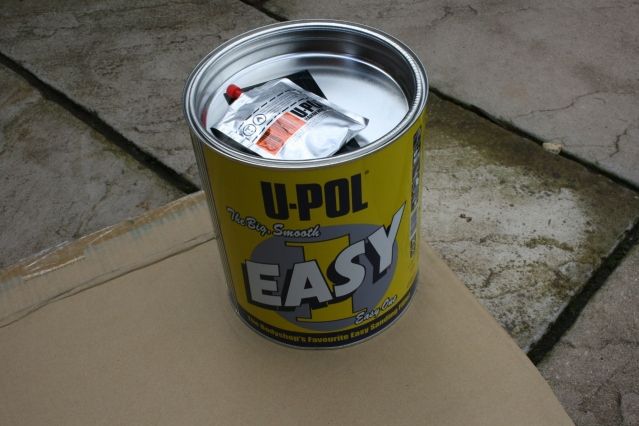
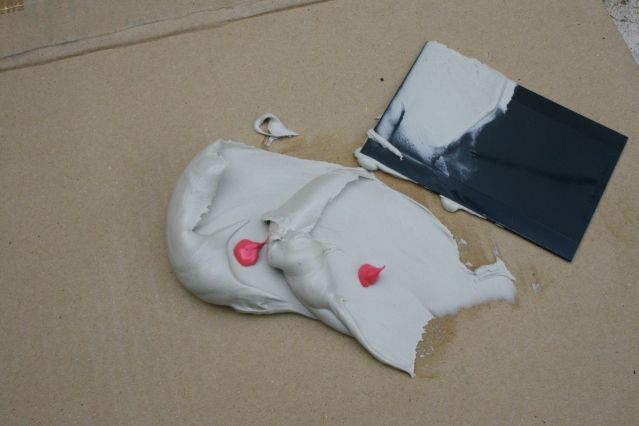
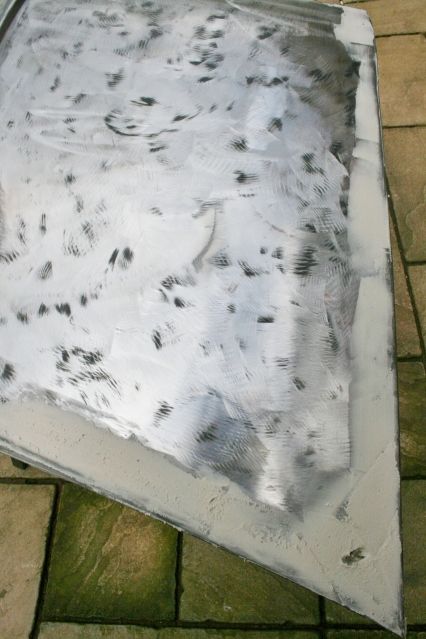
Got the upol easy 1 stuff as it said easy sanding and mixed in the golfball to pea ratio then spread it on, mixed far too much but you learn all the time in the mini game.
Let it go off and sanded with 240 grit wet and dry, easy sand my arse !! Had to resort to 80 grit to make inroads, and yes it was as expected a crap job to do as I thought !! Filled the missed bits, more sanding, and filled again. Came up after a couple of hours with sore fingers and this
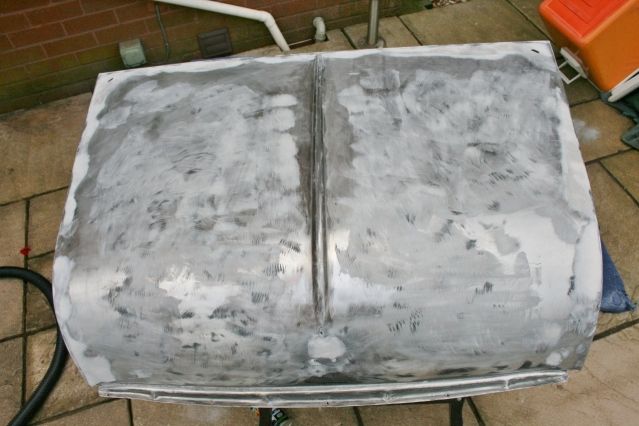
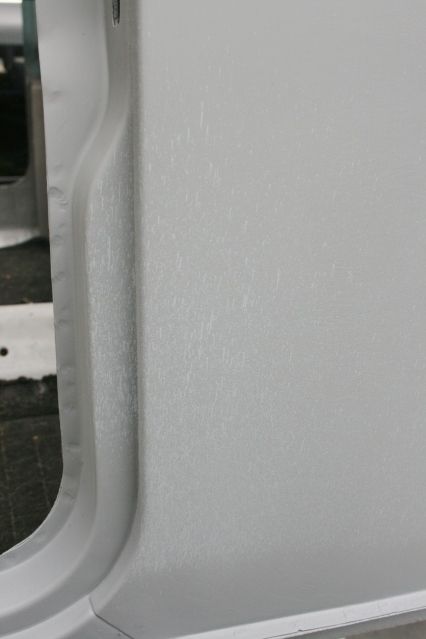
Panel wiped it down and etched
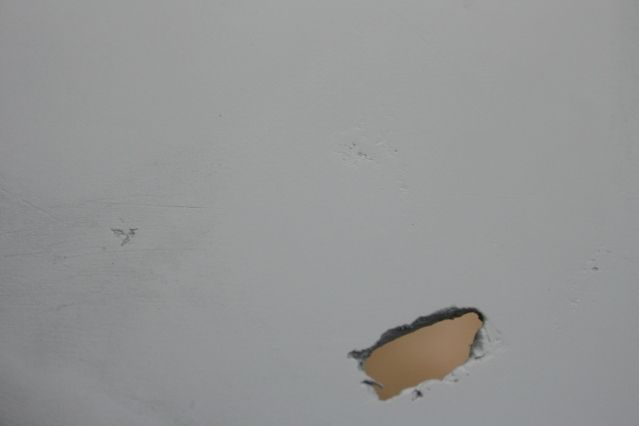
Came out nice but there were some imperfections left after etching which I will have to sort and the bonnet pin holes to scrape out.
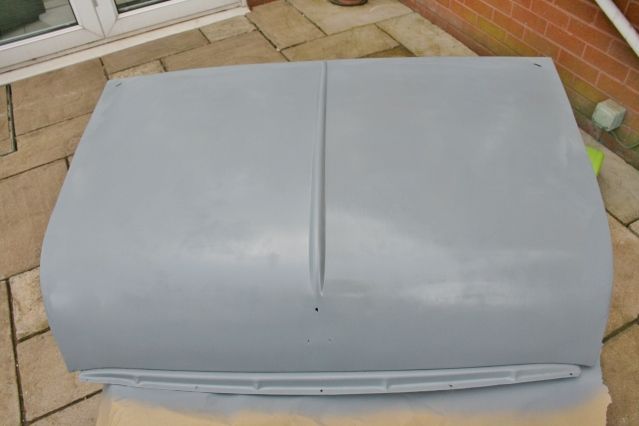
comming along,
Graham
Had a look at the stone chip today after it had dried for a day of so and I have had some reaction !! It is around the sill vents and think it is waxoil contamination so will have to wire brush off and re do those bits but no stock at the auto paint shop till Monday. Bit annoyed to be honest but better to fix now than rust later.
So on with a couple of jobs I have been putting off for ages. Getting the petrol tank and bonnet ready for paint.
Petrol tank first and it was surface rusty inside so I went down the low tech route and filled with stones and shook for ages. Lots of rusty powder came out so it did it's job nicely. For some added protection I poured some kurust inthere to give a coating. Will be fitting an inline filter on set up to catch any loose stuff !! So started to strip the tank, full of little rust spots on the outside but solid.
All stripped back to bare metal and etched ready for primer and paint.
Then to the bonnet which I had cut about to get nicer fit and welded back up.
I have ground down the welds on the outside but a skim of filler was required, the inside needed stripping and etching before seam sealing over the weld backs.
It took a while to strip the inside with a wire wheel and flexible 80 grit disc on the grinder but had to resort to a stanley knife blade to get the tight cornets done. Came out nicely though. The front was easier except for the really hard and what seemed flexible paint that kept clogging my strip discs. It was a second hand bonnet so don't know what had been done to it before but off the paint came.
Then the filling, never done it and was dreading it as I hate sanding.
Got the upol easy 1 stuff as it said easy sanding and mixed in the golfball to pea ratio then spread it on, mixed far too much but you learn all the time in the mini game.
Let it go off and sanded with 240 grit wet and dry, easy sand my arse !! Had to resort to 80 grit to make inroads, and yes it was as expected a crap job to do as I thought !! Filled the missed bits, more sanding, and filled again. Came up after a couple of hours with sore fingers and this
Panel wiped it down and etched
Came out nice but there were some imperfections left after etching which I will have to sort and the bonnet pin holes to scrape out.
comming along,
Graham
Edited by grahama, 29 June 2012 - 08:08 PM.
#547
liam-ds
-

- Traders
-
- 676 posts
Super Mini Mad
- Local Club: Barnsley mini club
Posted 29 June 2012 - 08:24 PM
hi Graham looking great, The stone chip will sand off get some 240 or 320 on it will take a little time but it does sand off, Are you stone chipping the inside of the car? I did everywhere with mine and its a lot less tinny to all the other minis ive been in.
Liam
Liam
#548
grahama
-
- Members
-
- 2,442 posts
Up Into Fourth
- Location: Warrington
- Local Club: None in my area !!
Posted 29 June 2012 - 08:28 PM
No, not doing inside Liam, going to get some flashing tape to dull things down as haven't got the money for proper sound deadening lol !! Just hope I can stop the reaction that's going on !!
#549
minimuk
-

- Members
-
- 1,947 posts
Camshaft & Stage Two Head
- Location: Midlands
Posted 29 June 2012 - 08:55 PM
Nice one Graham, bonnet looks good, hope the kurust will hold in the tank,.....all looks great in etch-primer agreed.
Edited by minimuk, 29 June 2012 - 08:55 PM.
#550
Shifty
-

- Admin
-
- 13,154 posts
Sponsored by Fosters (tm)
- Name: Sean
- Location: Shropshire(sunny)
- Local Club: TMF
Posted 29 June 2012 - 09:43 PM
Easy sand is a crap filler!!
Upol fantastic is a 100 times better.
Upol fantastic is a 100 times better.
#551
grahama
-
- Members
-
- 2,442 posts
Up Into Fourth
- Location: Warrington
- Local Club: None in my area !!
Posted 29 June 2012 - 09:52 PM
Thanks for that, but what is the difference. Not much to do so will have to stick with it now. As long as it doesn't fall out and takes paint then it will do.
#552
Shifty
-
- Admin
-
- 13,154 posts
Sponsored by Fosters (tm)
- Name: Sean
- Location: Shropshire(sunny)
- Local Club: TMF
Posted 29 June 2012 - 10:15 PM
Much easier to sand, less pinholes!!
You can almost use it as a stopper, its beautiful stuff!!
You can almost use it as a stopper, its beautiful stuff!!
#553
minimuk
-
- Members
-
- 1,947 posts
Camshaft & Stage Two Head
- Location: Midlands
Posted 29 June 2012 - 10:15 PM
Thanks for that, but what is the difference. Not much to do so will have to stick with it now. As long as it doesn't fall out and takes paint then it will do.
as far as I know, easy sand is for minor little scratches and small one off jobs, as Shifthy states the 'fantastic Upol' is designed for the jobs you are doing, I don't think it will fall out, just the fantastic is easyer to apply and sand/flatten after with 80-240-600grit.
#554
grahama
-
- Members
-
- 2,442 posts
Up Into Fourth
- Location: Warrington
- Local Club: None in my area !!
Posted 30 June 2012 - 06:48 PM
Ok I see the difference now as it was harder to spread than I thought. However I have to perservere with it now and learn my lesson !! I have only a few bits to do so not too bad.
Will a da sander rather than using a block and elbow grease be better to get the same result, or are they too rough ??
Graham
Will a da sander rather than using a block and elbow grease be better to get the same result, or are they too rough ??
Graham
#555
minimuk
-
- Members
-
- 1,947 posts
Camshaft & Stage Two Head
- Location: Midlands
Posted 30 June 2012 - 08:37 PM
Ok I see the difference now as it was harder to spread than I thought. However I have to perservere with it now and learn my lesson !! I have only a few bits to do so not too bad.
Will a da sander rather than using a block and elbow grease be better to get the same result, or are they too rough ??
Graham
elbow grease I am afraid is the better choise to flatten the filler, take yr time and feel where you go,machine is not controlable...unless you use one everyday...
 use edge of a steel ruler to look for smooth surface


3 user(s) are reading this topic
0 members, 3 guests, 0 anonymous users


