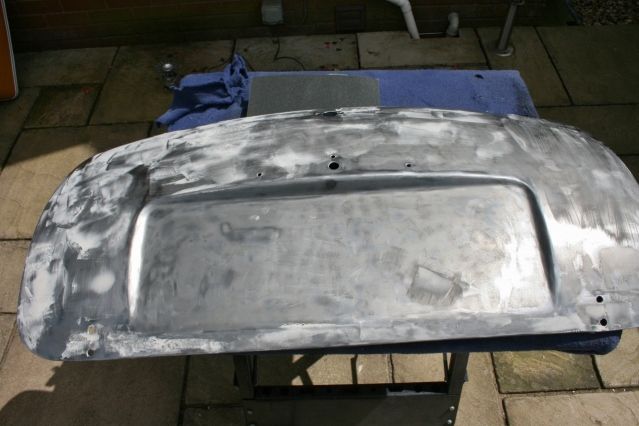
Grahama - did the filler take a while to go off? I tend to use slightly more hardener than they say to. I also fine 120 grit is easier to use when sanding.


Mini Virgin Rebuild Of 83 Mayfair.
Started by
grahama
, May 22 2010 05:09 PM
1006 replies to this topic
#556

Brams96
-

- Members
-

- 2,308 posts
Up Into Fourth
- Local Club: Kentish Mini Club
Posted 01 July 2012 - 07:56 AM
#557
grahama
-
- Members
-
- 2,442 posts
Up Into Fourth
- Location: Warrington
- Local Club: None in my area !!
Posted 01 July 2012 - 09:38 AM
It took 20 mins then lots of sanding !!! The 80 grit makes good in roads to the filler and the 240 to finish off. However I am still a novice at all this so will probably change things around a touch in the future.
#558
hughJ
-

- Members
-
- 727 posts
Soldiering Along
- Location: Highlands, Scotland
Posted 03 July 2012 - 07:24 PM
Graham I have not been of the forum for a while and to my utter shame you have been motoring along!! The car looks fantastic. I wish now I had consulted the forum of filler. I have had a pig of a time with it. Keep up the good work. I think you have moved ahead of me!!
Hugh
Hugh
#559
Shep76S
-

- TMF+ Member
-
- 553 posts
Super Mini Mad
- Location: Kent
- Local Club: L&SMOC
Posted 09 July 2012 - 09:10 PM
I have read all 38 pages today and I would just ike to say that I am very impressed. Well done!
Edited by Shep76S, 09 July 2012 - 09:11 PM.
#560
grahama
-
- Members
-
- 2,442 posts
Up Into Fourth
- Location: Warrington
- Local Club: None in my area !!
Posted 12 July 2012 - 08:30 PM
Hi all,
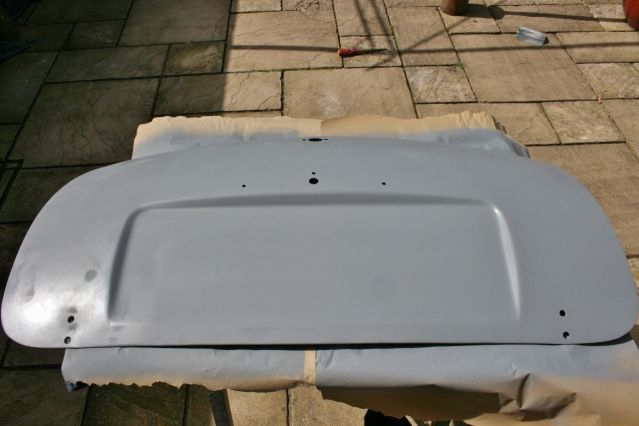
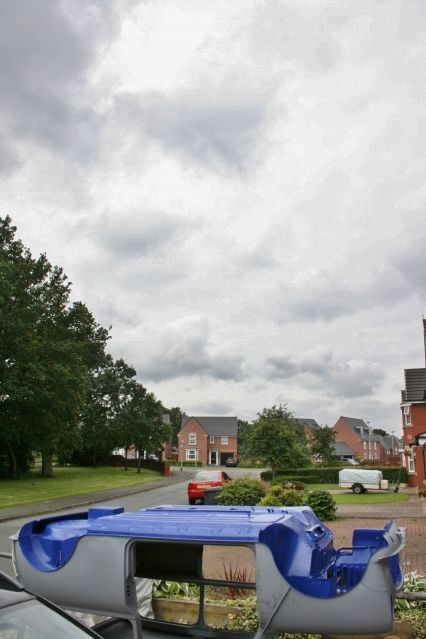
momentus day here today, some paint got sloshed on !! But first I stripped and etched the boot lid.

Put this aside and mixed some rustoleum with white spirit at about 5-10%. Think I need to be more exact to be honest for coverage.
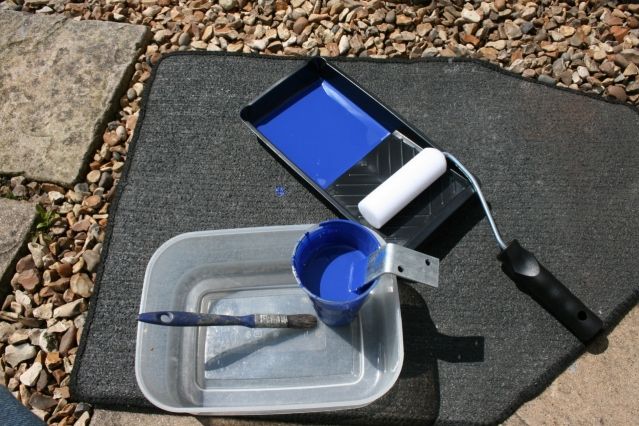


Came out ok, bit thin and patchy but another coat will sort it. Rollering was hard going over the stonechip, but can't get the mini inside the tent to spray so roller it was.

Not too bad for my first attempt, no reactions so far but it was taking it's time to dry, probably my mixing !!
Turned it upside down to bake in the sun.
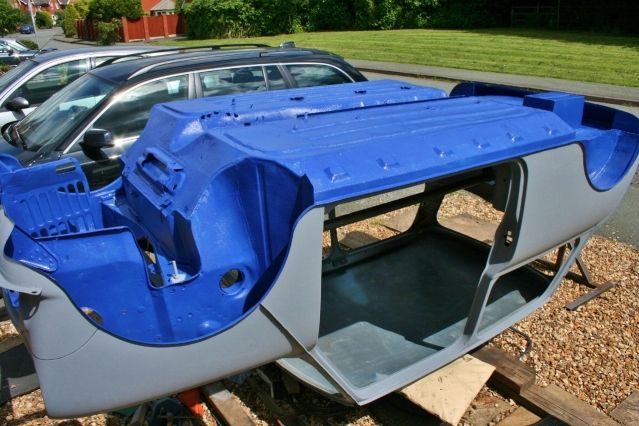
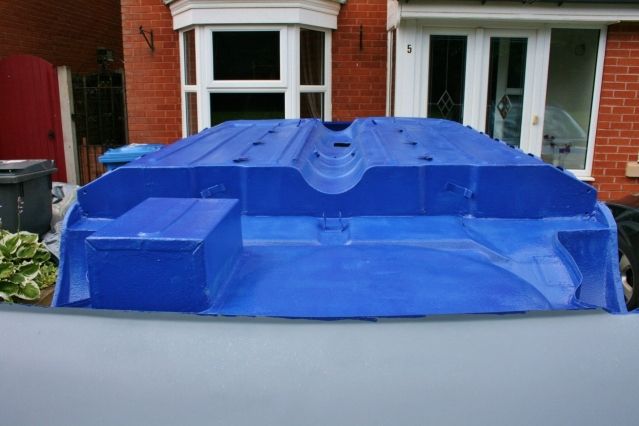
doing it this way meant that I missed small bits but they will be caught up on the second coat.
and this bit under the vallance I just can't reach at the moment...
Very pleased !!
Graham
momentus day here today, some paint got sloshed on !! But first I stripped and etched the boot lid.
Put this aside and mixed some rustoleum with white spirit at about 5-10%. Think I need to be more exact to be honest for coverage.
Came out ok, bit thin and patchy but another coat will sort it. Rollering was hard going over the stonechip, but can't get the mini inside the tent to spray so roller it was.
Not too bad for my first attempt, no reactions so far but it was taking it's time to dry, probably my mixing !!
Turned it upside down to bake in the sun.
doing it this way meant that I missed small bits but they will be caught up on the second coat.
and this bit under the vallance I just can't reach at the moment...
Very pleased !!
Graham
#561
Carlos W
-

- TMF+ Member
-
- 10,115 posts
Mine is purple, but I have been told that's normal
- Location: Sittingbourne, Kent
Posted 12 July 2012 - 08:32 PM
Looking good Graham!
#562
davej
-

- Members
-
- 985 posts
Kelly Jones
- Location: North Wales
Posted 12 July 2012 - 09:02 PM
Great work Graham, exciting stuff seeing some colour on it.
#563
Brams96
-
- Members
-
- 2,308 posts
Up Into Fourth
- Local Club: Kentish Mini Club
Posted 13 July 2012 - 05:36 PM
Looks great Graham, I found if you keep a 1/2" or 1" brush handy you can do all the little nooks the roller wont then just roller over it as close as you can get & it looks quite good. Is that Rustoleum Combi-color you are using? I've just used this & done a bit on my under floor to see how it came out & it looks pretty good, but I didn't thin mine at all. Keep it up!
#564
grahama
-
- Members
-
- 2,442 posts
Up Into Fourth
- Location: Warrington
- Local Club: None in my area !!
Posted 13 July 2012 - 09:33 PM
Thanks for comments but all I can say today is ' BLOODY RAIN !!! '
yes Brams it is good old combi colour, and thick it is just too long drying, thinned in the sun it was much better but not quick enough. A fellow tmf member says thin to 20% thinners and it will dry quicker, but with cellulose thinners. I dutifully went and got some and, as I said, rain so will report hopefully tomoz or Sunday !!
Brams, have you posted pics of ur underside, or have I missed them, and how long did it take to dry ??
Graham
#565
minimuk
-

- Members
-
- 1,947 posts
Camshaft & Stage Two Head
- Location: Midlands
Posted 13 July 2012 - 10:50 PM
Great job Graham, I take it the car will be Blue as you are painting the belly blue, when I painted Muk's Belly the first coat took a good 4 days to dry, then the second coat especially where the rear subby will be sitting against and the front subby behind tower's. al in all 6-7 days and if still felt little sticky, rain does not help of course. Got to let do what it needs to do....dry....
#566
Brams96
-
- Members
-
- 2,308 posts
Up Into Fourth
- Local Club: Kentish Mini Club
Posted 14 July 2012 - 12:11 AM
Graham - Sorry I haven't got any pics yet but I will get some soon & post them. As for the drying time I painted it about 3pm & left it over night & it was dry around lunch time the next day so a good 24 hours. I haven't put a second coat on yet as the first coat is a different colour to my final colour choice & I need to buy the paint still, £55 for a 2.5L tin!
#567
grahama
-
- Members
-
- 2,442 posts
Up Into Fourth
- Location: Warrington
- Local Club: None in my area !!
Posted 14 July 2012 - 11:58 AM
Hi all,
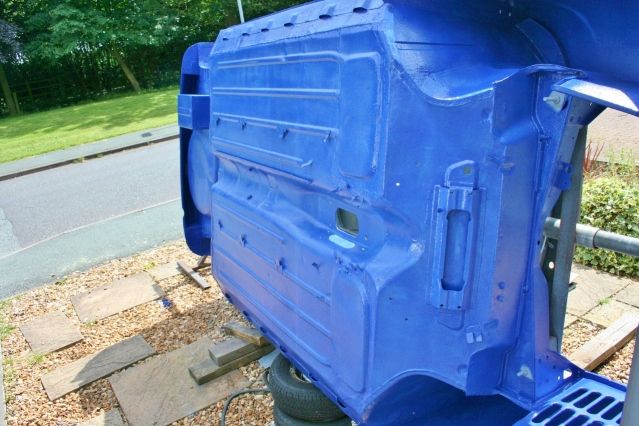
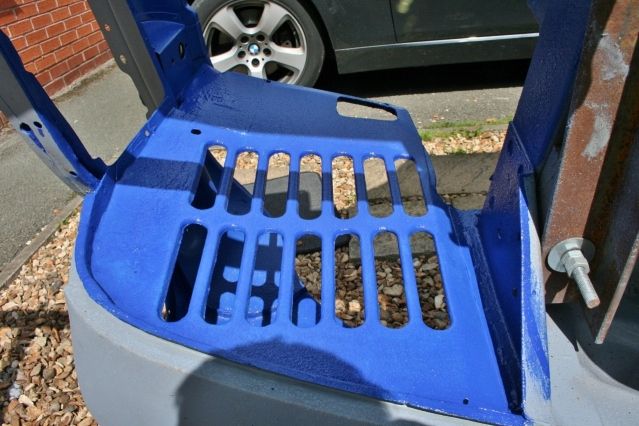
First coat was dry yesterday so this morning I was up early, got dogs walked and set about the second coat in the sun. An hour later I had this.

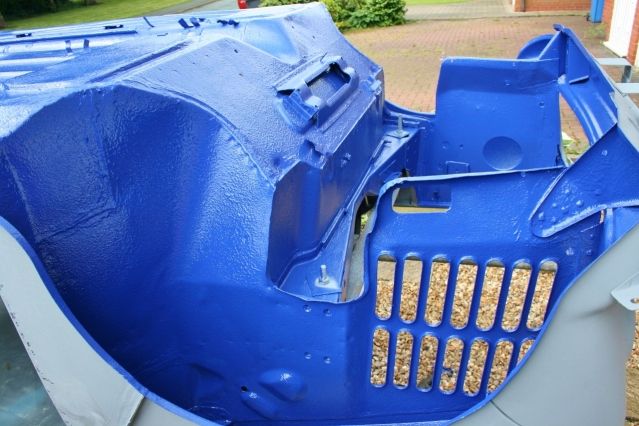
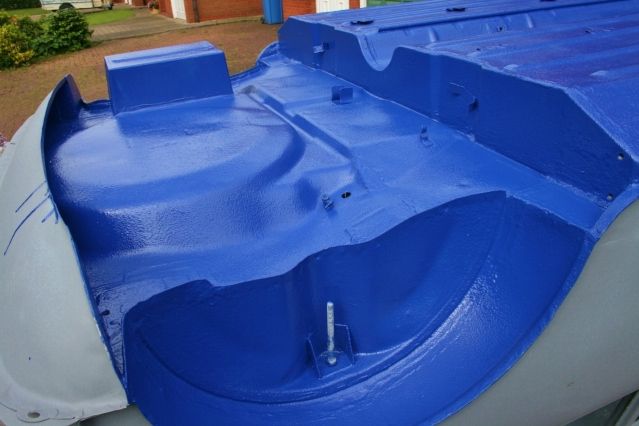
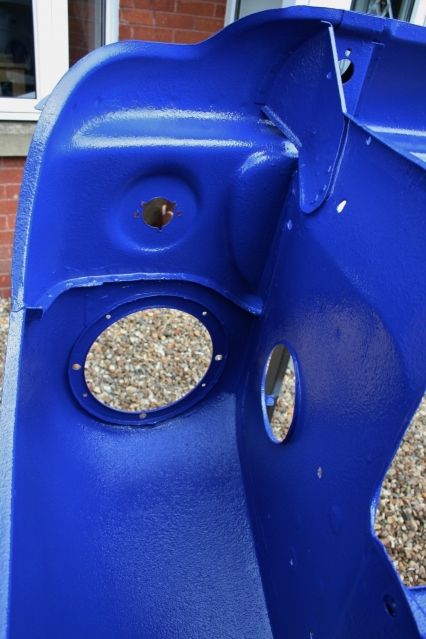
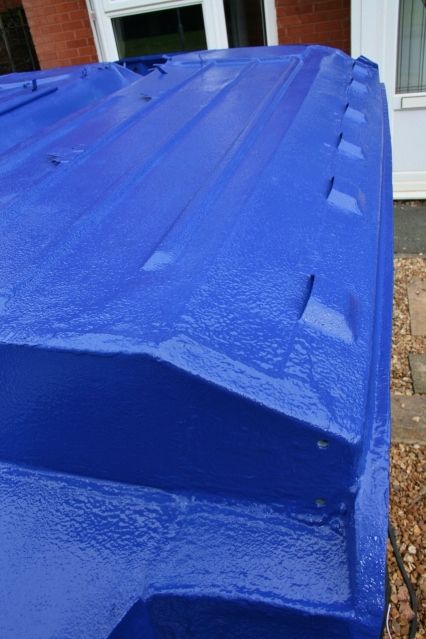
Not sure if it shows but the second coat is far better coverage wise and I used cellulose thinners at 20% this time which seems to be drying quicker. Not without the problems though.
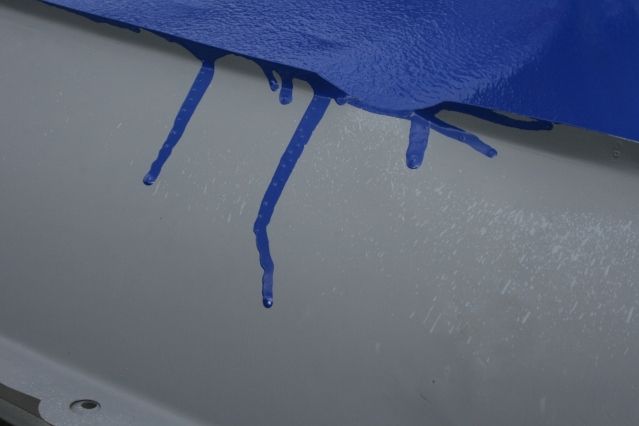
Mainly paint runs onto the top side but will sand them off before I go any further
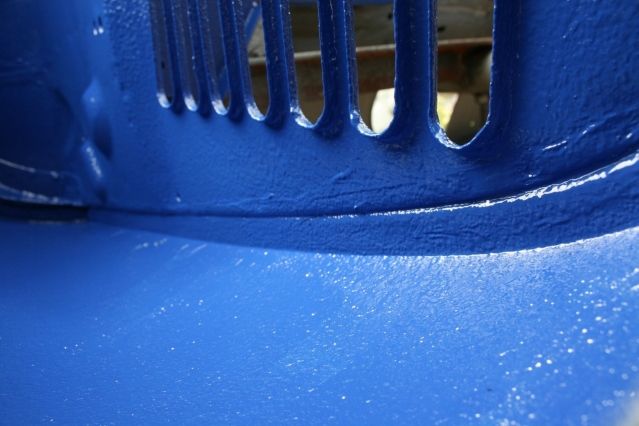
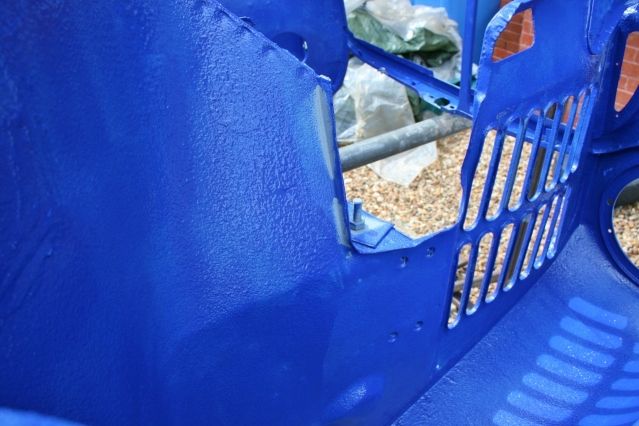
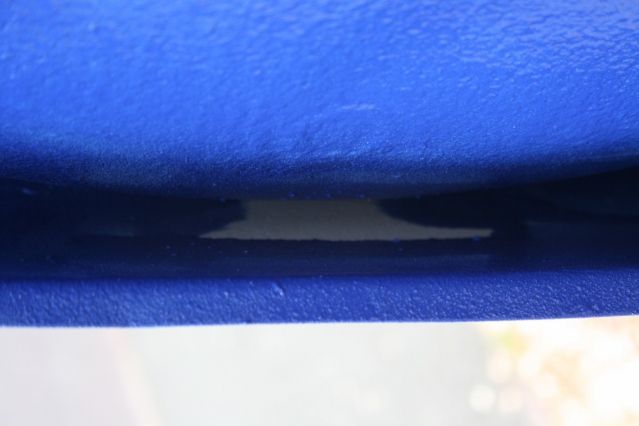
Also realised after the first coat I had not sealed this join from wing to inner wing so will have to smear some tiger seal in there and paint over later. Also will have to do under the spit bolts, but no big problem. This was the bigger problem
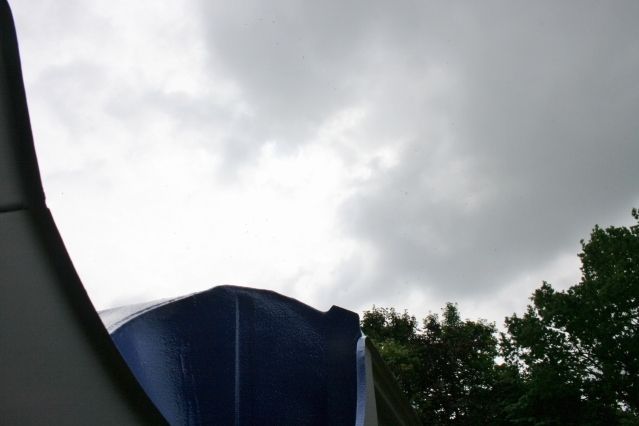
The joys of working outside. I left as long as I dared before covering it all up and am hoping the rain willl hold off till dry. Proper hardness will probably take a while longer but tomorrow the subframes go back on along with battery cable and fuel and brake lines !!!
Graham
Edit -
got away with it, all dry now and got some paint onto the patch under the rear vallanve too. Think the non sealed gap is actually sealed but not too thickly. Stonechip and paint will see it ok I think.
First coat was dry yesterday so this morning I was up early, got dogs walked and set about the second coat in the sun. An hour later I had this.
Not sure if it shows but the second coat is far better coverage wise and I used cellulose thinners at 20% this time which seems to be drying quicker. Not without the problems though.
Mainly paint runs onto the top side but will sand them off before I go any further
Also realised after the first coat I had not sealed this join from wing to inner wing so will have to smear some tiger seal in there and paint over later. Also will have to do under the spit bolts, but no big problem. This was the bigger problem
The joys of working outside. I left as long as I dared before covering it all up and am hoping the rain willl hold off till dry. Proper hardness will probably take a while longer but tomorrow the subframes go back on along with battery cable and fuel and brake lines !!!
Graham
Edit -
got away with it, all dry now and got some paint onto the patch under the rear vallanve too. Think the non sealed gap is actually sealed but not too thickly. Stonechip and paint will see it ok I think.
Edited by grahama, 14 July 2012 - 05:20 PM.
#568
Brams96
-
- Members
-
- 2,308 posts
Up Into Fourth
- Local Club: Kentish Mini Club
Posted 14 July 2012 - 05:25 PM
Hey Graham, I've posted some pics of my floor in My Project Build if you want a look.
#569
Sammo
-

- Noobies
-
- 3 posts
Starting My Mini Up
- Location: Epsom, Surrey
Posted 14 July 2012 - 07:07 PM
Just sat and read the whole thread! Brilliant work Graham. Looks like I need to pull my finger out and get myself a Mini project :)
#570
grahama
-
- Members
-
- 2,442 posts
Up Into Fourth
- Location: Warrington
- Local Club: None in my area !!
Posted 14 July 2012 - 10:19 PM
you wont regret it Sammo.
I have learnt so much through this build, ups and downs, but his forum does bring you back up. Glad you like my thread, more of a diary of my progress than a 'how to', but glad it helps people. Welding, fabrication filler and spraying are just some of the skills you learn!!
Graham
I have learnt so much through this build, ups and downs, but his forum does bring you back up. Glad you like my thread, more of a diary of my progress than a 'how to', but glad it helps people. Welding, fabrication filler and spraying are just some of the skills you learn!!
Graham


1 user(s) are reading this topic
0 members, 1 guests, 0 anonymous users


