Will do, assembled the suspension as a 'dry' fit and when it goes on it will be very greased up lol !!


Mini Virgin Rebuild Of 83 Mayfair.
Started by
grahama
, May 22 2010 05:09 PM
1006 replies to this topic
#586

grahama
-
- Members
-

- 2,442 posts
Up Into Fourth
- Location: Warrington
- Local Club: None in my area !!
Posted 30 July 2012 - 07:14 AM
#587
Carlos W
-

- TMF+ Member
-
- 10,115 posts
Mine is purple, but I have been told that's normal
- Location: Sittingbourne, Kent
Posted 01 August 2012 - 08:13 PM
You're as bad as Hugh, can you both slow down a bit please!
There just aren't enough hours in the day for me!
It's the wifes birthday this weekend so I wont be in the garage:-(
There just aren't enough hours in the day for me!
It's the wifes birthday this weekend so I wont be in the garage:-(
#588
grahama
-
- Members
-
- 2,442 posts
Up Into Fourth
- Location: Warrington
- Local Club: None in my area !!
Posted 04 August 2012 - 01:55 PM
Hi all,
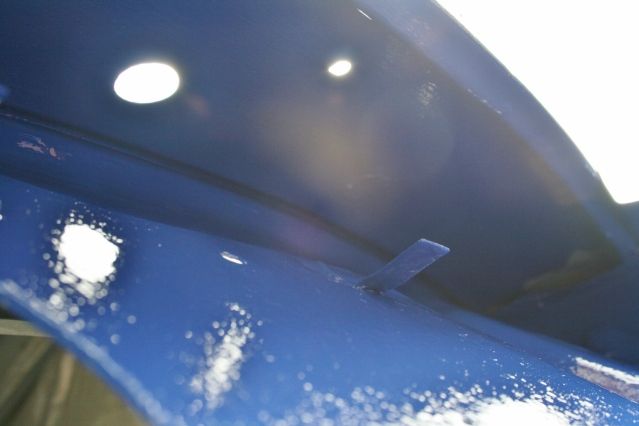
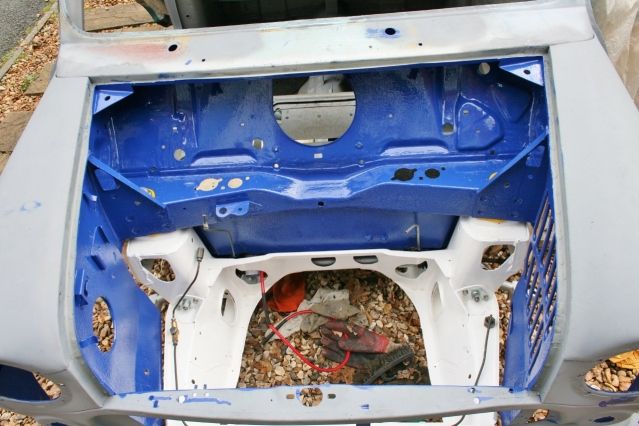
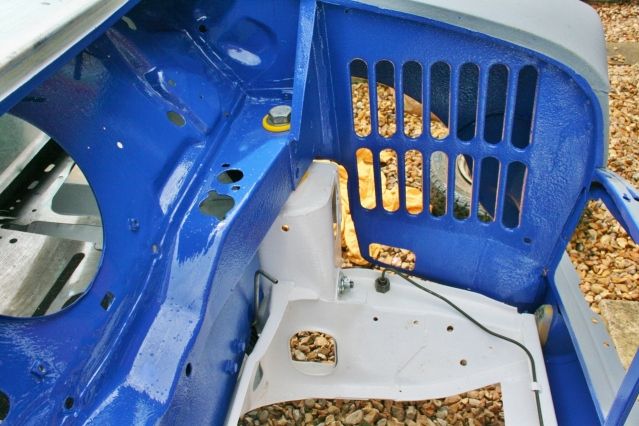
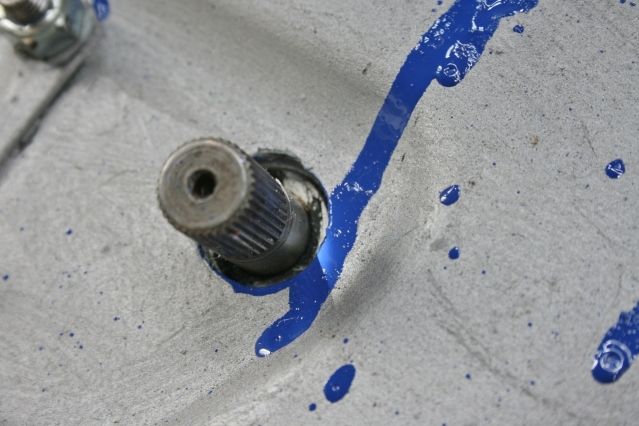
small update, as they always seem to be at present !! Went to fit the front subframe and realised that I hadn't painted the top of the bulkhead so I wasted a few more days than anticipated doing this and dodging rain but painted it is now. I have only brush painted this area as I wanted to get it done asap so I could get on so a little dissapointed with the finish but it's under the bonnet lol. While I was at it I slopped some paint on the underside of the scuttle panel, squeezing it into the gap near the windscreen surround as far as I could. Will put some tiger seal up there too when I get round to it.
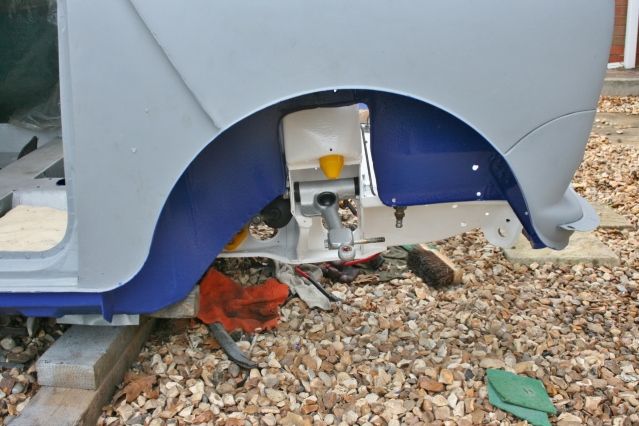
Fitted the subframe and what a nightmare. As with the rear it fitted ok before the stone chip and paint but it seemed to tighten up at this stage. LOADS of persuading later I had it in and stepped back to admire my work. Tried to pull the battery cable into place to test fit and realised I had trapped it in between the steering rack and subframe !!
Off it came again and when out of the way the front subby fitted rather better !! Not sure of the battery cable route but this is where mine is at the moment, all comments welcome about route lol.

Also I have forgotted to put a bush behind the bulkhead onto the steering rack so it may well all need to come off again !!
And as a last bit I have got these,
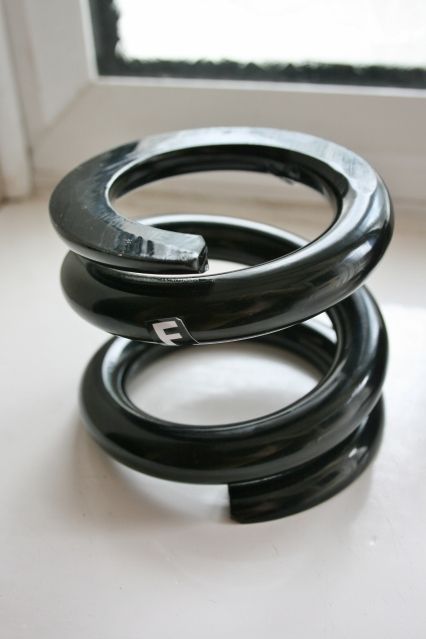
I know, I know, they may or may not be as good as the rubber cones but I am going to give them a go and see how they feel. They can't be that bad and cheaper by about 20 quid than 4 new uprated cones. If crap when all done then there is always fleabay lol.
Off to work again but even Matthew is looking impressed now, high praise indeed !!
Graham
small update, as they always seem to be at present !! Went to fit the front subframe and realised that I hadn't painted the top of the bulkhead so I wasted a few more days than anticipated doing this and dodging rain but painted it is now. I have only brush painted this area as I wanted to get it done asap so I could get on so a little dissapointed with the finish but it's under the bonnet lol. While I was at it I slopped some paint on the underside of the scuttle panel, squeezing it into the gap near the windscreen surround as far as I could. Will put some tiger seal up there too when I get round to it.
Fitted the subframe and what a nightmare. As with the rear it fitted ok before the stone chip and paint but it seemed to tighten up at this stage. LOADS of persuading later I had it in and stepped back to admire my work. Tried to pull the battery cable into place to test fit and realised I had trapped it in between the steering rack and subframe !!
Off it came again and when out of the way the front subby fitted rather better !! Not sure of the battery cable route but this is where mine is at the moment, all comments welcome about route lol.
Also I have forgotted to put a bush behind the bulkhead onto the steering rack so it may well all need to come off again !!
And as a last bit I have got these,
I know, I know, they may or may not be as good as the rubber cones but I am going to give them a go and see how they feel. They can't be that bad and cheaper by about 20 quid than 4 new uprated cones. If crap when all done then there is always fleabay lol.
Off to work again but even Matthew is looking impressed now, high praise indeed !!
Graham
Edited by grahama, 04 August 2012 - 01:57 PM.
#589
joezone2001
-

- Members
-
- 332 posts
Speeding Along Now
- Location: kirkby in ashfield
Posted 04 August 2012 - 02:20 PM
hi Graham.
this is looking absolutely fantastic mate! I love the blue paint you're putting on. what is it if you don't mind me asking? is that the colour the car is going to be?
I love the idea of the springs also. its something I have been undecided with for Cherry. I went as far as to ring minitastic up to order some then chickened out. haha. much research needed me thinks lol.
keep up the good work.
joe
Edited by joezone2001, 04 August 2012 - 02:24 PM.
#590
grahama
-
- Members
-
- 2,442 posts
Up Into Fourth
- Location: Warrington
- Local Club: None in my area !!
Posted 04 August 2012 - 02:30 PM
Hi Joe,
thanks for the comments,
It is indeed the finished colour of the car, but with a white roof. It is good old rustoleum but matched by ' Avenue coatings ' to the colour of the engine paint I used. I have a paint code if I need some more though as it is going down !!
My springs are Minitastic ones as he is just a few miles from me and a very nice chap to deal with. As far as I can see they will be fine, some like them, some don't but this fella builds racing cars as part of his garage so he seems to know what he is talking about. They go on fleabay for not far off what I paid for them so buying cones wont cost too much extra if I change, but can't see it happening to be honest !!
Graham
#591
hughJ
-

- Members
-
- 727 posts
Soldiering Along
- Location: Highlands, Scotland
Posted 04 August 2012 - 05:23 PM
Graham it does look so good. You are, or rather Matthew is, going to have a smashing little car.
All the best
Hugh
All the best
Hugh
#592
Down&Out
-

- Traders
-
- 4,853 posts
The King Of Retro Cool
- Location: -
Posted 04 August 2012 - 05:38 PM
Didnt know you could source springs so cheaply!
Let me know how they are, they probably last longer than cones.
Let me know how they are, they probably last longer than cones.
#593
minimuk
-

- Members
-
- 1,947 posts
Camshaft & Stage Two Head
- Location: Midlands
Posted 04 August 2012 - 06:17 PM
Hat' of to you Graham, colours and shiny bits, and them springs .....need painting yellow.... when you say 20 quid cheaper, where abouts u get those from, was going to invest in them too......
#594
myredmini
-

- TMF+ Member
-
- 3,211 posts
My Mummy Says It's OK
- Name: Dan
- Location: Teesside
- Local Club: BOG MOG
Posted 05 August 2012 - 09:15 PM
I need to catch up. Thats looking unbelievable!!
#595
grahama
-
- Members
-
- 2,442 posts
Up Into Fourth
- Location: Warrington
- Local Club: None in my area !!
Posted 06 August 2012 - 07:43 PM
Hi all,
Muk, the springs were from Minitastic as he is just up the road and they were £195, just less than a full set of cones !!
MRM, catch up?? dont know about that, progress does seem slow here at the moment. but here's a litle more...
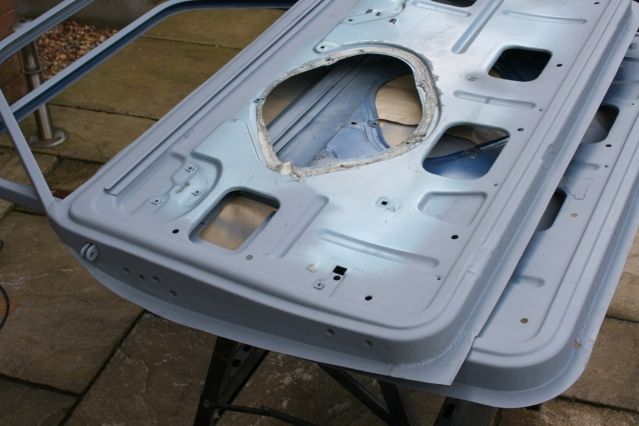
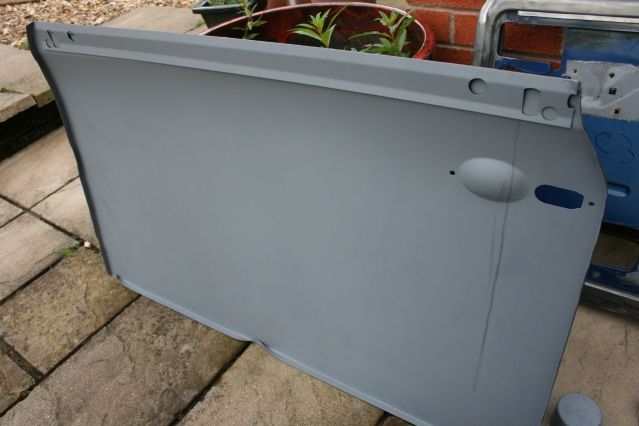
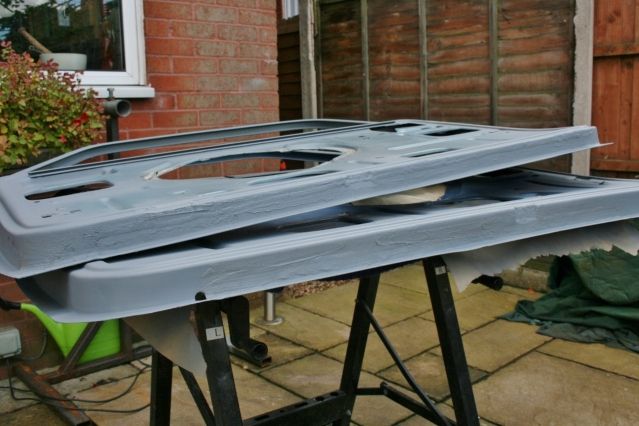
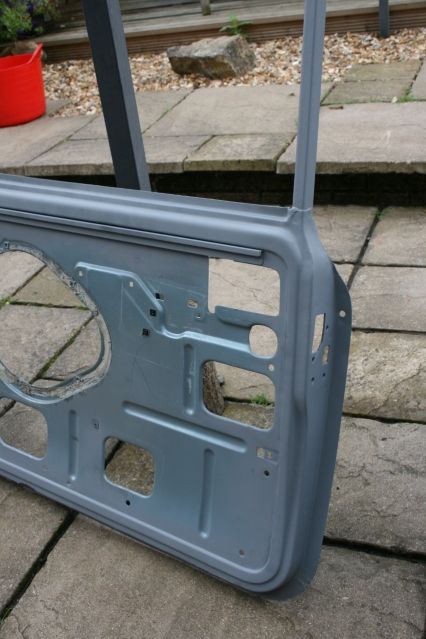
I looked at the doors I did a while ago and surface rust started on them even being stored in the dining room, much to Jan's annoyance lol. So took them outside, wire wheeled and kurusted for good measure. Then some etch primer on the doors and the drv door skin. Have to put some top coat on the skin inside before fitting tho.
The welds needed sealing too so that was next, blobbed it on on the inside of the door and the same on the outside but smoothed it over not that you can tell, but I did honest !!
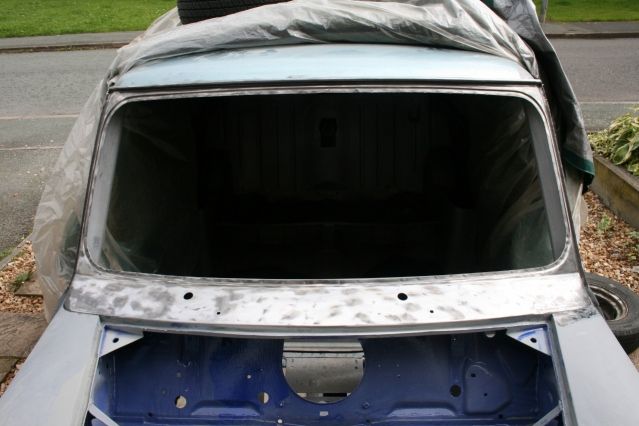
All ready for paint so outside inbetween showers to strip the scuttle and windscreen surround.
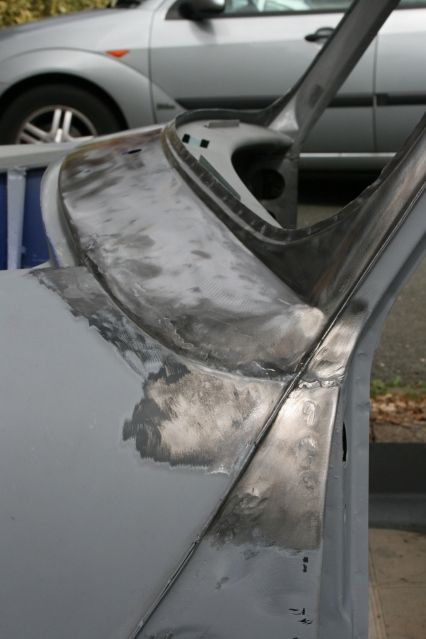
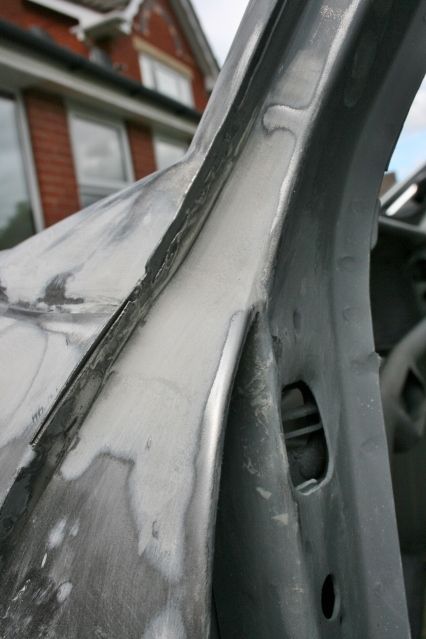
 Took the etch off the scuttle ends so I could see the welds and filler them, also the A post to A panel as they also need a fill. It is however my new hated thing, filling, can I get it on smoothle, no I cant and here's the evidence...
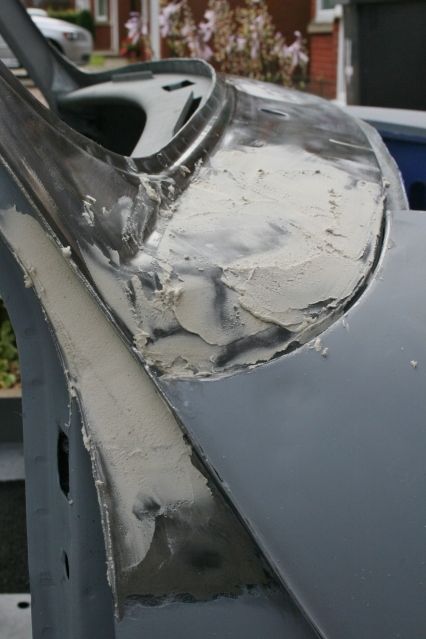
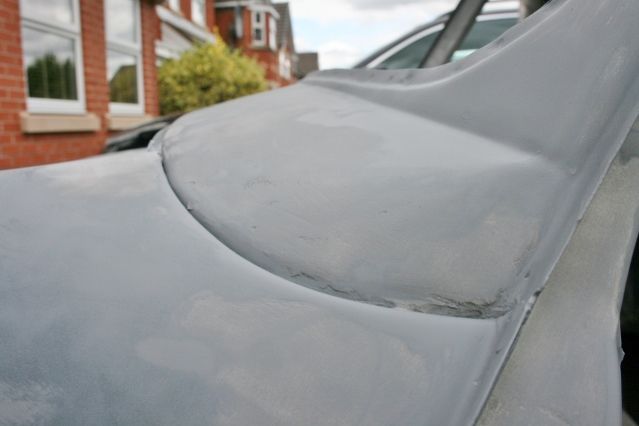
This was my second attempt as the first lot wouldn't go off, not enough activator but the first sand produced this
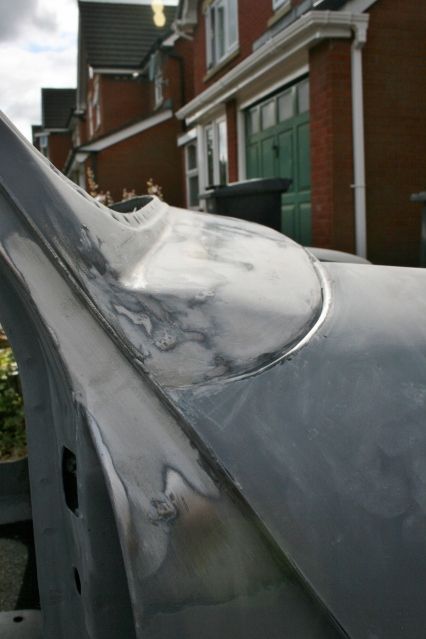
With some etch on to protect the imperfections showed up and will need some more attention.
Off to Bruges with Jan for a few days on Wednesday so that's all for now !!
Graham
Muk, the springs were from Minitastic as he is just up the road and they were £195, just less than a full set of cones !!
MRM, catch up?? dont know about that, progress does seem slow here at the moment. but here's a litle more...
I looked at the doors I did a while ago and surface rust started on them even being stored in the dining room, much to Jan's annoyance lol. So took them outside, wire wheeled and kurusted for good measure. Then some etch primer on the doors and the drv door skin. Have to put some top coat on the skin inside before fitting tho.
The welds needed sealing too so that was next, blobbed it on on the inside of the door and the same on the outside but smoothed it over not that you can tell, but I did honest !!
All ready for paint so outside inbetween showers to strip the scuttle and windscreen surround.
Took the etch off the scuttle ends so I could see the welds and filler them, also the A post to A panel as they also need a fill. It is however my new hated thing, filling, can I get it on smoothle, no I cant and here's the evidence...This was my second attempt as the first lot wouldn't go off, not enough activator but the first sand produced this
With some etch on to protect the imperfections showed up and will need some more attention.
Off to Bruges with Jan for a few days on Wednesday so that's all for now !!
Graham
Edited by grahama, 14 August 2012 - 09:16 PM.
#596
minimuk
-
- Members
-
- 1,947 posts
Camshaft & Stage Two Head
- Location: Midlands
Posted 06 August 2012 - 08:47 PM
Cheers Graham, looking good the Coils from Minitastic, just looked and am converted already.....
yr nearly there by the looks of it, have a Fab time in Belgium and some real nice Trappister beers,......
yr nearly there by the looks of it, have a Fab time in Belgium and some real nice Trappister beers,......
#597
grahama
-
- Members
-
- 2,442 posts
Up Into Fourth
- Location: Warrington
- Local Club: None in my area !!
Posted 06 August 2012 - 08:51 PM
mmmmmmmmmmmmmmmmmmmmmmmm trappest beer !!!
#598
minimuk
-
- Members
-
- 1,947 posts
Camshaft & Stage Two Head
- Location: Midlands
Posted 06 August 2012 - 09:37 PM
mmmmmmmmmmmmmmmmmmmmmmmm trappest beer !!!
just slowly poor it in the glass,take your time with a steady hand,like a good wine and leave the seddiment in the bottle......I can smell the hop already smooth with a creamy head............
#599
Brams96
-

- Members
-
- 2,308 posts
Up Into Fourth
- Local Club: Kentish Mini Club
Posted 06 August 2012 - 11:21 PM
Graham, when applying the filler use a plastic applicator or something that will conform to the shape your applying to. When you have applied it in all the hard to get places try pulling the applicator over the whole area in one smooth go. Remember to apply the filler slightly higher than you need it as you can shape it more when sanding. One smooth application instead of lots of little dabs will be better in the end. 
#600
grahama
-
- Members
-
- 2,442 posts
Up Into Fourth
- Location: Warrington
- Local Club: None in my area !!
Posted 07 August 2012 - 06:27 AM
Cheers Brams, I did use a plastic aplicator but it may well have been too stiff for the curved area. It does seem to go quite 'grainy' when I try to spread it about and the more I try to smooth it out the worse it gets. Good job I don't have much to do as I officially loathe this part of the build lol !!!
Graham
Graham


1 user(s) are reading this topic
0 members, 1 guests, 0 anonymous users


