
I dont think anything has dragged on. Like me, you have family and work commitments and plenty of other things in your life - it cant be all mini! I have been plodding on for about three years. It has now been painted and I am putting it back together and then untogether and back again, like you. Trouble is, I think it will need another respray by the time I have finished. Just keep smiling pal.


Mini Virgin Rebuild Of 83 Mayfair.
Started by
grahama
, May 22 2010 05:09 PM
1006 replies to this topic
#662

Brams96
-

- Members
-

- 2,308 posts
Up Into Fourth
- Local Club: Kentish Mini Club
Posted 19 September 2012 - 12:22 AM
I'm nearly a year down the line & way behind where I thought I'd be. We have been 1 man down on a 4 person shift rota since mid April so with the OT & other life commitments things just take time I haven't given up, just reassessed my expectations of when I will finish. You're doing really well Graham just keep plodding along & you'll be finished before you know it.
#663
Carlos W
-

- TMF+ Member
-
- 10,115 posts
Mine is purple, but I have been told that's normal
- Location: Sittingbourne, Kent
Posted 19 September 2012 - 02:15 PM
just reassessed my expectations of when I will finish.
I'm going to do this too!
I love the wording!
Shell will be solid and in paint by the end of 2013
#664
Brams96
-
- Members
-
- 2,308 posts
Up Into Fourth
- Local Club: Kentish Mini Club
Posted 19 September 2012 - 06:56 PM
Lol, yeah my original plan was to take it off the road, fix all the rust & have it back on the road for the Southern Mini Days...this year! Yeah right! Maybe by the show season next year 

#665
grahama
-
- Members
-
- 2,442 posts
Up Into Fourth
- Location: Warrington
- Local Club: None in my area !!
Posted 19 September 2012 - 06:58 PM
Hi all,
many kind words that made me feel better about not doing it quicker !! But progress today, albeit small but only with one step backwards !
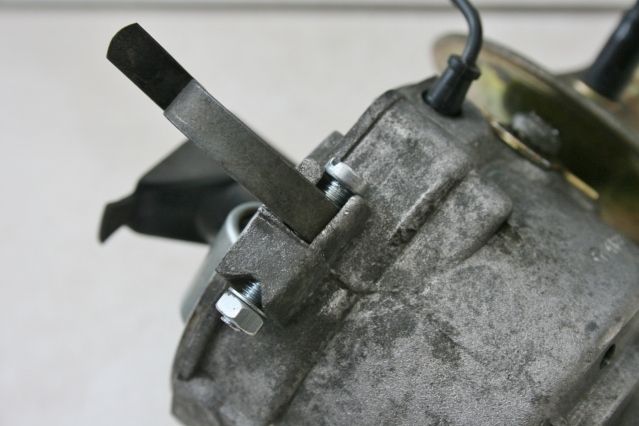
After putting the first rear suspension in place I decided to try the front. Went ok, fitted the hub bearings and new seals and assembled the cv joint and pot joints so all ready to slot in. But, there was 'in and out' play in the hub which I couldn't sort. Anyway thoight I'd check everything fitted roughly and ended up with this
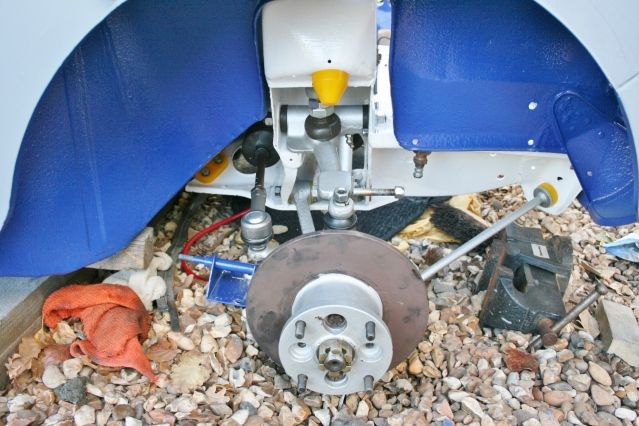
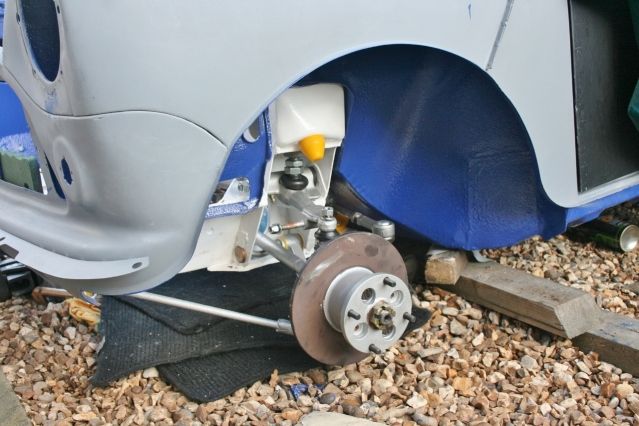
All looks nice and the steps back came in the form of the plastic knuckle cups which I mullered when getting out as the boot wouldn't fit over them when in place. The old knuckles were fine so reusing by the way. So more for ordering before it can be put on wheels, very frustrating.
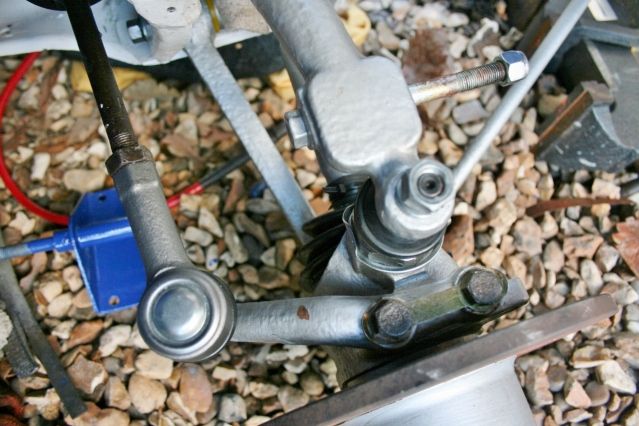
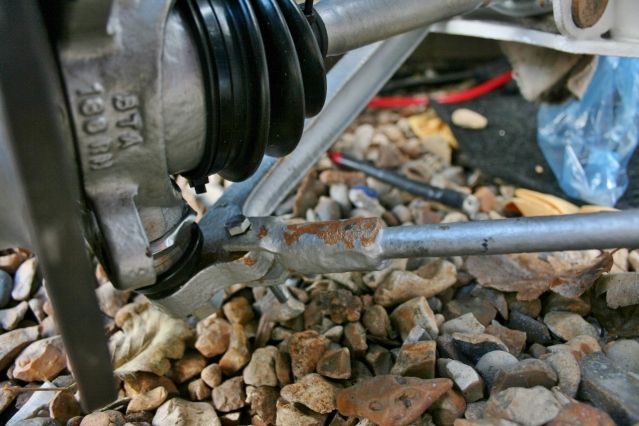
The passenger side hub had no play in it so i compared it to the driver side and decided to scrape some paint off the cv joint where it enters the hub through the seal. Now no play, but all these little problems don't half slow you down, as does fitting the short drive shaft on the driver side and having to remove it all and refit.
As you may notice this is all test fitted, lock tabs not done up, torque setting not done but it all goes in. Will, if I can get hold of a plastic cup get it on wheels at the weekend, honest, but all hopes of paint have now gone.
The fitting did produce much frustration and hammer work so I have a few of these lol
Good job I put loads of paint on, although what isn't painted is already being atacked, minis, what rust buckets they are !!
I tied bags round the pot joints to stop crud getting in there for now too and called it a day ! Dog walking and pub for a quick one followed !!
Graham
many kind words that made me feel better about not doing it quicker !! But progress today, albeit small but only with one step backwards !
After putting the first rear suspension in place I decided to try the front. Went ok, fitted the hub bearings and new seals and assembled the cv joint and pot joints so all ready to slot in. But, there was 'in and out' play in the hub which I couldn't sort. Anyway thoight I'd check everything fitted roughly and ended up with this
All looks nice and the steps back came in the form of the plastic knuckle cups which I mullered when getting out as the boot wouldn't fit over them when in place. The old knuckles were fine so reusing by the way. So more for ordering before it can be put on wheels, very frustrating.
The passenger side hub had no play in it so i compared it to the driver side and decided to scrape some paint off the cv joint where it enters the hub through the seal. Now no play, but all these little problems don't half slow you down, as does fitting the short drive shaft on the driver side and having to remove it all and refit.
As you may notice this is all test fitted, lock tabs not done up, torque setting not done but it all goes in. Will, if I can get hold of a plastic cup get it on wheels at the weekend, honest, but all hopes of paint have now gone.
The fitting did produce much frustration and hammer work so I have a few of these lol
Good job I put loads of paint on, although what isn't painted is already being atacked, minis, what rust buckets they are !!
I tied bags round the pot joints to stop crud getting in there for now too and called it a day ! Dog walking and pub for a quick one followed !!
Graham
Edited by grahama, 19 September 2012 - 06:59 PM.
#666
alex-95
-

- Members
-
- 6,078 posts
I am THE CLAMP MAKER
- Location: l
Posted 19 September 2012 - 07:12 PM
Your doing a great job on this graham, I always find that the small jobs take up the most time 
#667
Minidarren83
-

- Members
-
- 1,207 posts
One Carb Or Two?
- Location: Stanford Le hope
Posted 20 September 2012 - 04:42 AM
It's all looking great graham every step is a step closer so your getting there. Just a quick question why no paint this year?
Keep up the good work Darren
Keep up the good work Darren
#668
grahama
-
- Members
-
- 2,442 posts
Up Into Fourth
- Location: Warrington
- Local Club: None in my area !!
Posted 20 September 2012 - 07:38 AM
I am working outside and it's either too wet or too cold for the paint, (rustoleum) , to dry in a reasonable time. Don't want a tent on the front for months waiting for tacky paint to go off. No hardship though as there is plenty to do in the months over Winter !!
#669
grahama
-
- Members
-
- 2,442 posts
Up Into Fourth
- Location: Warrington
- Local Club: None in my area !!
Posted 22 September 2012 - 07:06 PM
Hi all,
Bit of a crappy weekend due to watching my beloved dog Peanut get run over on Friday and thinking I'd lost her, only to find she had miraculously avoided any harm save for a few bits of missing skin and a sore bum. Car v dog usually ends up soo different. She was my 40th birthday present and means as much to me as the kids, so I had a few drinks yesterday to celebrate still having her.
Due to hang over, only a couple of niggling jobs done today, small but needed to be done.
Firstly, before I could test the engine I had to fix the dizzy cap spring as the v clip that hend the cap clip in place flew off two years ago when the engine came out. I'll just get another one I thought, but no, no longer available except in a kit for £12. Glad I watched Blue Peter as a child ....

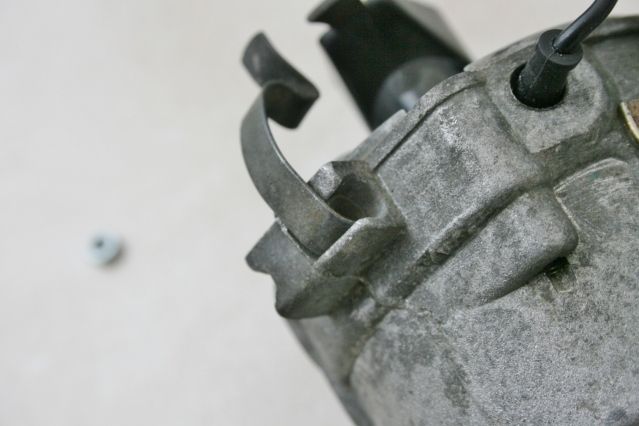
So I decided to drill and bolt it in and because the dizzy body is alloy or aluminium then it was surprisingly easy.
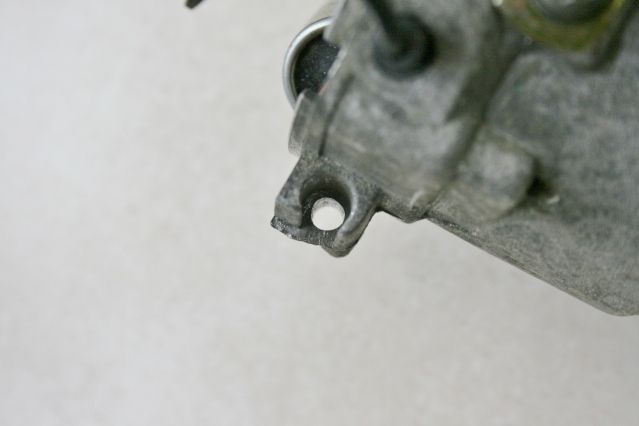
Voila, clip restrained but I am going to thin the bolt head down so it sits in flush. £12 saved, very pleased.
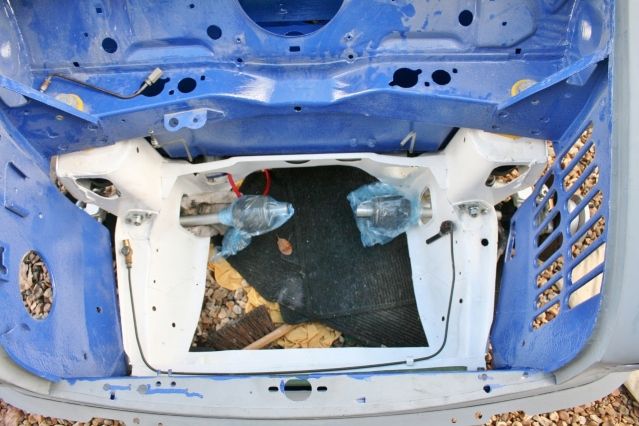
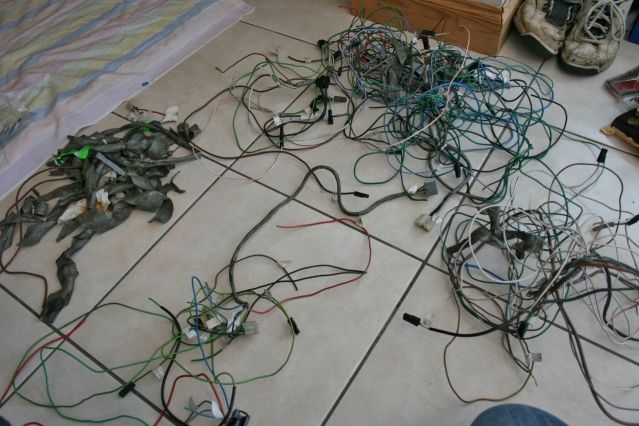
Then it was onto the wiring loom. My own from the mini I sadly butchered getting it all out, bits were broken, but I wish I had been more careful. Fleabay to the rescue and a front and back loom were picked up a while ago for about £30 all in, so not too bad, and from the same model as mine so no messing about splicing looms together. However, I hadn't looked at the wiring mess for over a year and what a job. Jan was not pleased when I layed it all out in the conservatory, and was soon thrown outside.
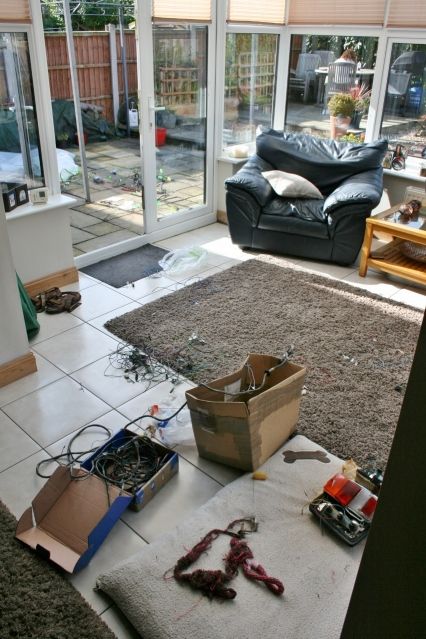
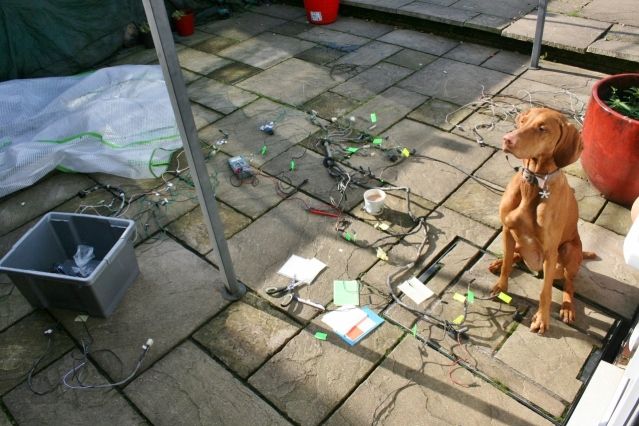
A few hours later, with the help of Peanut the wonder dog, I had traced all the wires on the newish loom and labelled it all up as best I could comparing it to the old wiring bits.

All labelled up and the fusebox worked out I was quite pleased. There were plenty of coroded connectors on the loom, but there were many on the old loom aswell so no time saved there. I will go through the loom with a fine tooth comb and replace the connectors, undo and retape it giving it a clean on the way so I know what colours I am really looking at !!
I had enough connectors to connect everything up, washer bottle, wiper etc but some of the feeds were different from my original loom which will have to be traced when I re tape it all. A good but tiresome days work, another beer in hand to help with the head and soon I will be able to connect things upto test it all in situ.
Sore head and dog, but progress !!
Graham
Bit of a crappy weekend due to watching my beloved dog Peanut get run over on Friday and thinking I'd lost her, only to find she had miraculously avoided any harm save for a few bits of missing skin and a sore bum. Car v dog usually ends up soo different. She was my 40th birthday present and means as much to me as the kids, so I had a few drinks yesterday to celebrate still having her.
Due to hang over, only a couple of niggling jobs done today, small but needed to be done.
Firstly, before I could test the engine I had to fix the dizzy cap spring as the v clip that hend the cap clip in place flew off two years ago when the engine came out. I'll just get another one I thought, but no, no longer available except in a kit for £12. Glad I watched Blue Peter as a child ....
So I decided to drill and bolt it in and because the dizzy body is alloy or aluminium then it was surprisingly easy.
Voila, clip restrained but I am going to thin the bolt head down so it sits in flush. £12 saved, very pleased.
Then it was onto the wiring loom. My own from the mini I sadly butchered getting it all out, bits were broken, but I wish I had been more careful. Fleabay to the rescue and a front and back loom were picked up a while ago for about £30 all in, so not too bad, and from the same model as mine so no messing about splicing looms together. However, I hadn't looked at the wiring mess for over a year and what a job. Jan was not pleased when I layed it all out in the conservatory, and was soon thrown outside.
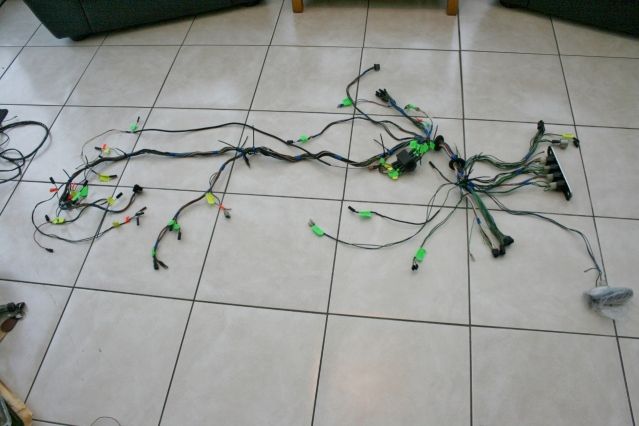
A few hours later, with the help of Peanut the wonder dog, I had traced all the wires on the newish loom and labelled it all up as best I could comparing it to the old wiring bits.
All labelled up and the fusebox worked out I was quite pleased. There were plenty of coroded connectors on the loom, but there were many on the old loom aswell so no time saved there. I will go through the loom with a fine tooth comb and replace the connectors, undo and retape it giving it a clean on the way so I know what colours I am really looking at !!
I had enough connectors to connect everything up, washer bottle, wiper etc but some of the feeds were different from my original loom which will have to be traced when I re tape it all. A good but tiresome days work, another beer in hand to help with the head and soon I will be able to connect things upto test it all in situ.
Sore head and dog, but progress !!
Graham
#670
Carlos W
-
- TMF+ Member
-
- 10,115 posts
Mine is purple, but I have been told that's normal
- Location: Sittingbourne, Kent
Posted 22 September 2012 - 07:10 PM
40th? You don't look old enough Graham!
#671
grahama
-
- Members
-
- 2,442 posts
Up Into Fourth
- Location: Warrington
- Local Club: None in my area !!
Posted 22 September 2012 - 07:12 PM
Feel it though Carlos lol. You are as old as the woman you feel tho, which makes me even older, doh !!!
#672
hughJ
-

- Members
-
- 727 posts
Soldiering Along
- Location: Highlands, Scotland
Posted 22 September 2012 - 07:19 PM
Graham, you are getting along and it looks amazing. I think you were wise with the wiring loom. I patched mine up. So pleased your doggy survived. She'll be wiser now!!
Hugh
Hugh
#673
grahama
-
- Members
-
- 2,442 posts
Up Into Fourth
- Location: Warrington
- Local Club: None in my area !!
Posted 24 September 2012 - 04:38 PM
Hi all,
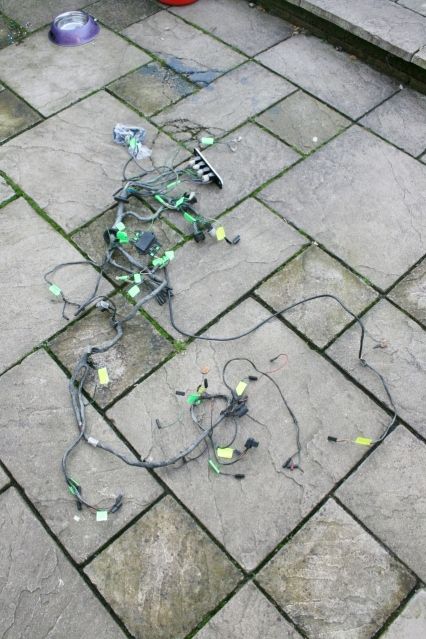
look part 2 yesterday and today. Untaping the fleabay loom uncovered not too much to be honest. A few insulation nicks, cruddy terminals that were hanging off and one previous repair.
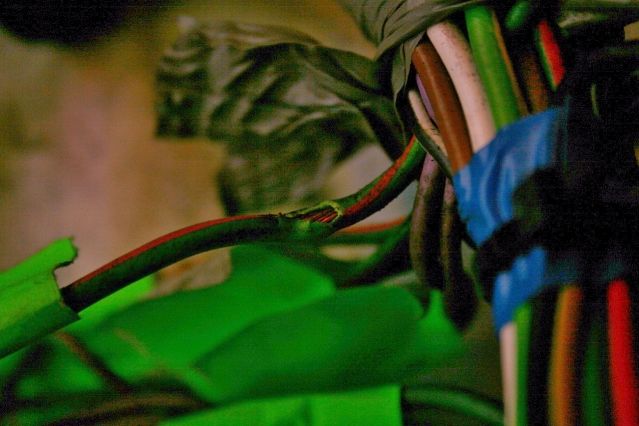
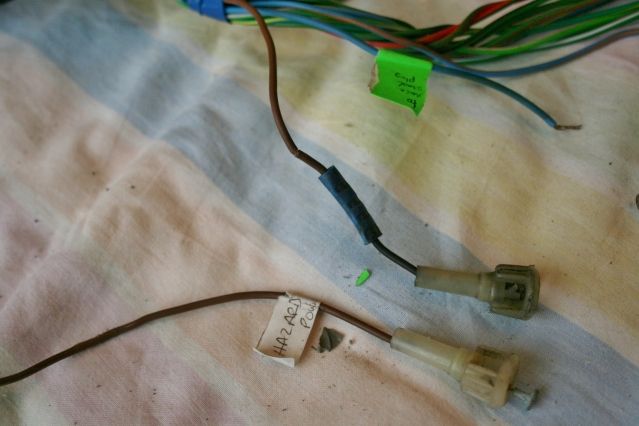
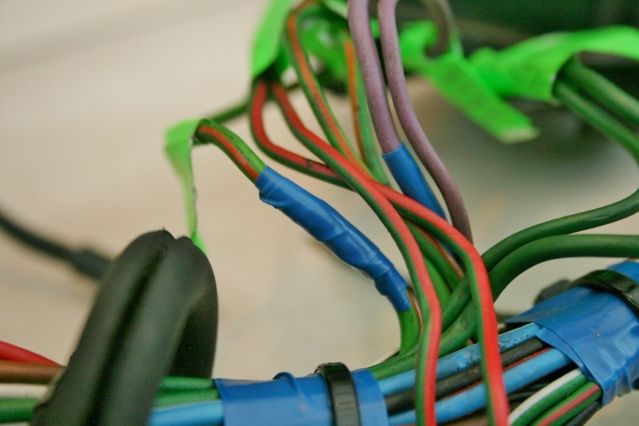
The wire beneath the nicks in insulation were fine and so I just wound them in insulation tape for protection when re taped. The old repair was taken out and a piece of my old loom put in using spade terminals and wrapped. I have some tape on order to properly seal the repairs before taping.
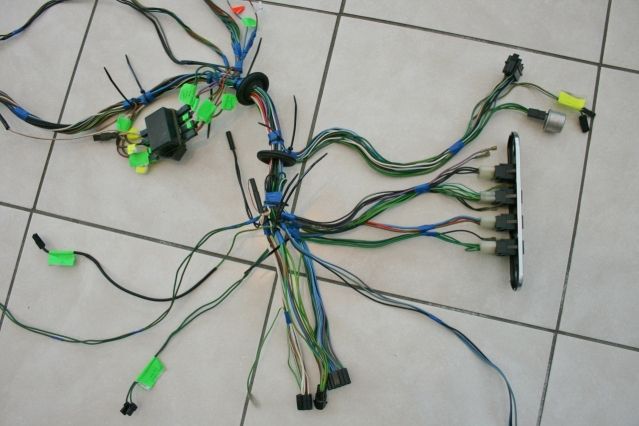
The old loom is finished with until I rig something up to test the engine but the new loom is ready for a few new connectore and tape. All labelled up, traced and junctions marked so it should fit in quite easily !!

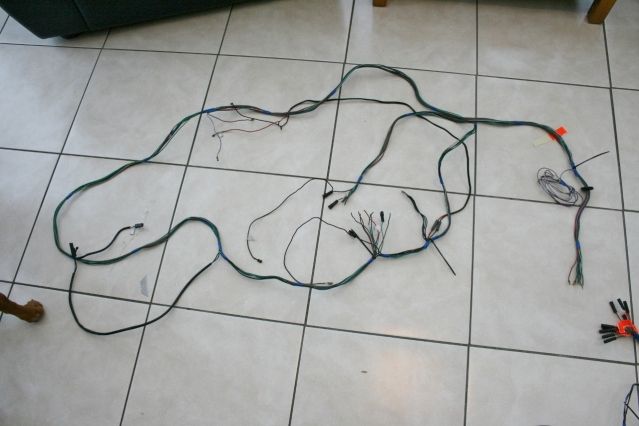
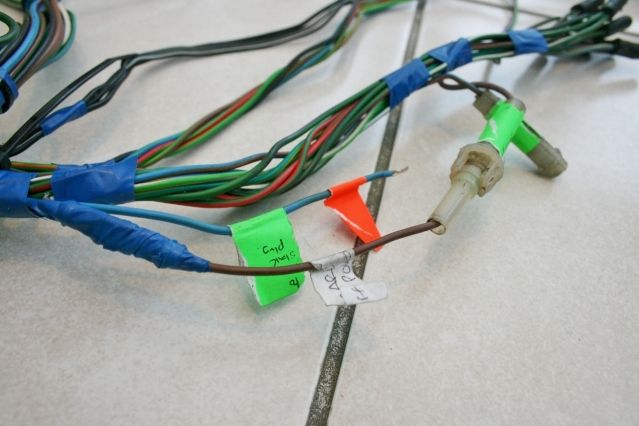
With the front loom done as far as I can I did the same for the rear loom. I am having to use my old loom which is in good nick except I cut the terminals off getting it out. The fleabay rear loom was not the same as mine so I will be selling it. Good condition with all terminals if you need it !!

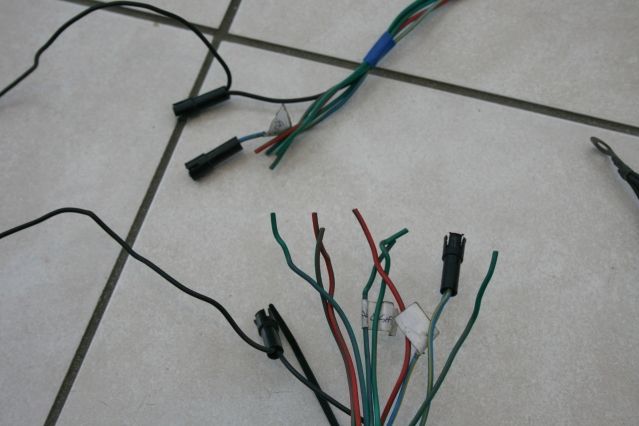
As you see the terminals are required but not a big job, just annoyed I didn't take my time getting it out now, but you live and learn !!
While the loom is in this state I want to run some extra cable into the loom for extras such as spotlights and audio equipment but I have to find out what cable I need first.
Trying out some tests with the bits and bobs tomorrow, wish me luck lol !
Graham
look part 2 yesterday and today. Untaping the fleabay loom uncovered not too much to be honest. A few insulation nicks, cruddy terminals that were hanging off and one previous repair.
The wire beneath the nicks in insulation were fine and so I just wound them in insulation tape for protection when re taped. The old repair was taken out and a piece of my old loom put in using spade terminals and wrapped. I have some tape on order to properly seal the repairs before taping.
The old loom is finished with until I rig something up to test the engine but the new loom is ready for a few new connectore and tape. All labelled up, traced and junctions marked so it should fit in quite easily !!
With the front loom done as far as I can I did the same for the rear loom. I am having to use my old loom which is in good nick except I cut the terminals off getting it out. The fleabay rear loom was not the same as mine so I will be selling it. Good condition with all terminals if you need it !!
As you see the terminals are required but not a big job, just annoyed I didn't take my time getting it out now, but you live and learn !!
While the loom is in this state I want to run some extra cable into the loom for extras such as spotlights and audio equipment but I have to find out what cable I need first.
Trying out some tests with the bits and bobs tomorrow, wish me luck lol !
Graham
#674
miniBrain
-
- Members
-
- 192 posts
Mini Mad
- Location: Preston
Posted 25 September 2012 - 11:31 AM
Hi Graham,
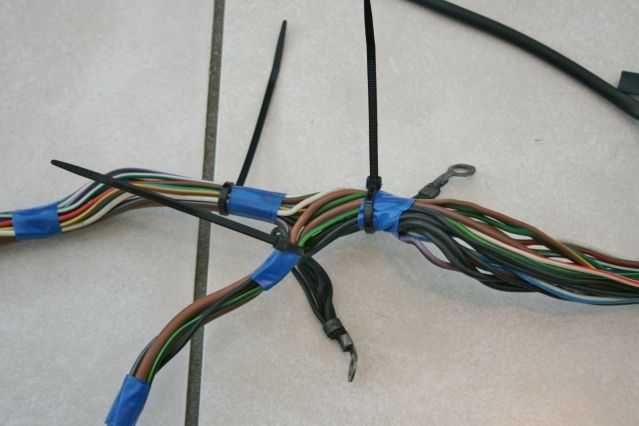
I've been using this curly plastic stuff for new/patched looms rather than electrical tape. It works great and you can easily undo it to add/remove wires. Its as cheap as chips too. Just thought you might be interested.
Bob

I've been using this curly plastic stuff for new/patched looms rather than electrical tape. It works great and you can easily undo it to add/remove wires. Its as cheap as chips too. Just thought you might be interested.
Bob
#675
grahama
-
- Members
-
- 2,442 posts
Up Into Fourth
- Location: Warrington
- Local Club: None in my area !!
Posted 25 September 2012 - 05:13 PM
I would just be a little worried about the security of the loom as it looks only loosely wrapped. Might try it when I trial fit and test in the car though. Where did you get it from ??
Tested the loom today too, got all the bits and pieces out of the loft, connected them up and nothing !! Earths were dirty, contacts corroded so a full on clean was needed on those bits. Two flasher relays later it was all working, only took me 6 hours lol.
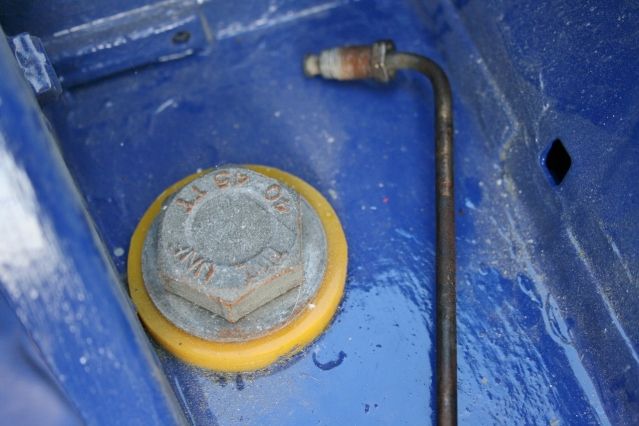
The broken item list is short, thankfully, and only consists of a hazard switch, brake fluid resevoir switch and an inline fuse. The flasher relays I got were the three pin type so I need to run an earth to each one for correct operation.
I have yet to test the engine side apart from the solenoid feeds, but need to get the engine ancilaries on first, so that's next !!
Graham
Tested the loom today too, got all the bits and pieces out of the loft, connected them up and nothing !! Earths were dirty, contacts corroded so a full on clean was needed on those bits. Two flasher relays later it was all working, only took me 6 hours lol.
The broken item list is short, thankfully, and only consists of a hazard switch, brake fluid resevoir switch and an inline fuse. The flasher relays I got were the three pin type so I need to run an earth to each one for correct operation.
I have yet to test the engine side apart from the solenoid feeds, but need to get the engine ancilaries on first, so that's next !!
Graham


0 user(s) are reading this topic
0 members, 0 guests, 0 anonymous users


