
Demon Tweaks or Raw Components plus a number of ebay suppliers or Maplins, etc. It holds the cables nice & tight.


Mini Virgin Rebuild Of 83 Mayfair.
Started by
grahama
, May 22 2010 05:09 PM
1006 replies to this topic
#677

PhilipGCaldwell
-

- Members
-

- 870 posts
One Carb Or Two?
Posted 27 September 2012 - 02:26 AM
Wow, not been on here for months! Looking great Graham, you should be really proud, will have to come see it in the flesh again soon, hope the engine is nearly sorted, may need the mag base back for work soon buddy but will let ya know.
My mini has been sadly neglected for the past 2 months to be honest, shes still working just not had the time to run her, so much so the battery is flat, will get it charged tomorrow
Phil
My mini has been sadly neglected for the past 2 months to be honest, shes still working just not had the time to run her, so much so the battery is flat, will get it charged tomorrow
Phil
#678
Brams96
-

- Members
-
- 2,308 posts
Up Into Fourth
- Local Club: Kentish Mini Club
Posted 27 September 2012 - 05:17 AM
miniBrain - That Raw Components site is awesome, thanks for sharing it (added to favourites  )
)
Graham - They also do the proper Fabric Loom Tape as well. But I especially like the Twin Supply Rail 12 Way Fuse Box, now that would be a good replacement for the standard mini fusebox.
)Graham - They also do the proper Fabric Loom Tape as well.
But I especially like the Twin Supply Rail 12 Way Fuse Box, now that would be a good replacement for the standard mini fusebox.
#679
grahama
-
- Members
-
- 2,442 posts
Up Into Fourth
- Location: Warrington
- Local Club: None in my area !!
Posted 27 September 2012 - 05:42 PM
Hi all,
Phill, no problem, just let me know when u need it and I will drop it down, you might still have my number but I will pm it you just in case.. The next job now the wiring is hopefully sorted and tested is to test fire the engine. Need a clutch plate, water pump and some expertise first though lol !!! May well be calling on you for the expertise part soon.
Brams, I have some of that tape, arrived yesterday, but was thinking of a non sticky liner to put on first incase I have to replace a wire. The spiral stuff MB suggested could go on first and then wrap it in the tape. More protection the better !
The fusebox, a great idea and have seen this before but too much work extending the loom to fit and sorting blade fuses out. I just cant find all the equipment ratings to get the fusing correct.
Graham
#680
PhilipGCaldwell
-
- Members
-
- 870 posts
One Carb Or Two?
Posted 27 September 2012 - 09:27 PM
If you need Graham, I think I have an entire clutch assembly in the shed off my original engine, if you need it, its yours, Its a flywheel clutch plate and backlplate and was all working perfectly when removed.
No worry about the mag base, as long as its still safe, just the boss at work was asking if I still had it
No worry about the mag base, as long as its still safe, just the boss at work was asking if I still had it
#681
grahama
-
- Members
-
- 2,442 posts
Up Into Fourth
- Location: Warrington
- Local Club: None in my area !!
Posted 09 October 2012 - 06:43 PM
Hi all,
not much progress over the past week or so, but progress is progress so here goes.
The electrical saga continues, with minis I bet you're not surprised, but I am pretty much there now.
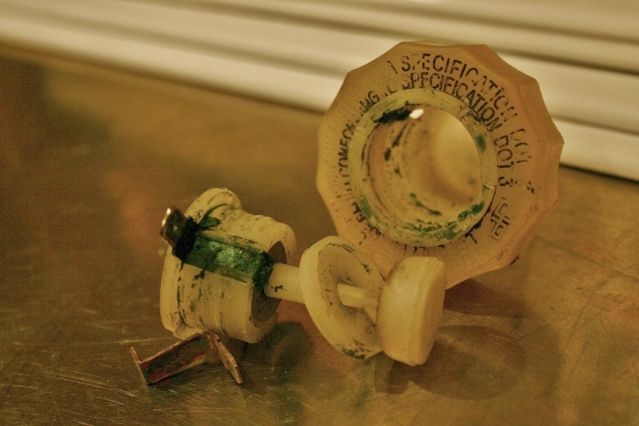

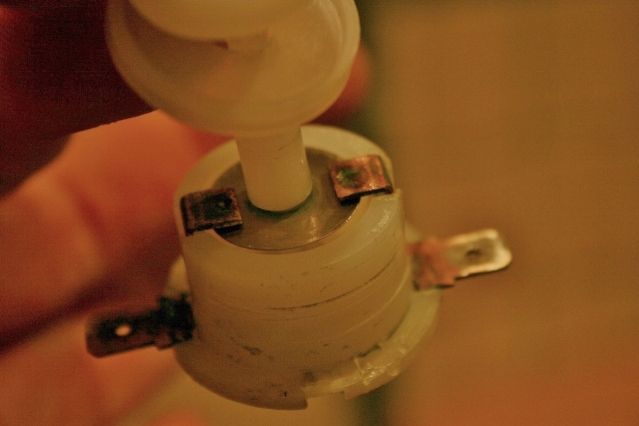
The brake fluid reservoir was not working and the cruddy contacts were the reason. A strip down and sand with wet and dry solved that problem, and at £15 each to replace then I am pleased. The only other thing not working correctly is the petrol sender and I tried to fix it, but it wont send a consistant signal to the binicle so I will have to but one of those, doh !! All the contacts are on between the front and rear loom so just need to fit and protect the junctions. I will use a combination of heat shrink sheilding and self amalgamating tape, which seals onto itself to make a water tight cover.
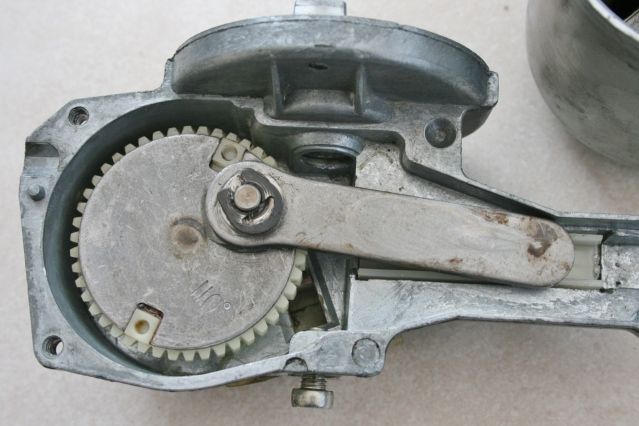
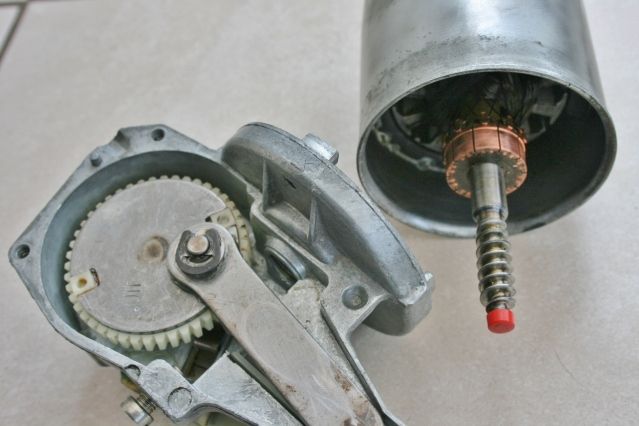
The wiper motor was working ok, but seemed a little laboured when I was going through the loom so I striped it down into it's component parts, cleaned with white spirit to get the old muck and greaseoff and reassembled, luckily without breaking any bushes or wires, unlike the alternator !!
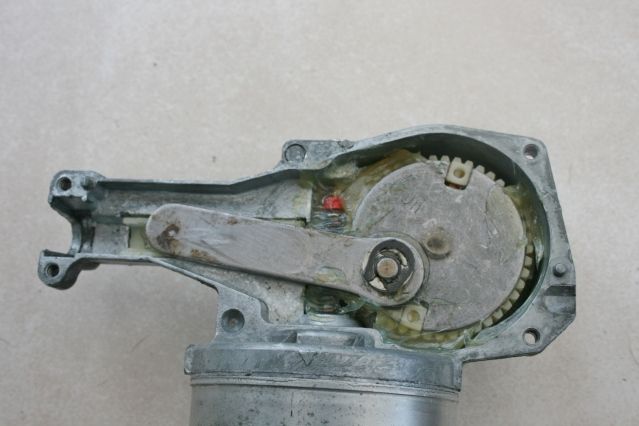
All re greased and tested I covered it up till I need it. The radiator cowl was next but I have only just got it off.
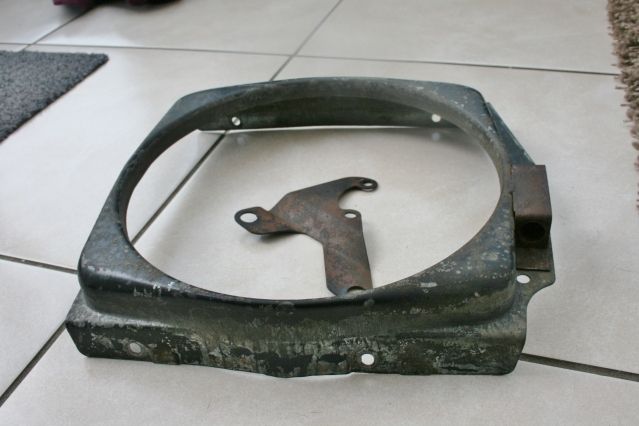
A bit cruddy and corroded but a good wire brushing and coat of etch soon sorted that out. Will paint tomorrow in the loft 'art studio' !!
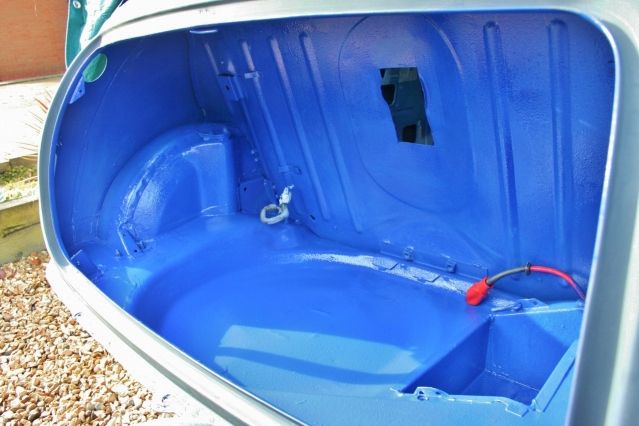
I got a break in the rain the other day too, amazing I know for Northern England so I decided to paint the boot as it was the only bit of the inside not finished.
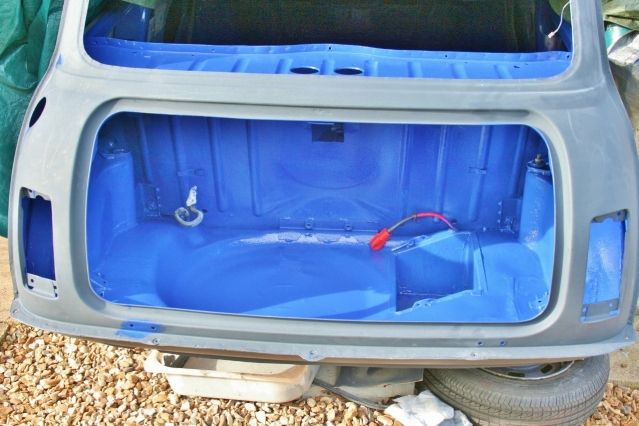
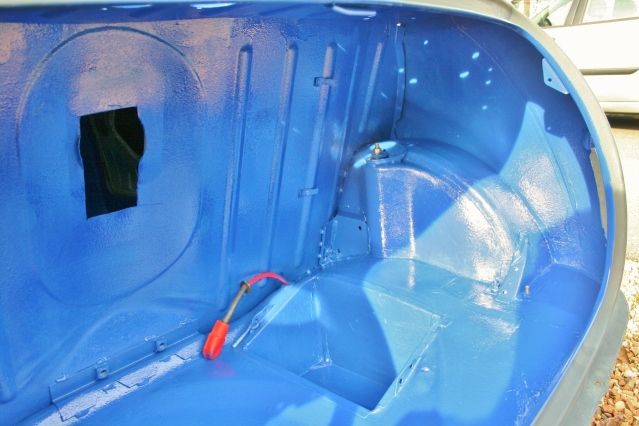
All going well I thought till I uncovered the rear quarter and found the dreaded brown stuff.
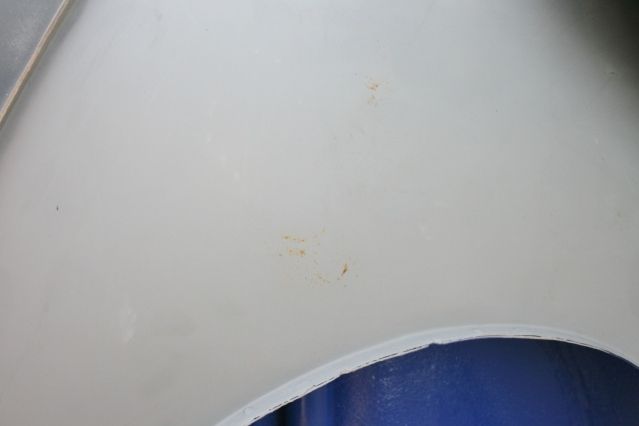
Only slight surface rust but I will have some extra prep work to do when I finally get to paint next year. Bit annoyued to be honest but not unexpected, it's only etch primer and it's my own fault for not getting on with it !!!
I have also sorted the wiring for spot lights, stereo system and security and that will be going into the stripped loom when it arrives.
There ya go, a bit more !!
Graham
not much progress over the past week or so, but progress is progress so here goes.
The electrical saga continues, with minis I bet you're not surprised, but I am pretty much there now.
The brake fluid reservoir was not working and the cruddy contacts were the reason. A strip down and sand with wet and dry solved that problem, and at £15 each to replace then I am pleased. The only other thing not working correctly is the petrol sender and I tried to fix it, but it wont send a consistant signal to the binicle so I will have to but one of those, doh !! All the contacts are on between the front and rear loom so just need to fit and protect the junctions. I will use a combination of heat shrink sheilding and self amalgamating tape, which seals onto itself to make a water tight cover.
The wiper motor was working ok, but seemed a little laboured when I was going through the loom so I striped it down into it's component parts, cleaned with white spirit to get the old muck and greaseoff and reassembled, luckily without breaking any bushes or wires, unlike the alternator !!
All re greased and tested I covered it up till I need it. The radiator cowl was next but I have only just got it off.
A bit cruddy and corroded but a good wire brushing and coat of etch soon sorted that out. Will paint tomorrow in the loft 'art studio' !!
I got a break in the rain the other day too, amazing I know for Northern England so I decided to paint the boot as it was the only bit of the inside not finished.
All going well I thought till I uncovered the rear quarter and found the dreaded brown stuff.
Only slight surface rust but I will have some extra prep work to do when I finally get to paint next year. Bit annoyued to be honest but not unexpected, it's only etch primer and it's my own fault for not getting on with it !!!
I have also sorted the wiring for spot lights, stereo system and security and that will be going into the stripped loom when it arrives.
There ya go, a bit more !!
Graham
Edited by grahama, 09 October 2012 - 06:46 PM.
#682
alex-95
-

- Members
-
- 6,078 posts
I am THE CLAMP MAKER
- Location: l
Posted 09 October 2012 - 06:49 PM
Look's great graham (well apart from the rust of course).
Edited by alex-95, 09 October 2012 - 06:49 PM.
#683
hughJ
-

- Members
-
- 727 posts
Soldiering Along
- Location: Highlands, Scotland
Posted 09 October 2012 - 06:50 PM
Graham things are looking good. You get parts so clean. I'm just lashing back bits that are still grubby. As I've always said I'm doing an advanced MOT!! I do like the colour. These rust spots coming through could make you weep!! But isn't that just like it when working on a Mini!! It will be a smashing car one day.
Hugh
Hugh
Edited by hughJ, 09 October 2012 - 06:50 PM.
#684
joezone2001
-

- Members
-
- 332 posts
Speeding Along Now
- Location: kirkby in ashfield
Posted 09 October 2012 - 07:34 PM
Graham.
looking cracking as always mate! shame about the rust but I'm sure you'll have it sorted in no time.keep up the good work. joe
looking cracking as always mate! shame about the rust but I'm sure you'll have it sorted in no time.keep up the good work. joe
#685
graham in aus
-

- Noobies
-
- 6 posts
Just On Tickover
- Local Club: NSW MCC
Posted 12 October 2012 - 05:25 AM
As you may notice this is all test fitted, lock tabs not done up, torque setting not done but it all goes in. Will, if I can get hold of a plastic cup get it on wheels at the weekend, honest, but all hopes of paint have now gone.
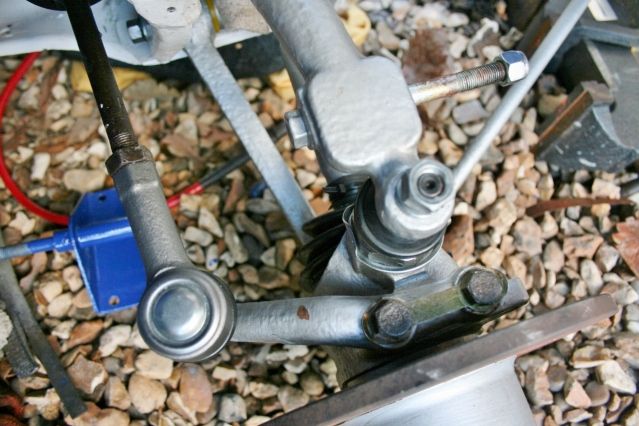
You noted it was all temporary here, I hope you have just placed those track rod ends like that (Upside down!) the tapers will not fit correctly!
Sure you have it covered..... !

#686
grahama
-
- Members
-
- 2,442 posts
Up Into Fourth
- Location: Warrington
- Local Club: None in my area !!
Posted 12 October 2012 - 07:03 PM
I had no idea that they were upside down, thanks. I put them on that way as it was the only way the rack ends looked right. When on the other way up the ends of the rack seem to point down which seems wrong ??? Is this right ???
Graham
Graham
#687
danie garry
-

- Members
-
- 2,296 posts
I love BMW minis
- Location: malmo
- Local Club: IMOC-Irish Mini Owners Club
Posted 12 October 2012 - 08:38 PM
I had no idea that they were upside down, thanks. I put them on that way as it was the only way the rack ends looked right. When on the other way up the ends of the rack seem to point down which seems wrong ??? Is this right ???
Graham
it only seems like they're pointing down cause the suspension is hanging, they work out about level when the car is on its wheels so thats in from underneath and nut on top
#688
grahama
-
- Members
-
- 2,442 posts
Up Into Fourth
- Location: Warrington
- Local Club: None in my area !!
Posted 12 October 2012 - 09:39 PM
All is now clear, thanks for pointing out my error Graham in Oz, and Danie for answering yet another amateur question, you live and learn !! Glad it's not all tightened up !!!
Graham
Graham
#689
mackeellan
-

- Noobies
-
- 43 posts
On The Road
Posted 13 October 2012 - 07:45 AM
Enjoying reading this once again, well done Graham, hope you will be able to get on with something over the winter. All the best
#690
Minidarren83
-

- Members
-
- 1,207 posts
One Carb Or Two?
- Location: Stanford Le hope
Posted 13 October 2012 - 10:13 AM
If it makes you feel any better graham I would have done the same as it seems the logical way to put them on glad I read your thread it will stop me from making the same mistakes lol


2 user(s) are reading this topic
0 members, 0 guests, 0 anonymous users
-
Bing (2)


