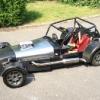
Project Mini
#241

Posted 03 March 2006 - 08:10 AM
#242

Posted 06 March 2006 - 10:22 PM
Looks Good mate.
#243

Posted 07 March 2006 - 09:57 AM
On a lighter note, now going to cut back the rear valence seam where i welded it on and turn it into a smooth rear bumper now. Theres a new door on the canteen and ive had my phone replaced.
Still got to sort out my temper though.
#244

Posted 07 March 2006 - 11:53 AM
#245

Posted 07 March 2006 - 02:40 PM
#246

Posted 07 March 2006 - 03:23 PM
I noticed that all the z cars minis i have seen have got the driveshafts at a really steep angle compared to mine which are almost flat. Is it because they have a reverse fitted???
No, yours is on its arse with all that weight it's carrying!!!
#247

Posted 07 March 2006 - 03:28 PM
Mine is 81/2" from the ground to the sill lip. What measurement do you other blokes have???
PS Mark, after i had the shave it went up a bit.
#248

Posted 07 March 2006 - 04:22 PM
Now it measures 1200mm, it's off the floor
Welding, cutting and grinding away at the valence i squashed. :'(
#249

Posted 08 March 2006 - 12:07 AM
He bloody leans on the mini and it falls over on the post i had the back resting on.
Pulled the crease out, and he started to fill it with the fiberglass i got to make my boot box for the Kit car.
#250

Posted 08 March 2006 - 12:15 AM
is the rear pretty much all fibreglass? im planning on welding my NEW rear valance on soon and deseaming any tips?
looking spot on welderman!
#251

Posted 08 March 2006 - 08:01 AM
Took me 3 hours to do the welding, cutting and grinding last night, then my mate about an hour to fiberglass and filler it up.
Thought about de-seaming the Mini, but might do that on the next one, going to fit arches at the end and blend them in, should look good i think.
TIP 1. Keep checking that both your valance and mini are inline with each other, if i remember from memory first time round. They don't quite match up and your better getting the inside right, you can the sand down the outside lip to suit.
TIP 2. Get your mate to lean on your Mini and falls over, so as he has to sort the dent he has just caused.
Sorry about all that typing.
before and after pic's
Attached Files
#252

Posted 09 March 2006 - 03:01 PM
Painted the front subframe.
This mornings task.
My painting skills.
Will let my mate do the outside bits you can see.
Attached Files
#253

Posted 09 March 2006 - 04:17 PM
Will have to come and see it when its painted and ready for its rebuild.
More pictures to take
#254

Posted 09 March 2006 - 05:34 PM
#255

Posted 12 March 2006 - 09:44 PM
Bolted front subframe on.
Bolted steering rack on.
Bolted springs, hubs etc etcon, you get the drift.
Picture quality poor, sorry just taken them 20 min ago and it's not very well lit in the small work shop.
Attached Files
1 user(s) are reading this topic
0 members, 1 guests, 0 anonymous users


