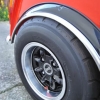
 i love the old city graphics just a fantastic graphic!

Mk4 Mini City
Started by
Lund
, Dec 19 2005 06:35 PM
702 replies to this topic
#631

Surfbluegarage
-

- Traders
-

- 1,547 posts
AKA mini_mad_daps
- Location: nottingham
- Local Club: Notts About Minis
Posted 16 July 2009 - 02:20 PM
this is a well tidy mini i love the old city graphics just a fantastic graphic!
i love the old city graphics just a fantastic graphic!
#632
Lund
-
- TMF+ Member
-
- 1,864 posts
Camshaft & Stage Two Head
Posted 28 July 2009 - 01:50 PM
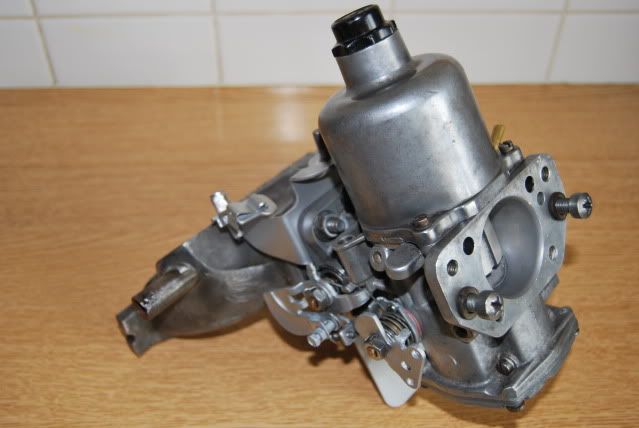
I have began to rebuild the carb now, after cleaning it best I could. Its not perfect but will certainly/hopefully do the job. It's all pieced together. I just haven't quite worked out how to reset the springs into place, but from looking at some of the before photo's I have an idea of how they should sit!
Bare Carb:
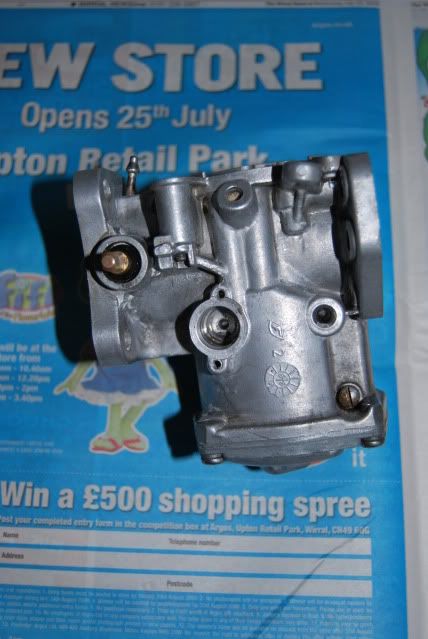
Part Assembled:
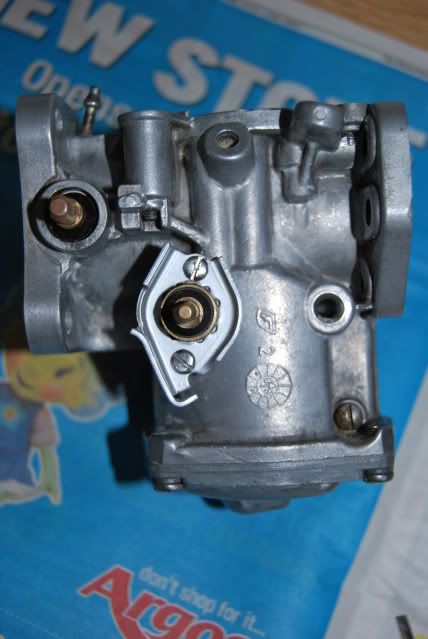
Assembled:
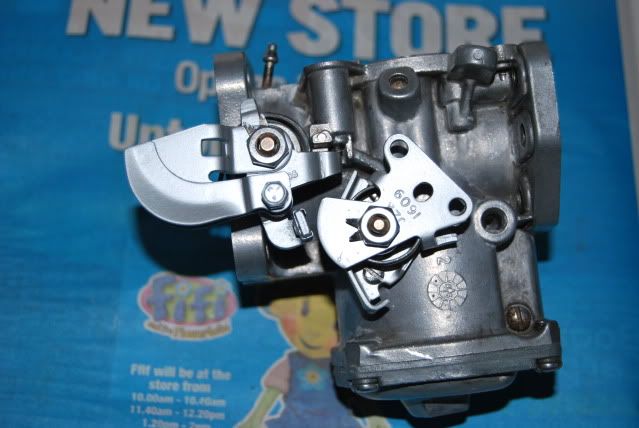
Thanks for looking.
Bare Carb:
Part Assembled:
Assembled:
Thanks for looking.
Edited by Lund, 28 July 2009 - 01:50 PM.
#633
AndrewJ530
-

- Members
-
- 1,628 posts
Camshaft & Stage Two Head
- Location: Middlesbrough
Posted 28 July 2009 - 04:31 PM
Looks all nice and shiny. How long do you reckon till the new engine is up and running?
#634
Lund
-
- TMF+ Member
-
- 1,864 posts
Camshaft & Stage Two Head
Posted 28 July 2009 - 05:58 PM
Looks all nice and shiny. How long do you reckon till the new engine is up and running?
A few months yet. Probably.
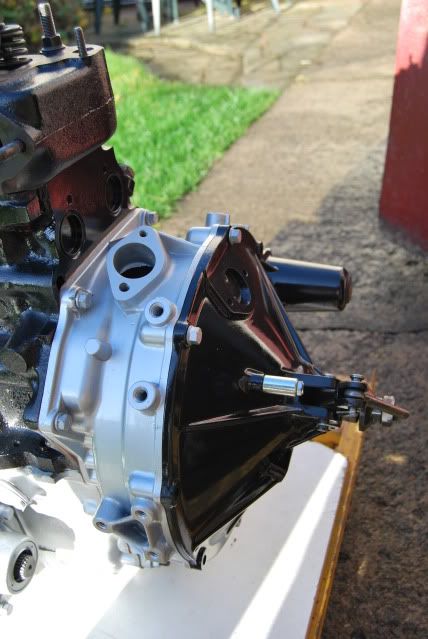
I'm going to mate the gearbox and engine block next. Just need to clear some space in the garage to be able to do so & then its full steam ahead
#635
Lund
-
- TMF+ Member
-
- 1,864 posts
Camshaft & Stage Two Head
Posted 18 August 2009 - 08:03 PM
Watch this space.
#636
dsgoody
-

- TMF+ Member
-
- 519 posts
Super Mini Mad
- Location: Bristol
- Local Club: Gert Lush Minis
Posted 18 August 2009 - 09:07 PM
Watching  Nothing better than seeing everything nice and clean.
Nothing better than seeing everything nice and clean.
#637
Mini-Mad-Craig
-

- Members
-
- 9,298 posts
Crazy About Metro's
- Location: Travelling in a fried out Kombi
Posted 18 August 2009 - 11:53 PM
Tom


Just sat down and read all of this thread, took about 2 hours (that doesnt include tea making time
 )
)Think its one of the best project threads on the forum, made me laugh lots of times and is really inspirational.
keep up the goodwork mate.And i quoted that picture because, i used to have the same hair as you

Edited by Mini-Mad-Craig, 18 August 2009 - 11:54 PM.
#638
Lund
-
- TMF+ Member
-
- 1,864 posts
Camshaft & Stage Two Head
Posted 31 August 2009 - 07:25 PM
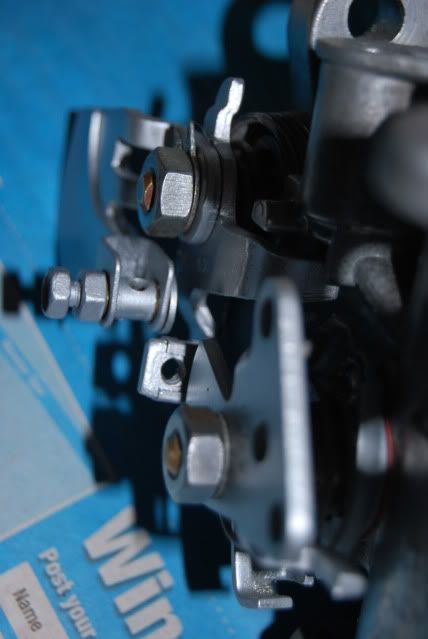
Rebuilt Hif44:
#639
Lund
-
- TMF+ Member
-
- 1,864 posts
Camshaft & Stage Two Head
Posted 07 September 2009 - 10:24 PM
Sneaky peak of what to expect soon;
#640
Lund
-
- TMF+ Member
-
- 1,864 posts
Camshaft & Stage Two Head
Posted 04 November 2009 - 04:58 PM
Update guys!
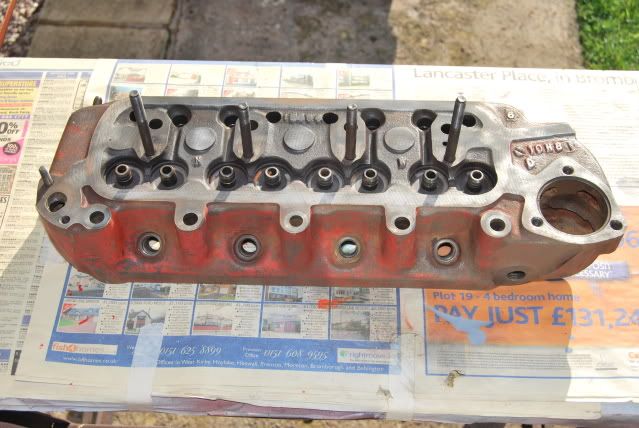
I have focused my attention on the cylinderhead, cleaned and re-ground the valve seats;
I have also primed and lightly coated the cylinder head when the weather was decent, all is looking well. I can't wait to piece it all together and fit it to the block.
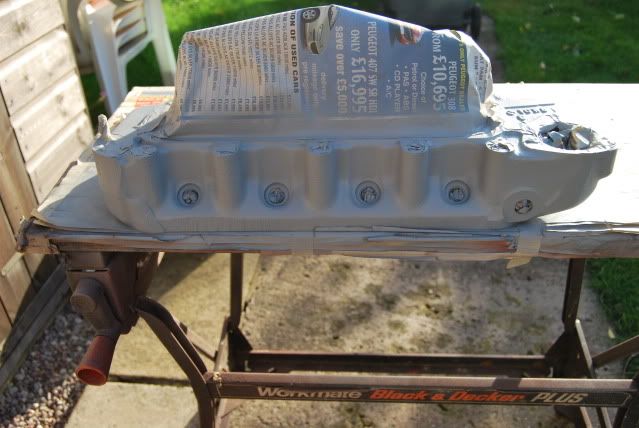
Coat of paint abit thin in places:
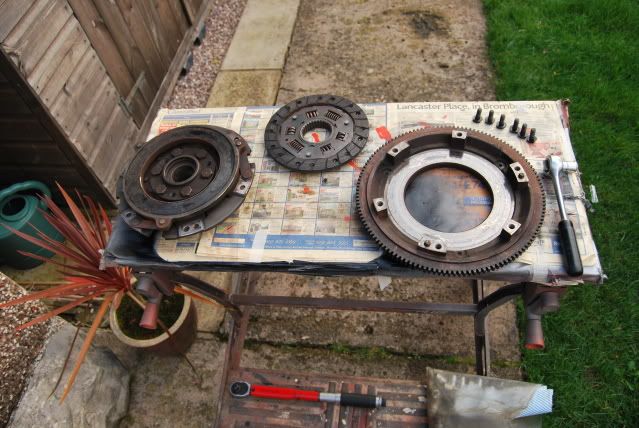
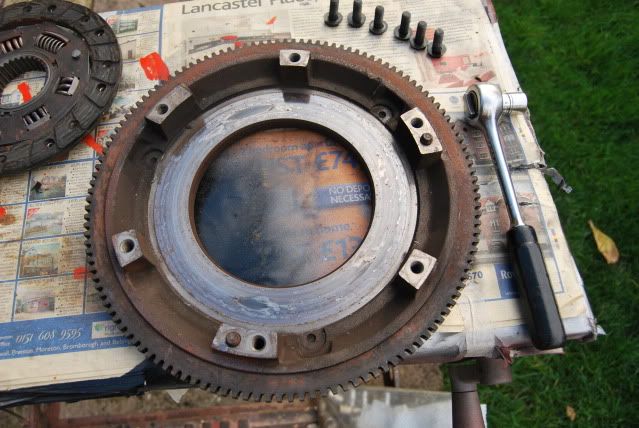
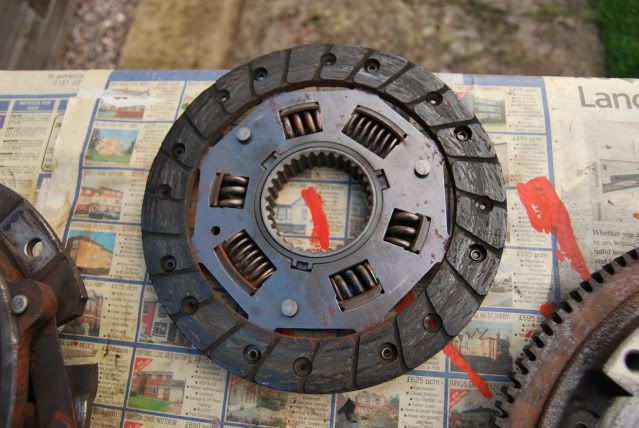
Today, I have just disassembled the Verto clutch and flywheel, could do with a good clean up. Clutch looks slightly worse for wear. I'm thinking along the lines of a Metro Turbo clutch replacement.
What do you reckon guys?
I have focused my attention on the cylinderhead, cleaned and re-ground the valve seats;
I have also primed and lightly coated the cylinder head when the weather was decent, all is looking well. I can't wait to piece it all together and fit it to the block.
Coat of paint abit thin in places:
Today, I have just disassembled the Verto clutch and flywheel, could do with a good clean up. Clutch looks slightly worse for wear. I'm thinking along the lines of a Metro Turbo clutch replacement.
What do you reckon guys?
#641
Lund
-
- TMF+ Member
-
- 1,864 posts
Camshaft & Stage Two Head
Posted 17 November 2009 - 03:52 PM
17/11/09
I began assembling the flywheel end cover today, I greased the arm and plunger & renewed the split pins. I am extremely pleased with the finish on the end cover, looks a tad dusty in the sunlight in the photo;

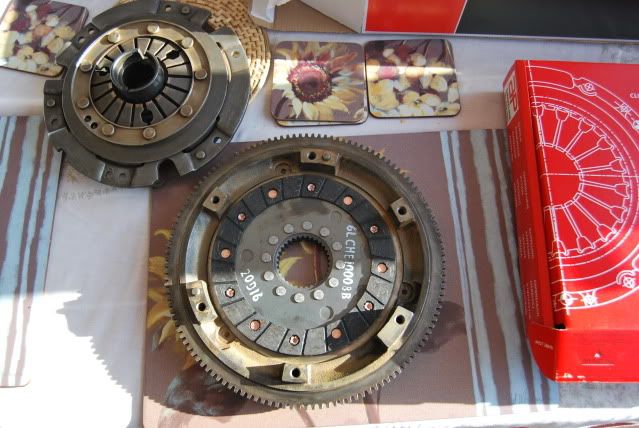
Yet another Minispares order revealed a new AP clutch (HB8017), genuine flywheel oil seal, dust shield & locating bracket for the verto slave.
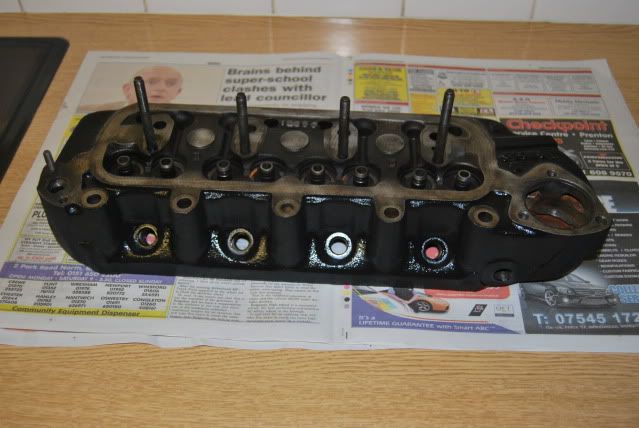
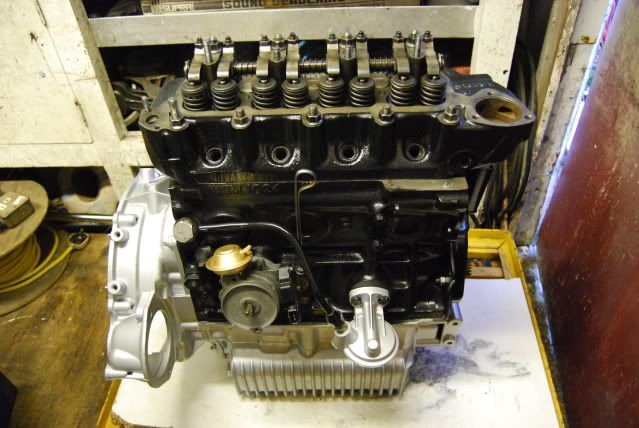
I can't quite get my head round how the slave locating bracket fits, but I'm sure it will become obvious as I fit the end cover. I gave the cylinder head one last clean up and assembled the top hats, springs, valves & collets, along with the rocker assembley.
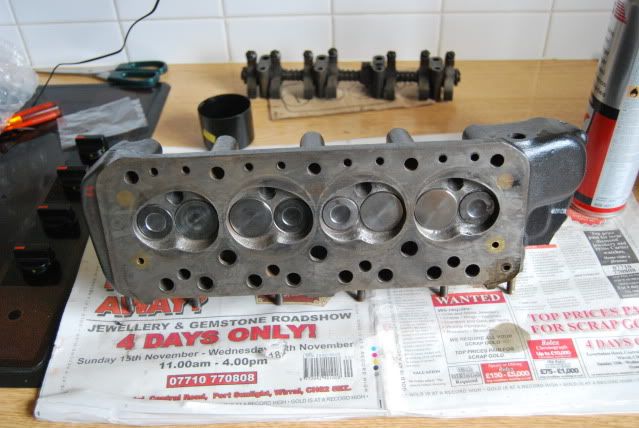
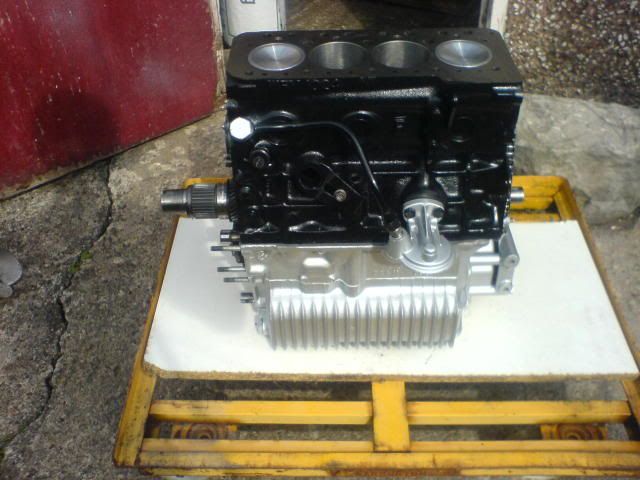
The push rods were also cleaned and freshly oiled. I placed the head gasket between the block and head, having given the cylinder bores a wipe with oil ready for priming the engine. The cylinder head is now fitted, but not torqued up. I'll find the torque sequence and torque it up properly in the week.
I began assembling the flywheel end cover today, I greased the arm and plunger & renewed the split pins. I am extremely pleased with the finish on the end cover, looks a tad dusty in the sunlight in the photo;
Yet another Minispares order revealed a new AP clutch (HB8017), genuine flywheel oil seal, dust shield & locating bracket for the verto slave.
I can't quite get my head round how the slave locating bracket fits, but I'm sure it will become obvious as I fit the end cover. I gave the cylinder head one last clean up and assembled the top hats, springs, valves & collets, along with the rocker assembley.
The push rods were also cleaned and freshly oiled. I placed the head gasket between the block and head, having given the cylinder bores a wipe with oil ready for priming the engine. The cylinder head is now fitted, but not torqued up. I'll find the torque sequence and torque it up properly in the week.
#642
minimininut
-

- Members
-
- 830 posts
Look Out For My Haynes Minature Engine Install Project
Posted 17 November 2009 - 05:37 PM
Mini Lund! Great to see you posting again and back on the case with your engine, good work
(PS - If I sound excited it's because yours was the first ever project thread I read and partly what got me addicted to the mini forum!!)
(PS - If I sound excited it's because yours was the first ever project thread I read and partly what got me addicted to the mini forum!!)
#643
Lund
-
- TMF+ Member
-
- 1,864 posts
Camshaft & Stage Two Head
Posted 17 November 2009 - 08:39 PM
Mini Lund! Great to see you posting again and back on the case with your engine, good work
(PS - If I sound excited it's because yours was the first ever project thread I read and partly what got me addicted to the mini forum!!)
Hi there, thank you for the keen interest. I'm juggling university work with engine building & bad weather! The lack of garage space doesnt help either. Next to tackle is the fitment of the clutch oil seal and dust shield & finally the clutch assembley.
#644
Lund
-
- TMF+ Member
-
- 1,864 posts
Camshaft & Stage Two Head
Posted 29 November 2009 - 05:35 PM
Update: Just declared the mini SORN, I'll be removing the 850 sometime in the next few months as the 1293 is nearly ready. I have just fitted the diff oil seals and C clips, pot joints are also now on. Touched up the paint in places as it was abit thin.
Clutch assembly is on, I just need to be torque the centre bolt. Any ideas on how to torque the centre bolt, as I presume the engine would just turn?

Tom
Clutch assembly is on, I just need to be torque the centre bolt. Any ideas on how to torque the centre bolt, as I presume the engine would just turn?
Tom
#645
Pauly
-

- Members
-
- 4,213 posts
Up Into Fourth
- Location: Wolverhampton
- Local Club: Just 4 Fun Minis!
Posted 29 November 2009 - 07:06 PM
Stick an old shell bearing in the ring gear of the flywheel or an old screwdriver .
Looks good mate!
Paul.
.Looks good mate!
Paul.


2 user(s) are reading this topic
0 members, 2 guests, 0 anonymous users


