Jump to content


Photo

1971 Clubman Estate....now Turbo


  • Please log in to reply
297 replies to this topic

#151 woodenman23

woodenman23

    Mini Mad

  • Noobies
  • PipPipPipPip
  • 299 posts

Posted 23 November 2012 - 08:43 PM

I have been working towards being able to get the floor in.

Posted Image

Posted Image

Posted Image

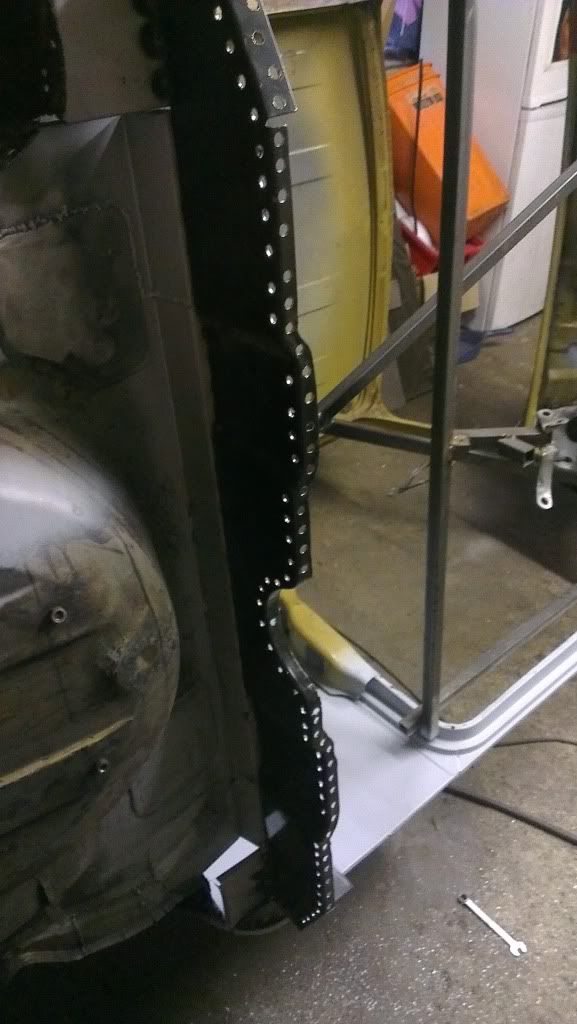
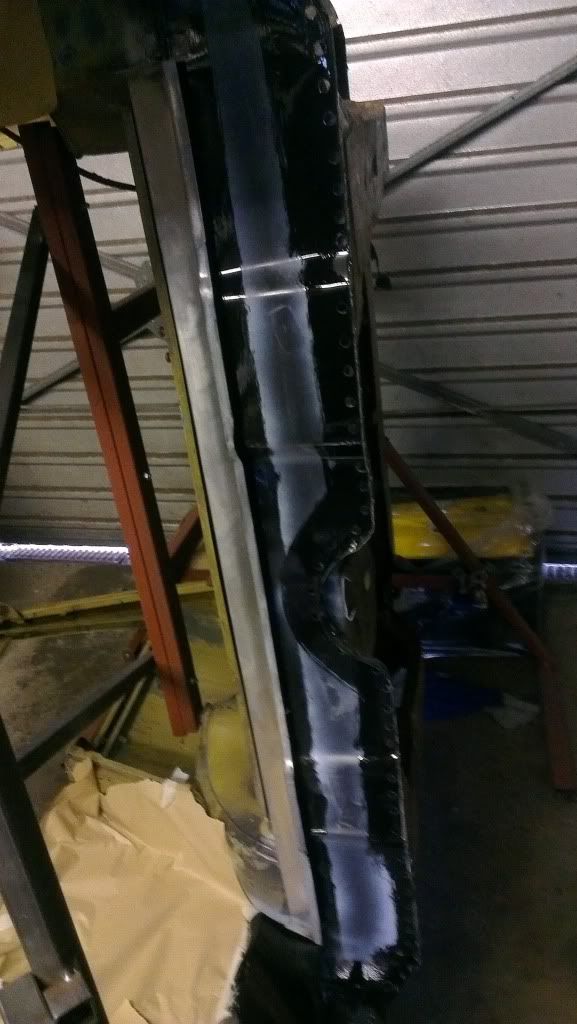
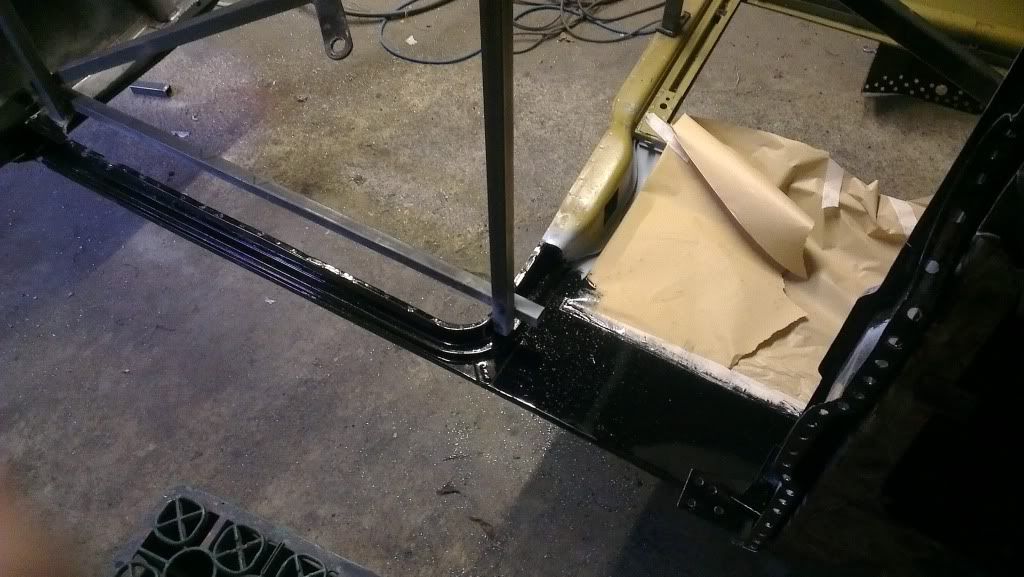
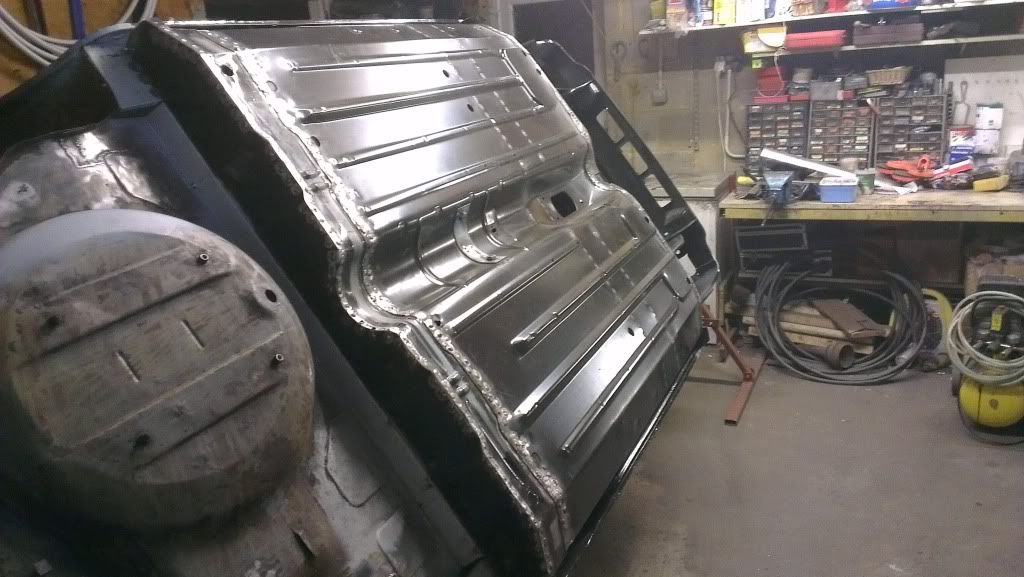
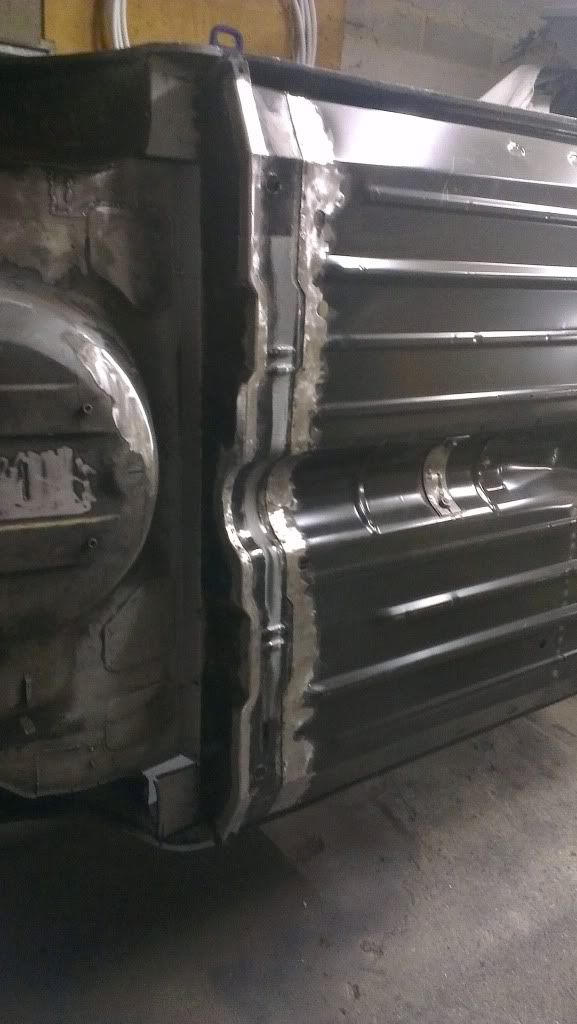
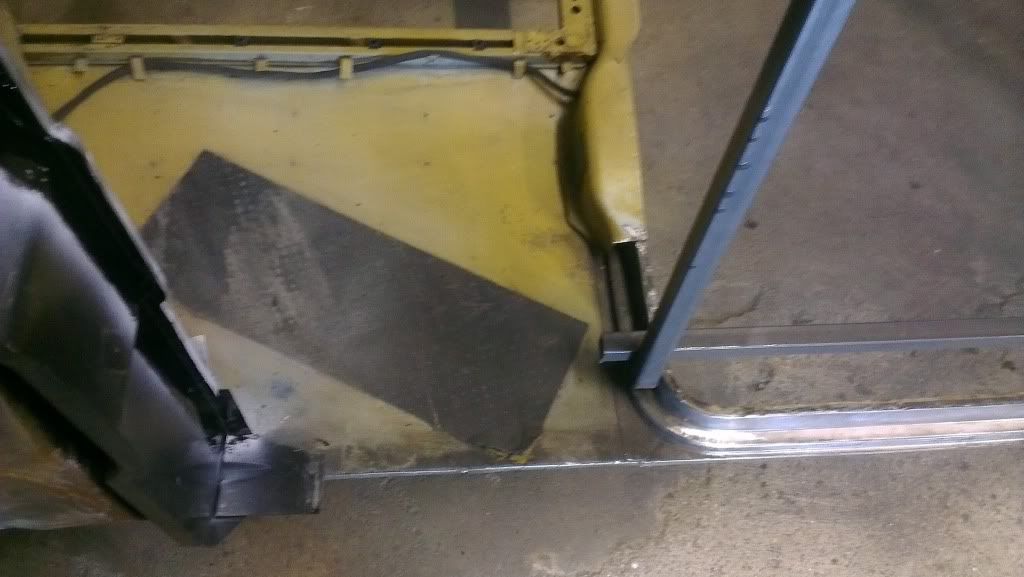
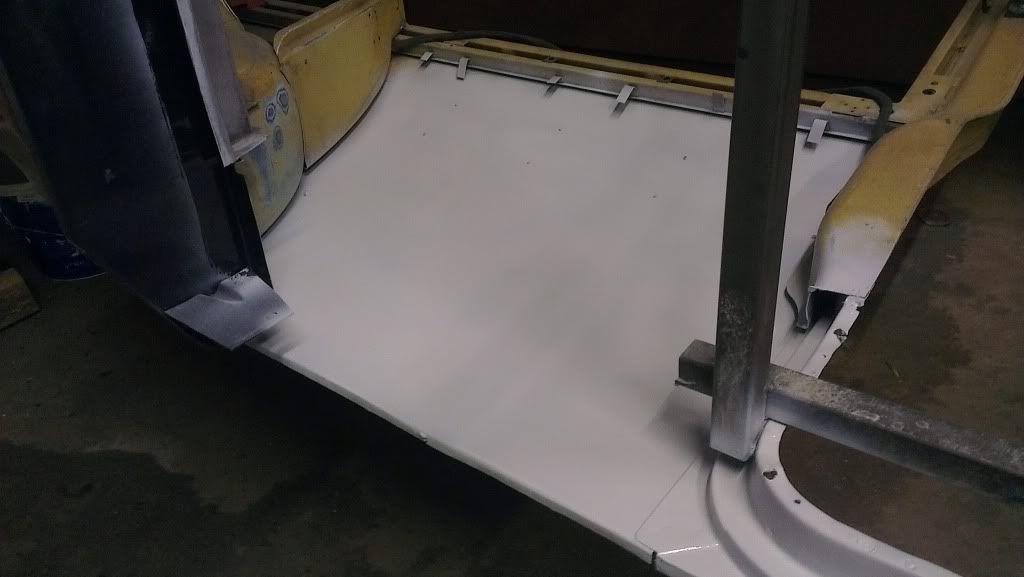
I have done the same to the other side as well. Just needing to paint some por15 along the bottom of the rear quarters for extra protection, as I don't think it will be easy getting good coverage when the floor and stiffener bracket is in.

Posted Image

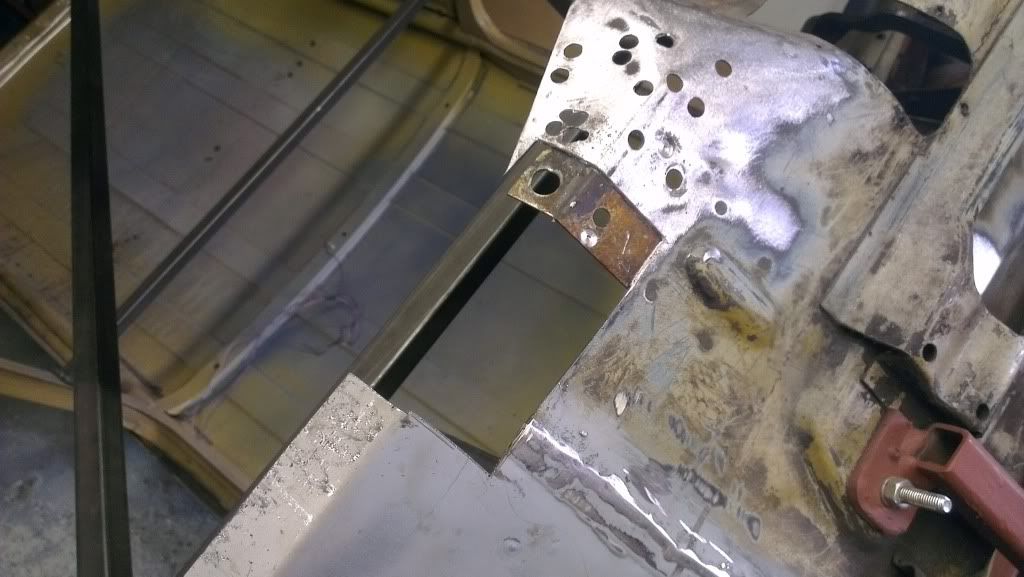
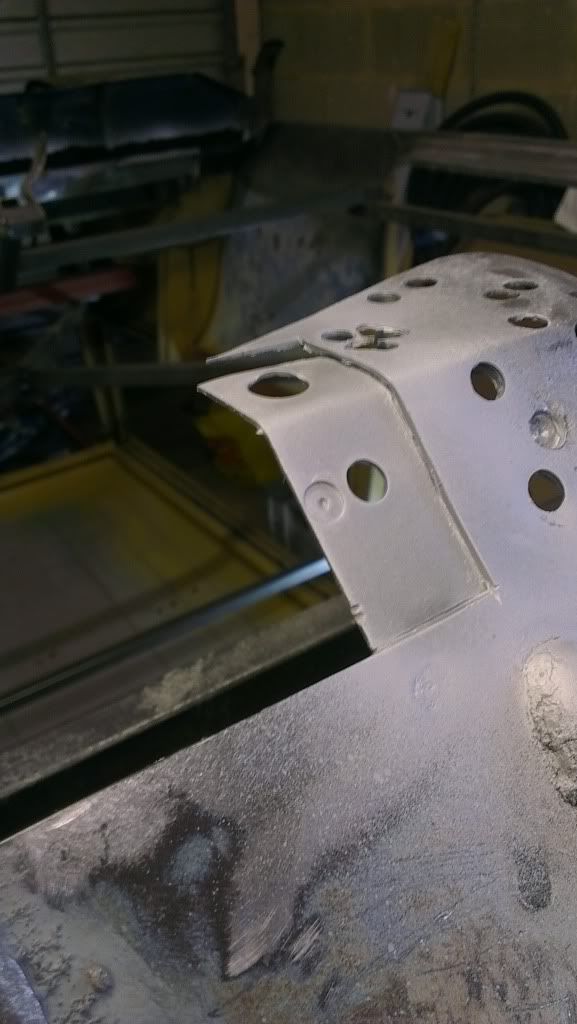
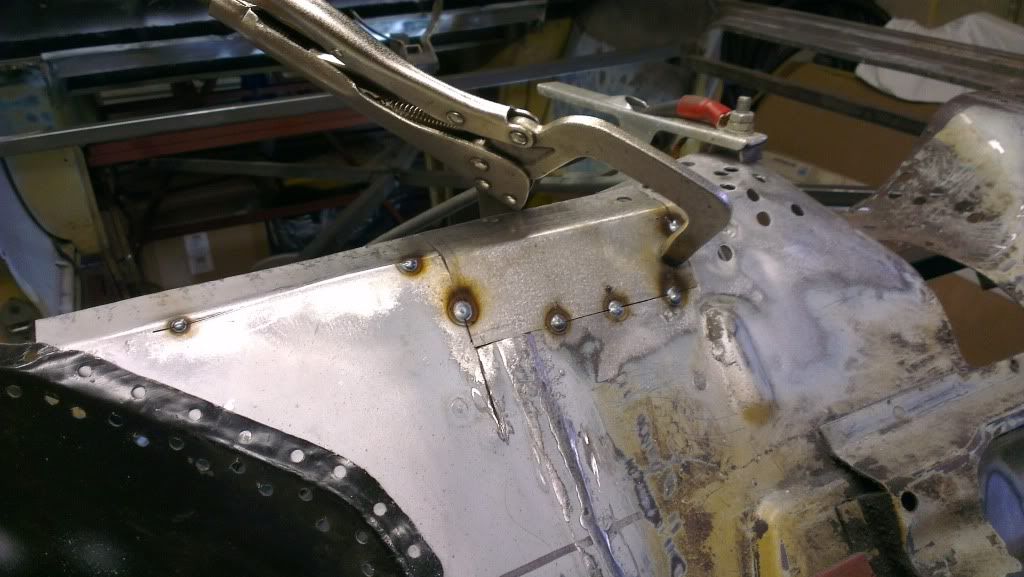
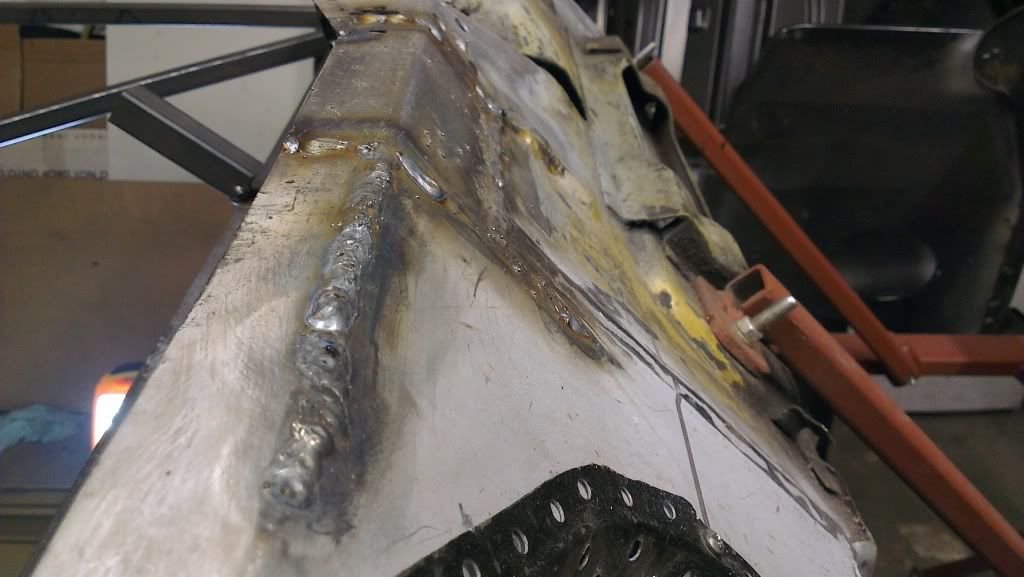
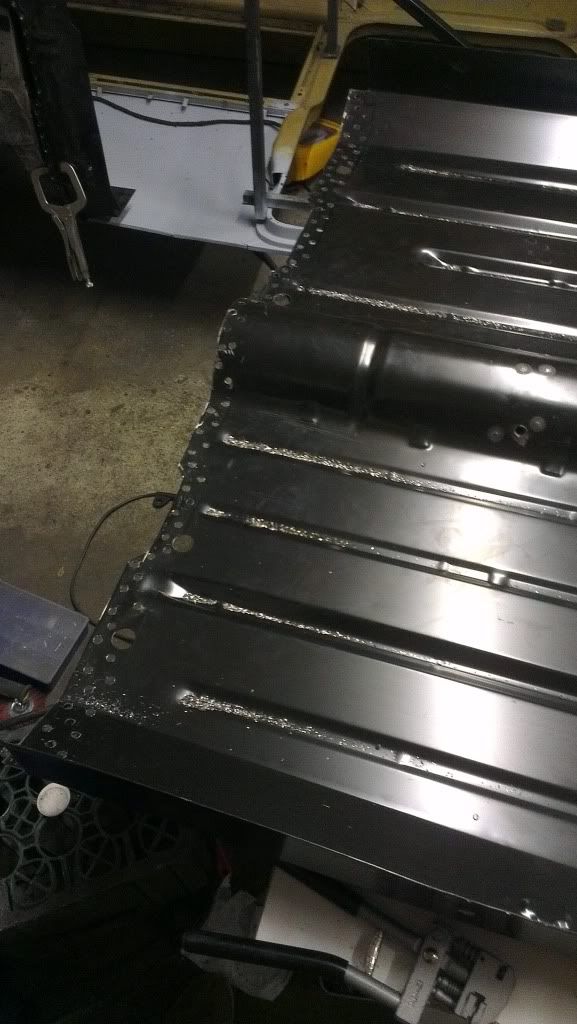
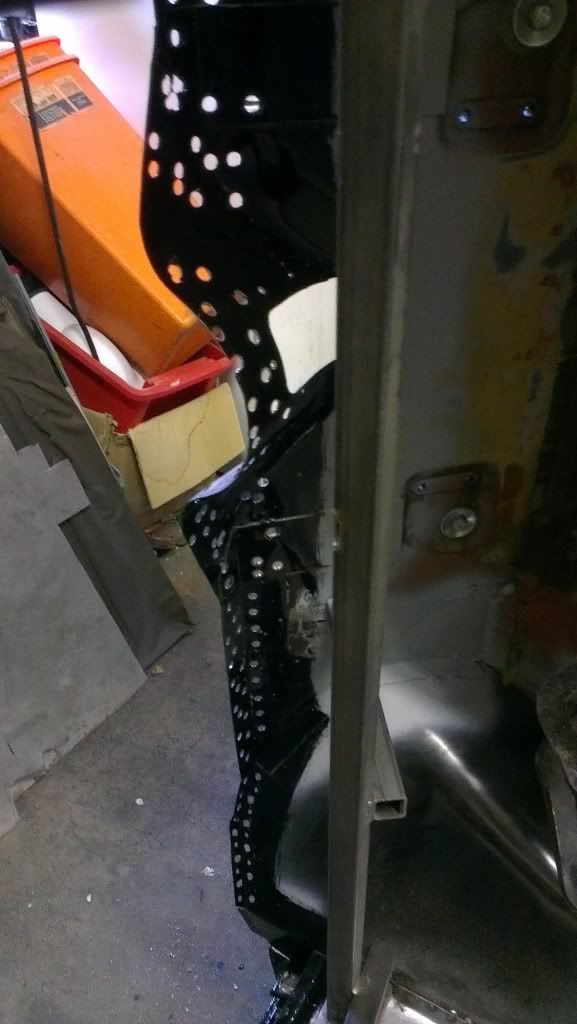
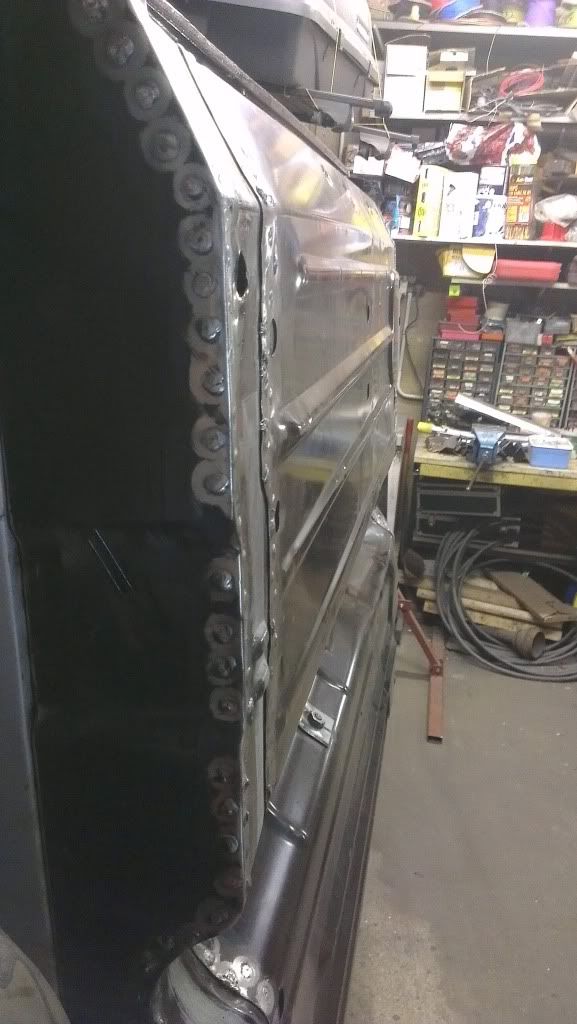
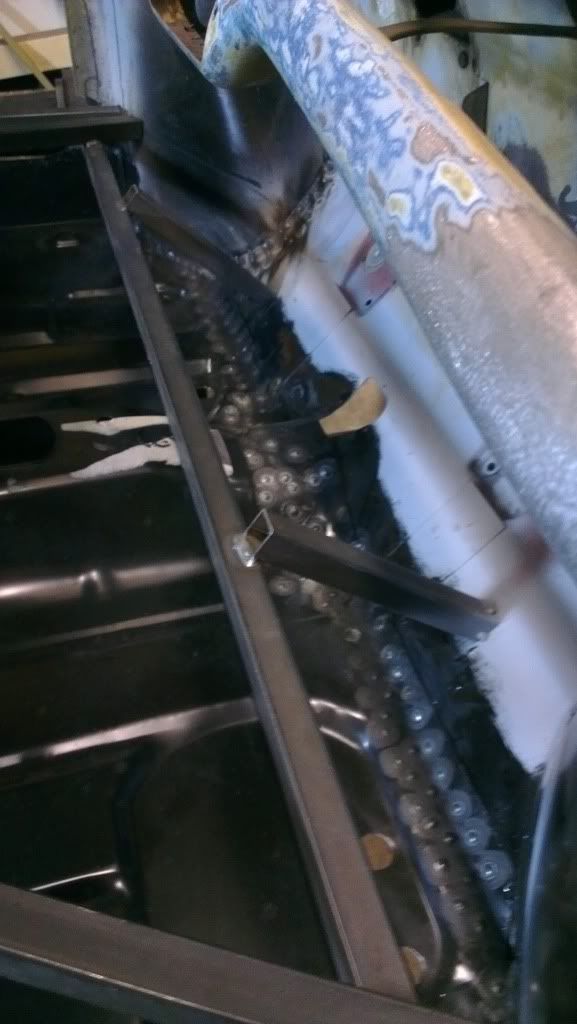
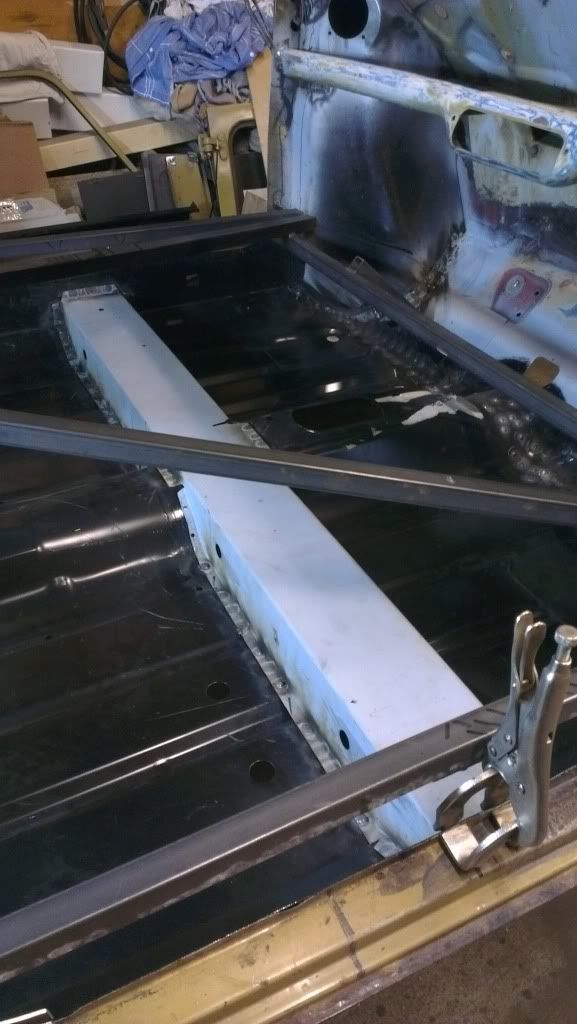
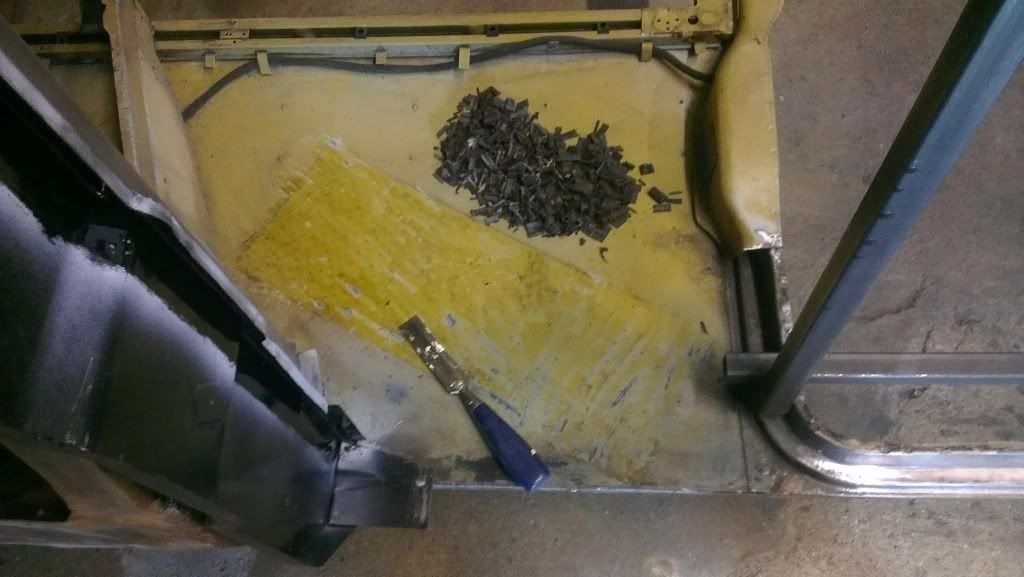
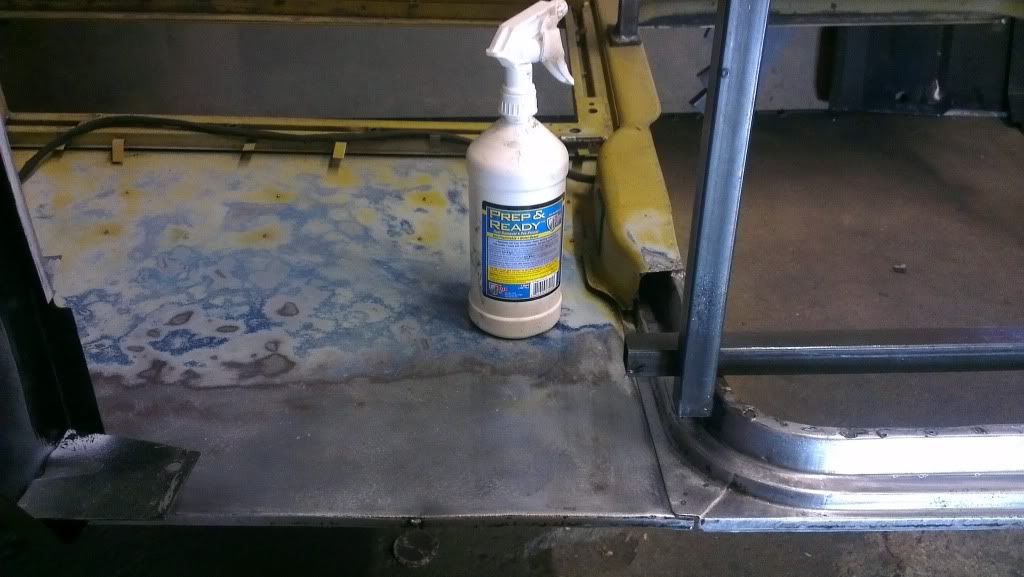
Had to do a couple of repairs along the bottom of the toe board. After this was done I dressed down the welds the where on the inside of the car so that the floor would sit flush.

Posted Image

Posted Image

Posted Image

Posted Image

Posted Image

Posted Image

Posted Image

Posted Image

#152 woodenman23

woodenman23

    Mini Mad

  • Noobies
  • PipPipPipPip
  • 299 posts

Posted 25 November 2012 - 08:44 PM

A lot more trial fittings of the floor. One thing pictures don't convey is how much time everything takes, I know I'm not the fastest of workers. At least it now sits nicely up into the cradle I made to help with the realignment of the floor.

Posted Image

Confident that I have now got the floor where it needs to be I drilled through the holes on my cradle for the seat belt anchoring plate. After a couple of coats of paint, on the mating faces, I bolted it in and then welded it. This should allow me to get it back into the same position a lot easier now.

Posted Image

Back out with the floor to drill a sh*t tonne of holes ready for plug welding.

Posted Image

Posted Image

All the surfaces that will be lapped have had a couple of coats of por15.

Posted Image

Posted Image

Posted Image


Should have the floor welded in soon.....................


Hopefully

#153 MiniJosh92

MiniJosh92

    Camshaft & Stage Two Head

  • Traders
  • PipPipPipPipPipPipPipPip
  • 1,707 posts
  • Location: Nr Ashford, Kent

Posted 25 November 2012 - 09:13 PM

Some superb effort & dedication going into this, very well done so far, keep it up :)

#154 alex-95

alex-95

    I am THE CLAMP MAKER

  • Members
  • PipPipPipPipPipPipPipPipPipPip
  • 6,025 posts
  • Location: l

Posted 25 November 2012 - 09:14 PM

Look's great liam, I always find that the fitting takes the most time, Once it's placed, It doesn't take long to weld in.

#155 minimikej

minimikej

    Speeding Along Now

  • Members
  • PipPipPipPipPip
  • 347 posts
  • Location: Derbyshire

Posted 25 November 2012 - 09:37 PM

Proper job, well done

#156 woodenman23

woodenman23

    Mini Mad

  • Noobies
  • PipPipPipPip
  • 299 posts

Posted 29 November 2012 - 08:18 PM

Thanks guys.

UPDATE!!!

I now have the floor welded in.


Posted Image

Posted Image

Posted Image

Posted Image

Posted Image

Posted Image

Posted Image

Liam

#157 woodenman23

woodenman23

    Mini Mad

  • Noobies
  • PipPipPipPip
  • 299 posts

Posted 01 December 2012 - 12:57 AM

Wooo, I have some 'Likes' I don't get many of them.

#158 ryan22_lgm

ryan22_lgm

    One Carb Or Two?

  • Traders
  • PipPipPipPipPipPipPip
  • 1,478 posts
  • Location: woolacombe, north devon
  • Local Club: north devon mini register

Posted 01 December 2012 - 02:21 AM

thats a beauty! good job! :D

#159 Minidarren83

Minidarren83

    One Carb Or Two?

  • Members
  • PipPipPipPipPipPipPip
  • 1,207 posts
  • Location: Stanford Le hope

Posted 01 December 2012 - 02:51 PM

It looks great I'm loving how you braced the car putting reference points in there too like a mini jig type thing it's great keep it up
Darren

#160 woodenman23

woodenman23

    Mini Mad

  • Noobies
  • PipPipPipPip
  • 299 posts

Posted 06 December 2012 - 12:18 AM

I'm going to be investing in a decent pair of safety goggles/glasses. Somehow even though I was wearing my (cheapo) safety glasses I got a sharp bit of metal in my eye whilst using the angle grinder. Bleeding painful even more so after they removed it, as they scratch with a needle at the surface of your eye :( Luckily my brothers girlfriends mum is a eye specialist at the local hospital so skipped the a&e fun fair.

It looks great I'm loving how you braced the car putting reference points in there too like a mini jig type thing it's great keep it up
Darren


Yeah that cradle thing really did help to make sure everything went back as it should.

#161 woodenman23

woodenman23

    Mini Mad

  • Noobies
  • PipPipPipPip
  • 299 posts

Posted 07 December 2012 - 05:47 PM

Dressed all the welds on the underside of the car. A couple of my plug welds had little hair pin holes, once I have sort this with more weld i'll etch prime for protection. Then I have to dress down the penetration I got on the inside, fun fun fun...

Posted Image

Posted Image

Liam

#162 matthew_leech

matthew_leech

    Speeding Along Now

  • Members
  • PipPipPipPipPip
  • 428 posts
  • Location: Newark/Derby
  • Local Club: Clubless

Posted 07 December 2012 - 06:06 PM

Looking good :)

Seeing this thread makes me want to do mine, it just isn't rusty yet haha!

I am still unsure how the rear bumper idea will look once finished!

What sort of overall "look" are you going for with the 'state?

#163 woodenman23

woodenman23

    Mini Mad

  • Noobies
  • PipPipPipPip
  • 299 posts

Posted 07 December 2012 - 06:31 PM

To be honest I don't even know the 'look' I'm going for. There are still lots of things I'm undecided about. After seeing your car I don't even know if I'm going to run arches or not.

I got the idea of the bumper from the innocenti estate which had a full length bumper. Mine isn't exactly the same. This might help you visualise it

Posted Image

#164 matthew_leech

matthew_leech

    Speeding Along Now

  • Members
  • PipPipPipPipPip
  • 428 posts
  • Location: Newark/Derby
  • Local Club: Clubless

Posted 07 December 2012 - 09:15 PM

Yh I haven't gone for a look, just period mods! Just having a non rusty shell is a good start which it seems your nearly there with :)

Clubman estates, in my opinion obviously, don't suit arches, they are so square little round bulges look out of place in my eyes.

The Inno looks cool, but the number plate is on the door which doesn't look to bad with the business of the wooden trims on travellers, where you thinking of mounting it?

I wouldn't mind original rear bumpers for mine as I have stainless van ones on currently!

Edited by matthew_leech, 07 December 2012 - 09:16 PM.


#165 MG x Nero

MG x Nero

    Just On Tickover

  • Noobies
  • Pip
  • 9 posts
  • Location: Old Catton Norwich
  • Local Club: Norfolk Mini Owners Club

Posted 08 December 2012 - 06:00 PM

nice job on the resto so far liking the daily run about as well :)


1 user(s) are reading this topic

0 members, 1 guests, 0 anonymous users