
Bump

919 replies to this topic
#46

Andrew O
-
- Members
-

- 1,425 posts
Previously known as Andrewo330.
Posted 30 September 2011 - 06:34 PM
#47
FARRANTINO
-
- Members
-
- 163 posts
Mini Mad
- Local Club: Bucks Mini Club
Posted 30 September 2011 - 06:40 PM
good work fella
#48
sonikk4
-

- Admin
-
- 16,177 posts
Twisted Paint Polisher!!!
- Name: Neil
- Location: Cotwolds.
Posted 30 September 2011 - 06:47 PM
Cut the rust out, don't plate over it or you will end up doing it again later. I've just done the same sort of job on Project Paddy so have a look on there if you need some tips etc.
Also you don't need to keep bumping your thread, people will still look at it without making comments. You will be surprised at how many people will look at a thread without saying anything. Keep posting away as most of us like to see how other members get on with their projects.
Also you don't need to keep bumping your thread, people will still look at it without making comments. You will be surprised at how many people will look at a thread without saying anything. Keep posting away as most of us like to see how other members get on with their projects.
#49
Bash Master
-

- TMF+ Member
-
- 150 posts
Mini Mad
- Location: Blackpool, Lancashire
Posted 30 September 2011 - 08:03 PM
Subframe is looking great 
#50
Andrew O
-
- Members
-
- 1,425 posts
Previously known as Andrewo330.
Posted 30 September 2011 - 08:17 PM
ThanksSubframe is looking great
#51
Andrew O
-
- Members
-
- 1,425 posts
Previously known as Andrewo330.
Posted 03 October 2011 - 04:13 PM
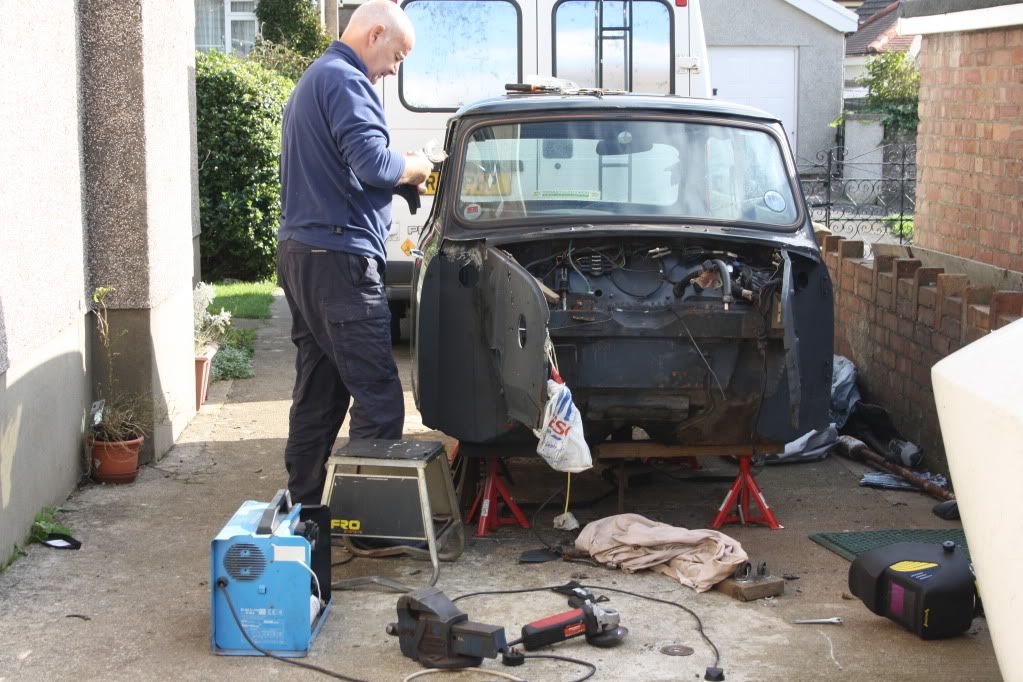
Well i had an inset day on Friday and Monday which meant an extra long weekend and as i wansnt doing Motocross it was Mini 4 days in a row 
Here come the pictures -
My top arm bearings arrived on Saturday which meant i could get the cones in . And ow my God it was sooo difficult ( Considering i have never done it before )
My dad even high fived me when we finished and that is saying something as he hardly talks to me Hehe
There were 3 tiny holes in the boot that i have never noticed so i welded them up
Before -
After -
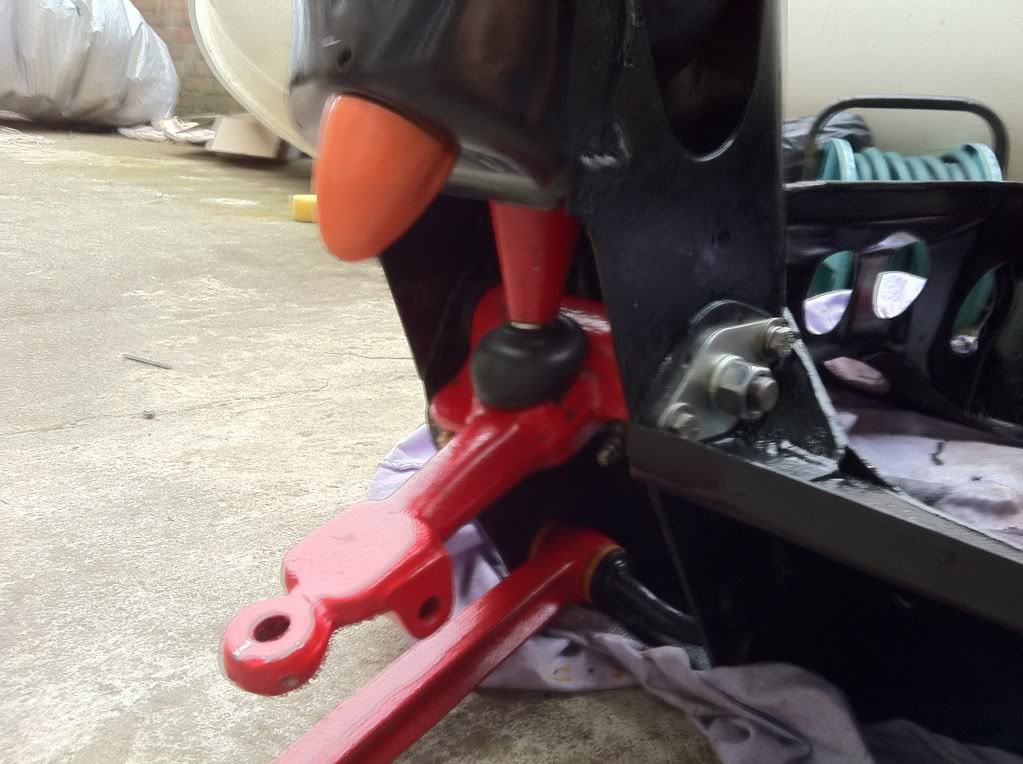
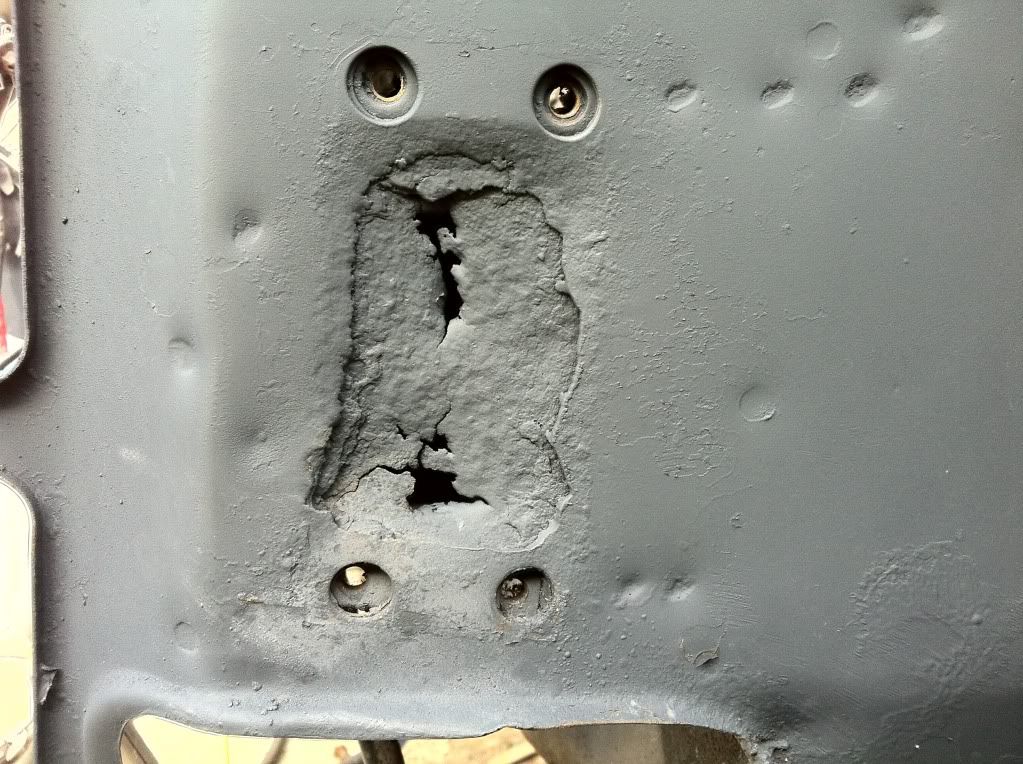
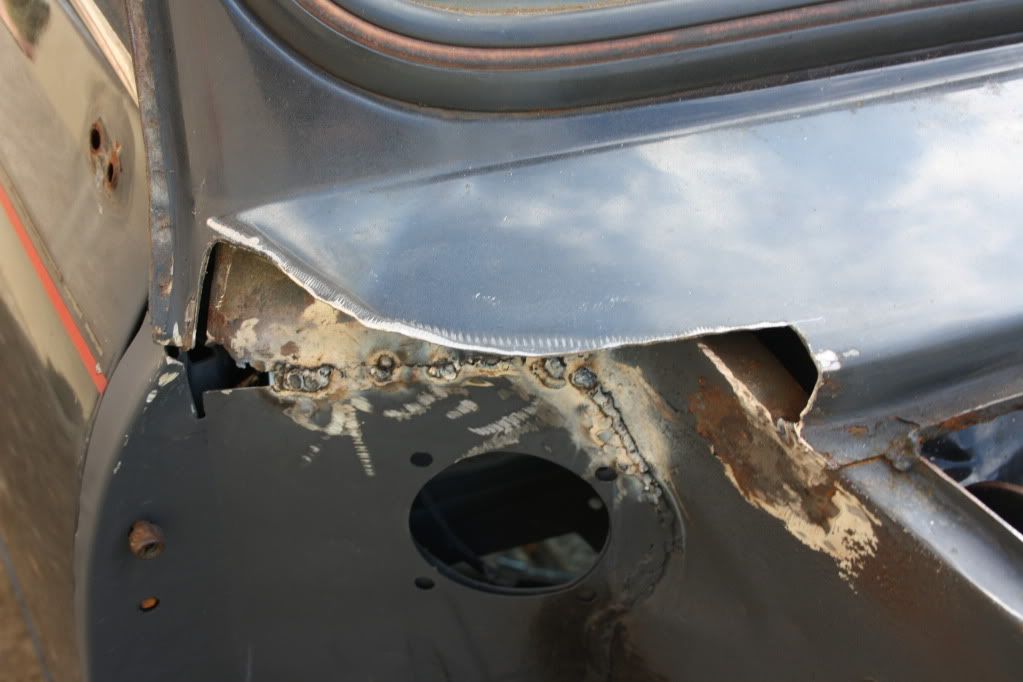
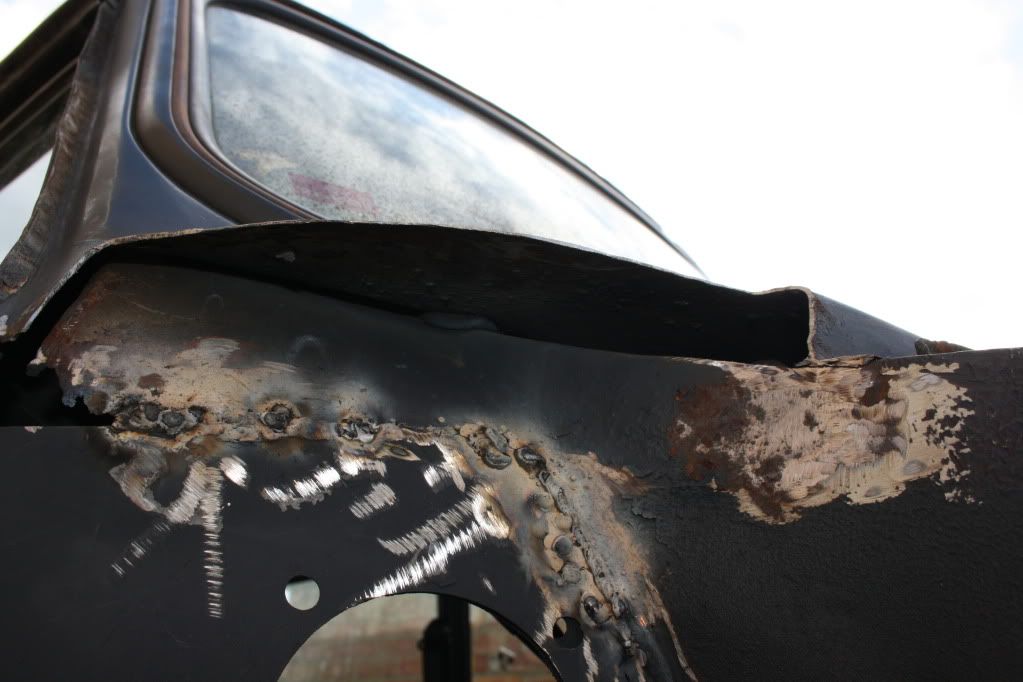
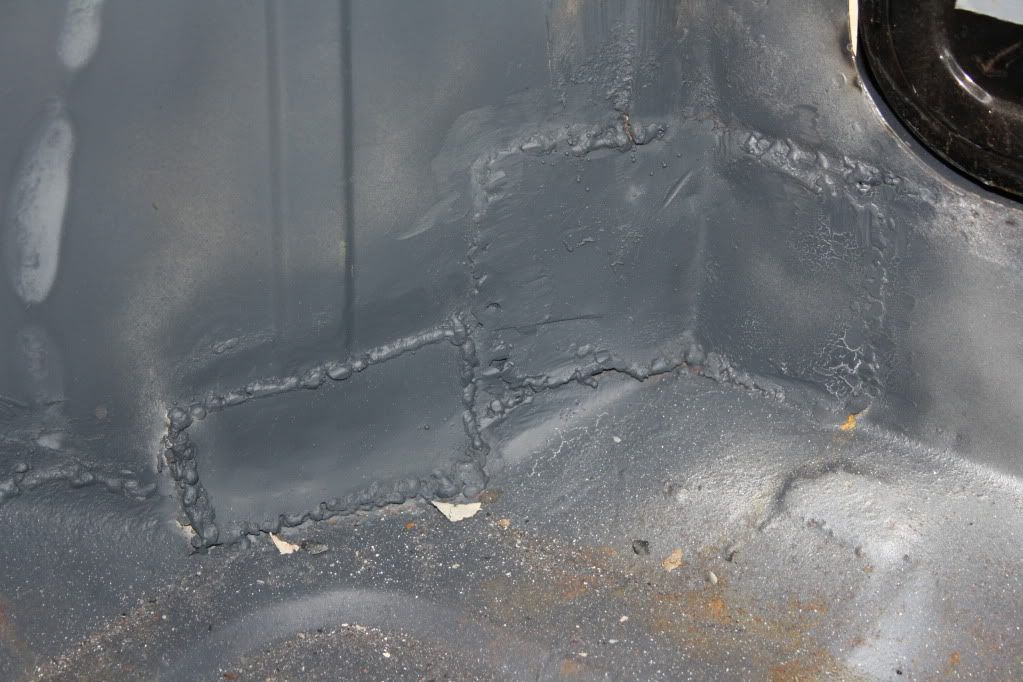
I have been practising my welding lots so i thought i would takle the shock mount areas
Before -
After -
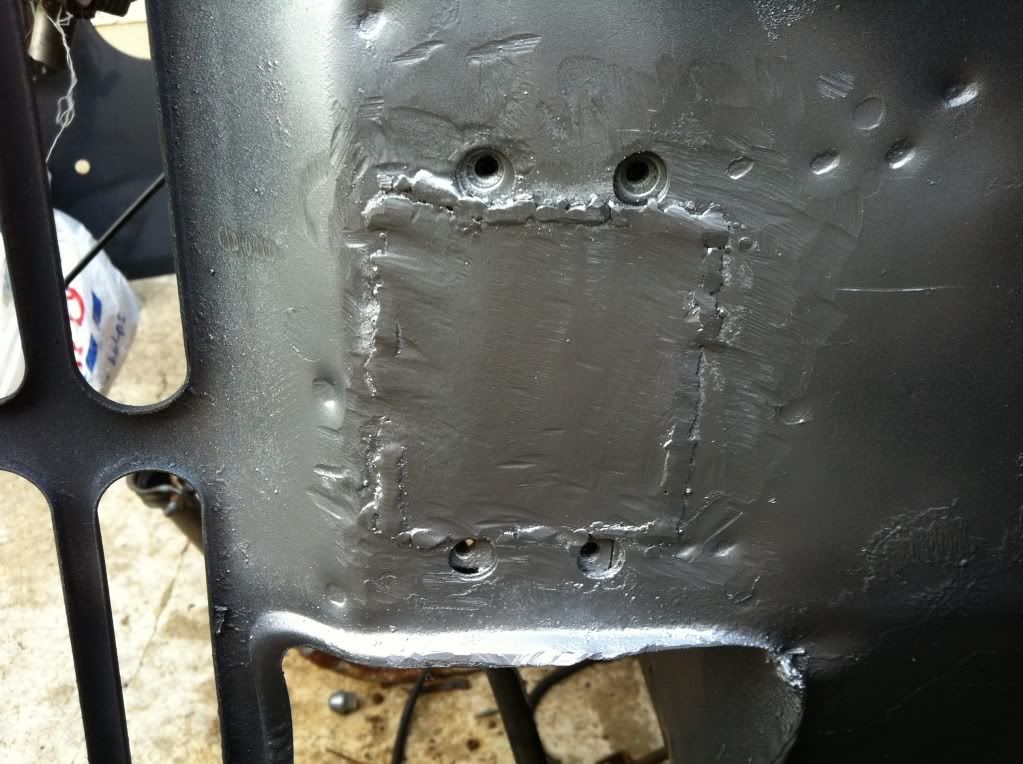
What do you think ???????????????
For my first ever weld job ( Im 16 ) its not bad going
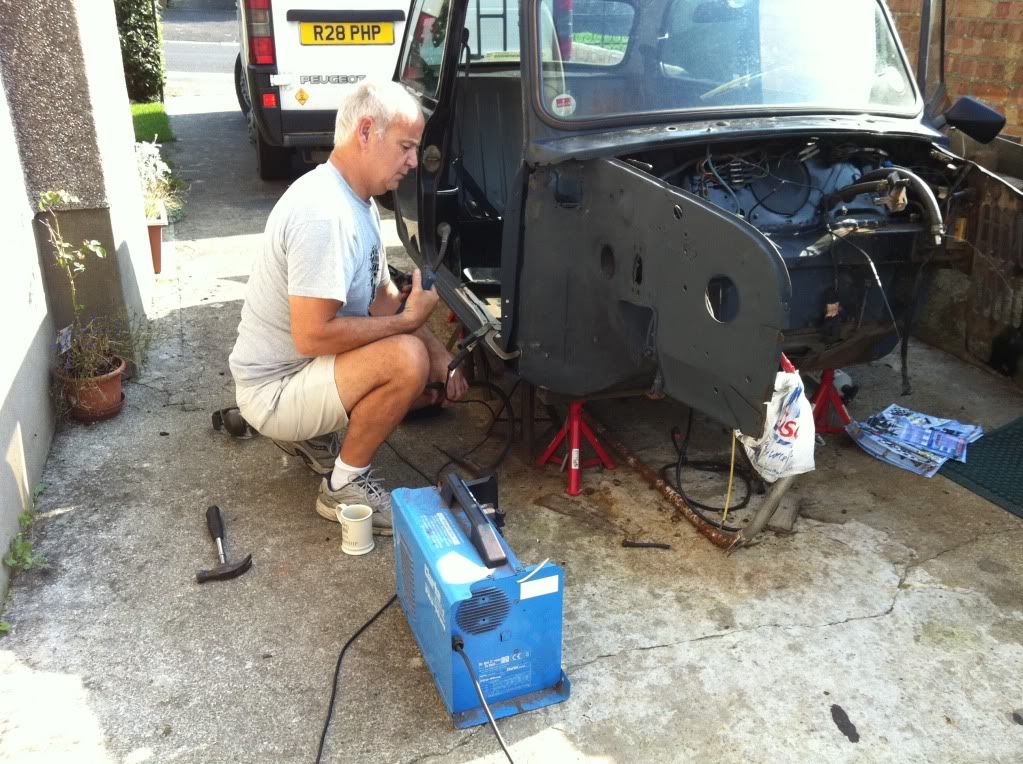
My dad helping me out -
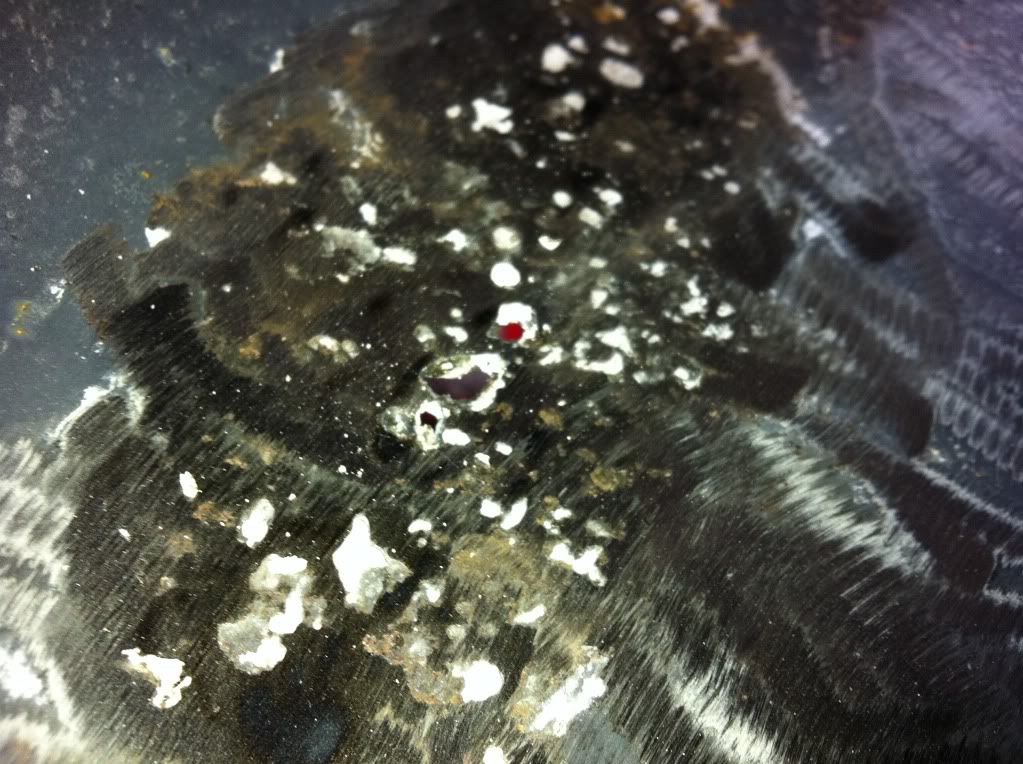
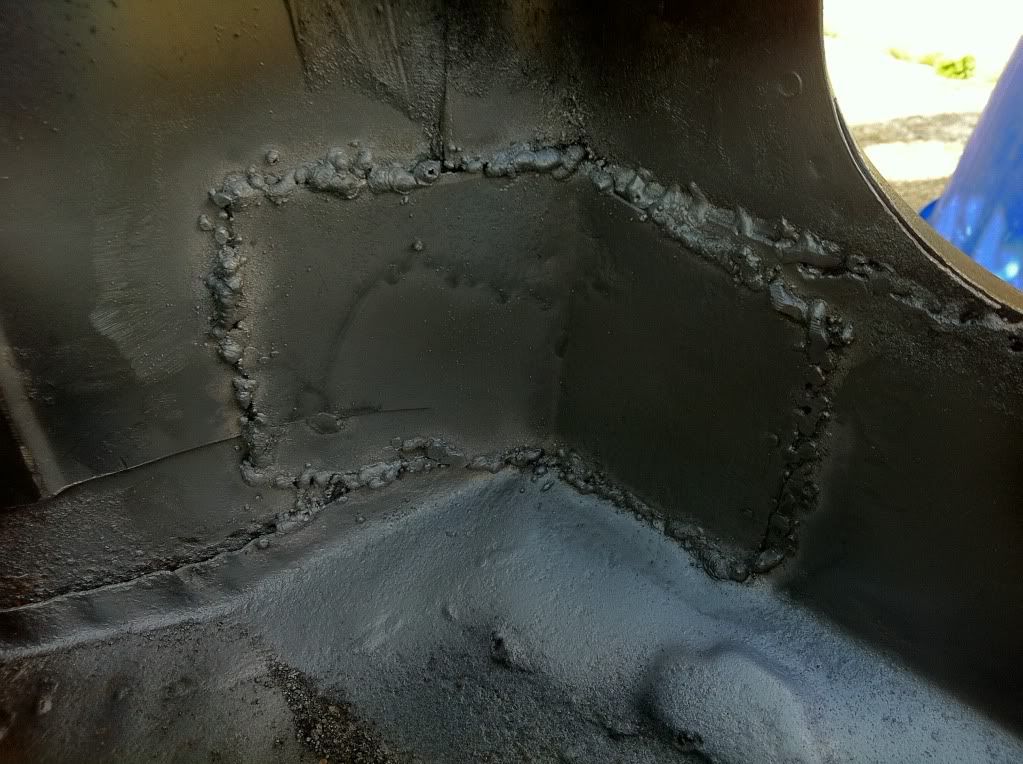
There was a hole on the inside so i patched that up. I know its not perfect but it does the job and you won't see it.
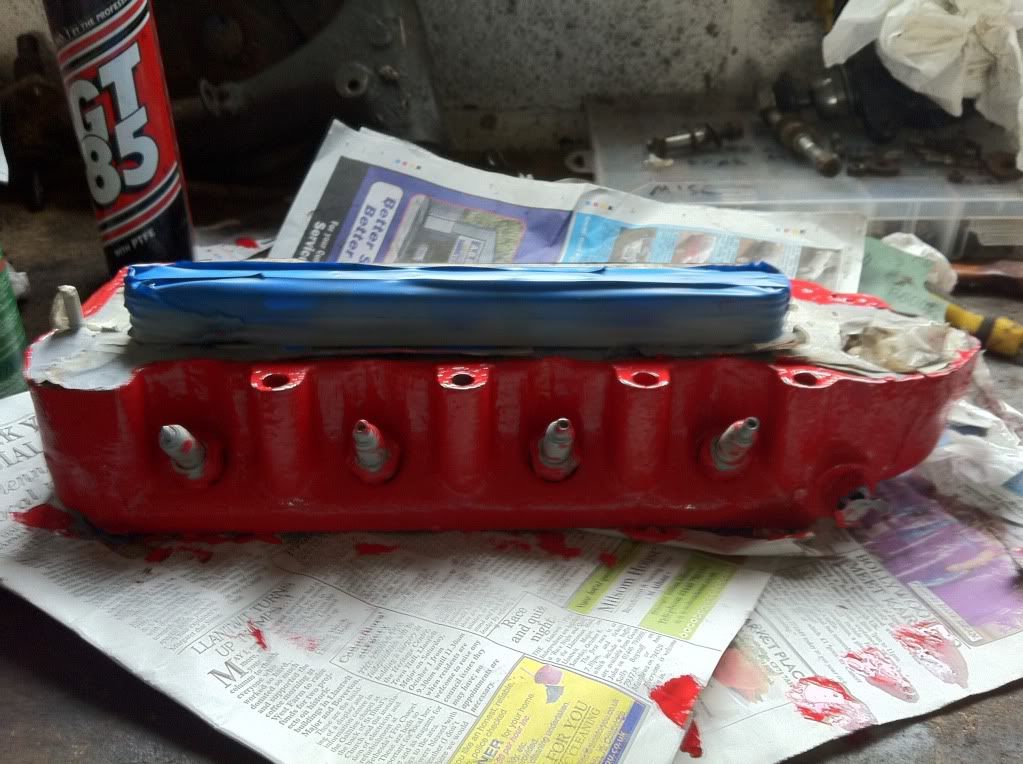
Painting my Cylinder Head -
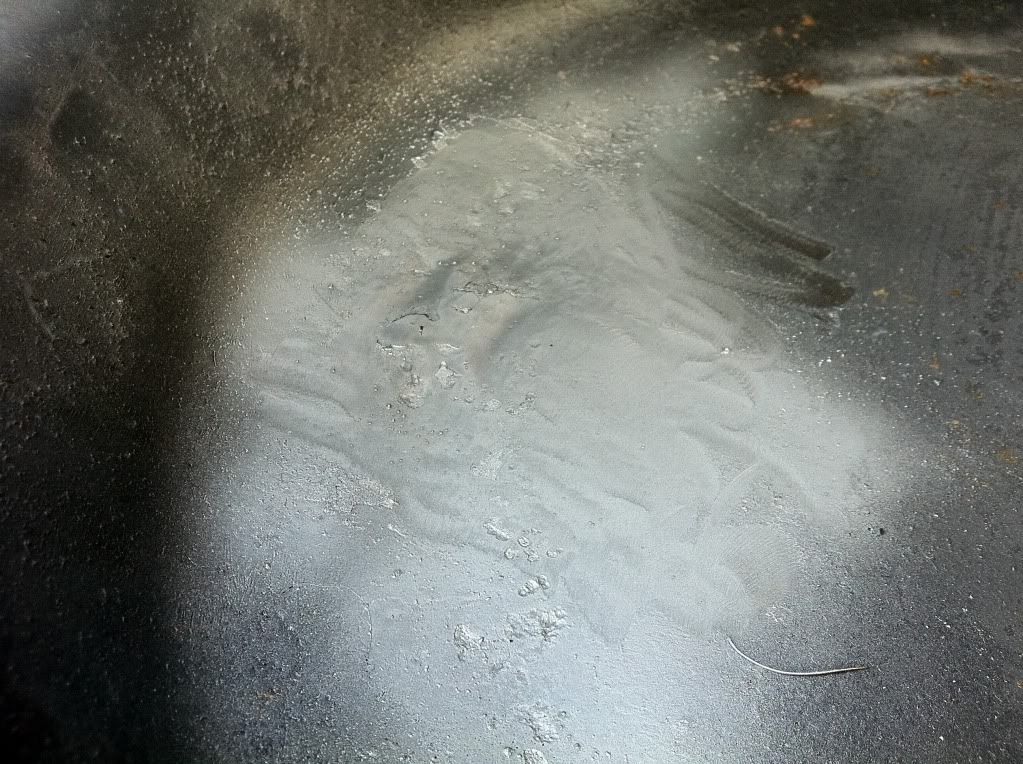
Im also in the process of removing the sound proofing ( The tar like stuff ) but I'm not finished yet, I will get a photo up when its done.
Well thats about it for today
Please add your comments tips or opinions as i would REALLY appreciate them weather good or bad.
Watch this space for regular updates.
Thanks.... Andrew
Here come the pictures -
My top arm bearings arrived on Saturday which meant i could get the cones in . And ow my God it was sooo difficult ( Considering i have never done it before )
My dad even high fived me when we finished and that is saying something as he hardly talks to me Hehe
There were 3 tiny holes in the boot that i have never noticed so i welded them up
Before -
After -
I have been practising my welding lots so i thought i would takle the shock mount areas
Before -
After -
What do you think ???????????????
For my first ever weld job ( Im 16 ) its not bad going
My dad helping me out -
There was a hole on the inside so i patched that up. I know its not perfect but it does the job and you won't see it.
Painting my Cylinder Head -
Im also in the process of removing the sound proofing ( The tar like stuff ) but I'm not finished yet, I will get a photo up when its done.
Well thats about it for today
Please add your comments tips or opinions as i would REALLY appreciate them weather good or bad.
Watch this space for regular updates.
Thanks.... Andrew
#52
grahama
-

- Members
-
- 2,442 posts
Up Into Fourth
- Location: Warrington
- Local Club: None in my area !!
Posted 03 October 2011 - 04:38 PM
Hi,
love the subframe work, hope mine look as nice when I do them this Winter. I would however have another look at the patch you have welded in. Personally I would grind them down alot and at the very least go over them, maybe with a little more power or less wire speed to join everything up and seal the gaps/pinholes you have. If there is a place for water to get in, it will.
Not critisising but you don't want to have to re-do them in a year. Hopefully someone with lots more welding experience will comment on the patch to help you. It's all a big learning curve so keep going and keep the pics coming.
Graham
#53
Andrew O
-
- Members
-
- 1,425 posts
Previously known as Andrewo330.
Posted 03 October 2011 - 04:44 PM
Thanks for your advice ( Much appreciated ). I forgot to add in that i hadn't grinded down the weld you are referring to so its not complete yet, But i see what your getting at with the holes and i will have to address that.Hi,
love the subframe work, hope mine look as nice when I do them this Winter. I would however have another look at the patch you have welded in. Personally I would grind them down alot and at the very least go over them, maybe with a little more power or less wire speed to join everything up and seal the gaps/pinholes you have. If there is a place for water to get in, it will.
Not critisising but you don't want to have to re-do them in a year. Hopefully someone with lots more welding experience will comment on the patch to help you. It's all a big learning curve so keep going and keep the pics coming.
Graham
Thanks very much ... Andrew
Ps Your project is looking great
#54
jaydee
-

- Members
-
- 8,565 posts
Crazy About Mini's
Posted 04 October 2011 - 11:05 AM
The weldings look fine, i would just fill all the little holes and imperfections a little better then carefully file down a bit on the damper mounting holes just to make sure that once you've fitted the daper mountings, they will sit straight.
On the cylinder head, are you going to skim down the top surface? if not, remove the paint on the surfaces where the nuts will be torqued..
Good luck!
On the cylinder head, are you going to skim down the top surface? if not, remove the paint on the surfaces where the nuts will be torqued..
Good luck!
#55
Andrew O
-
- Members
-
- 1,425 posts
Previously known as Andrewo330.
Posted 04 October 2011 - 11:25 AM
Thanks for the comments, Once i have ground down the welds i will go back over them filling in the holes. And i will be rubbing the paint of the mating surface.The weldings look fine, i would just fill all the little holes and imperfections a little better then carefully file down a bit on the damper mounting holes just to make sure that once you've fitted the daper mountings, they will sit straight.
On the cylinder head, are you going to skim down the top surface? if not, remove the paint on the surfaces where the nuts will be torqued..
Good luck!
Watch this space for regular updates
#56
holmesy
-
- Members
-
- 879 posts
One Carb Or Two?
- Location: Lowestoft
Posted 07 October 2011 - 02:29 PM
hey sorry i took my time to reply, college got me going lke crazy so the mini been left for a month but yours looks like its coming along well now , sprayed the roof white and am quite please for my first paint job as i only ot 1 small run so im a happy bunny, went to snetterton last weekend and a very nice mini pulled up along side of me and after having a butchers it turnt out to GEOFF MABBS 1963 morris cooper s type!! as i sat in it looked up and saw that Pady Hopkirk had signed the sun visor and everything was orginal!! as you said about making a thread ofmy build i will have a go when i get my latop back ad upload the pics of what ive done, good luck
, sprayed the roof white and am quite please for my first paint job as i only ot 1 small run so im a happy bunny, went to snetterton last weekend and a very nice mini pulled up along side of me and after having a butchers it turnt out to GEOFF MABBS 1963 morris cooper s type!! as i sat in it looked up and saw that Pady Hopkirk had signed the sun visor and everything was orginal!! as you said about making a thread ofmy build i will have a go when i get my latop back ad upload the pics of what ive done, good luck
#57
mk1leg
-

- Members
-
- 9,343 posts
Crazy About Mini's
- Location: Jersey
- Local Club: Mini Club Jersey, MCR
Posted 07 October 2011 - 07:40 PM
coming along nicely..........keep it up.................. 
#58
Andrew O
-
- Members
-
- 1,425 posts
Previously known as Andrewo330.
Posted 07 October 2011 - 08:29 PM
Thanks, Stay tuned there will be an update in the next few dayscoming along nicely..........keep it up..................
#59
Andrew O
-
- Members
-
- 1,425 posts
Previously known as Andrewo330.
Posted 22 October 2011 - 04:22 PM
Right i havnt updated in while ( Too busy with Motocross,School and working on the Mini ) so this one is a BIGGY
Ive got a week off school next week so i will hopefully be finishing the welding thats all weather dependant though.
Here we go .... Lots of pictures
Welded the new inner wing part on and cut the scuttle ready for new peace -
Dad offering up the new piece -
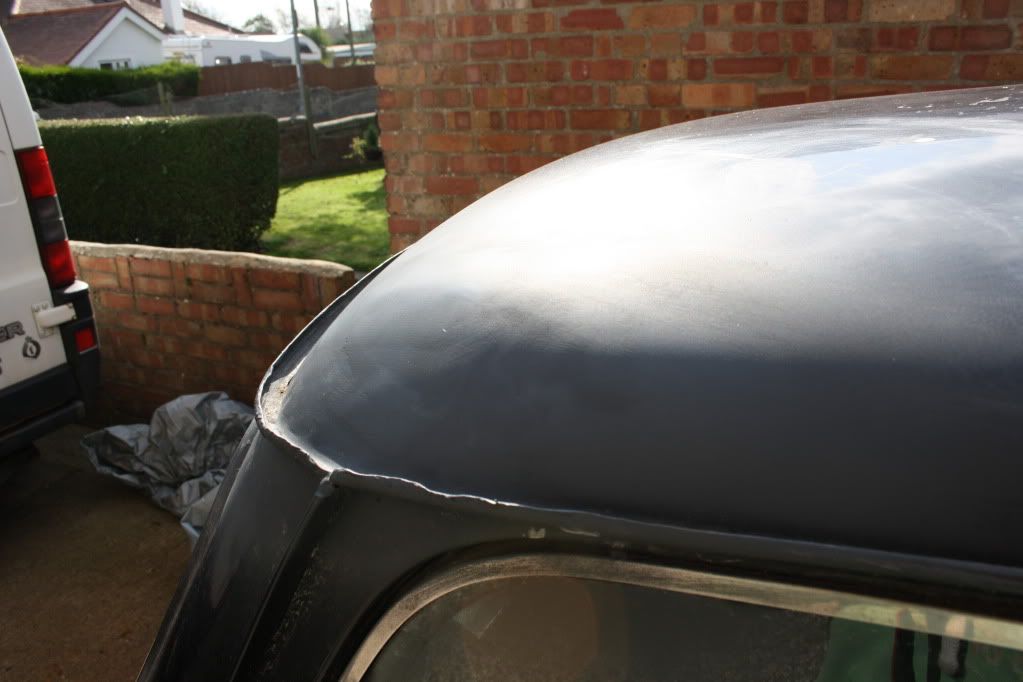
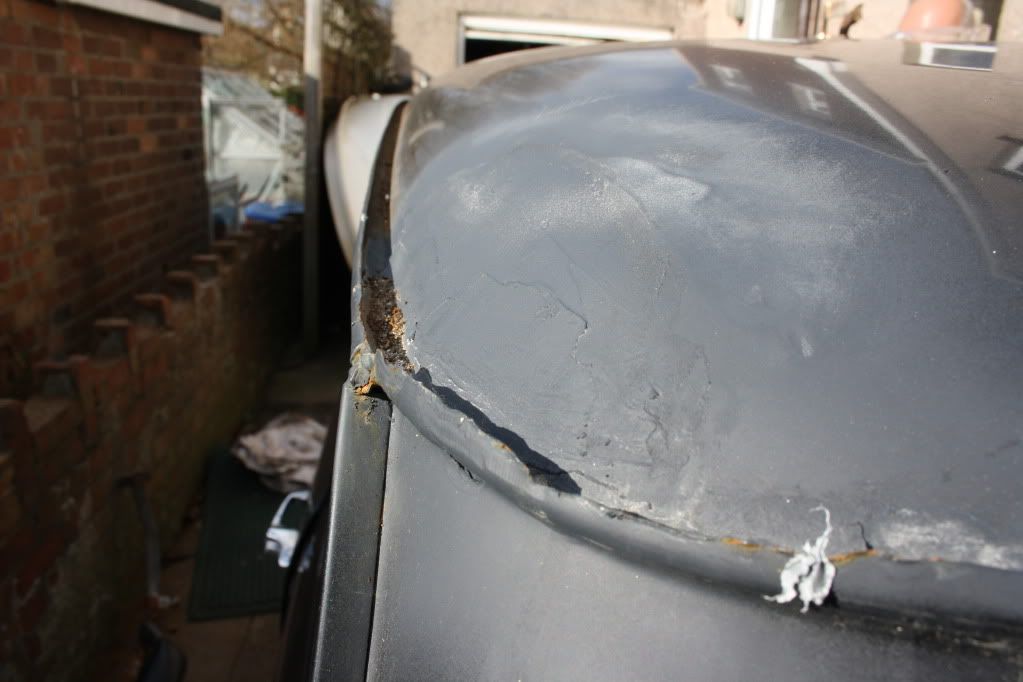
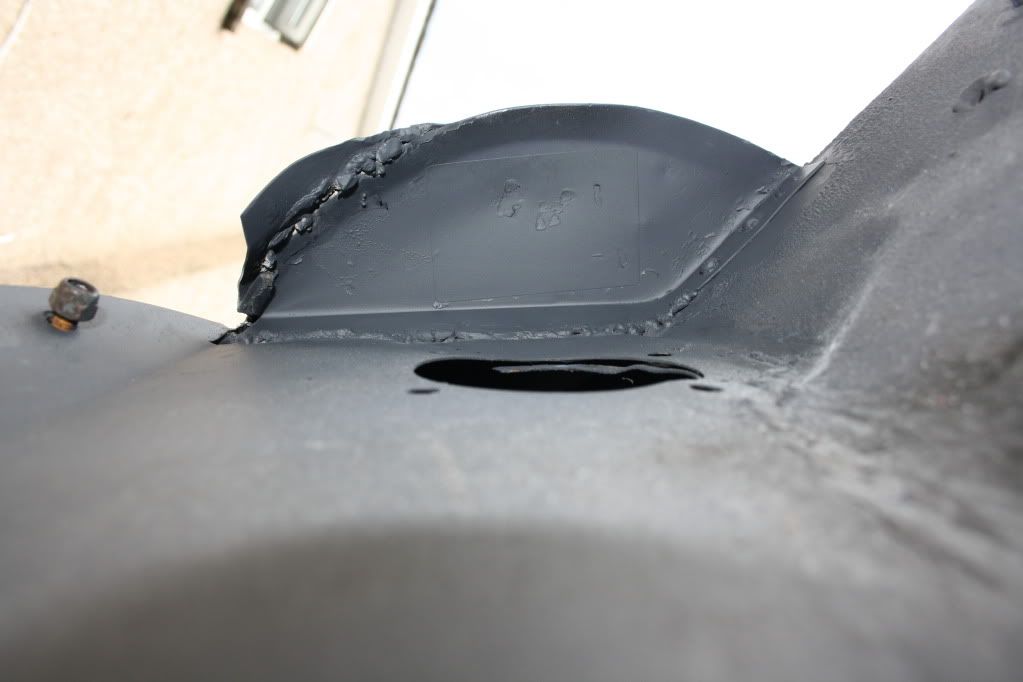
Hole in the roof all sorted -
Rear valence cut off -
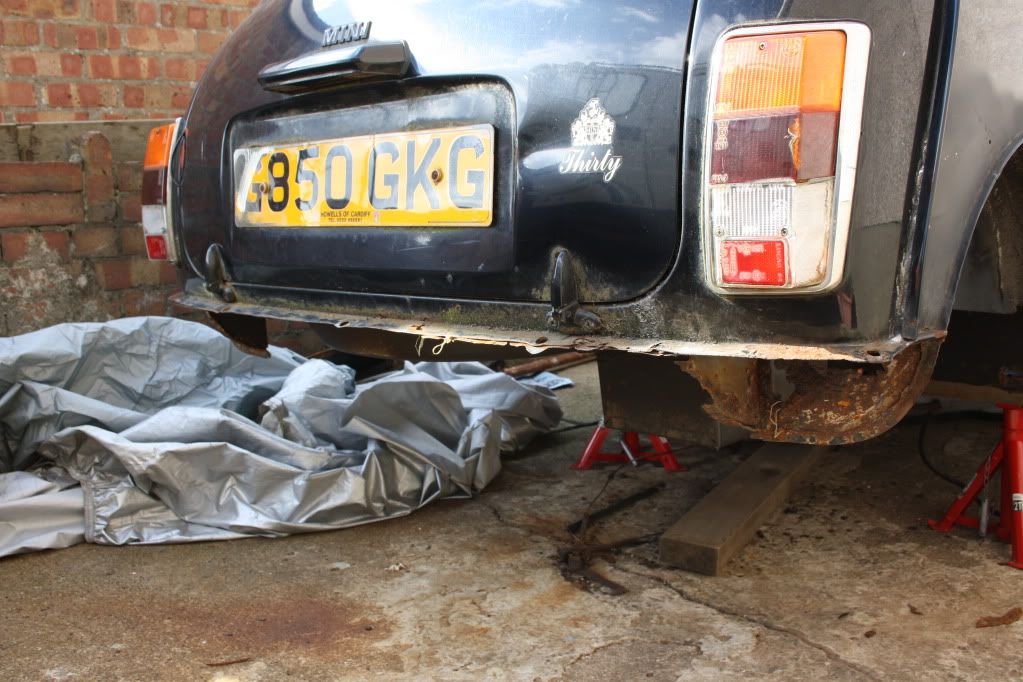
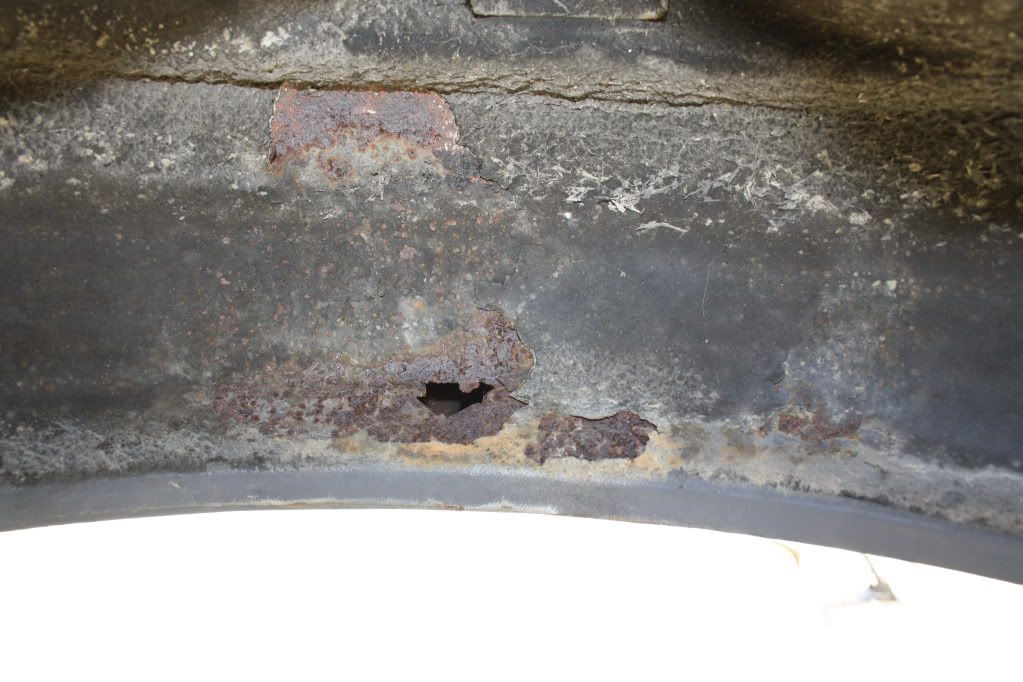
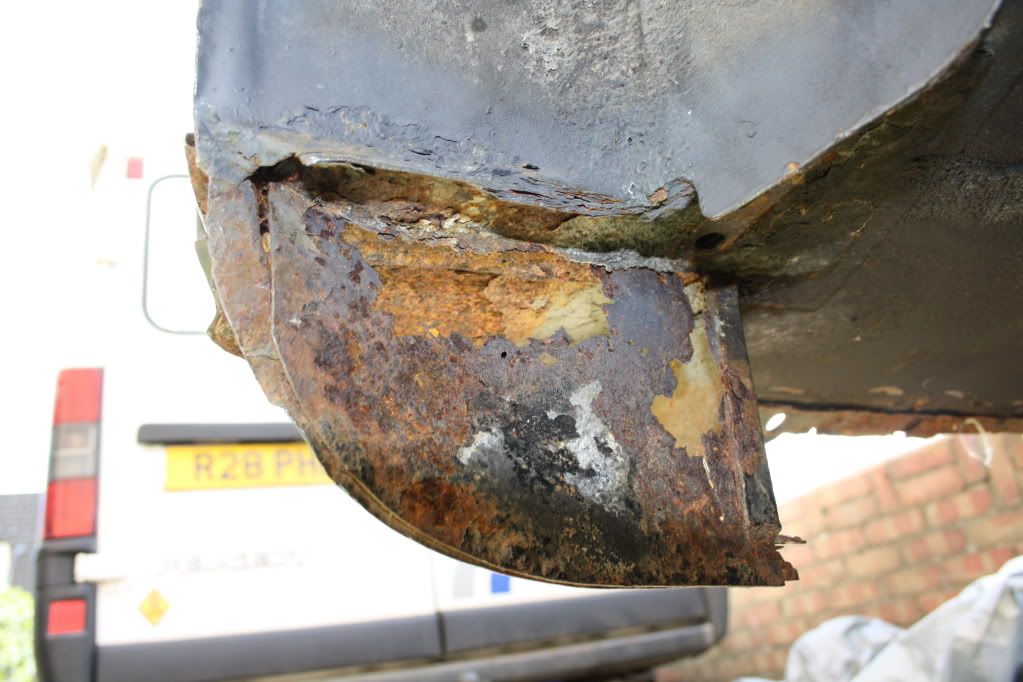
Any ideas what i should do about this???? ( Its the rear arch )
Closing panels will have to be replaced -
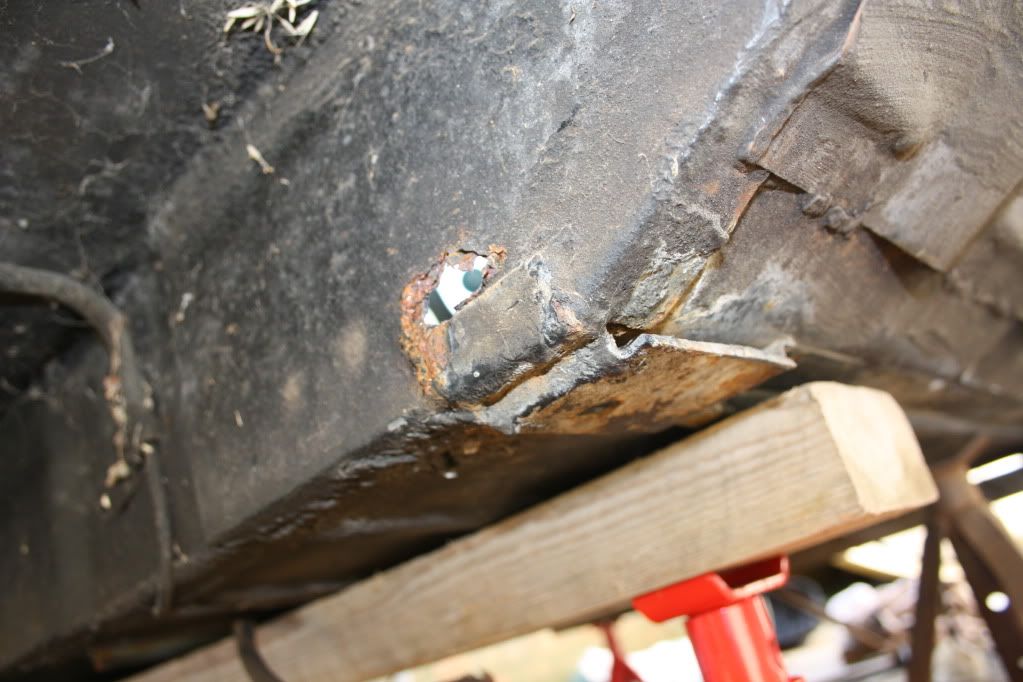
Discovered a new hole when taking the subframe out -
Second roof hole sorted ( Not sanded smooth yet ) -
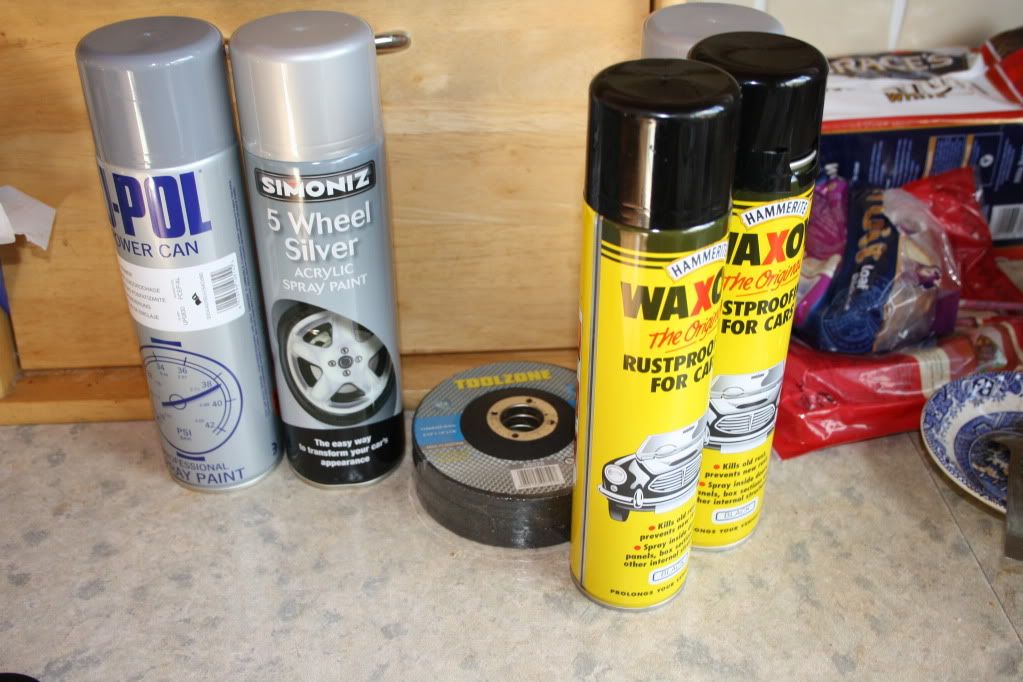
Few bits from Ebay -
Scuttle sorted out -
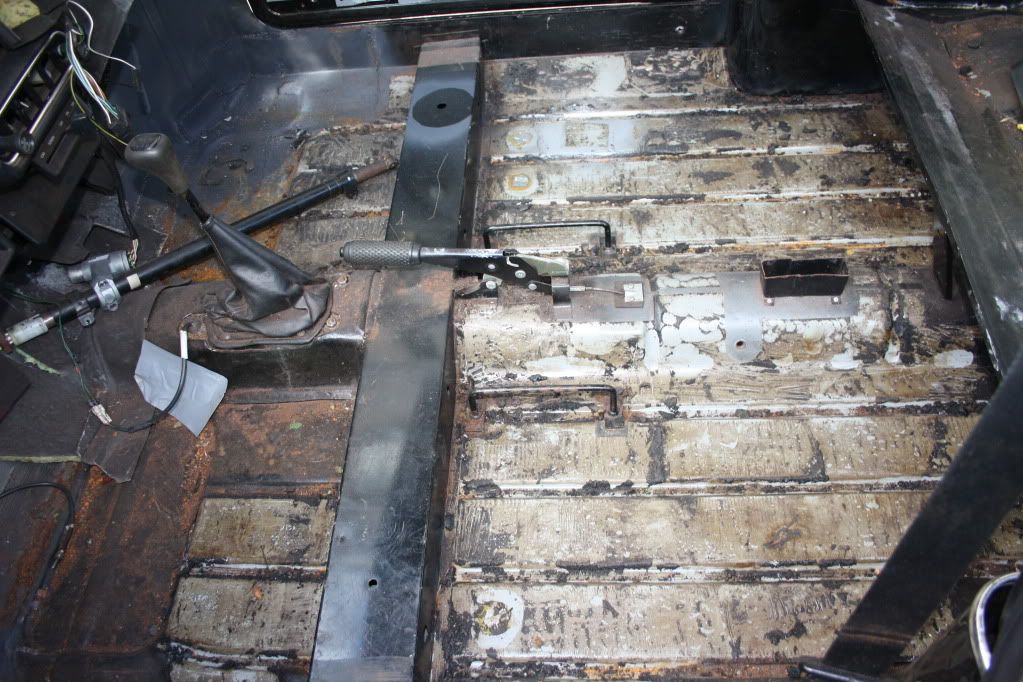
Underneath -
Sound proofing out -
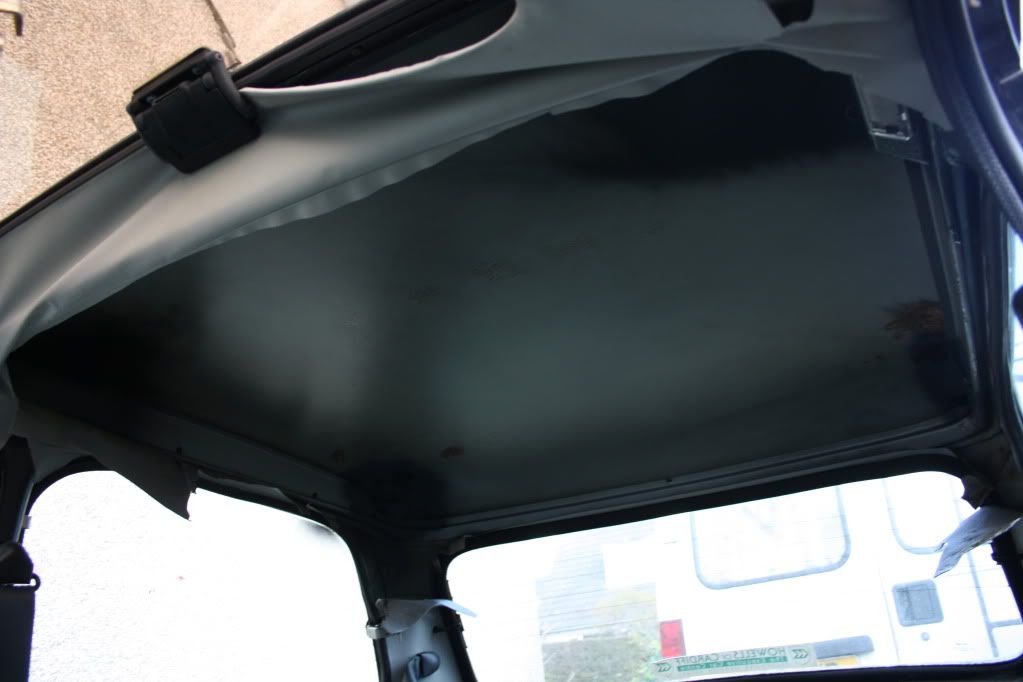
Headlining out to check the roof ( Found many spiders in the process ) -
Footwell patched up -
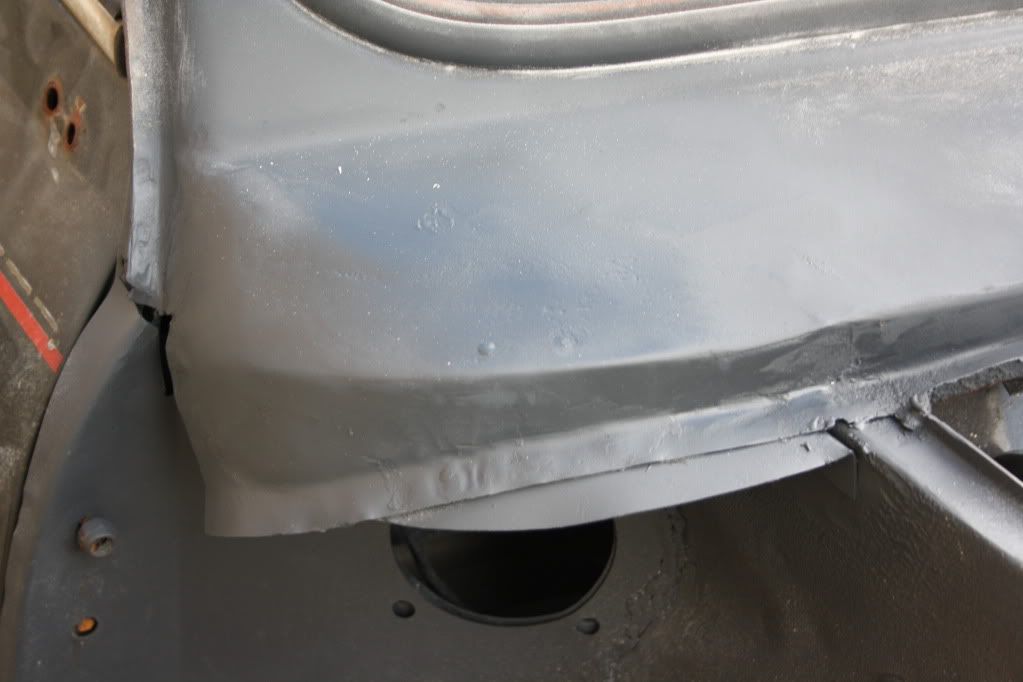
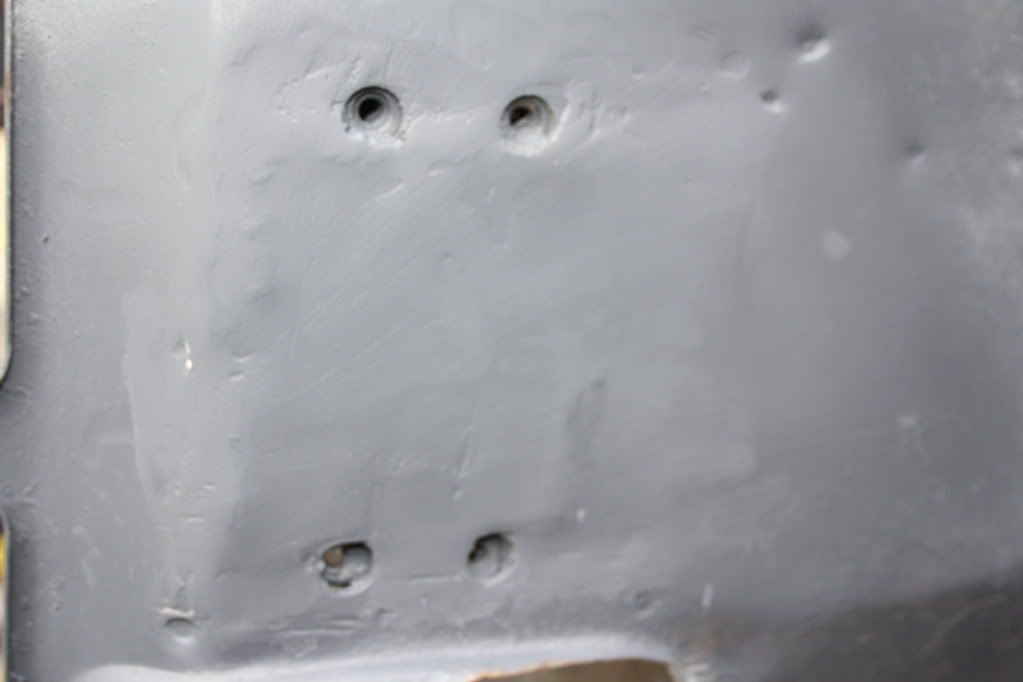
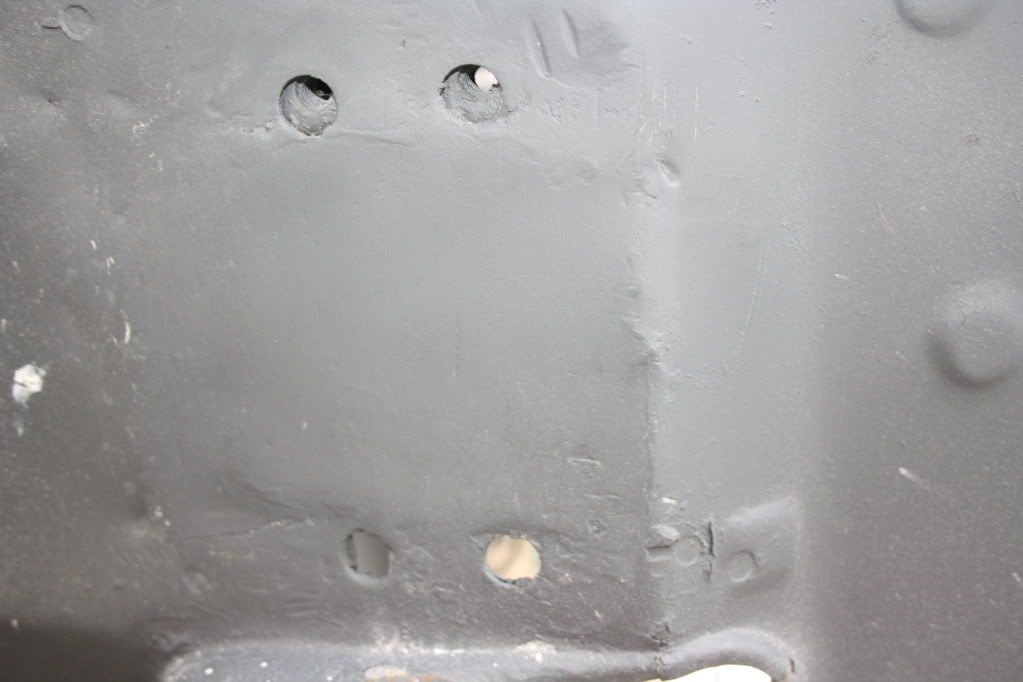
Shock mounts sorted out -
Well don't say i didn't warn you it was a big one ( Sorry admin team )
Stay tuned as there will be a lot of progress in the next week
As always PLEASE ADD YOUR COMMENTS AND OPINIONS
Thanks again Andrew.
Ive got a week off school next week so i will hopefully be finishing the welding thats all weather dependant though.
Here we go .... Lots of pictures
Welded the new inner wing part on and cut the scuttle ready for new peace -
Dad offering up the new piece -
Hole in the roof all sorted -
Rear valence cut off -
Any ideas what i should do about this???? ( Its the rear arch )
Closing panels will have to be replaced -
Discovered a new hole when taking the subframe out -
Second roof hole sorted ( Not sanded smooth yet ) -
Few bits from Ebay -
Scuttle sorted out -
Underneath -
Sound proofing out -
Headlining out to check the roof ( Found many spiders in the process ) -
Footwell patched up -
Shock mounts sorted out -
Well don't say i didn't warn you it was a big one
( Sorry admin team )Stay tuned as there will be a lot of progress in the next week
As always PLEASE ADD YOUR COMMENTS AND OPINIONS
Thanks again Andrew.
Edited by Andrewo330, 22 October 2011 - 04:23 PM.
#60
holmesy
-
- Members
-
- 879 posts
One Carb Or Two?
- Location: Lowestoft
Posted 27 October 2011 - 02:14 PM
looking good


Also tagged with one or more of these keywords: roundnose
Projects →
Mini Saloons →
1976 Mini 1000 Le "stripey"Started by cafeclassic , 03 Sep 2025 |
|

|
||
Projects →
Mini Saloons →
Mini Cooper Project - Finally StartsStarted by piphatch , 08 Jan 2025 |
|

|
||
Projects →
Mini Saloons →
1965 Austin Mini Restoration - Canadian Mk1Started by DoubleEh , 14 Nov 2022 |
|

|
||
Projects →
Mini Saloons →
Project Joe - 1991 Mini Mayfair 998Started by Eggers , 02 Jun 2022 |
|

|
||
Projects →
Mini Saloons →
Mpi Dashboad ProblemStarted by mikeprez , 22 Dec 2021 |
|

|
1 user(s) are reading this topic
0 members, 1 guests, 0 anonymous users


