Look's good cliff, are you going to make your own scuttle closing panels?

Project Checkmate....
#256

Posted 17 August 2013 - 04:10 PM
#257

Posted 17 August 2013 - 04:38 PM
Look's good cliff, are you going to make your own scuttle closing panels?
Looking at the shape and complexity i think i might yeah :)
I'l be making as many panels as i can now, might even try making some sills from scratch ![]()
![]()
Cheers Al
#258

Posted 17 August 2013 - 05:45 PM
Tidy! ![]() And how much did the folding machine set you back?
And how much did the folding machine set you back?
Edited by Smiler258, 17 August 2013 - 05:45 PM.
#259

Posted 17 August 2013 - 05:54 PM
Tidy!
And how much did the folding machine set you back?
Tada:
http://www.ebay.co.u...=item19bbb8f187
I suggest you get one Nath, will save you doing all those extra bits of welding a grinding if you can fab up one piece repairs ;)
You'll be able to find cheaper ones either brandnew or second hand, one word of warning though with these vice mounted benders is not to fold anything over 2mm otherwise it ends up like mine with a big chunk missing out of the folder so it doesn't fold very well at one end now :/ haha
#260

Posted 17 August 2013 - 06:24 PM
Cheers pal. Another item to my tool list. And I will only use it for 1mm sheet anyway. 2mm+ will be bent with an oxypropane torch and a hammer lol ![]()
#261

Posted 14 September 2013 - 06:36 PM
UPDATE!!
Hi guys and ladies,
Finaly got my mini time back today and got stuck in with some stuff on the checkmate, things (progress) is quite slow with all these little bits being done on and around the bulkhead but as soon as the flith tops and dash rail are in it should pick up pace rather quickly, but until then it just a long slog of a project within a project ![]() (much like my mk2's B-post haha)
(much like my mk2's B-post haha)
Today saw the offside dooe back on with me being able to get the drill out and re-drill some hinge stud hols in the stiffener as i repaired a lower section due to fractures in that area.
So now i'm waiting on being able to use the MIG to weld the rest of the stiffener repair up and then i can get the flitch repair welded in and then it should pick up pace in terms of updates (weather dependant ofcourse ![]() )
)
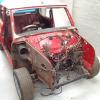
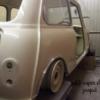
So heres a very tired looking offside front of the mini and the flitch in primer and paint ready to be trimmed and drilled on the pillar drill tomorrow:
Cheers,
Cliff
#262

Posted 18 September 2013 - 09:51 PM
Your getting there slowly :) great fabrications too :)
#263

Posted 19 September 2013 - 07:55 PM
any more progress on your projects mate?
#264

Posted 22 September 2013 - 12:49 AM
Your getting there slowly :) great fabrications too :)
Ahh thankyou, alot more to come yet haha
any more progress on your projects mate?
Afraid not as of yet tom, tomorrow should see me posting an update though, even if the weathers so bad a can't work on the main body i'l find something Checkmate to progress with ![]()
Sorry i,ve not replyed in a few days now, just had a little away time
Cheers,
Cliff
#265

Posted 22 September 2013 - 06:08 PM
Hi folks, not done much recently on any of the minis due to weather and me just having a break to be honest.
But finaly today i made a start again ![]() , allbeit at 2 or 3 O'clock
, allbeit at 2 or 3 O'clock ![]() but anyways.....
but anyways..... ![]()
So heres these little bits done so far...
Thought i'd make a stat on the flitch top panels i made and fitting them in place ready to weld in tomorrow if i can so trimmed the nearside one up and did abit of welding (WITH GAS!!! ![]() ), my firt bit of MIG welding with gas in too long!
), my firt bit of MIG welding with gas in too long!
In place mocked up and looking okay, primed it tonight so a few cats and some zinc primer tomorrow and ready to get welding haha
Seeing as i,ve almost finished the stiffener repair on the lower edge i,ve drilled out the flitch panel so i can plug weld in plase as per the other side, and also i,ve started making a channel section for the offside were the wing spot weld to as the one was rotted and cut out by me:
Cheers,
Cliff
#266

Posted 22 September 2013 - 06:21 PM
![]() Tidy stuuuff
Tidy stuuuff ![]()
#267

Posted 22 September 2013 - 06:27 PM
Tidy stuuuff
Cheers Nath, just getting back into the mini jist of things hahha, suprised at how lost i felt till i got going with it, thought i'd never get anything done when i walked upto it today ![]() , i'm going to move the Checkmate to the other side shortly so i have more room to play with, currectly having to lean on a landrover gearbox
, i'm going to move the Checkmate to the other side shortly so i have more room to play with, currectly having to lean on a landrover gearbox ![]() haha
haha
pretty pleased with how these flitch tops have turned out but not sure if my weldings any good so far, just seems abit lumpy in the pictures above
Cheers,
Cliff
#268

Posted 22 September 2013 - 07:46 PM
I've found I cant turn the settings down anymore or the rod hits the metal, blobs up the gun, and splats on the floor lol.
#269

Posted 22 September 2013 - 08:07 PM
The mini bead above looks fine. So long as it penetrates well it's a good'n.
I've found I cant turn the settings down anymore or the rod hits the metal, blobs up the gun, and splats on the floor lol.
Haha sounds quite humorous that ![]()
![]()
I'l have to play about with the settings on some crap, i pretty much just picked it up and started welding so i'l be good to go soon enough no doubt, i see you're making great progress on yours (i,ve not yet commented but im watching you ![]() )
)
#270

Posted 23 September 2013 - 08:48 PM
Hi Again folks,
Managed to get that flitch top welded in today with an extra coat off primer after and paint (brushed on)
Welding has okay penertration and is getting there the more i do (obviously ![]() )
)
And then after that i decided i needed to jiggle the mini over abit to give myself a little more room on the driverside flitch repairs as its going to be more of a fiddle re-creating the innerwing rail that the wing spot welds onto:
Cheers
Cliff
2 user(s) are reading this topic
0 members, 2 guests, 0 anonymous users


