Jump to content


Photo

Danish 1977 Van

van

  • Please log in to reply
117 replies to this topic

#91 Cavazzi

Cavazzi

    Stage One Kit Fitted

  • Noobies
  • PipPipPip
  • 75 posts
  • Location: Herning

Posted 11 April 2016 - 06:16 PM

Thank you I will do the same!

No problem, it looks good and neat if done well.


I'd like to do something similar for my van although my wood working skills are limited so might get someone to do it for me.

If you'd like a set for your van we could might work something out. i can find out the price if you want.


#92 simpsonsclassics

simpsonsclassics

    Mini Mad

  • Noobies
  • PipPipPipPip
  • 106 posts
  • Location: UK

Posted 13 April 2016 - 05:45 AM

Really like that wood paneling in the back looks nice and tidy :)


#93 Cavazzi

Cavazzi

    Stage One Kit Fitted

  • Noobies
  • PipPipPip
  • 75 posts
  • Location: Herning

Posted 17 April 2016 - 07:16 PM

The assembly have begun.

Ordered a lot of spares and overhauled some of the old spares that was still in a reasonable condition.

All bolts and nuts on subframes are stainless steel, even the steering arms locktab are made of stainless steel, and all other parts except hubs and wheel flange have been zink plated. New bushes and bearings all over.


Found a good offer on springs, with hilo, instead of rubber cones and there where even a good offer on a 3 core aluminum radiator, so obviously i had to get one of those too.


Front subframe are already assembled, and the rear subframe will be delivered for powder coat tomorrow and i will hopefully have it back this week. The new steering rack have been installed and i did remember to fit the anti friction strips and the foam thingy.


Also having a sandblasting cabinet really makes things easy at this stage.


FOT91D6_zpst0zavkfu.jpg


FOT33A8_2_zpsvbppfynh.jpg


FOTAAE9_zps8tfsh2rc.jpg


WP_20160417_18_04_47_Pro_zpsuqb2nwpg.jpg


WP_20160417_zpstqhuewvc.jpg


WP_20160417_17_41_15_zpsxdomvauu.jpg


Brgds

Christian


Edited by Cavazzi, 17 April 2016 - 07:16 PM.


#94 simpsonsclassics

simpsonsclassics

    Mini Mad

  • Noobies
  • PipPipPipPip
  • 106 posts
  • Location: UK

Posted 18 April 2016 - 05:44 AM

Nice and fresh, not long until its down on the ground again sat on its wheels


#95 Cavazzi

Cavazzi

    Stage One Kit Fitted

  • Noobies
  • PipPipPip
  • 75 posts
  • Location: Herning

Posted 30 April 2016 - 08:55 PM

Been a busy couple of weeks.


Fabricated a way more complicated than needed engine stand :genius: , and the rear subframe is almost finished.


Had to build a engine stand for when i start working on the engines i have lying around (currently counting 4). Started looking for one to buy but we quickly decided we could build one ourself that was atleast as good. Well one idea took the other and now it folds, has a lot of locking positions, detachable arms for turning, grease points and spring loaded lock pin. Everything can be disambled with only a few screws if needed and of course it is partially zinc plated. :shades:


Rear subframe wasnt in a good condition but we decided to use it anyway, it was sanblasted and powdercoated like the front subframe. camber adjusting brackets was also sandblasted and zinc plated as the paint that was on was so thin you could see through it. mounting brackets and back plates were zinc plated too. All bolts and nuts are stainless steel and new bushes all around.


Ordered the wrong type of drums for the flages i had, so either new drums or new flanges.


Currently working with the brake pipes but have only had time to finish the rear subframe.


Engine stand.

IMAG1273_zpswjgggftm.jpg


IMAG1271_zpsvgneugmy.jpg


IMAG1272_zpsksqjzrye.jpg


Almost finished.

IMAG1281_zps0vqzedbo.jpg


IMAG1278_zpspeapyhr7.jpg


Nice and neat.

IMAG1277_zpsefol63uh.jpg


Flaring tool kit for brake pipes.


IMAG1276_zps4y1topnc.jpg


Thats all for now.


Christian Cavazzi


#96 Cavazzi

Cavazzi

    Stage One Kit Fitted

  • Noobies
  • PipPipPip
  • 75 posts
  • Location: Herning

Posted 09 May 2016 - 10:49 PM

Things are still happening! but been a little slow due to other projects and I've started studying for a motorcycle license.


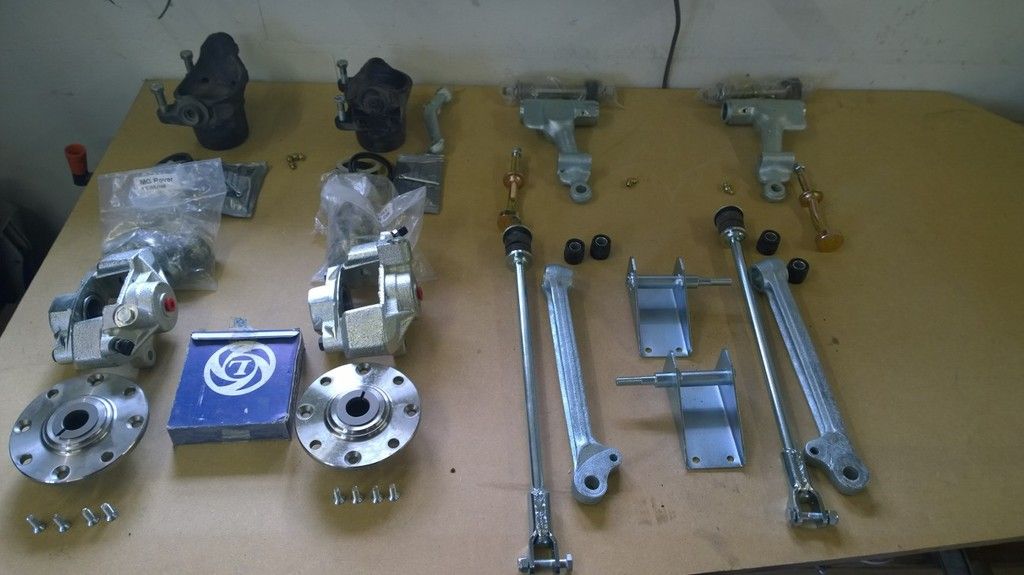
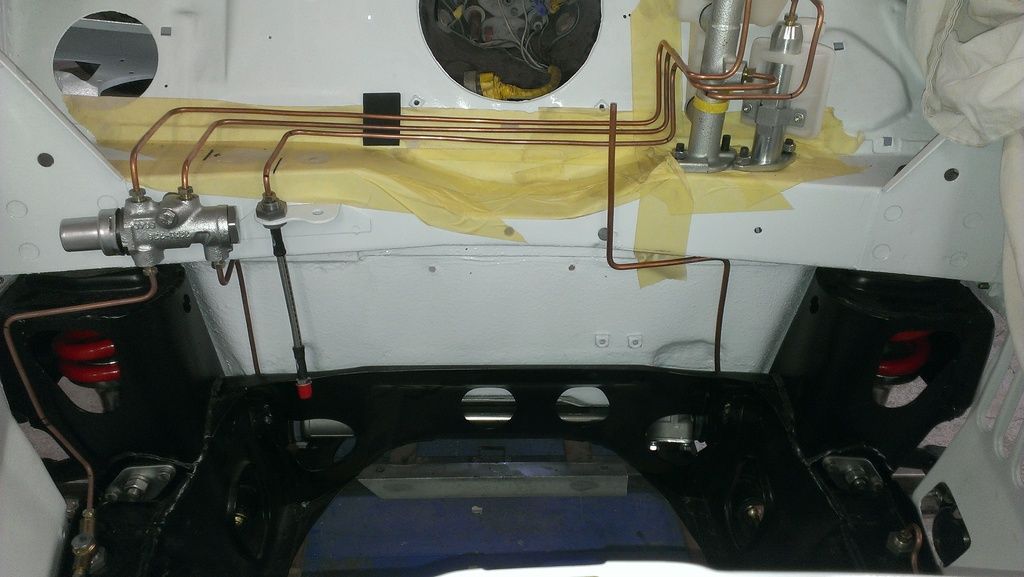
More brake parts have been ordered and some installed too, still need a little more piping to do.


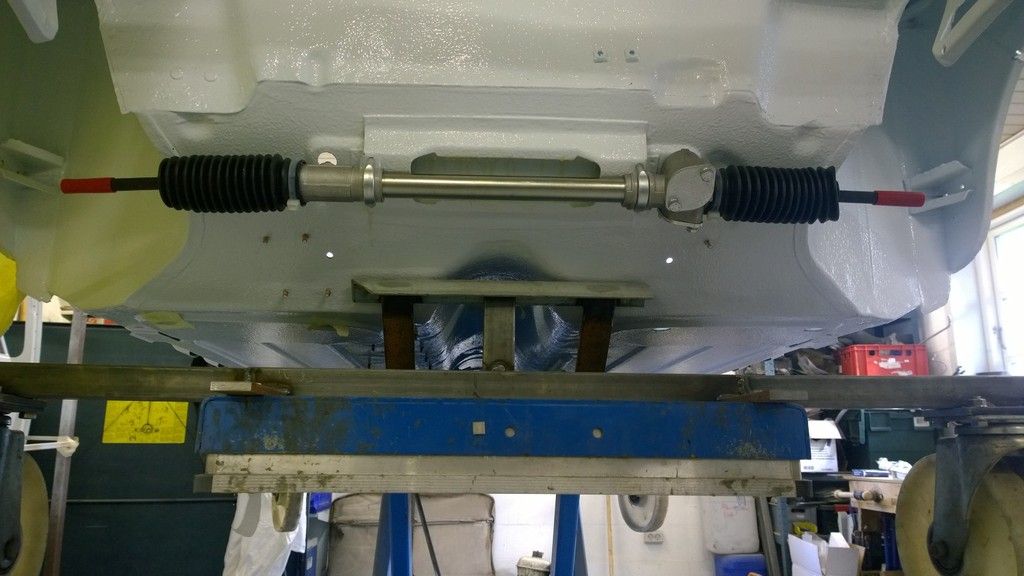
Pedal unit was disassembled, sandblasted and painted, so has the steering rack.


Heater unit was disassembled, sandblasted and painted. Put it together with new foam but kept the old facia for the patina but im not sure if its gonna stay.


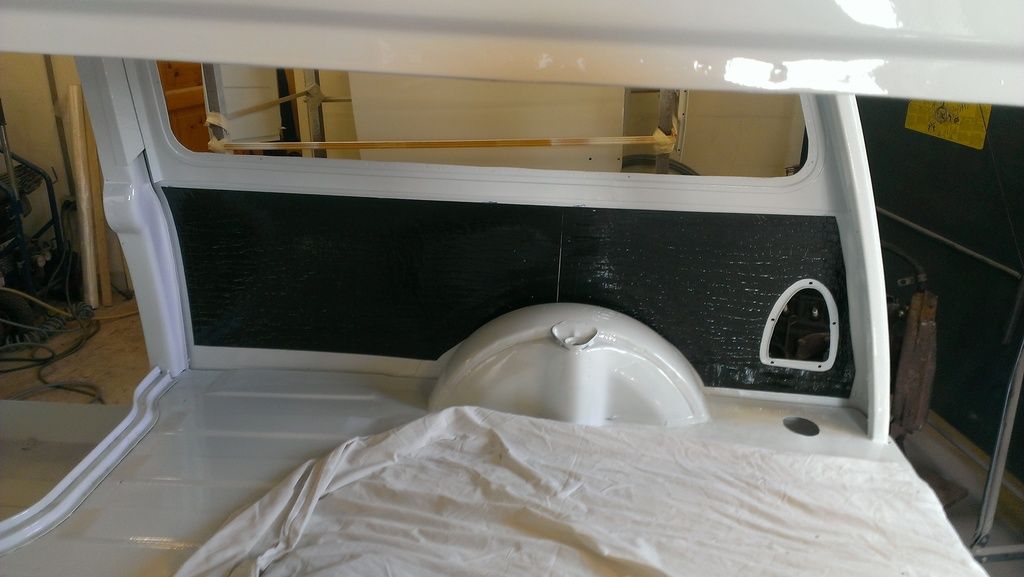
Got the sound deadening panels in which really makes a difference. this is a industrial type but very similar to the popular dynamat and only costs 30£ for 4,5m3 compared to 160£ for 3,3m3 of dynamat.


Also started working on the dash, which is a 3 piece wooden one, but the wood is in bad condition so it will have new laminate which will also be Santos palisander.


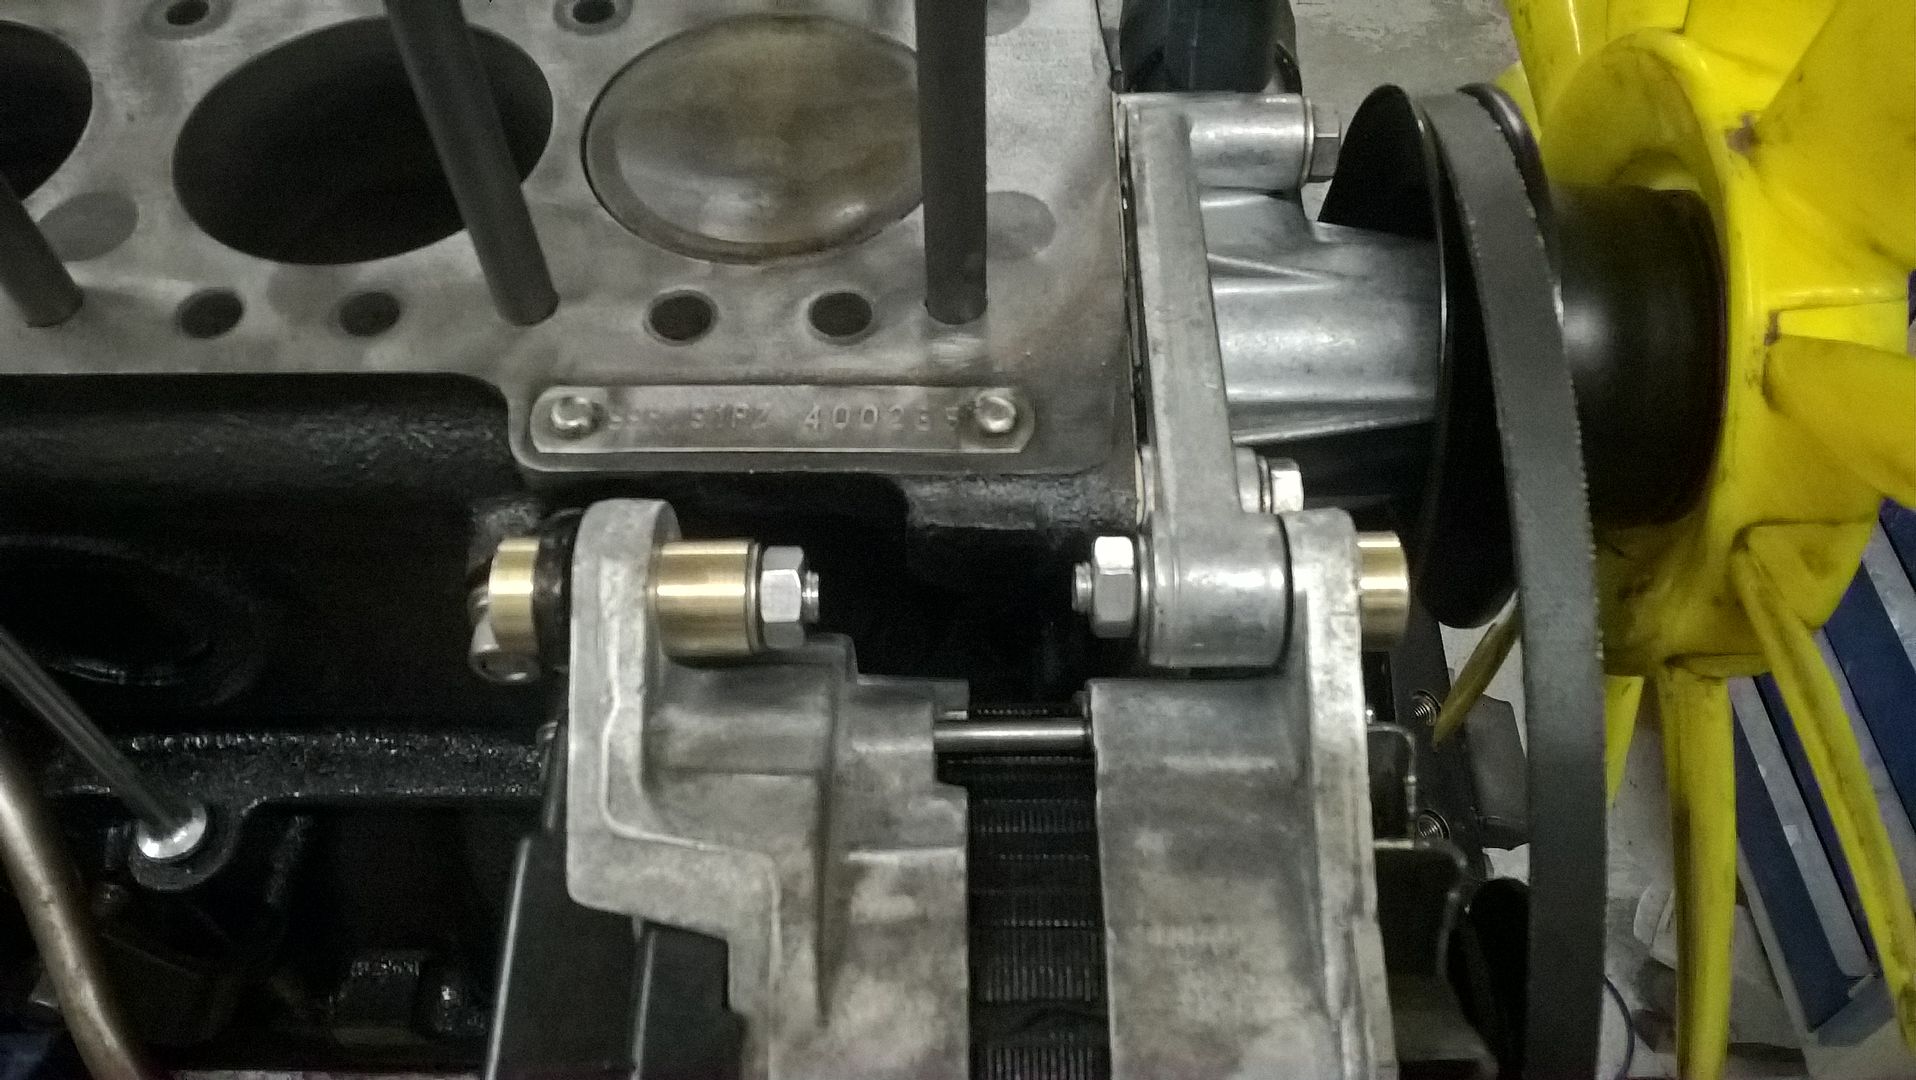
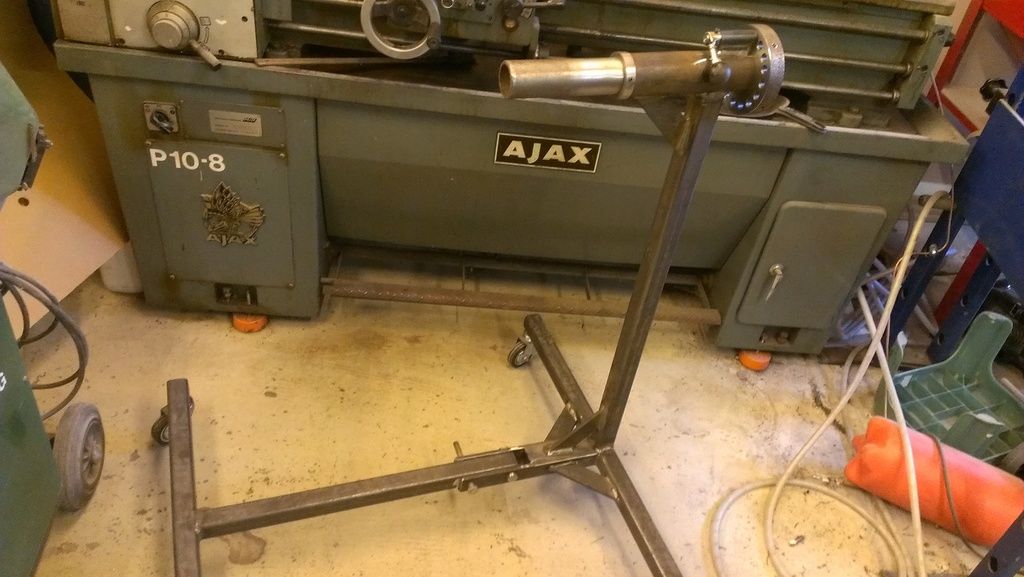
Last week i started on the gear selector unit, which i thought would be a quick clean and re grease and it was good to go, but of course not. The hole for the selector rod was badly worn and the other casing i have, has bad pitting from rust. it was cleaned in a petrol bath for almost 1 week before it was left in the ultrasonic for a couple of hours. Then i had to sort out the problems with poor design of this.


IMAG1286_zpsyd9enqco.jpg

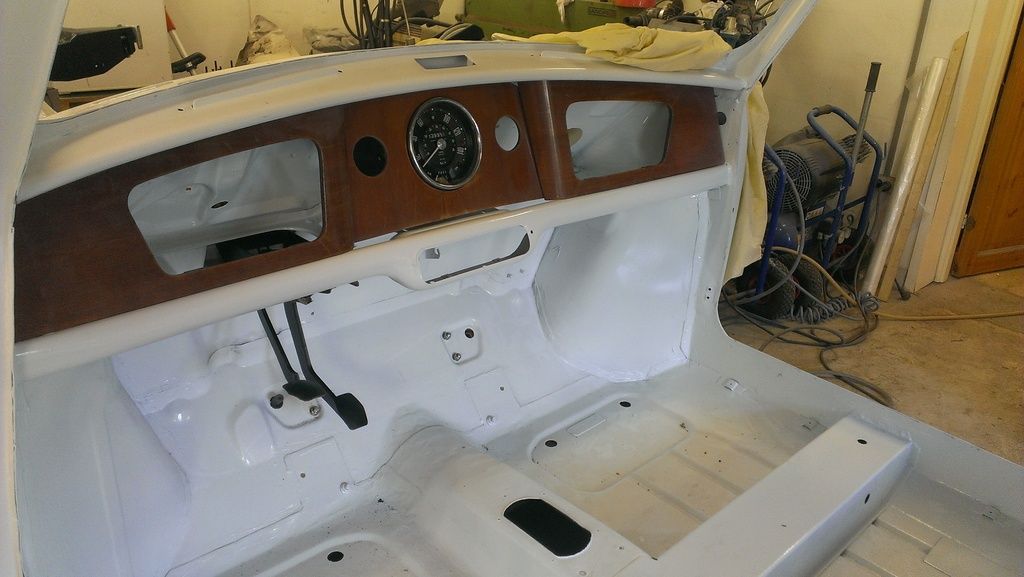
The center piece i have to make a whole new panel as the old one is a very bad fit, currently in the process of cluing the laminate to a board, and it takes days to harden.


The lower dashrail have to be resprayed as it will not be covered and it has a few runs and dents.
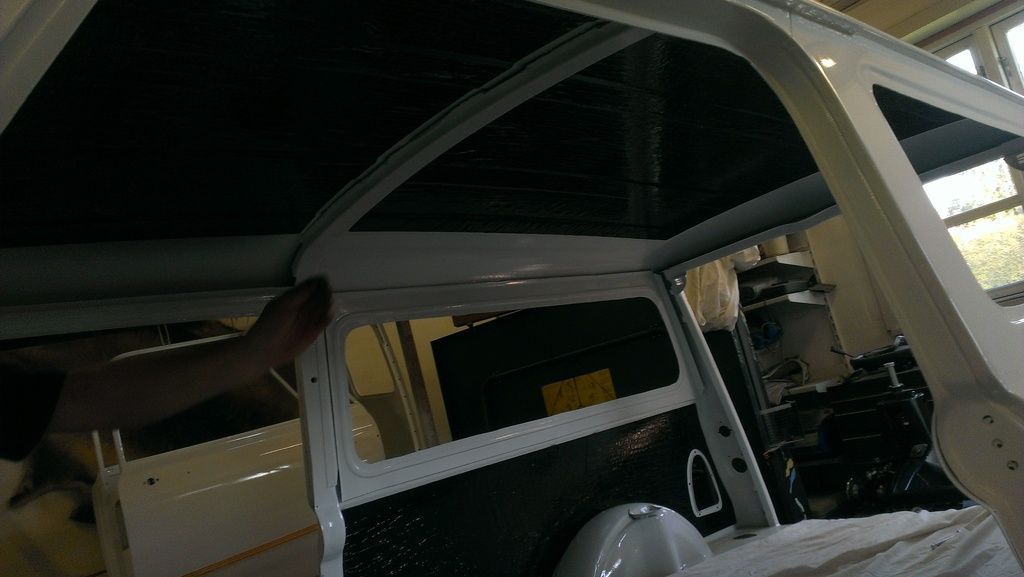
 

IMAG1284_zpszhjoslcx.jpg


IMAG1285_zpsq7oeyosz.jpg

Yes its my arm..


IMAG1288_BURST002_zpsdrqxu0ee.jpg

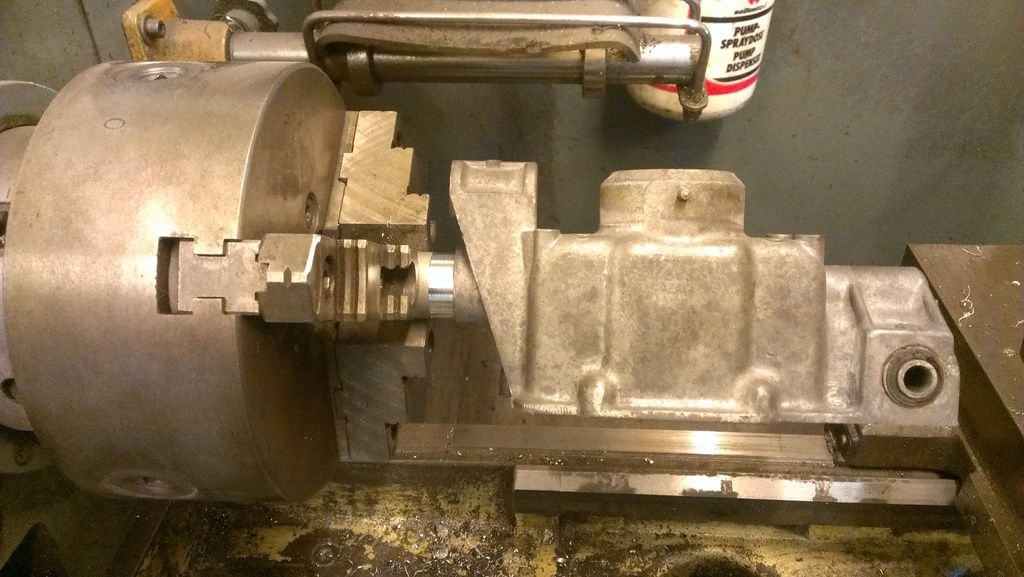
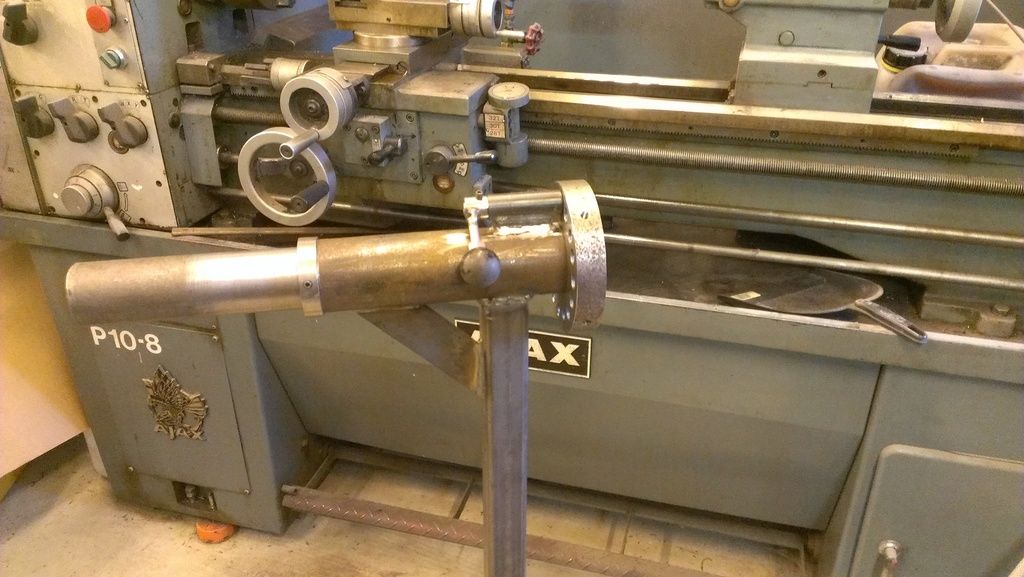
Had to drill out a lot due the the worn hole was oval. To do this i made up a bush in the lathe to center a 20mm drill.


IMAG1290_zpsgimqjjbd.jpg

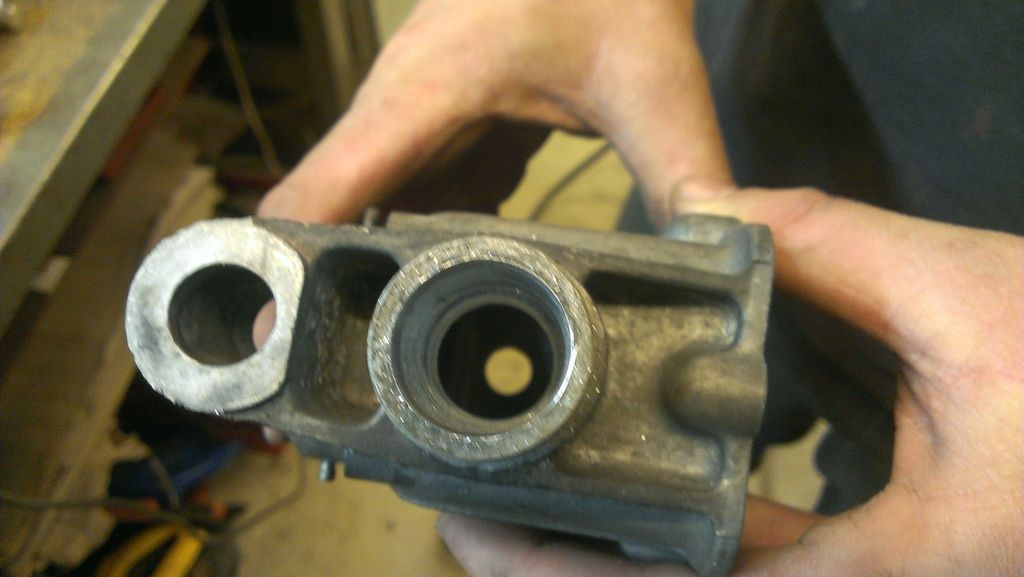
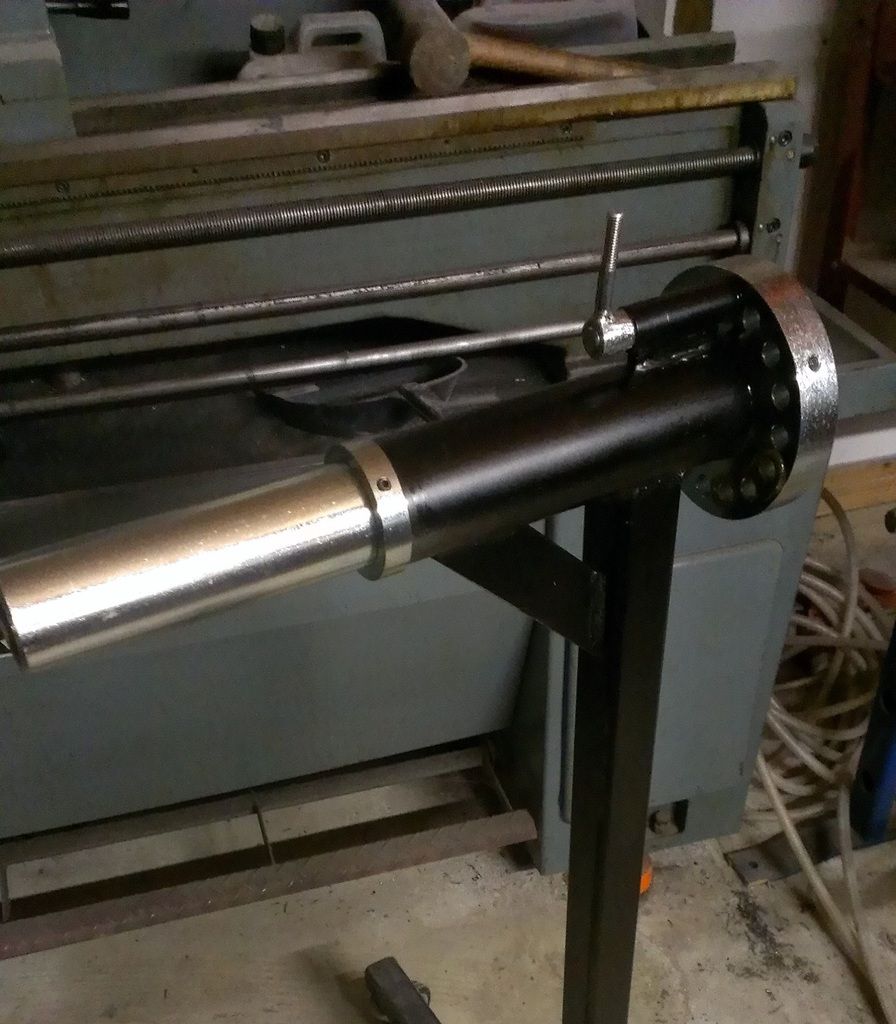
The hole after being drilled to 20mm and removed the bush, nice and center thanks to the bush. it was drilled out in a pillar drill which was quite difficult to mount in the correct position.


IMAG1292_zpskiqqcjnl.jpg

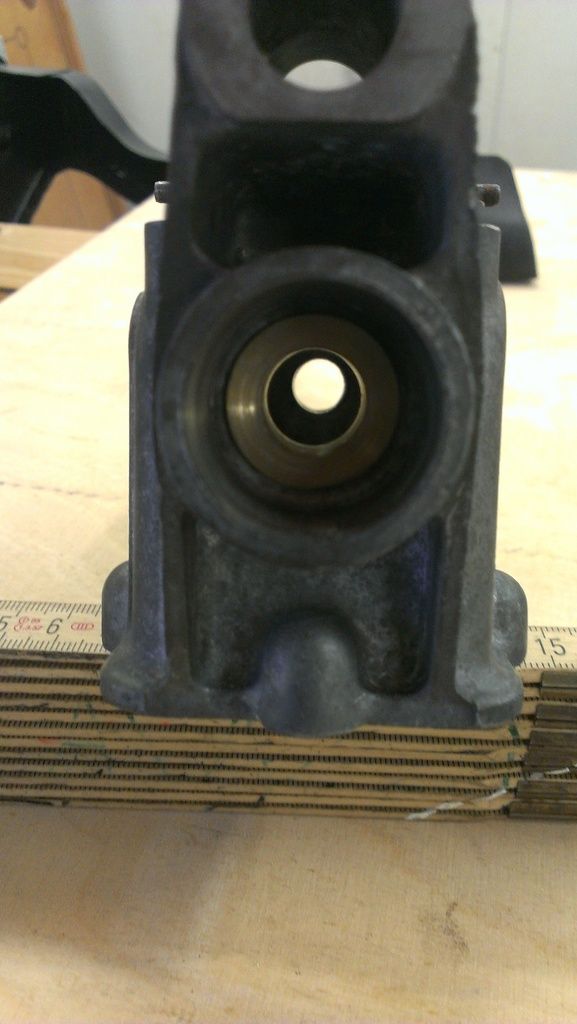
With new brass bush pressed into the aluminum casing. to help prevent dirt getting in and messing up my new bush i have bought a dust cap (simmering) 12x25 which should fit nice and tight over the new stainless steel selector rod i will make up when i get the material.


Thats all for now folks.


C. Cavazzi


Edited by Cavazzi, 09 May 2016 - 10:52 PM.
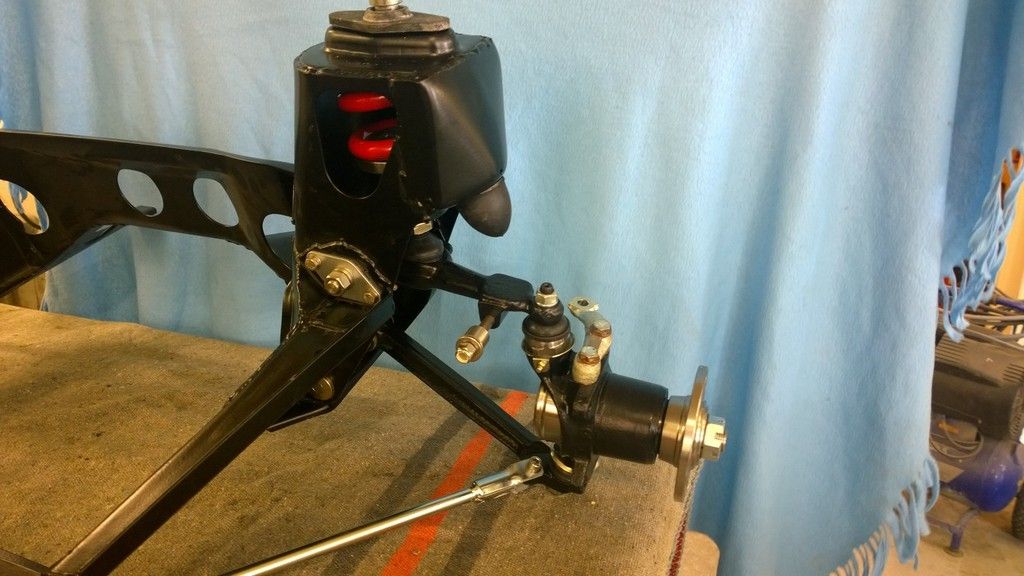
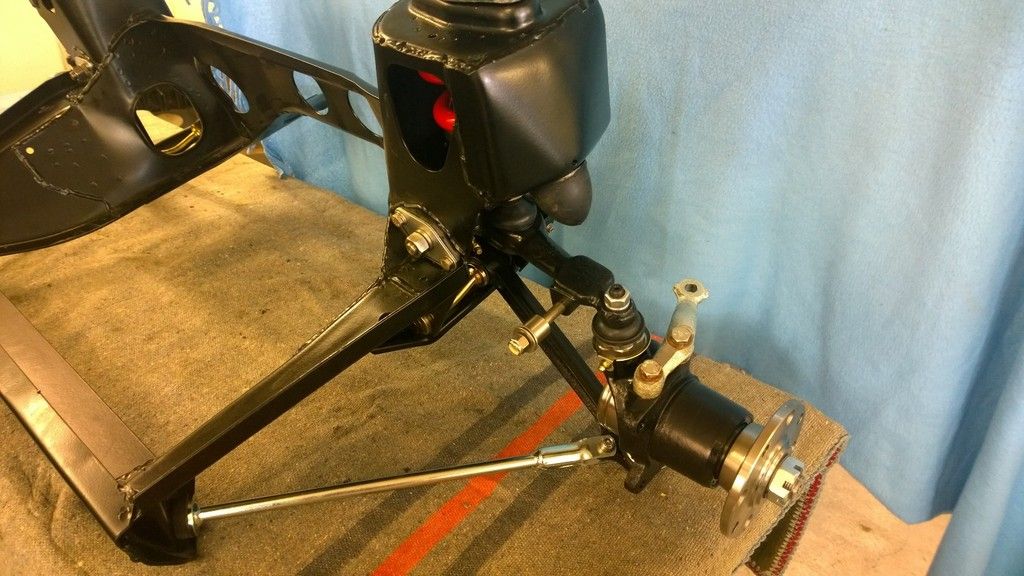
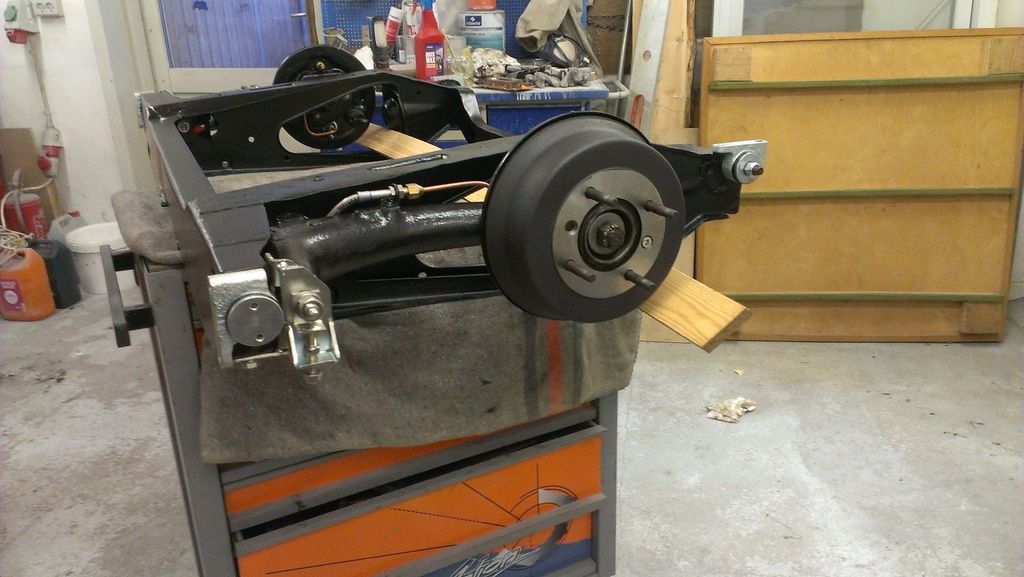
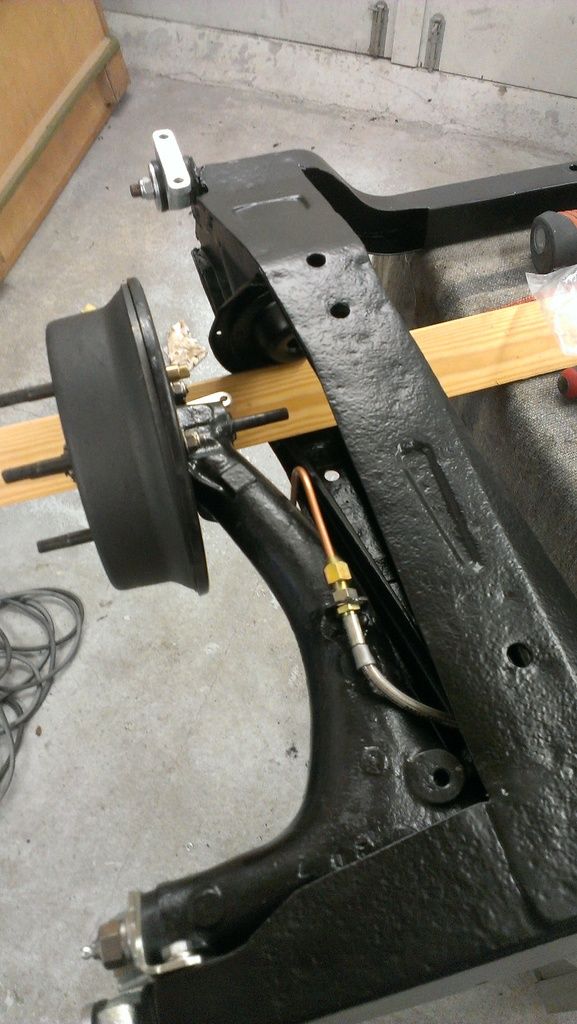
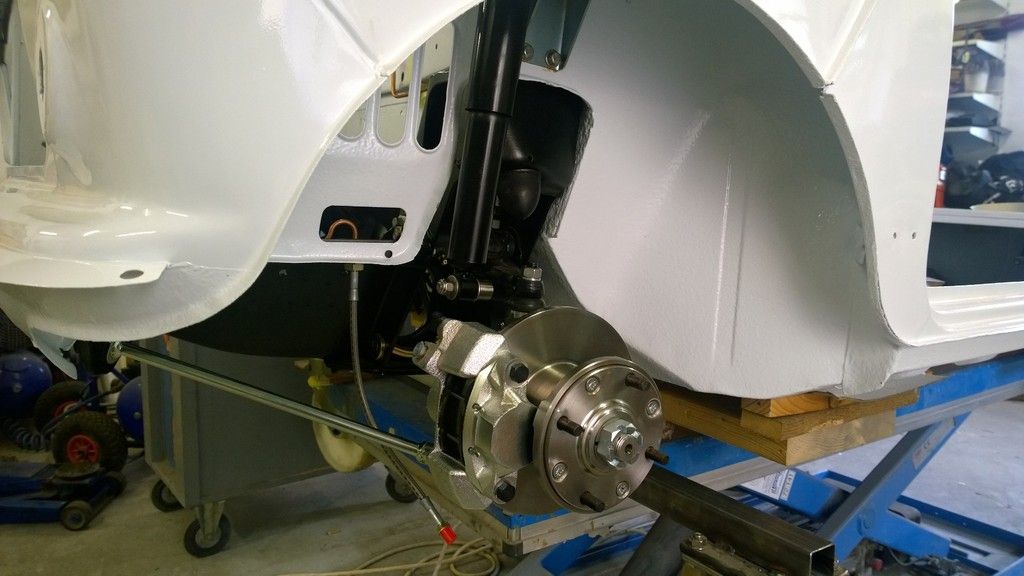
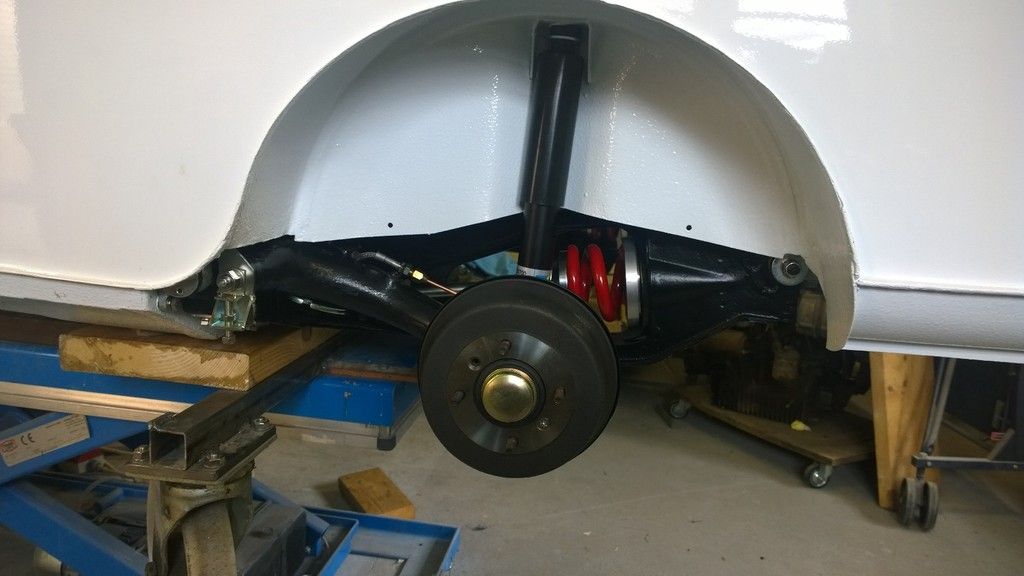
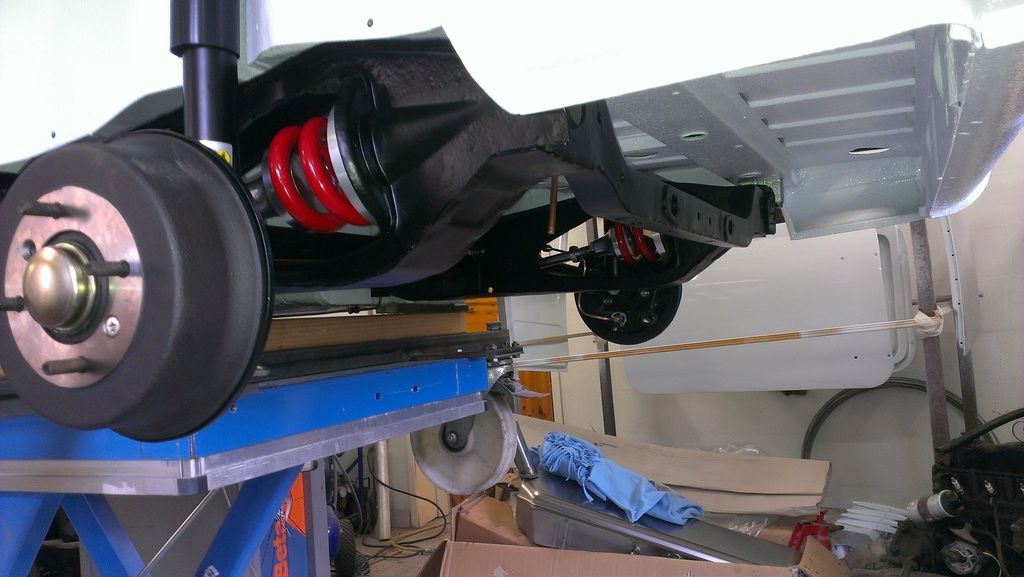
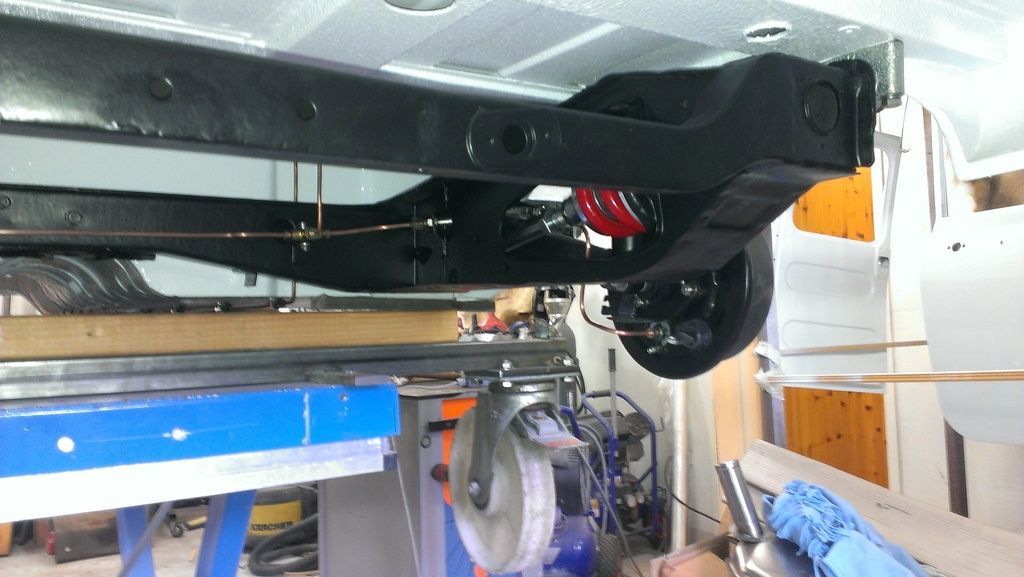
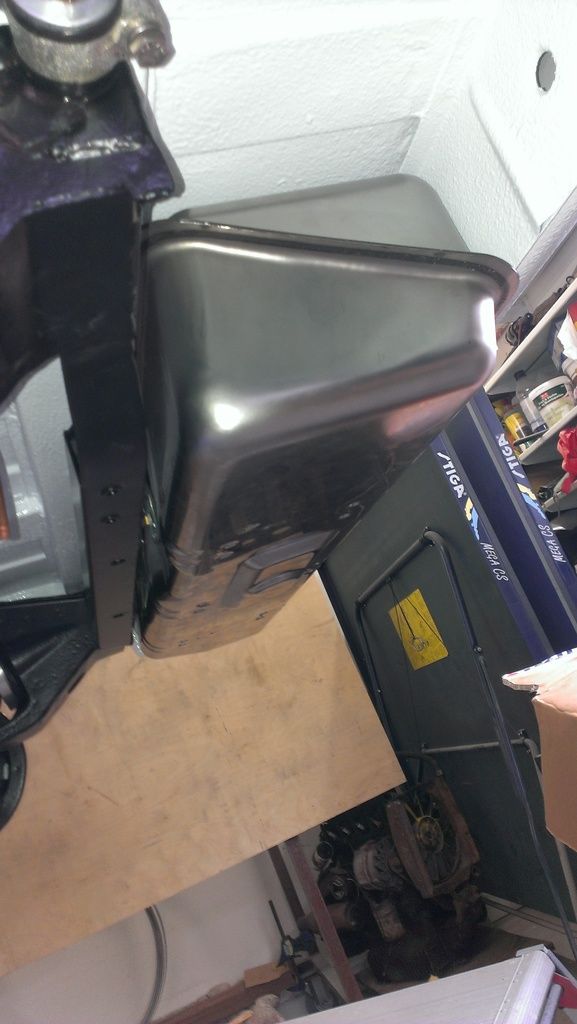
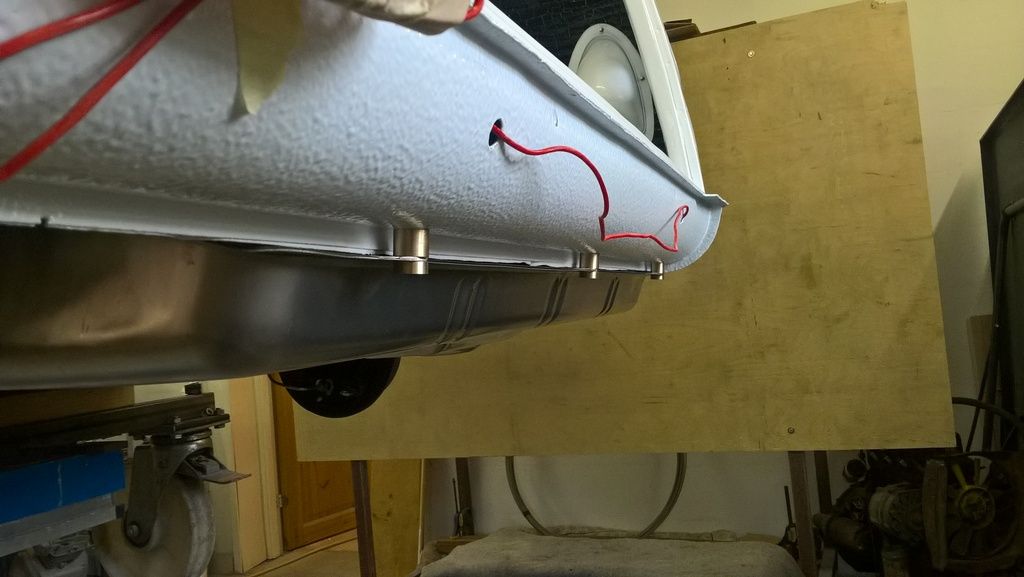
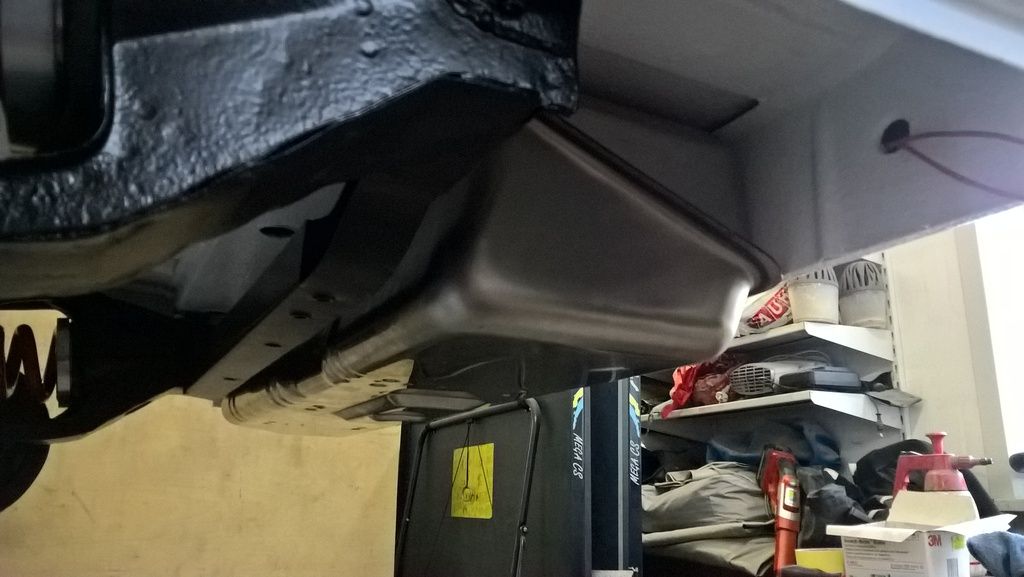

#97 Cavazzi

Cavazzi

    Stage One Kit Fitted

  • Noobies
  • PipPipPip
  • 75 posts
  • Location: Herning

Posted 22 May 2016 - 08:48 PM

Got some more work done on the car.


Front subframe and rear subframe is in and all the brake piping is done, but need to make om a small bracket to keep them evenly apart and straighten them a little


Fuel line is in but im waiting for a electronic fuel pump before finishing the ends.


Brakes and suspension is all done.

Had the new stainless fuel tank in but the fitment isnt too good so had to drill new holes for screw and tomorrow its off for welding up the old holes. Made some special spacers for the rear screws in brass with countersunk screws, the picture is too bad so i will take a new one tomorrow.


Need to turn in right side disc brake as its offbeat.


WP_20160521_15_02_00_Pro_zpsdmxckfqn.jpg


IMAG1304_zpsyztl1axq.jpg


WP_20160521_15_01_00_Pro_zpsvrcekwcv.jpg


IMAG1307_zpsopwkyvlq.jpg


IMAG1305_zpslaceu498.jpg


IMAG1308_zpso0w0rw48.jpg


-Christian


Edited by Cavazzi, 25 May 2016 - 07:59 AM.


#98 Magneto

Magneto

    One Carb Or Two?

  • Members
  • PipPipPipPipPipPipPip
  • 889 posts
  • Location: Kansas City, USA
  • Local Club: KC MINI Club

Posted 23 May 2016 - 12:02 AM

I'll be interested to hear what you think of the springs, I put a set in my Clubman Estate and I mostly really liked the ride improvement.....


#99 Mr Frosty

Mr Frosty

    Mini Mad

  • Noobies
  • PipPipPipPip
  • 140 posts
  • Location: Maidstone, Kent

Posted 23 May 2016 - 07:25 AM

Fantastic work! love the attention to detail on the pipe work.


#100 Cavazzi

Cavazzi

    Stage One Kit Fitted

  • Noobies
  • PipPipPip
  • 75 posts
  • Location: Herning

Posted 23 May 2016 - 08:17 AM

I'll be interested to hear what you think of the springs, I put a set in my Clubman Estate and I mostly really liked the ride improvement.....


The car havent been lifted off the lift as yet, and probably wont until winter time, so cant give you any info until.

One thing i didnt like though was that i had to remove the top arm on the front subframe in order to install the spring and hilo which was a pain in the butt and required 3 arms but i managed.

Otherwise they seem okay and the price tag is fair, just remember to grease the tread upon install with copper slide or similiar.


#101 Cavazzi

Cavazzi

    Stage One Kit Fitted

  • Noobies
  • PipPipPip
  • 75 posts
  • Location: Herning

Posted 25 May 2016 - 08:02 AM

Got the fuel tank installed yesterday, with the bushes i made up in brass. Fitment around the filler neck is close to perfect, and look really good.


After the tank was in i started prepping for painting the dash rails again to get a better finish.


WP_20160524_16_34_49_Pro_LI_zpsdmwelwqh.


WP_20160524_16_32_52_Pro_LI_zpsi878xdek.


Edited by Cavazzi, 25 May 2016 - 08:03 AM.


#102 Mini Manannán

Mini Manannán

    Well I'll be buggered if I can find it

  • Members
  • PipPipPipPipPipPipPipPipPip
  • 2,825 posts
  • Location: Middle of the Irish Sea
  • Local Club: man Estate

Posted 11 June 2016 - 05:54 PM

I really like those brass bushes, so much better than the plastic bushes you tend to get.  I might have to make up some of those myself next time the estate's tank is out.


#103 minimissions

minimissions

    Up Into Fourth

  • Members
  • PipPipPipPipPipPipPipPipPip
  • 3,427 posts
  • Location: North West
  • Local Club: M.M.O.C

Posted 12 June 2016 - 09:30 AM

This is really coming together its looking ace. nice and clean and tidy...


#104 Cavazzi

Cavazzi

    Stage One Kit Fitted

  • Noobies
  • PipPipPip
  • 75 posts
  • Location: Herning

Posted 22 September 2016 - 09:43 PM

Been a long time since last post.

I´ve been away for work for 10 weeks, and when i came home i needed a little vacation and then some more work, but had a few days in between on the mini.


Before i went away we got the interior resprayed.

WP_20160527_12_33_00_Pro_LI_zpsuinkucmf.


And when i came home i got started on the engine. I had bought a 998 A+ a while ago which ive decide to use as i didnt know the conditoin of the engine that came with the car.

Got my 12G295 head sent off to be refurbished. Turns out it was cracked O_O 
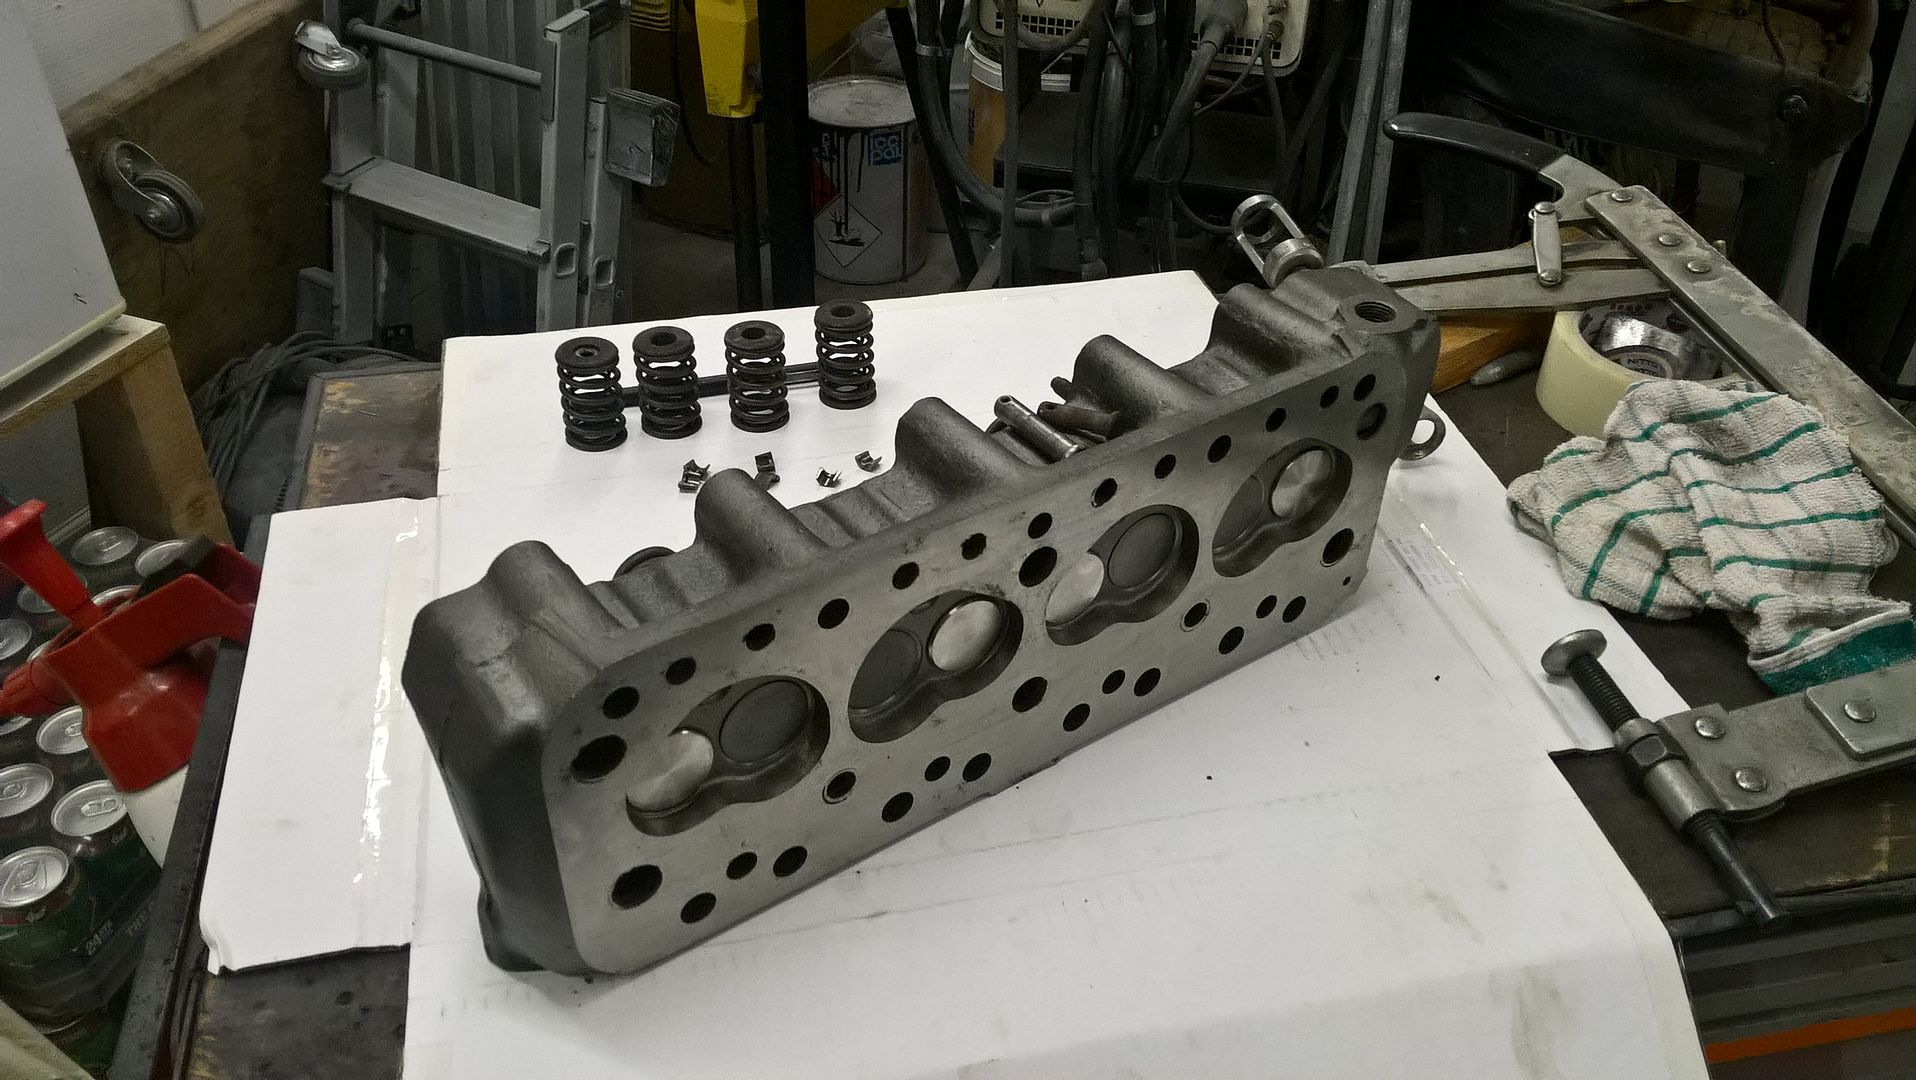
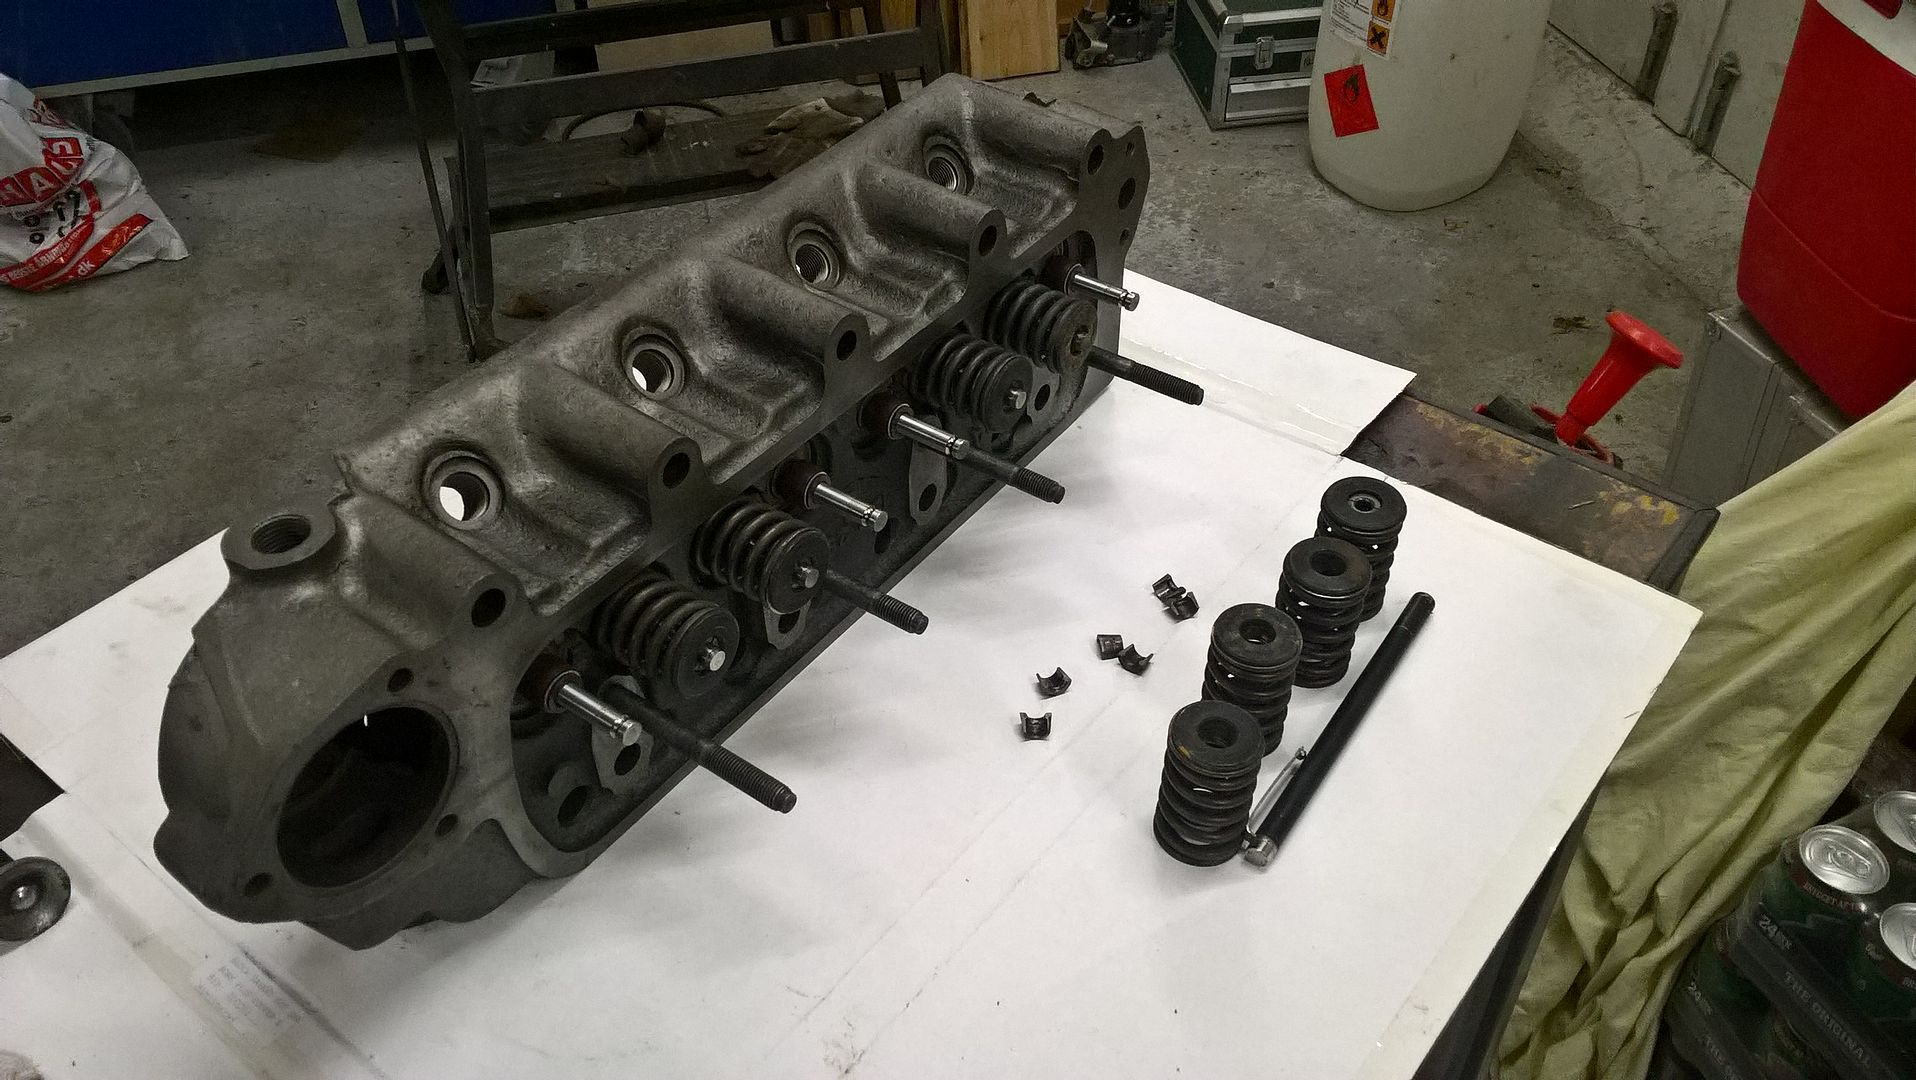
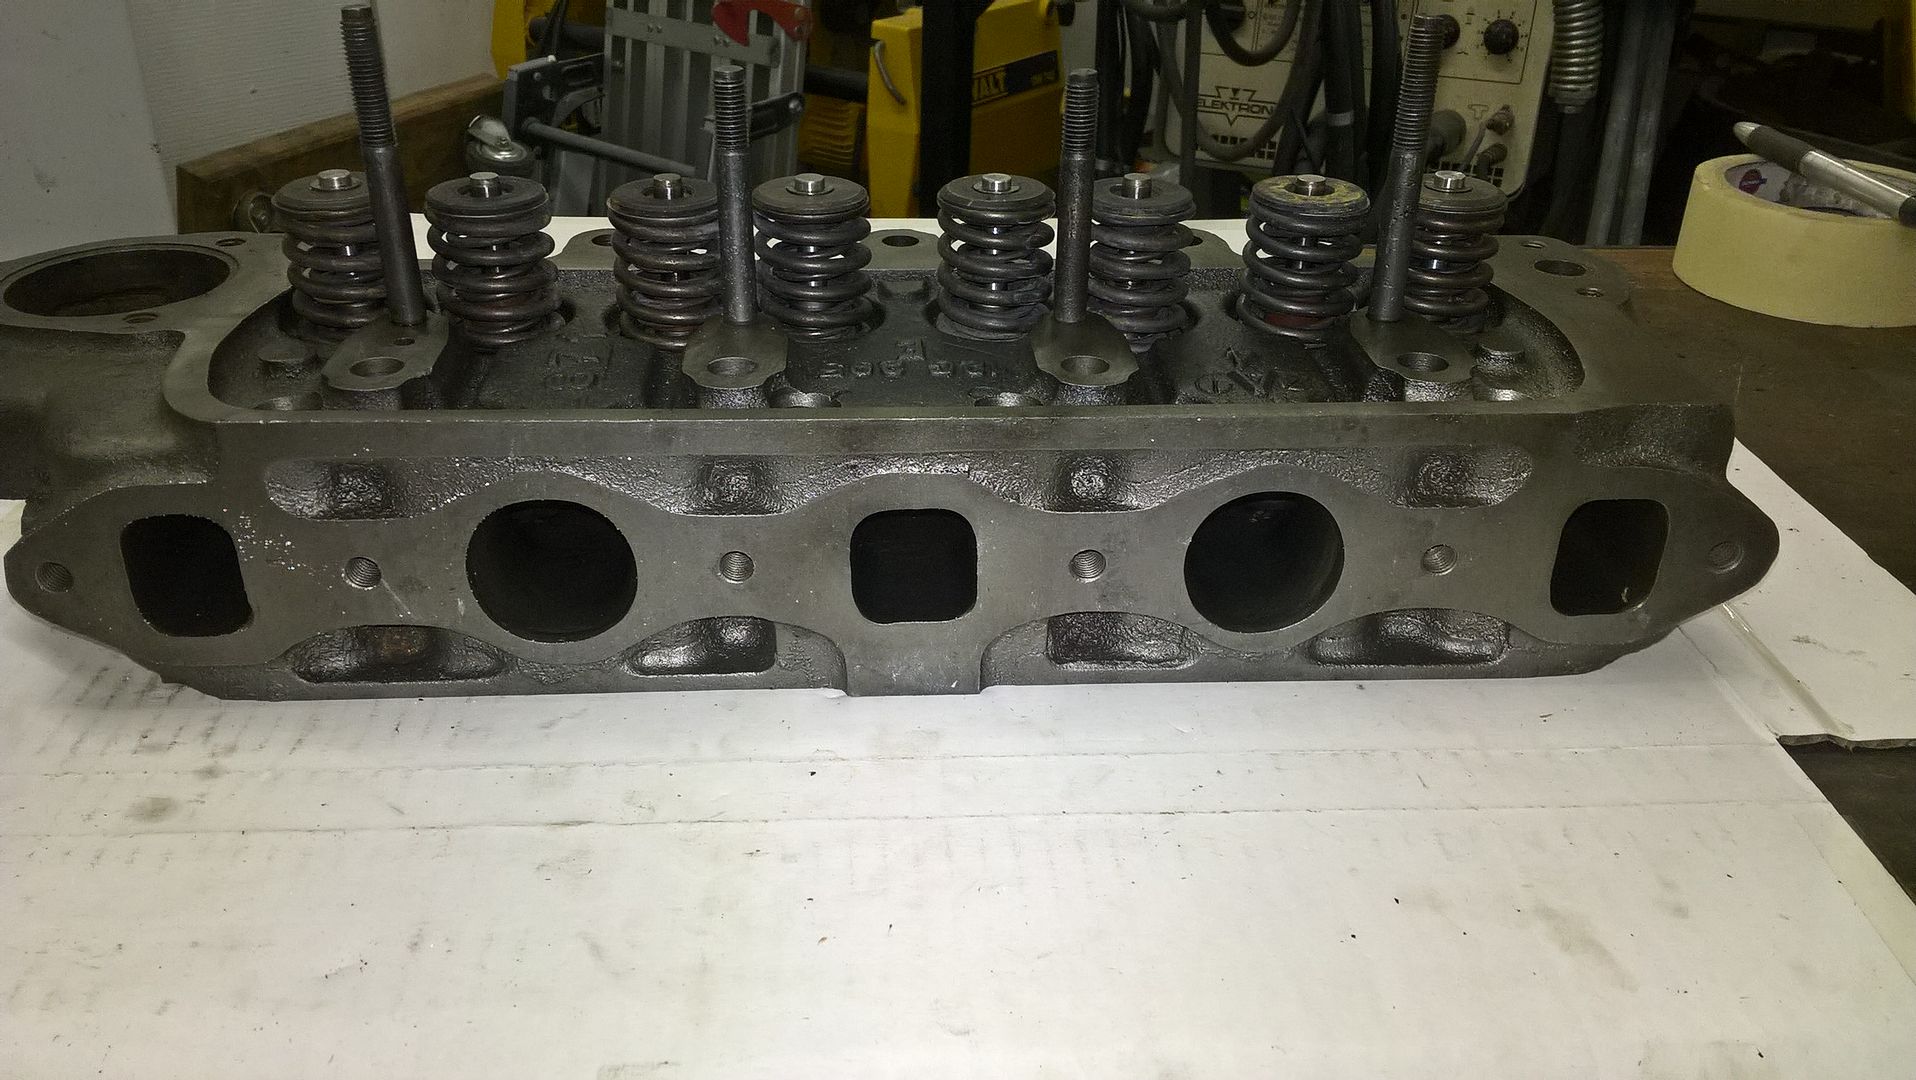
found another 12G295 head which had been ported and skimmed to the extreme and larger exhaust valves.


The engine before a cleanup:

WP_20160817_17_56_08_Pro_zpsjfyigu7l.jpg


After and with some paint.

WP_20160822_08_15_07_Pro_zpsv6dhnqts.jpg


Putting back the pieces. New minispares EVO waterpump, High torgue started was a bargain for half the price of a new, and it was knew. New sportscoil, and a used contactless distributor with new cap and rotor, and also a new clutch and release bearing.

WP_20160920_20_00_48_Pro_zpstngydvpk.jpg


I didnt like the bolts for the generator so made up some brass bushes so i could use some nice countersunk screws instead. Need some 8mm lock nuts before its all done.

WP_20160920_20_00_36_Pro_zpsslatpv4g.jpg


WP_20160920_20_03_05_Pro_zpscpjo8k00.jpg


WP_20160920_20_03_24_Pro_zpsjgvdhea8.jpg

Dont worry i remembered to remove the oil seal from the exhaust valves, they were just good at holding the valve in place while measuring and working on the head.


One of the old exhaust valves was cracked so i had 4 new cut and fitted, but it is no longer possible to get the ones used, so i had to settle with some race types for 1275 heads, which have a longer stem. To keep the same compression of the springs i need new caps, and found that some works race caps almost did the trick and i only neede to shim the spring approx 1mm. So klnocked up some shims in the lathe and put underneath.

WP_20160921_17_19_46_Pro_zpsoa1qlgfe.jpg


Finished assembling the head, just needs a little paint before it goes on the engine with a nice Payen copper head gasket.

WP_20160921_17_38_16_Pro_zps5ew7p7qc.jpg


More pics will follow when i get the last parts for the engine ready.


-Christian


Edited by Cavazzi, 22 September 2016 - 09:47 PM.


#105 Mini Manannán

Mini Manannán

    Well I'll be buggered if I can find it

  • Members
  • PipPipPipPipPipPipPipPipPip
  • 2,825 posts
  • Location: Middle of the Irish Sea
  • Local Club: man Estate

Posted 22 September 2016 - 09:59 PM

I wondered what was happening, it has been a good while. Keep up the good work Christian

.


Also tagged with one or more of these keywords: van

0 user(s) are reading this topic

0 members, 0 guests, 0 anonymous users