Today I put the long brake pipe from the tank up through the the engine bay and the same for the brake pipe.
I clipped them to the floor using p-clips and rivets.
All good.
Rod

One Carb Or Two?

Posted 07 June 2015 - 05:05 PM
Today I put the long brake pipe from the tank up through the the engine bay and the same for the brake pipe.
I clipped them to the floor using p-clips and rivets.
All good.
Rod
Stage One Kit Fitted

Posted 17 June 2015 - 07:06 PM
One Carb Or Two?
Posted 18 June 2015 - 04:46 PM
Seats look brill mate, I have bought alfa gtv front and rears myself last week, hopefully they will look as good as yours when they are finally in!
The fronts are tough to fit and you have to be wary of the height but the backs fly in no problem at all.
Rod
Stage One Kit Fitted
Posted 19 June 2015 - 11:53 AM
Seats look brill mate, I have bought alfa gtv front and rears myself last week, hopefully they will look as good as yours when they are finally in!
The fronts are tough to fit and you have to be wary of the height but the backs fly in no problem at all.
Rod
HI Buddy
By height do you mean a bit low, I haven't had them in yet but they do look very low to me without any subframes? Also, did you fabricate subframes or use after market cobra type?
Cheers Lee
Edited by lee84, 19 June 2015 - 11:55 AM.
One Carb Or Two?
Posted 19 June 2015 - 01:23 PM
Hi,
I meant that if I mounted them on top of the crossmember then my head was waaaay to high even without the roof lining in. I made brackets, take a look a few pages back in this thread to see what I did.
Rod
One Carb Or Two?
Posted 19 June 2015 - 05:15 PM
Let me tell you what I achieved this morning. Sweet FA that's what I achieved! A very frustrating half day.
I found that there are captive nuts for holding the charcoal canister bracket to the inner wing and I don't know what size they are. They looked like they should be 1/4 but they aren't so I've posted a question on it but nobody has answered yet.
I found that the fuel hose I had bought to go from the breather to the charcoal canister was the wrong size so had to jump on to SomerFord Minis and buy one off them.
THEN I found that the fuel hose out of the tank was damaged so I had to take the tank out and remove that and go and order it as well.
Time for a change I thought.
I'll put the front caliber on while I have the car jacked up and the wheel off I thought.
Caliper flew on - result I thought.
Wheel goes back on and I find that the tyre weights catch the top of the caliber each time it spins so either they will have to be fitted elsewhere OR I need to shave the top of the caliber - BRILLIANT!
I did get the right bolt to hold FAM7821on to the bulkhead so I de-greased, primed and painted it up ready to go on tomorrow.
Then I gave up.
Rod
One Carb Or Two?
Posted 27 June 2015 - 05:36 PM
Made some progress today which was good.
Fitted the charcoal canister bracket and mounted the canister. After lots of messing about I worked out the captive nuts were 1/4 unf.
Got the pipe in from the fuel tank breather pipe to the charcoal canister. I then sorted out the brake pipe so cut it, flared it and got it connected to the valve in the engine bay.
Then I put in the big thick cable from the battery through to the engine bay.
I fitted the bracket for holding the fuel tank strap. Instead of welding it I drilled and bolted it then sprayed the underside with Dynax S50 to cover the bolts and holts. I also sprayed all the P Clips to ensure no water can seep in.
To try and protect the new paint I put the edge trims along the side of the door step/ sill and cleaned up the floor and boot floor ready to have SilentCoat layered over it.
Small jobs but needed doing.
Rod
 IMG_0712.jpg 44.5K
16 downloads
IMG_0714.jpg 48.8K
12 downloads
IMG_0720.jpg 54.48K
15 downloads
IMG_0712.jpg 44.5K
16 downloads
IMG_0714.jpg 48.8K
12 downloads
IMG_0720.jpg 54.48K
15 downloads
Stage One Kit Fitted
Posted 02 July 2015 - 12:10 PM
Seats look brill mate, I have bought alfa gtv front and rears myself last week, hopefully they will look as good as yours when they are finally in!
The fronts are tough to fit and you have to be wary of the height but the backs fly in no problem at all.
Rod
HI buddy,
Did you have to cut out the rear seat bulkhead to get them to fit flush? I have got them in mocked up but because the centre of the rear bulkhead sticks out they don't sit right, the backrest is currently in 'one piece' with the two seats attached to the centre console, I am guessing this could be detached which would mean the backrests sit against the back wall? I hope you dont mind the questions mate, any feedback or pics would be massively appreciated.
Thanks
Lee
One Carb Or Two?
Posted 03 July 2015 - 04:07 PM
Seats look brill mate, I have bought alfa gtv front and rears myself last week, hopefully they will look as good as yours when they are finally in!
The fronts are tough to fit and you have to be wary of the height but the backs fly in no problem at all.
Rod
HI buddy,
Did you have to cut out the rear seat bulkhead to get them to fit flush? I have got them in mocked up but because the centre of the rear bulkhead sticks out they don't sit right, the backrest is currently in 'one piece' with the two seats attached to the centre console, I am guessing this could be detached which would mean the backrests sit against the back wall? I hope you dont mind the questions mate, any feedback or pics would be massively appreciated.
Thanks
Lee
Hi
I don't mind at all. The lower part of the rear seats didn't require anything to be done (although I may to something later if I think they are too loose).
For the upper section if you leave it in one piece then each chair sits quite proud of the sculpted back of the body. To try and reduce this I cut the two metal bars out that go across the centre piece and hold both backrests in place. That allows them to move back relative to the centre piece. To fix them in, I've simply drilled a hole per seat in the metal that forms the wall of the boot and I'm using a threaded hook to hold the metal hoop on the back of the seat to pull it tight to the car. Does that make sense? I'll try to get a picture for you tomorrow.
PM me if you want to talk it through and I'll send you my number.
Rod
One Carb Or Two?
Posted 04 July 2015 - 07:34 PM
Hi
Didn't get too much done but I put the two front brake callipers and the pads then I put the flexible hoses on to go up to the front subframe.
Also Lee, here are a couple of photos of how I've mounted and modified the rear seats as promised.
http://s288.photobuc...html?sort=3&o=2
http://s288.photobuc...html?sort=3&o=1
http://s288.photobuc...html?sort=3&o=0
Cheers,
Rod
Edited by rodandtom, 05 July 2015 - 09:26 AM.
One Carb Or Two?
Posted 19 July 2015 - 06:18 PM
Had a play around with to try and adjust the tie bars. So far I've just had the wheels on and didn't worry too much about how straight they were. So I took the wheels off and tried to make the tie bars the same length. The problem I had is that the n/s tie bar was a lot longer than the o/f. I took care of that and adjusted the camber some as well but I'll need to put the camber tool I have on the wheel to get it right but I experimented with the adjustments to see what I could do.
Then I tried to centre the steering rack. I haven't appreciated fully what is involved obviously. I got the track rod ends on the same number of turns but but that didn't make them line up with the steering arms so I'm not sure what else I need to be doing. I'll do some research and have another go over the next few days.
No pics today - nothing to take photos of really.
One Carb Or Two?
Posted 21 July 2015 - 08:29 PM
Had another go at centering the steering rack. THere's a thread on this so I think I have got it about right, ready for proper alignment.
I then took the steering wheel off with the rack at approx half way and, guess what, the steering now sits on perfectly straight! Hurray!
I know need to find out why there is play in the steering column but one step at a time.
We also fitted the heater cable through the bulkhead.
Rod
One Carb Or Two?
Posted 25 July 2015 - 05:30 PM
Today was a day of swings and roundabouts.
I started off by fitting the braided flexible pipes from the front brakes to the subframe, then I put in the connecting banjo in, shaped the pipe around the front subframe, fitted it and clipped it to the subframe.
At that point I discovered I hadn't bought the pipe to join the banjo to the brake limiter valve - doh!
I tightened down the housing for the servo and tightened the brake master cylinder down. I also attached two flexible hoses to the brake master cylinder ready for attaching to the servo.
After a short break to watch qualifying for the Hungarian grand prix I decided that it was time to fit the rear hi-lo's. Got the o/s wheel off, took the shock out, undid the bracket holding the radius arm to the heelboard - all good. A bit of fiddling and we got the hi-lo in and everything back in place.
Took the n/s wheel off, undid the bracket holding one end of the radius arm in, moved the fuel tank out the way and undid the shock. We were taking the radius arm off when one of the rubber seals around the end of the arm fell off. It had split right across and that was brand new when I put the arm on a few months back.
It's a pain but I'm glad we found it now. It could have been much worse if we had driven around on it.
So now the car is right down on the wheel so we carefully put it in the garage and I now have to buy a new one.
Time to go visit Minispares website again!
Rod
IMG_0836.jpg 59.86K
17 downloads
IMG_0838.jpg 42.59K
20 downloads
One Carb Or Two?
Posted 02 August 2015 - 08:43 PM
Today I got the new seal on to the radius arm and fitted it with the n/s hi-lo. Check out the new ride height. Will have to see how that looks when all the gubbins is in the car with the engine.
Also fitted the brake pipe from the pressure regulator to the banjo on the front subframe.
Then I put the flexi pipe and the copper pipe to the rear brake drums - got all the tightened in.
Next thing is to fit the master cylinder and fill the system.
It's not too much but its done and won't need to be done again so I'm happy 
Rod
IMG_0851.jpg 54.46K
10 downloads
IMG_0850.jpg 61.32K
7 downloads
Super Mini Mad

Posted 02 August 2015 - 09:19 PM
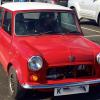
I do like those D1's and the body coloured arches look good too, nice touch! have you got a full side picture?
Out of interest, what front brakes do you have, I'm really torn on wheels and if I do go down the 10" route would like to fit 7.9 discs with 4 pot callipers but I'm not sure they fit all 10's.


0 members, 1 guests, 0 anonymous users


