Jump to content


Photo

My Pickup Restore. 1972 In Teal Blue.

pickup

  • Please log in to reply
5 replies to this topic

#1 myminipickup

myminipickup

    Mini Mad

  • Noobies
  • PipPipPipPip
  • 152 posts
  • Location: Southampton

Posted 07 October 2015 - 03:07 PM

Just thought I would share a few pictures of my Mini Pickup restore -


Some of the rusty floor and X member:


Attached File  RUSTY TUNNEL.jpg   62.4K   6 downloads

Attached File  RUSTY TUNNEL 2.jpg   70.04K   4 downloads

]Attached File  RUSTY X.jpg   37.98K   3 downloads

Attached File  RUSTY INNER SILL.jpg   50.7K   3 downloads

Attached File  RUSTY INNER WING.jpg   92.57K   9 downloads


On the spit ready to remove the floor:


Attached File  ON THE SPIT.jpg   60.31K   10 downloads

Attached File  SPIT.jpg   53.53K   5 downloads


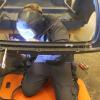
I welded in some bracing to help hold it all together:


Attached File  BRACING.jpg   49.25K   6 downloads

Attached File  BRACING 2.jpg   45.07K   6 downloads


I bought loads of new panels from Mini Machine:


Attached File  NEW PANELS.jpg   76.32K   19 downloads


 Removed drivers side and part of the tunnel:


Attached File  FLOOR REMOVED 3.jpg   66.86K   8 downloads

Attached File  FLOOR REMOVED 2.jpg   56.63K   5 downloads

Attached File  FLOOR REMOVED.jpg   74.12K   5 downloads

Attached File  TUNNEL REMOVED.jpg   80.51K   6 downloads

Attached File  TUNNEL REMOVED 2.jpg   60.55K   4 downloads


and replaced the part of tunnel with new bits from the new tunnel:


Attached File  TUNNEL WELDED IN.jpg   58.3K   10 downloads


and then replaced the drivers floor:


Attached File  FLOOR CLAMPED IN.jpg   51.23K   4 downloads

Attached File  FLOOR CLAMPED INSIDE_n.jpg   52.33K   6 downloads

Attached File  FLOOR CLAMPED.jpg   50.32K   4 downloads


Then welded it all in and done the same with the passengers side where I found the rear subframe mount was rusty:


Attached File  RUSTY SUBFRAME MOUNT.jpg   90.03K   7 downloads


So I made up a new part to weld in using the original mounting nuts and bracket, and welded it in place:


Attached File  SUBFRAME MOUNT.jpg   44.96K   7 downloads

Attached File  NEW SUBFRAME MOUNT.jpg   40.73K   4 downloads


I replaced the X member and replaced the original handbrake mounting bracket:


Attached File  HANDBRAKE.jpg   53.64K   7 downloads


After a little bit of tiding, I sprayed the bottom of the floor with epoxy mastic primer (great stuff by the way):


Attached File  FINISHED.jpg   53.82K   19 downloads


Obviously the work continues but the floor is a bit better than it was! Next I need to move forward and do the inner wings, inner A panels, etc.


More pictures can be found on www.facebook.com/MyMiniPickup. And I will try to update this also.


Enjoy!


Any comments/advice/help would be welcomed.


Edited by myminipickup, 07 October 2015 - 04:30 PM.


#2 minimissions

minimissions

    Up Into Fourth

  • Members
  • PipPipPipPipPipPipPipPipPip
  • 3,427 posts
  • Location: North West
  • Local Club: M.M.O.C

Posted 07 October 2015 - 04:13 PM

Looks like an awesome project :) so nice work has gone into that...


#3 myminipickup

myminipickup

    Mini Mad

  • Noobies
  • PipPipPipPip
  • 152 posts
  • Location: Southampton

Posted 23 March 2016 - 01:58 PM

Hello,


Thought I would post a few updates:


So I found loads of rust around the front. The inner A panel and hinge panel was almost missing! The doors were held on with luck and magic: 


12118914_1504474439851125_81447315166114


12141586_1504474449851124_11336246276195


So I cut out all the rust from the drivers side and removed the wing, A panel, Inner A panel, etc:


11010616_1506355859662983_47215806966916


12065592_1506355439663025_25761154823986


And began to replace it with new panels and metal:


12191705_1507967682835134_76954296664995


12004017_1507967626168473_49448991822336


11148594_1508222396142996_68168865044396


Eventually I finished the inner wing:


12247144_1511978752434027_75908554291905


Then I clamped in the new wing and A panels, note the ratchet strap pulling the wing together:


12308251_1517039415261294_26485654496929


And welded it in:


12346447_1517039315261304_72324140275457


Then I started on the passenger side, but found the front panel on that side was full of filler covering a lot of damage to the panel:


12373174_1520827338215835_53644642679260


12347618_1520827291549173_25970483121008


So I've left that for now to think about what to do. But I fixed the inner wing:


10410226_1524915817806987_83327239305246


7398_1524915614473674_288056682495141570


Next I moved on the the rear, leaving the front panel in the back of my head to think about how to fix it.


Edited by myminipickup, 23 March 2016 - 02:01 PM.


#4 myminipickup

myminipickup

    Mini Mad

  • Noobies
  • PipPipPipPip
  • 152 posts
  • Location: Southampton

Posted 23 March 2016 - 04:07 PM

I found loads more rust and missing metal in the rear of the Pickup:


12745521_1537531289878773_43777516178930


12742838_1537531299878772_79887526463968


12688368_1539583033006932_28925156617599


12743732_1538582126440356_37725663963651


12745711_1538582113107024_80553146855240


12742014_1538582169773685_44471798700752


I made up a couple of jigs in metal so that I could remove the wheel arch and replace it with a new one:


12733451_1539252493039986_74507795129701


12745402_1539250796373489_53196583399106


And also a wooden one to line up the replacement rear panel:


12705680_1539252339706668_83606909755200


Then I cut it all out:


12744248_1539582943006941_17765545181167


12795489_1541568699475032_26942987718834


and began the repair job, first on the rear cross member:


12806094_1541568396141729_68431109689743


Then the box section between the rear wheel arch and the rear panel:


1916735_1541568249475077_181063967413346


Then the rear load bed repair panel and wheel arch went in:


12798945_1541568106141758_60841610663695


And welded in place:


12814761_1543825109249391_86005011138689


And the top rail cut out:


12063503_1546496082315627_11609091362369


Bed drain pipe fabricated and welded in place:


10363369_1546496165648952_88921666912268


The rear panel clamped in place:


12821371_1546496222315613_86715176556352


Then I found a problem. The rear panel would not line up or fit.. the best I could get it was with a gap around the door frame:


10258576_1549336462031589_84886863503082


The marker line shows where the door frame is behind the panel:


12122520_1549336438698258_12495592099275


So I cut along the line and removed the excess metal and welded along the seam:


10322763_1549336435364925_87440829225539


10610874_1549336398698262_79009977875857


And the door shuts:


1923513_1549336392031596_222151343650941


So I welded the panel in place:


1618492_1549336615364907_140254689318324


Edited by myminipickup, 23 March 2016 - 04:12 PM.


#5 Magneto

Magneto

    One Carb Or Two?

  • Members
  • PipPipPipPipPipPipPip
  • 889 posts
  • Location: Kansas City, USA
  • Local Club: KC MINI Club

Posted 23 March 2016 - 04:37 PM

Since you can still buy a complete front panel, seems like replacing it would give you the best result. Your little trucklet is coming along nicely now.....I can't believe how badly these rust!

Edited by Magneto, 23 March 2016 - 04:37 PM.


#6 minimissions

minimissions

    Up Into Fourth

  • Members
  • PipPipPipPipPipPipPipPipPip
  • 3,427 posts
  • Location: North West
  • Local Club: M.M.O.C

Posted 30 March 2016 - 01:05 PM

Some really great work there its really coming along nicely!


Also tagged with one or more of these keywords: pickup

0 user(s) are reading this topic

0 members, 0 guests, 0 anonymous users