A Midas Duet
#76

Posted 15 June 2007 - 10:56 PM
#77

Posted 15 June 2007 - 11:13 PM
#78

Posted 15 June 2007 - 11:17 PM
I would say the best thing would be to make one up specifically for the mini, front and back....Blue Peter style...... should be easy as they are flat anyway. IF you need to add fins to the side, they are easy to add to with strips of bonded GRP.
....it might sound crazy but it does and will work... and is basically the method that moulders use anyway, even on yachts and one off cars etc.
Best thing to do would be to find someone with their mini on a spit roast thats being worked on.....or roll yours over in a field with a mattress on the leeside! You could make some in a day for probably about 40 or 50 quid max.
Once the mini is turned over, get a large piece of card and cut it to the shape of the front, and the same at the back. Make cutouts for anything that protrudes like on the Midas. Cut some strips of card along the length to stiffen it up for the right shape and glue in position at 90 degrees to the undertray mockup to form stringers.
......A hot glue gun is your best friend here.
Once the hot glue has gone off take the cars off the car, pour polyester resin over the inside of the card on the flat side and sand flat once it has gone off. What happens is the resin soaks into the card and turn it into a sold composite plug.
Next get some PVA release agent, brush it on the plugs you have made and let it go dry for a couple of hours.
Lay up GRP on the inside edge on top of the PVA release agent....about 2 or 3 layers (laminates) thick should suffice. Once they have gone off you will have a pair of undertrays.
Edited by lvm18, 15 June 2007 - 11:35 PM.
#79

Posted 15 June 2007 - 11:21 PM
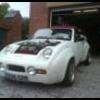
I like to think of them as a modern interpretation of a frogeye sprite, but with a bit of mini agility.
The grandfather car, the Mini Marcos had the claim to fame in I think '66 to be the only British Motor car to finish the Le-Mans 24 hours race.
#80

Posted 15 June 2007 - 11:27 PM
#81

Posted 15 June 2007 - 11:32 PM
Mine bolts to the front bumper and goes under the gearbox/subframe and bolts to the bottom of the front bulkhead
The back one bolts from the back of the floor pan and goes under the rear subframe and bolts to the back of the integrated rear bumper/rear valance.
The mini floor is relatively flat if I remember right.....
#82

Posted 15 June 2007 - 11:34 PM
Midas ones wont work as they are suited to the Metro subframes.
I would say the best thing would be to make one up specifically for the mini, front and back....Blue Peter style...... should be easy as they are flat anyway. IF you need to add fins to the side, they are easy to add to with strips of bonded GRP.
....it might sound crazy but it does and will work... and is basically the method that moulders use anyway, even on yachts and one off cars etc.
Best thing to do would be to find someone with their mini on a spit roast thats being worked on.....or roll yours over in a field with a mattress on the leeside! You could make some in a day for probably about 40 or 50 quid max.
Once the mini is turned over, get a large piece of card and cut it to the shape of the front, and the same at the back. Make cutouts for anything that protrudes like on the Midas. Cut some strips of card along the length to stiffen it up for the right shape and glue in position.
......A hot glue gun is your best friend here.
Once the glue has gone off take the cars off the car, pour polyester resin over the inside of the card on the flat side and sand flat once it has gone off. What happens is the resin soaks into the card and turn it into a sold composite plugs.
Next get some PVA release agent, brush it on the plugs you have made and let it go dry for a couple of hours.
Lay up GRP on the inside edge on top of the PVA release agent....about 2 or 3 layers (laminates) thick should suffice. Once they have gone off you will have a pair of undertrays.
Right... i'm gonna have to get and finish this garage!!!!!!
#83

Posted 15 June 2007 - 11:37 PM
#84

Posted 15 June 2007 - 11:49 PM
Best thing is to keep it stealthy too.
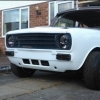
The rear bumper on the Midas has 3 air slots in it. They are apparently there to allow the upper air pressure to remain at a certain level as a balance to the air pressure below.
It all sounds a bit extreme....but stick your hand out of the window at speed.....when no cars are near by!.... and see the amount of air force against your hand at 40-50 mph. Multiply that by the obstructions on the whole of the bottom of the car and it becomes quite a large obstruction, affecting both acceleration and top end performance as well as the additional traction from the groundeffects .
Edited by lvm18, 15 June 2007 - 11:50 PM.
#85

Posted 15 June 2007 - 11:55 PM
#86

Posted 16 June 2007 - 12:02 AM
Plus if it is too great, it could mean the trays getting ripped off, depending on the material they are made from.
Imagine the air coming in through the front of the grill.....forces its way around the engine and above the front undertray.....and down the exhaust tunnel....along the tunnel and out above the rear undertray.
I know some might say it all sounds a bit extreme but it has been researched in great depth by car manufacturers...and I have noticed a lot of new cars on the roads have started to fit them for their performance and economy gains. The Midas had them from the beginning of the 1980's, from the MK2 onwards following Gordon Murray's advice.
I noticed that even my wife's VW Passat has them now.
Watch out for water puddles. They have to be well fixed or they may rip them off.
Edited by lvm18, 16 June 2007 - 12:08 AM.
#87

Posted 16 June 2007 - 12:15 AM
the mini floor also has swagin in which i would imagin air to run down aswell
#88

Posted 16 June 2007 - 12:21 AM
With a small triangular dart on each side flowing the air backwards away from the rear wheels
I wouldnt worry about the sides of the sills.
#89

Posted 16 June 2007 - 07:28 PM
(fiberglass or carbon)
 rear_suspension.JPG 35.78K
15 downloads
#90

Posted 16 June 2007 - 10:00 PM
1 user(s) are reading this topic
0 members, 1 guests, 0 anonymous users


