


Guennie's Turbo Conversion
Started by
Guennie
, Jun 23 2008 09:37 PM
87 replies to this topic
#46

miRon
-
- Banned
-

- 1,993 posts
Camshaft & Stage Two Head
- Local Club: SMAG
Posted 15 February 2009 - 11:42 PM
#47
Guennie
-
- Members
-
- 186 posts
Mini Mad
- Location: Newmarket
- Local Club: Bury Mini Club
Posted 15 February 2009 - 11:46 PM
Thanks a lot for that. Looks like it's deffinatily worth doing and not too hard!
#48
Guennie
-
- Members
-
- 186 posts
Mini Mad
- Location: Newmarket
- Local Club: Bury Mini Club
Posted 22 February 2009 - 09:59 PM
Hi,
Did some more work on the mini over the weekend. With the L2B looming i really need to keep on it! I haven't got too many pictures beacuse although the bits i did were quite substancial steps towards the final goal, there isn't really too much to them!
My main task was to get the brace bars fitted so i felt more comfortable about moving the car about/jacking it up, without it warping. The forum has proved very useful with some of the faq's on how to fit a flip front and bracebars and i've followed a fair few of the walkthroughs.
Anyway the brace bars went on without too much hassel and the whole car seems nice and secure now. Then i decided to take the old engine out. This job is 10 times easier without the front end on! There's far eaiser access to all the nuts and bolts and also i didn't need an engine crane to get the engine out. I simply put the car on axel stands and used a jack and some wood to raise the engine up to the height of the front subframe (no front panel ). then we just walked it over the subframe to another jack and lowered it down. job done!
The rest of the bits i did were things like removing anything from the 998 engine that im going to need (fan housing, thermoustate housing, etc) and cleaning up the bulkhead and front subframe. I hope to clean the rest of the bulkhead up and make it ready to cut out and weld in bulkhead box next weekend (ed - if you fancy giving me a hand with the welding, your help would be very much appreciated). Hopefully i should have time this week to make up some damper mount repair panels so i can do a bit more welding work.
Here are a couple of pictures of what i've done this weekend.
Brace bars on and engine out:
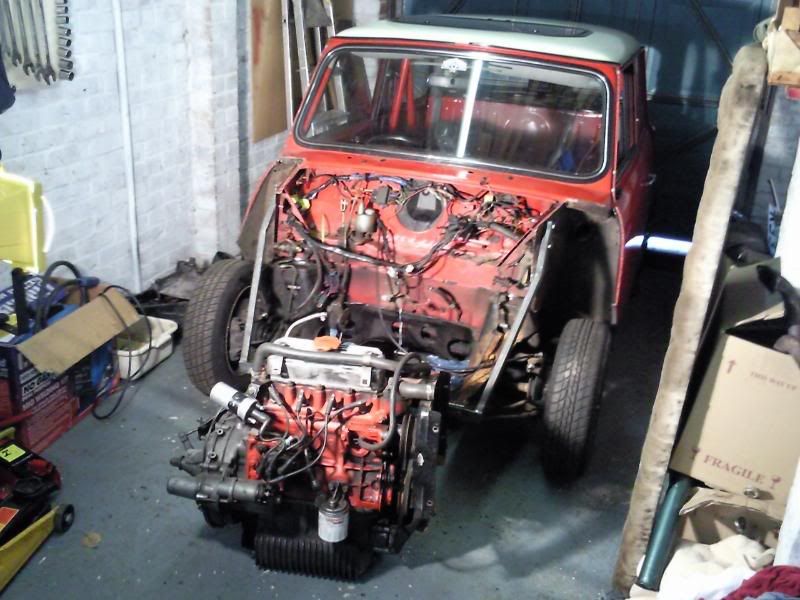
Engine out:
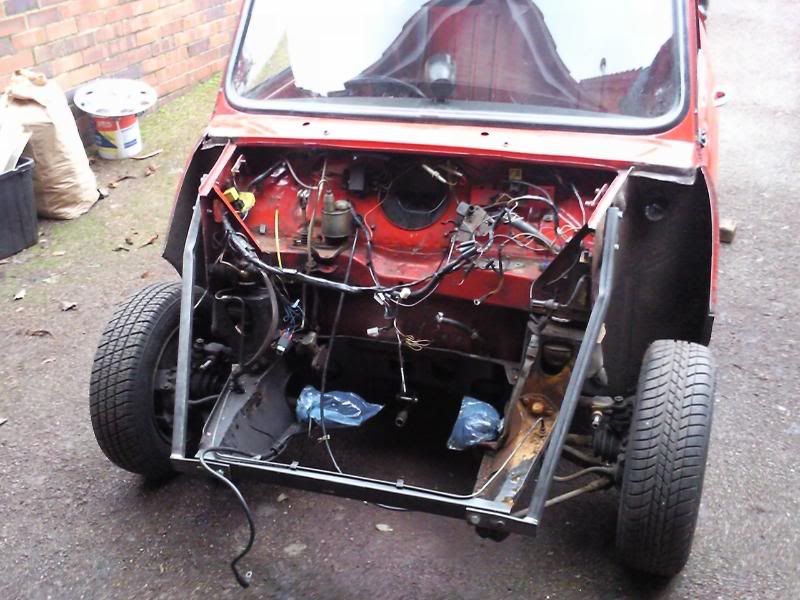
Cleaning up the engine bay:
thanks for looking,
Guennie
Did some more work on the mini over the weekend. With the L2B looming i really need to keep on it! I haven't got too many pictures beacuse although the bits i did were quite substancial steps towards the final goal, there isn't really too much to them!
My main task was to get the brace bars fitted so i felt more comfortable about moving the car about/jacking it up, without it warping. The forum has proved very useful with some of the faq's on how to fit a flip front and bracebars and i've followed a fair few of the walkthroughs.
Anyway the brace bars went on without too much hassel and the whole car seems nice and secure now. Then i decided to take the old engine out. This job is 10 times easier without the front end on! There's far eaiser access to all the nuts and bolts and also i didn't need an engine crane to get the engine out. I simply put the car on axel stands and used a jack and some wood to raise the engine up to the height of the front subframe (no front panel
). then we just walked it over the subframe to another jack and lowered it down. job done!The rest of the bits i did were things like removing anything from the 998 engine that im going to need (fan housing, thermoustate housing, etc) and cleaning up the bulkhead and front subframe. I hope to clean the rest of the bulkhead up and make it ready to cut out and weld in bulkhead box next weekend (ed - if you fancy giving me a hand with the welding, your help would be very much appreciated). Hopefully i should have time this week to make up some damper mount repair panels so i can do a bit more welding work.
Here are a couple of pictures of what i've done this weekend.
Brace bars on and engine out:
Engine out:
Cleaning up the engine bay:
thanks for looking,
Guennie
#49
edi57
-

- Members
-
- 821 posts
One Carb Or Two?
Posted 25 February 2009 - 06:04 PM
You're making fab progress Si. Do you think you're going to be repainting your engine bay while the engine is out?
As soon as the bulkhead box is ready to be welded in let me know and I'll be over.
Keep up the good work mate.
Ed
As soon as the bulkhead box is ready to be welded in let me know and I'll be over.
Keep up the good work mate.
Ed
#50
Saxo-Fiesta-Mini
-

- Members
-
- 2,889 posts
Up Into Fourth
- Local Club: LCMOC
Posted 25 February 2009 - 06:13 PM
beautiful work i have been doing a simiar tidy up i with mine today was fun
#51
Guennie
-
- Members
-
- 186 posts
Mini Mad
- Location: Newmarket
- Local Club: Bury Mini Club
Posted 01 March 2009 - 11:56 PM
Thanks for the coments guys. That really would be great if you could weld that bulkhead box in for me Ed. Hopefully i should have it ready to go in, in the next week or two. I thought i may as well repaint the engine bay whilst it's all stripped out. It's not a concorse car but i'd like it to be presentable, especially with the flip front making it very visable!
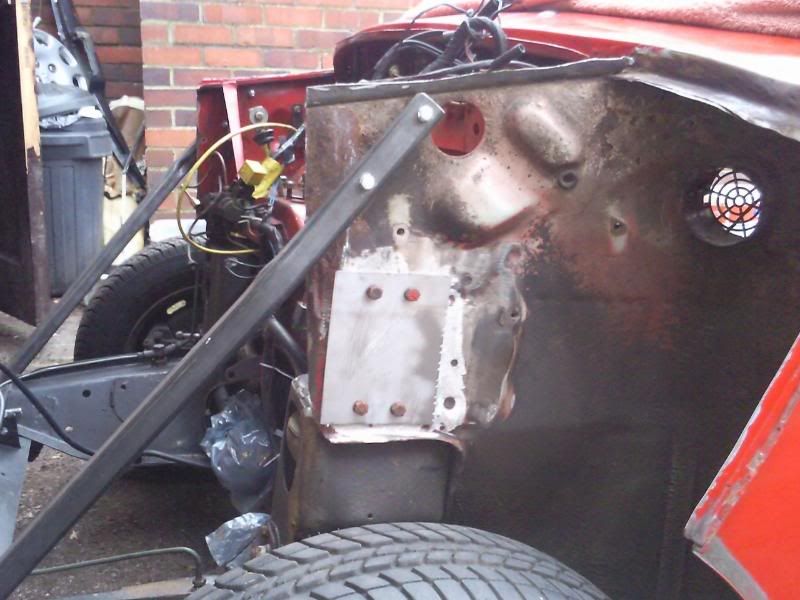
I had a pretty good weekend on the mini and got quite a few things done. Firstly i got the grinder out and using a variety of different discs, cutting, grinding and sanding i prepared the damper mounts for some patches to be welded in. I also made the plates that i am going to weld in. I found some reasonable gauge steel that i cleaned up and cut to size.
This picture shows the plate before it's had its final trim.
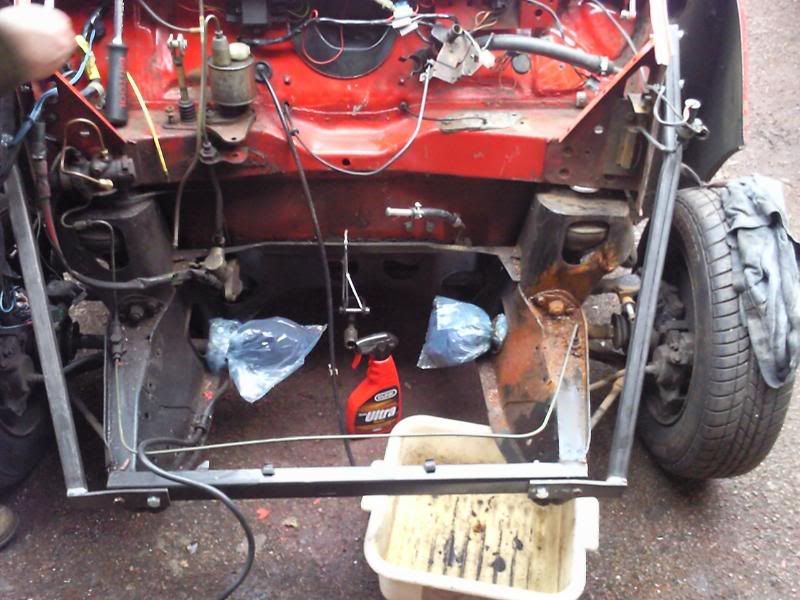
Another thing i did was fit a right hand fuel tank. This tank is one that dad bought and used in his mini many years ago. Unfortunatily that was written off before i was born but the tank was saved! Seen as dad had fitted it once before, he seemed keen to help and after i had made a template for the neck position, he got busy drilling and grinding the hole out.
Of course fitting the tank ment my washer bottle will have to be relocated. I'd planed to do this anyway and now have plenty of space under the front wings.
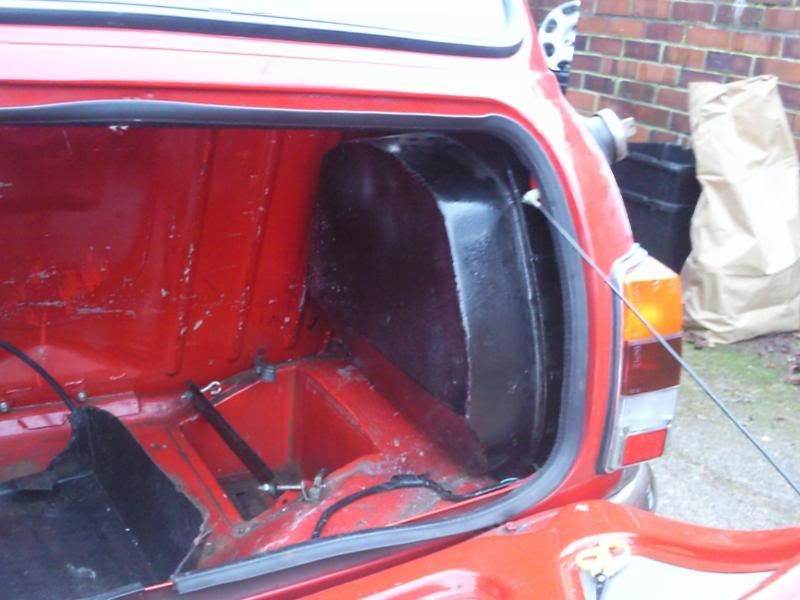
The tank went in reasonably easily and looks great!
The twin tank set up, with mpi tank and pump for turbo:

Making the template from the left side:
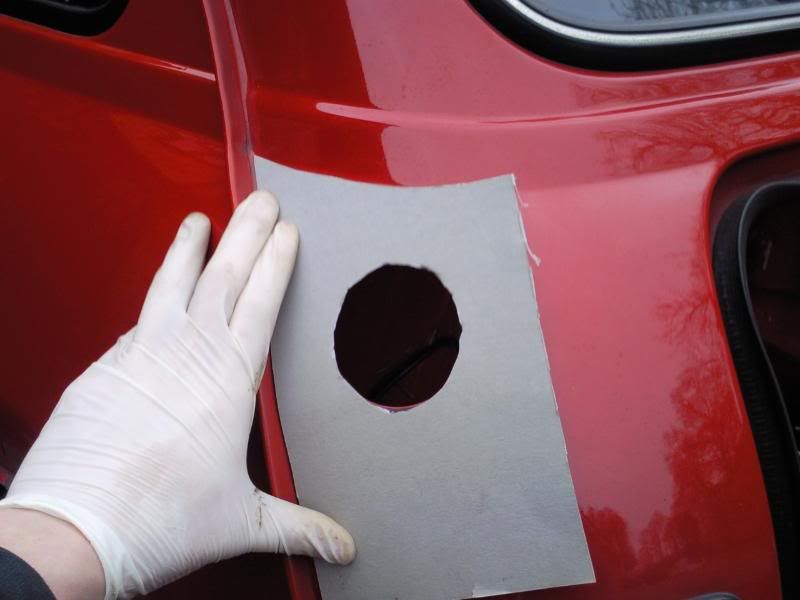
Flipping the template and drilling the first hole:
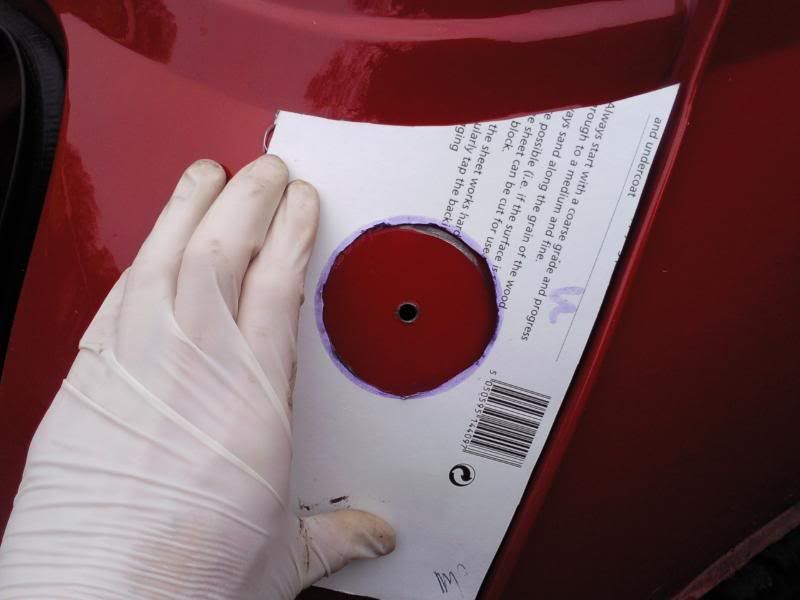
It's in!
I also tidied up the bulkhead a bit more ready for the bulkhead box to be fitted.
This week im going to mark up and maybe cut the bulkhead ready for the turbo box, and weld in the damper mount plates. Also i need to remove the camshaft from the engine so i can send it off to avonbar to be reprofiled! It's all go at the moment!
Cheers, Guennie
I had a pretty good weekend on the mini and got quite a few things done. Firstly i got the grinder out and using a variety of different discs, cutting, grinding and sanding i prepared the damper mounts for some patches to be welded in. I also made the plates that i am going to weld in. I found some reasonable gauge steel that i cleaned up and cut to size.
This picture shows the plate before it's had its final trim.
Another thing i did was fit a right hand fuel tank. This tank is one that dad bought and used in his mini many years ago. Unfortunatily that was written off before i was born but the tank was saved! Seen as dad had fitted it once before, he seemed keen to help and after i had made a template for the neck position, he got busy drilling and grinding the hole out.
Of course fitting the tank ment my washer bottle will have to be relocated. I'd planed to do this anyway and now have plenty of space under the front wings.
The tank went in reasonably easily and looks great!
The twin tank set up, with mpi tank and pump for turbo:
Making the template from the left side:
Flipping the template and drilling the first hole:
It's in!
I also tidied up the bulkhead a bit more ready for the bulkhead box to be fitted.
This week im going to mark up and maybe cut the bulkhead ready for the turbo box, and weld in the damper mount plates. Also i need to remove the camshaft from the engine so i can send it off to avonbar to be reprofiled! It's all go at the moment!
Cheers, Guennie
#52
miniboo
-

- Members
-
- 9,327 posts
Lord of Original Thinking
Posted 02 March 2009 - 01:14 AM
That tank looks the absolute spit of my homemade jobby, that i bought
#53
Guennie
-
- Members
-
- 186 posts
Mini Mad
- Location: Newmarket
- Local Club: Bury Mini Club
Posted 21 March 2009 - 11:41 PM
Hey,
I believe the tank is a home made one. My dad bought it many years ago from a guy who i think made it, so it's not genuine, but that doesn't really bother me!
I haven't updated in a while but have done a number of different things on both the bodywork side and engine bits.
First the engine bits:
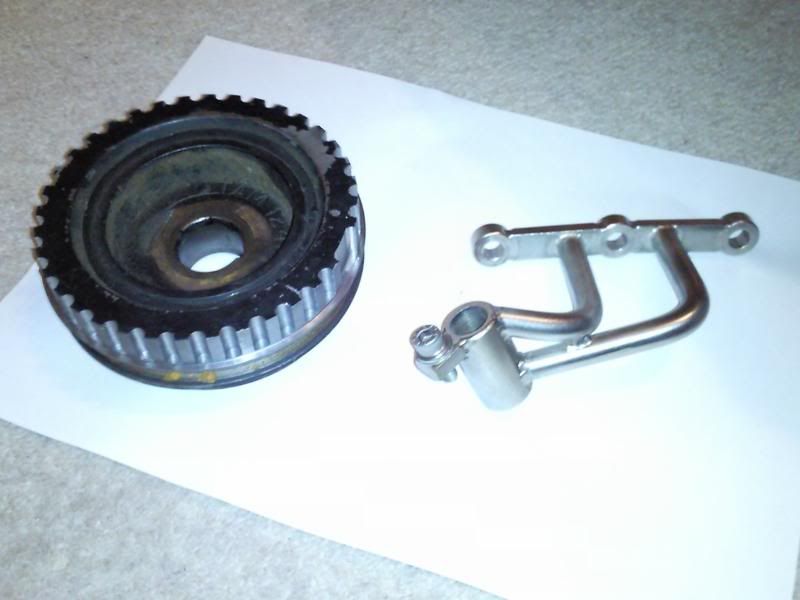
I sent my bottom pulley off to a guy on the TurboMinis forum to be machined for my megajolt setup, i recieved it back a couple of weeks ago. It looks great and the bracket i bought from him is great too,
Before machining
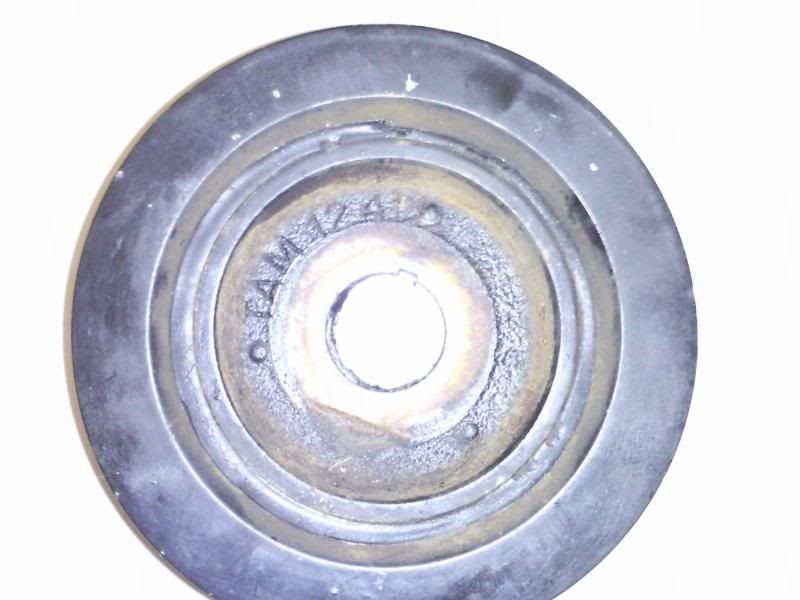
After machining with bracket
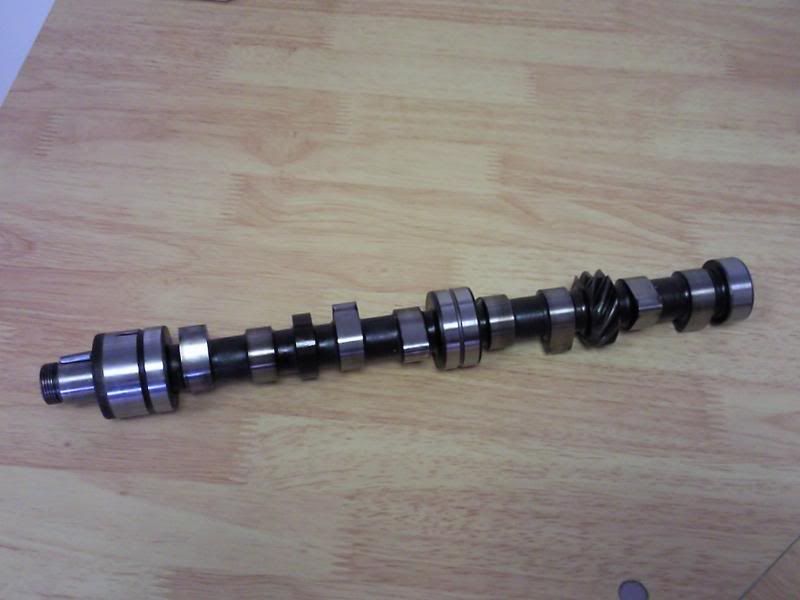
I've decided to go use a phase 2 turbo camshaft rather than the standard turbo one. The cheapest and easyest way i could do this was to have my one reprofiled. I removed it and have sent it off to Avonbar to be reprofiled. When they've done that they are going to call me to arrange payment and hopefully i'll order the rest of my engine bits.
Standard Turbo Camshaft
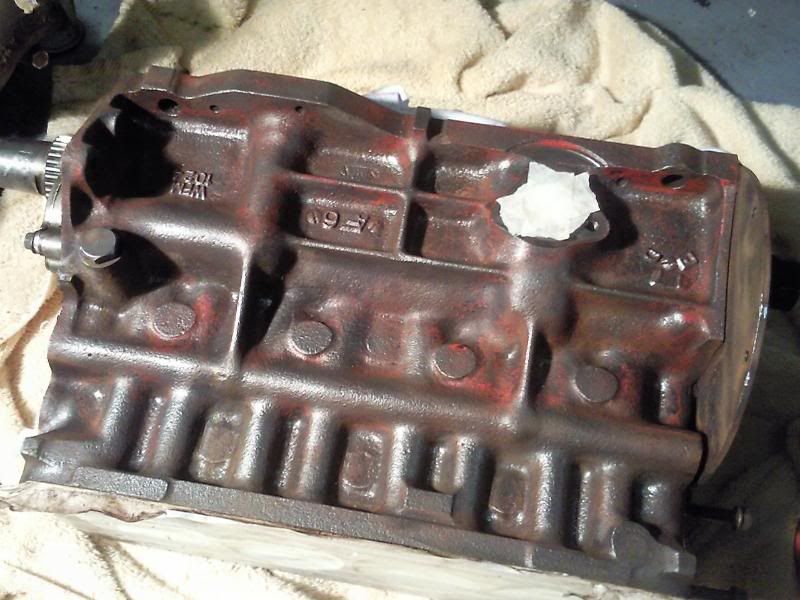
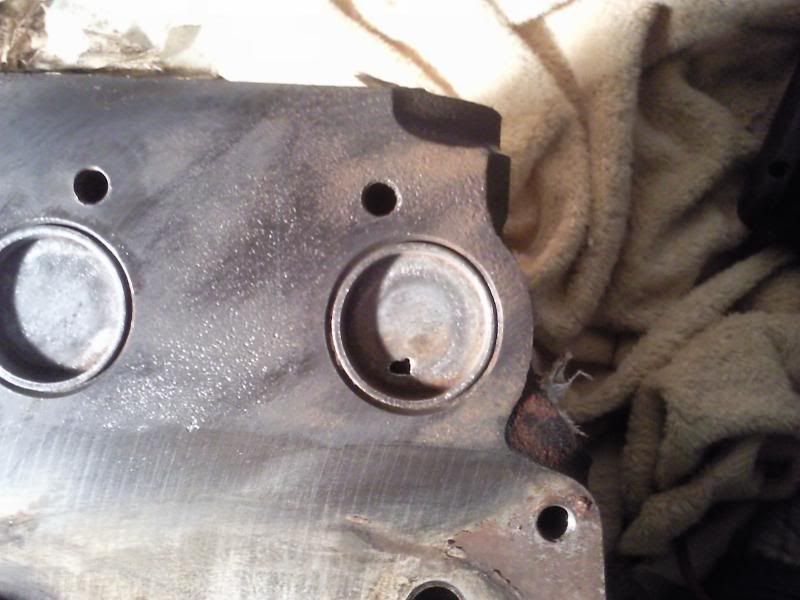
Finally on the engine side of things is purely cosmetic. I have cleaned up the block, and discovered a small rust hole in a core plug. it's ready to be painted (go faster red) and have started to clear up some of the ancilleries too.
cleaned block
Hole in core plug
That tank looks the absolute spit of my homemade jobby, that i bought
I believe the tank is a home made one. My dad bought it many years ago from a guy who i think made it, so it's not genuine, but that doesn't really bother me!
I haven't updated in a while but have done a number of different things on both the bodywork side and engine bits.
First the engine bits:
I sent my bottom pulley off to a guy on the TurboMinis forum to be machined for my megajolt setup, i recieved it back a couple of weeks ago. It looks great and the bracket i bought from him is great too,
Before machining
After machining with bracket
I've decided to go use a phase 2 turbo camshaft rather than the standard turbo one. The cheapest and easyest way i could do this was to have my one reprofiled. I removed it and have sent it off to Avonbar to be reprofiled. When they've done that they are going to call me to arrange payment and hopefully i'll order the rest of my engine bits.
Standard Turbo Camshaft
Finally on the engine side of things is purely cosmetic. I have cleaned up the block, and discovered a small rust hole in a core plug. it's ready to be painted (go faster red) and have started to clear up some of the ancilleries too.
cleaned block
Hole in core plug
#54
Guennie
-
- Members
-
- 186 posts
Mini Mad
- Location: Newmarket
- Local Club: Bury Mini Club
Posted 21 March 2009 - 11:55 PM
Must have reached the post size limit because i couldn't type anything else in the last one! Anyway, onto body work.
I welded the damper mount plates on so now i just need to get some new mounts. Although the welding isn't brilliant i made sure i had some nice strong welds in place.
The bulkhead box was next on the list of things to do. I did quite a lot of research on these forums for the best way to put them in, and where i'd need to make my cuts. After a lot of measuring and positioning i made the first cut.

After lots of cutting and grinding i managed to get a hole like this
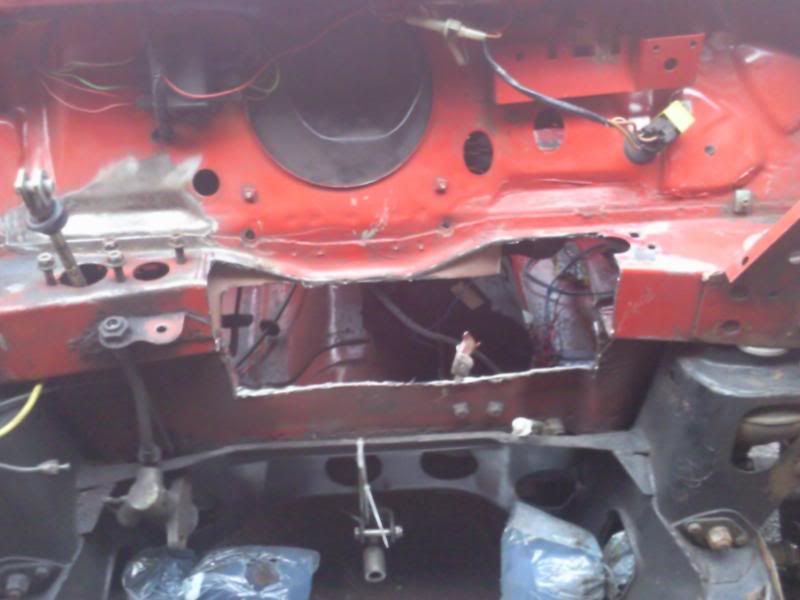
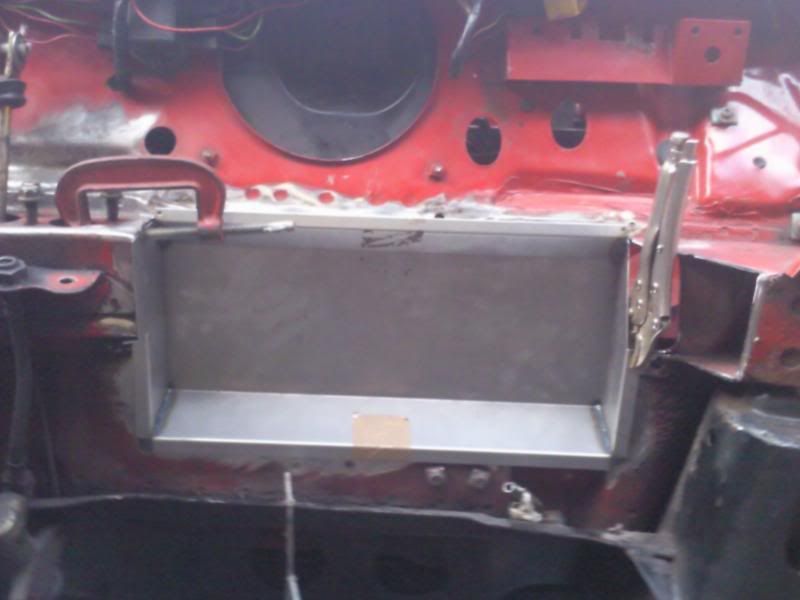
and the bulkhead box fitted in nicely like this
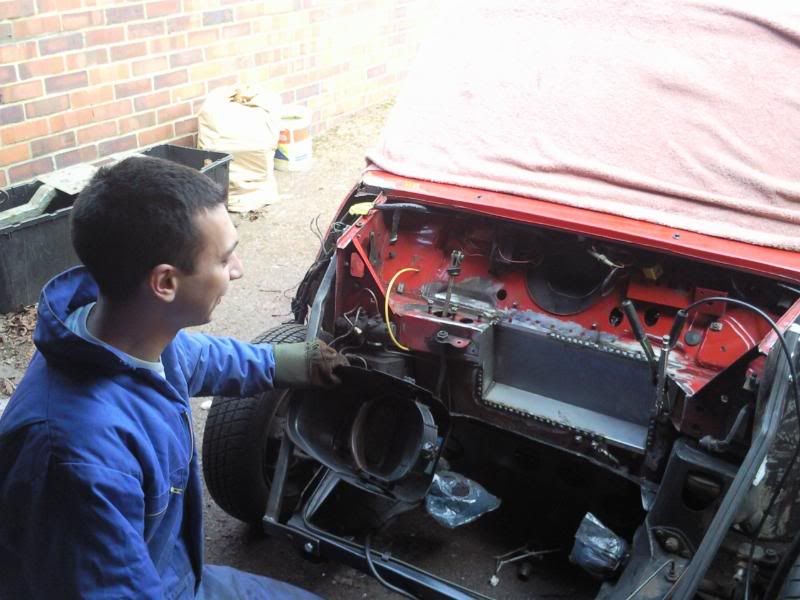
This morning ed (edi57) came round as he had offered to do the welding for me. His welding is very good, far better than mine, if you want to see an example of his work check out his project thread (i'll find a link later!).
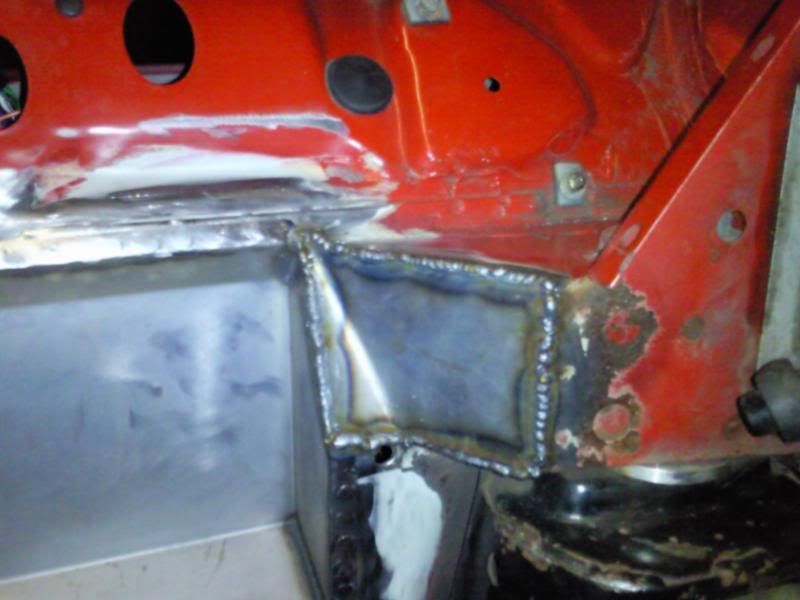
Here's ed welding in the box
and the box after being welded in
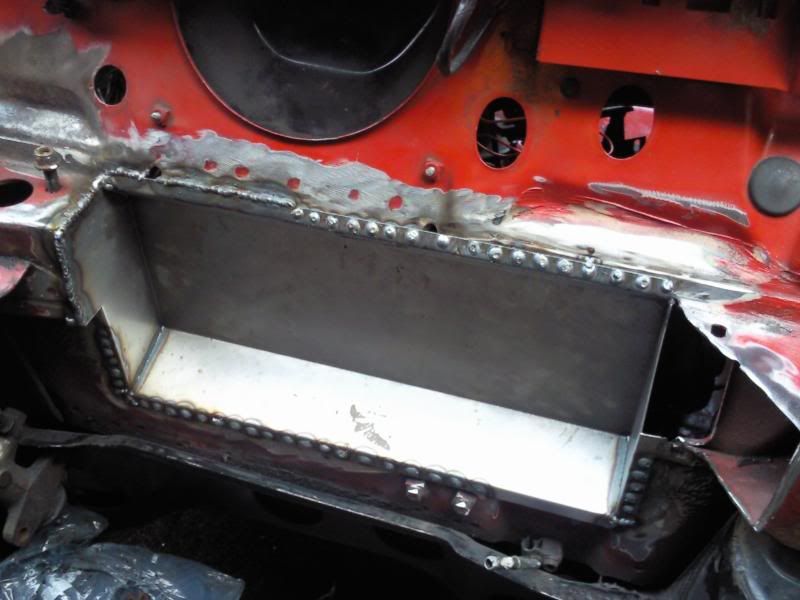
ed had to leave before it was completely finished, but that gives me time to grind back the welds and fabricate a piece of metal to fill the gap at the end of the box. Many thanks to ed for doing such a brilliant job so far!
Thanks for reading!
Guennie
I welded the damper mount plates on so now i just need to get some new mounts. Although the welding isn't brilliant i made sure i had some nice strong welds in place.
The bulkhead box was next on the list of things to do. I did quite a lot of research on these forums for the best way to put them in, and where i'd need to make my cuts. After a lot of measuring and positioning i made the first cut.
After lots of cutting and grinding i managed to get a hole like this
and the bulkhead box fitted in nicely like this
This morning ed (edi57) came round as he had offered to do the welding for me. His welding is very good, far better than mine, if you want to see an example of his work check out his project thread (i'll find a link later!).
Here's ed welding in the box
and the box after being welded in
ed had to leave before it was completely finished, but that gives me time to grind back the welds and fabricate a piece of metal to fill the gap at the end of the box. Many thanks to ed for doing such a brilliant job so far!
Thanks for reading!
Guennie
Edited by Guennie, 27 March 2009 - 12:02 AM.
#55
richardsoniscool
-

- TMF+ Member
-
- 629 posts
Super Mini Mad
- Location: Huntingdon
- Local Club: Bury Mini Club
Posted 22 March 2009 - 12:26 AM
yay an update, looking good:), and eds welding is as good as ever :)im having trouble sourcing an engine for mine. i am serilosly thinking about and engine conversion  but im not sure, i wil ask everyones opinion next week
mike
ps will now add u on facebook
but im not sure, i wil ask everyones opinion next week mike
ps will now add u on facebook
Edited by richardsoniscool, 22 March 2009 - 12:42 AM.
#56
Guennie
-
- Members
-
- 186 posts
Mini Mad
- Location: Newmarket
- Local Club: Bury Mini Club
Posted 27 March 2009 - 12:17 AM
Another quick update.
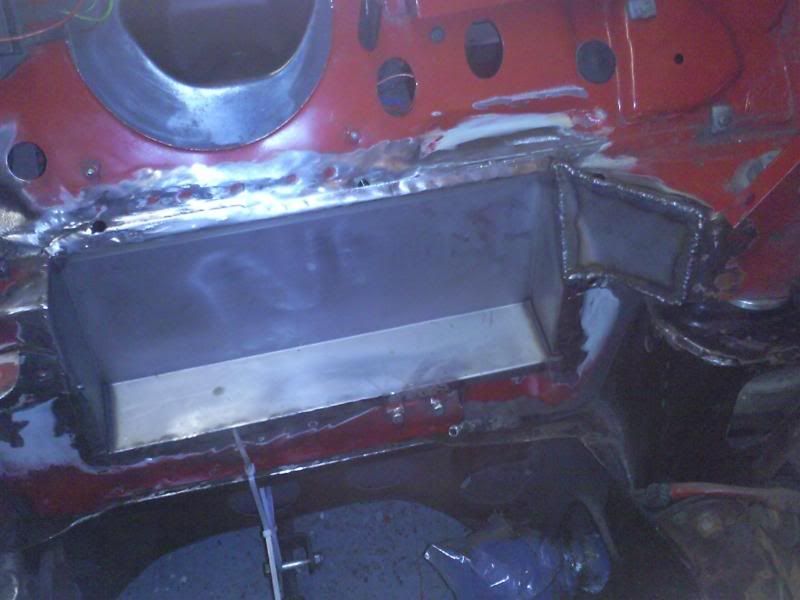
After grinding down the welds made on saturday, I managed to fabricate a piece of metal to fill the gap at the end of the bulkhead, where the actuator will sit. Ed then came round on sunday to weld it in and as always did a brilliant job of it. This just needs to be ground down now and then i can paint it all up (this weekend hopefully)
The fabricated end piece
the whole bulkhead box
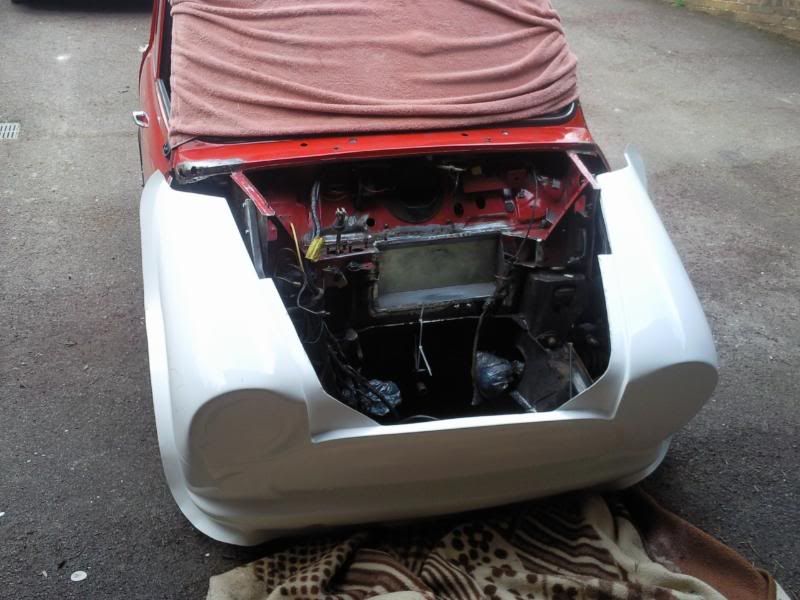
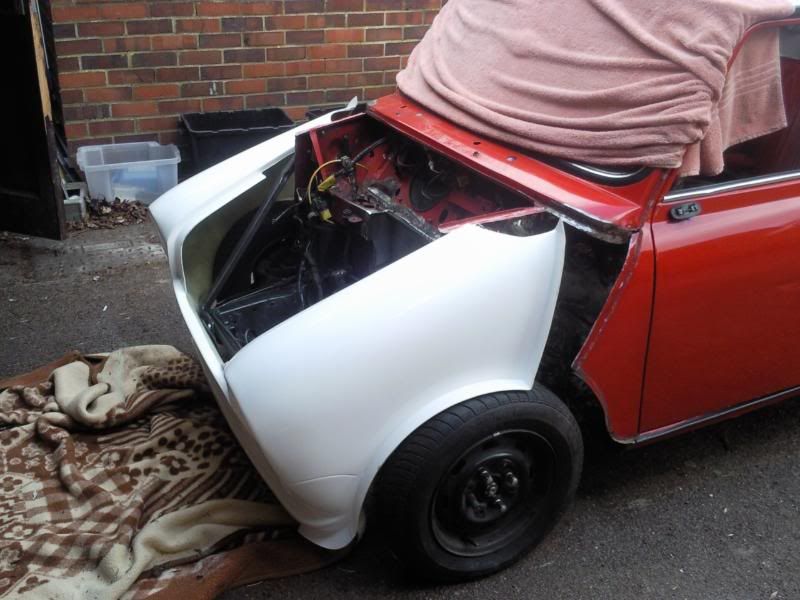
Dad and i also started to line up and fit the fibreglass front end. This is proving an absolute nightmare! Im sure i have many hours ahead of me to get it fitting right. I haven't spent too long on it so far but this is what i have.
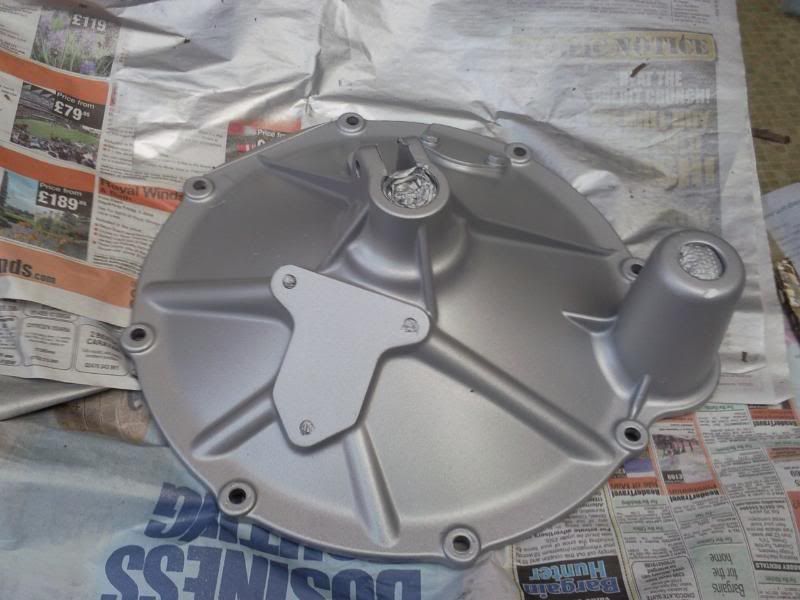
Another thing i had a quick go at over the weekend was cleaning and spraying up different engine parts. I started with the flywheel/clutch cover. On my last engine i cleaned it with a wire brush and jus left it like that. This time after i cleaned it i decided to spray it up in silver. Im pretty pleased with the result and am now in the process of cleaning up other arts ready for a coat of paint.
Thanks for looking.
Guennie
After grinding down the welds made on saturday, I managed to fabricate a piece of metal to fill the gap at the end of the bulkhead, where the actuator will sit. Ed then came round on sunday to weld it in and as always did a brilliant job of it. This just needs to be ground down now and then i can paint it all up (this weekend hopefully)
The fabricated end piece
the whole bulkhead box
Dad and i also started to line up and fit the fibreglass front end. This is proving an absolute nightmare! Im sure i have many hours ahead of me to get it fitting right. I haven't spent too long on it so far but this is what i have.
Another thing i had a quick go at over the weekend was cleaning and spraying up different engine parts. I started with the flywheel/clutch cover. On my last engine i cleaned it with a wire brush and jus left it like that. This time after i cleaned it i decided to spray it up in silver. Im pretty pleased with the result and am now in the process of cleaning up other arts ready for a coat of paint.
Thanks for looking.
Guennie
#57
deemo
-

- Members
-
- 185 posts
Mini Mad
- Local Club: LCMOC
Posted 27 March 2009 - 01:28 AM
Just read through the project up to this point, Looks great!
I saw the pics of your bust engine on turbo minis. Crazy!
I'm doing something similar to you, turboed, flipfronted ect Your futher on though and I have more rot
Wicked project, keep it up. I'll be watching your progress
I saw the pics of your bust engine on turbo minis. Crazy!
I'm doing something similar to you, turboed, flipfronted ect Your futher on though and I have more rot
Wicked project, keep it up. I'll be watching your progress
#58
Guennie
-
- Members
-
- 186 posts
Mini Mad
- Location: Newmarket
- Local Club: Bury Mini Club
Posted 29 March 2009 - 01:14 AM
Just read through the project up to this point, Looks great!
I saw the pics of your bust engine on turbo minis. Crazy!
I'm doing something similar to you, turboed, flipfronted ect Your futher on though and I have more rot
Wicked project, keep it up. I'll be watching your progress
Thanks. It was wierd when i introduced myself on TurboMinis because i put a few of the engine pics on my first post. I then had a guy tell me that someone else had already posted the pics before lol. Must have got them off this forum!
I was pleasently surprised with the lack of rot on mine. There are still a few places i need to sort but not many.
I painted the bulkhead up today, and got the rest of my megajolt setup from a scrapyard. I'll post some pictures tomorrow when i've uploaded them.
#59
Guennie
-
- Members
-
- 186 posts
Mini Mad
- Location: Newmarket
- Local Club: Bury Mini Club
Posted 29 March 2009 - 10:40 PM
Ok so i've taken a few pictures of the painted bulkhead. It still needs to be tidied up a bit and maybe have another coat of paint but its looking good for now, plus it's going to stop the freshly welded bulkhead box going rusty!
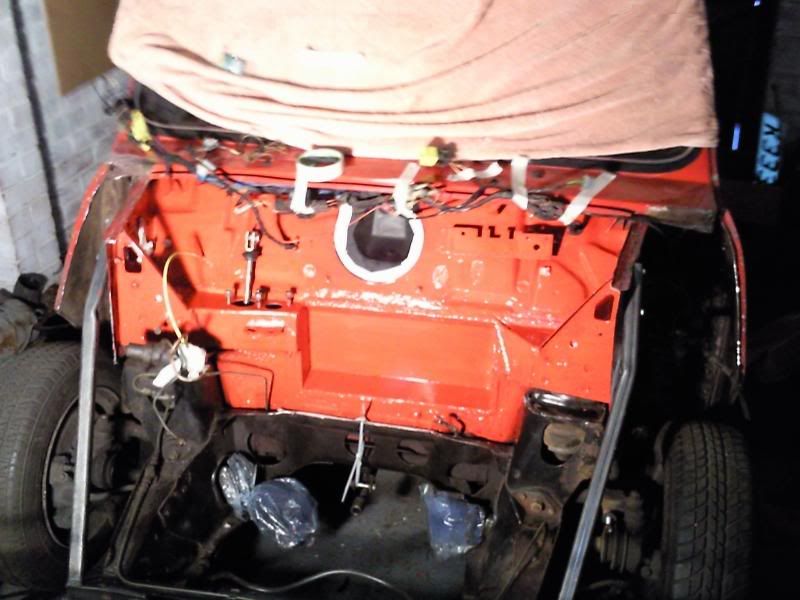
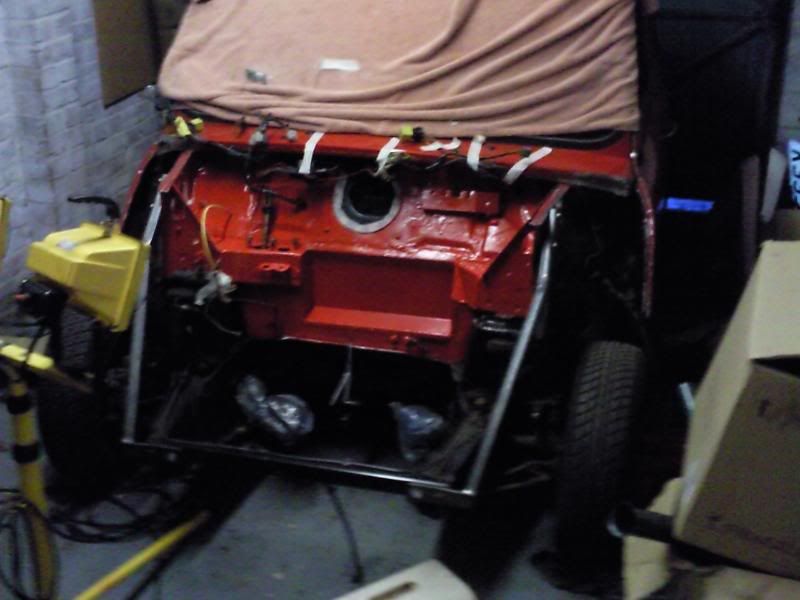
After steve (who knocked on my garage door on saturday asking what i needed him to do on the mini!) and i had painted the bulkhead and were waiting for the paint to dry, we decided to hit the scrapyards to search for a door for his girlfriends mini, and the final components for my megajolt set up.
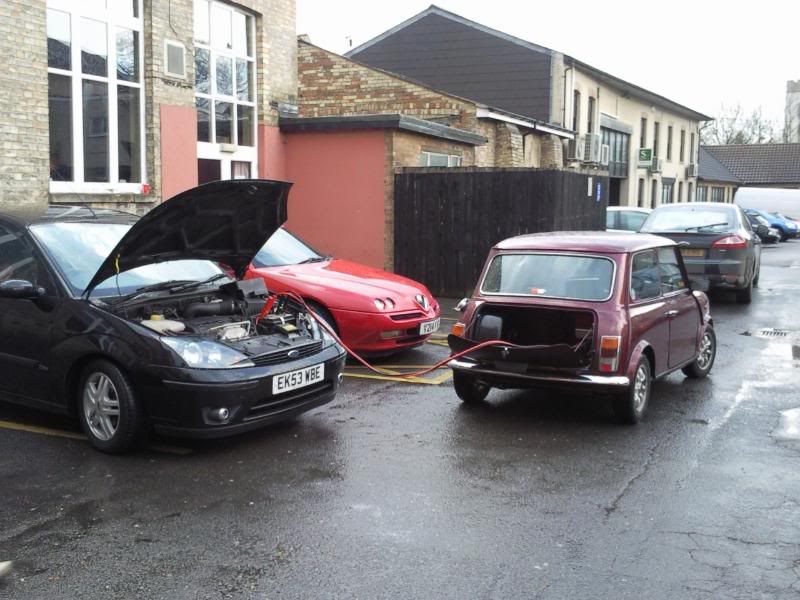
After stoping at Steve's on the way to collect his coat we went outside to find his focus wouldn't start! We managed to jump start it from his brothers car and were on our way until he flashed his lights to let someone go. This stalled the engine!!! the car refused to start, so we pushed it off the highstreet into a pub car park. A call was made to danny who promptly turned up in his mini and jump started us again!
It's not often the mini starting the focus!!!
Anyway, steves problem sorted and we picked up a Coil Pack, Crank Position Sensor, and some HT leads which has completed my megajolt kit
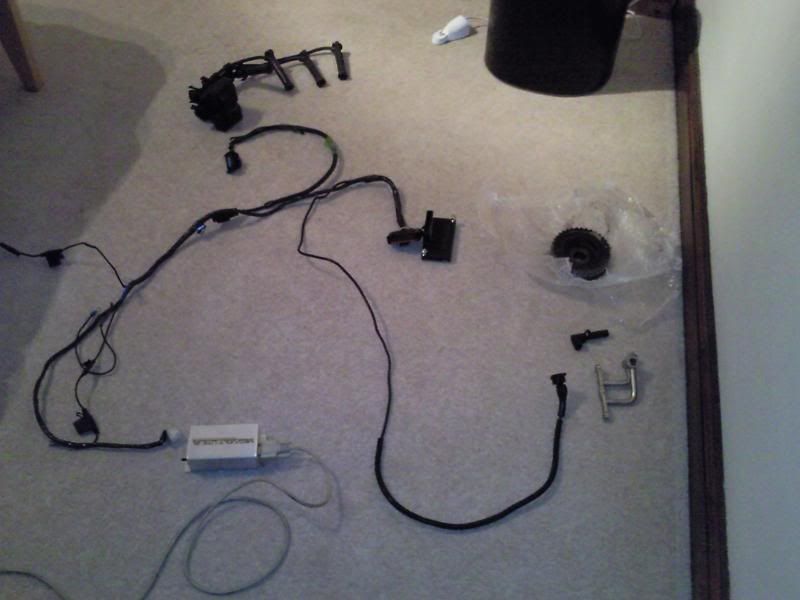
Unfortunatily we couldn't find any mini doors for steve.
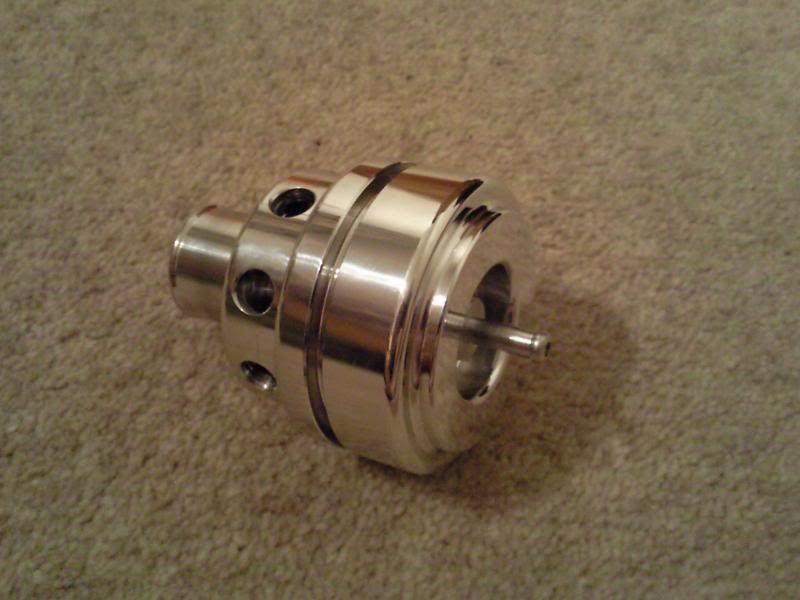
Also after placing a substancial order with Avonbar last week, bits have started turning up. The first package that turned up was a nice shiny dumpvalve. Hopefully i should have a lot more delivered this week.
I should be able to get on a bit quicker now that it's lighter in the evenings. the L2B deadline is looming!
After steve (who knocked on my garage door on saturday asking what i needed him to do on the mini!) and i had painted the bulkhead and were waiting for the paint to dry, we decided to hit the scrapyards to search for a door for his girlfriends mini, and the final components for my megajolt set up.
After stoping at Steve's on the way to collect his coat we went outside to find his focus wouldn't start! We managed to jump start it from his brothers car and were on our way until he flashed his lights to let someone go. This stalled the engine!!! the car refused to start, so we pushed it off the highstreet into a pub car park. A call was made to danny who promptly turned up in his mini and jump started us again!
It's not often the mini starting the focus!!!
Anyway, steves problem sorted and we picked up a Coil Pack, Crank Position Sensor, and some HT leads which has completed my megajolt kit
Unfortunatily we couldn't find any mini doors for steve.
Also after placing a substancial order with Avonbar last week, bits have started turning up. The first package that turned up was a nice shiny dumpvalve. Hopefully i should have a lot more delivered this week.
I should be able to get on a bit quicker now that it's lighter in the evenings. the L2B deadline is looming!
Edited by Guennie, 29 March 2009 - 10:41 PM.
#60
Saxo-Fiesta-Mini
-
- Members
-
- 2,889 posts
Up Into Fourth
- Local Club: LCMOC
Posted 29 March 2009 - 10:59 PM
good work


1 user(s) are reading this topic
0 members, 1 guests, 0 anonymous users


