Jump to content


Photo
- - - - -

92 City, My First Rebuild.

roundnose

  • Please log in to reply
670 replies to this topic

#16 big-jay

big-jay

    Super Mini Mad

  • Members
  • PipPipPipPipPipPip
  • 518 posts
  • Location: Birmingham
  • Local Club: British Mini Club

Posted 10 January 2014 - 10:50 PM

Great threaed, I have sneaking suspicion I'm going to learn a lot from this. Good luck with the build.


Hi skmulvany, I'm still learning myself but am getting more and more confident each time I work on the car, I'm glad you feel you can learn from this !

Edited by big-jay, 27 June 2014 - 10:08 AM.


#17 domdee

domdee

    Formally known as dominicdee

  • Members
  • PipPipPipPipPipPipPip
  • 1,183 posts
  • Location: hull
  • Local Club: hull clubs on FB

Posted 11 January 2014 - 12:27 PM


D9AB7B4F-2B55-47BE-8ACD-BD317FAC381D_zps

is that your welders earth bolted on there?

Yes, sandwiched between two bolts so its a decent earth, not the best but it got the job done.


hey i arent knocking it, probably a better earth than the sh1tty clamps that come with welders


#18 big-jay

big-jay

    Super Mini Mad

  • Members
  • PipPipPipPipPipPip
  • 518 posts
  • Location: Birmingham
  • Local Club: British Mini Club

Posted 11 January 2014 - 05:59 PM


is that your welders earth bolted on there?

Yes mate, I sandwiched it between two bolts so its a decent earth, not the best but it got the job done, the clamps a bit dodgy haha !

hey i arent knocking it, probably a better earth than the sh1tty clamps that come with welders

I agree the clamps are terrible, they don't last very long !

Edited by big-jay, 27 June 2014 - 12:09 AM.


#19 big-jay

big-jay

    Super Mini Mad

  • Members
  • PipPipPipPipPipPip
  • 518 posts
  • Location: Birmingham
  • Local Club: British Mini Club

Posted 11 January 2014 - 06:52 PM

Update guys,

Me and my dad got the floor pan welded in today, took some persuasion but nothing the grinder and a big hammer couldn't sort out ;-). Really happy with how it came out, got some pictures of the process.

In position to be welded -

4DB8B2B1-0F6D-4A9B-BC5C-237BD476D5ED_zps

Welded, tidied up and temporarily primed to keep the rust at bay -

D04C7782-A875-4D81-A090-83FC75388453_zps

Ill be sanding the whole floor of the car, priming, applying Tiger Seal on the welds, applying more primer, top coating and will then be applying Dyna-Mat with underlay. Then I think I'll be buying a new carpet set from Newton Commercial, so that should smarten the inside up !

Also I removed the shock absorber mount today, I new it had gone but didn't think it would be too bad, couldn't of been more wrong !

D72B86F2-52A3-4F87-B87B-76C30933F10C_zps

Rot cut out -

B0B89757-54E1-4EED-BD81-EB49953D528B_zps

Temporary primer applied -

62B306D8-355B-4888-8856-DDF559A508C2_zps

Will have to make a repair piece for this and then I'll be purchasing Lowered Shock Absorber Mounting Brackets for both sides from Minispares.

Also made a small patch for the bottom of the Flitch panel -

FC41E708-9A69-401D-80EA-870258AD263D_zps

You can't really see the patch but if you look back at the earlier photo of when we put the Flitch panel In You'll see there's a small hole at the bottom.

So, to do list for tomorrow is as follows, make a piece to fit the top of the Flitch panel, ( as you can see in the photo above ), and also get the Cross Member repair section welded in. Feels like we're making good speedy progress with this so I'm happy :D. Can't wait to get this welding phase over and start prepping the whole car for a nice new shiny paint job :D. Still got the other side to do though but hopefully won't take us too long.

That's it for today guys but I'll have some more to update tomorrow !

Edited by big-jay, 27 June 2014 - 12:12 AM.


#20 big-jay

big-jay

    Super Mini Mad

  • Members
  • PipPipPipPipPipPip
  • 518 posts
  • Location: Birmingham
  • Local Club: British Mini Club

Posted 12 January 2014 - 07:18 PM

Update,

We made a piece to fit the top of the Flitch panel today, i hate really fiddly pieces, and some how it took all day to get it right so didnt get chance to do anything else but it does look good now it's in.

In position to be welded -

B56F7A1B-9253-4740-A897-F70EAC17A080_zps

Welded in and dressed up -

60815833-BC72-458D-BAC3-EBC98C802C00_zps

Still got to make another piece to fit the remaining gap at the top of the Flitch but getting there :-)

On a side note, she's looking sorry for her self ;-) -

38C405DA-F3C0-4BAB-8EB8-67B6B9DFC878_zps

Two minis tucked up ;-) -

82E35867-F7AF-4FF4-B7FA-8D229F83517E_zps

#21 big-jay

big-jay

    Super Mini Mad

  • Members
  • PipPipPipPipPipPip
  • 518 posts
  • Location: Birmingham
  • Local Club: British Mini Club

Posted 15 January 2014 - 05:37 PM

Update,

Booked the night off work last night so I got a bit done yesterday and some today.

The rust bug had already started to come through my nice fresh welding so had to sand all the welding down we've done, re-primer and apply temporary black top coat to stop it.

37EE730B-A91A-4E07-82D8-0A3B801AA4DA_zps

B4979312-A377-4E7B-9AFF-7DB46E8A5A46_zps

I also removed what was left of the wing from the inner wing and front panel.

Started off like this -

CBF7D316-18D5-4727-A1A4-0E582D905C1B_zps

And ended up like this -

6D0D0D64-F2AB-4AF6-B3AC-F71F9E9A1371_zps

As you can see the inner wing lip at the top is gone so I spent today fabricating a new one. Had to make it in two halves as I haven't got a piece of steel long enough.

Made a card template first -

62A21999-DE36-4CF4-813F-0F82FC879F8F_zps

Then transferred it to steel -

9D5912EF-D664-453D-80C2-12FF04FA88DC_zps

How it fits -

0768A133-4A74-4B5A-89BF-9A991DC970A0_zps

I left the old lip in place so I could get the curve right. Didn't get chance to fabricate the top half or remove the old lip today as it started chucking down so I went in. I'll do some more the weekend though as I'm at work for the rest of the week now.

Also I received some new smoked side indicators today, bargain from Wood and Pickett on EBay !

EBC68323-18EE-47E5-B494-97DF5B477809_zps

Aiming to have a big box full of new goodies for the rebuild :D

All in all I'm happy with the progress but still have a massive list of panels and parts I need, new rear subframe, bonnet, boot, possible front subframe, all the panels for the other side, respray and the list goes on believe me ;-). Ill have to upload a picture of it !

More updates the weekend :-)

#22 big-jay

big-jay

    Super Mini Mad

  • Members
  • PipPipPipPipPipPip
  • 518 posts
  • Location: Birmingham
  • Local Club: British Mini Club

Posted 21 January 2014 - 12:20 AM

I have a massive update coming soon guys, don't worry I've not give up ;-). Got loads done, just haven't had the time to update this thread, also photobuckets messed all my pictures up so I've got to figure out how to fix that too !

#23 big-jay

big-jay

    Super Mini Mad

  • Members
  • PipPipPipPipPipPip
  • 518 posts
  • Location: Birmingham
  • Local Club: British Mini Club

Posted 24 January 2014 - 06:58 PM

Huge Update,

Right, where do I start :D ! Got a load done over the last few weeks but haven't been able to get on here to update, but nows the time !

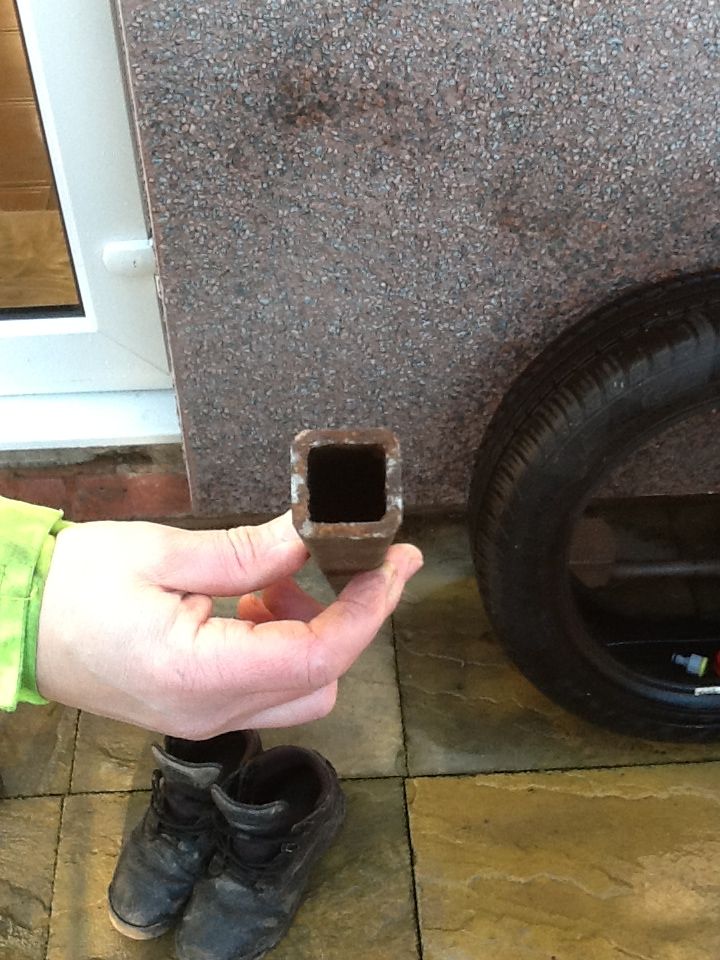
I acquired some one inch box section to make some bracing ready for the removal of the doorstep.

E866BCD7-0462-4E54-8494-CDFADE904B45_zps

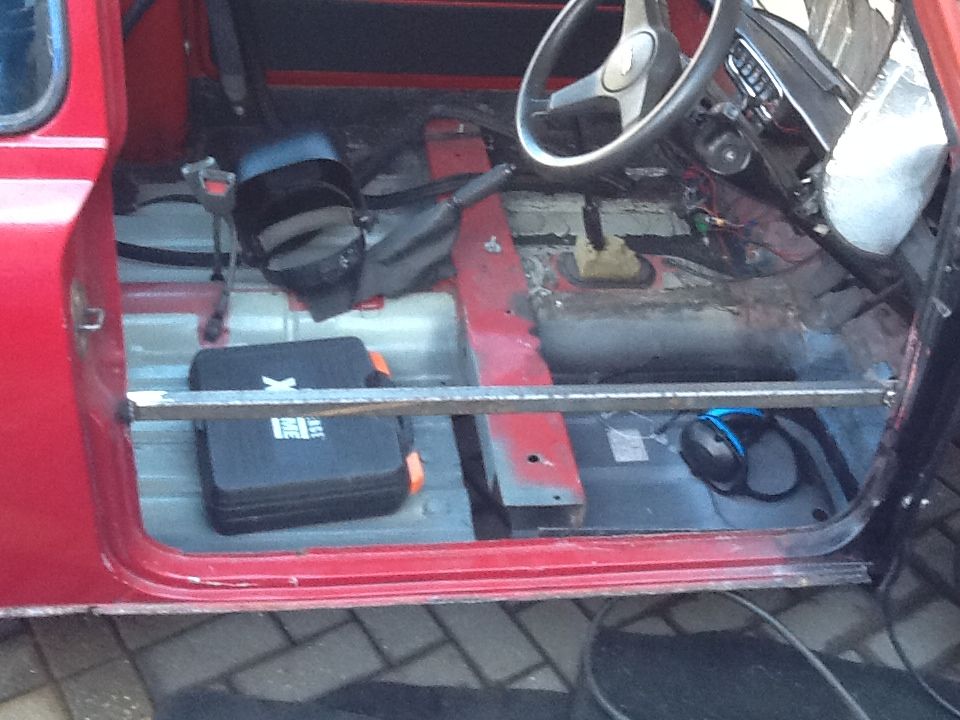
Braced the door by tacking it to either side of the door flanges, before I did this I took some accurate measurements from the other side and they where bang on the same, so that was a relief, means nothing's moved that shouldn't have !

6CC23714-0964-49F7-AA8A-7E48FFF9DE43_zps

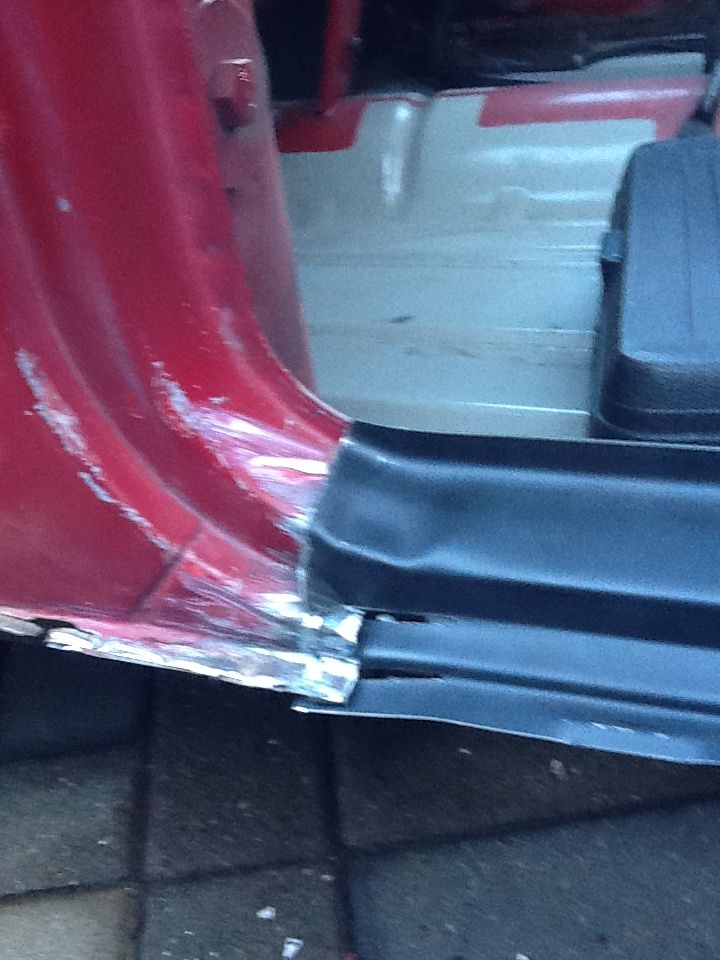
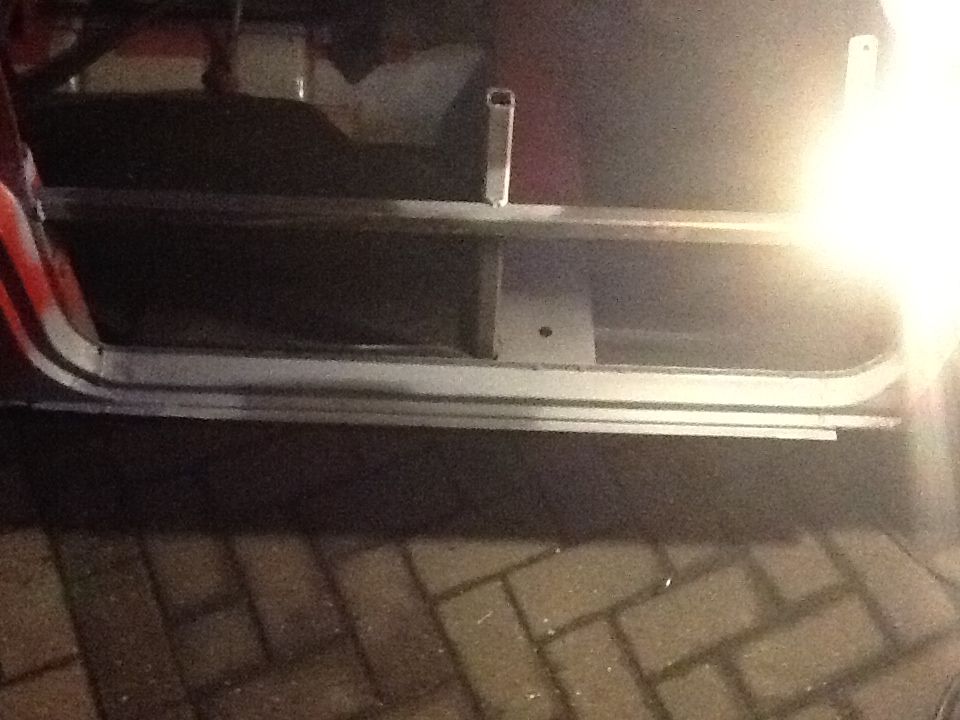
We then chopped the old doorstep out and had a play trying to get the other doorstep into place. Ive heard the magnum doorsteps are a pig to fit but to be honest it really wasn't a bad fit at all, just took a bit of time to get it to fit right at the rear end but not to bad at all.

Roughly positioned into place ( apologise for the poor pictures, but just wanted to get on with it :-) )

A27D54F5-B621-488B-B013-B3AB89B655EC_zps

Then we checked the fit with the door on -

A51B3585-3E01-4FC2-AA3D-2D0B42E9E4CA_zps

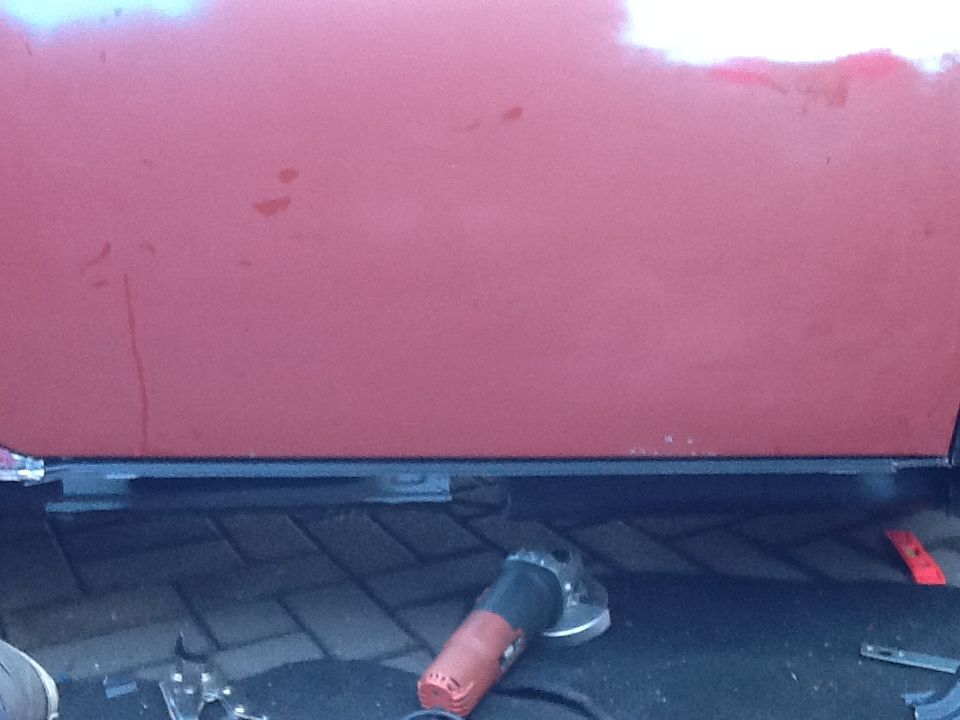
Not a bad fit at all, still needed more work as the gap was wider at the back. I have got a picture of the finished product but its not brilliant as the light was fading and my cameras not the best as it is, I will post a better picture of the finished product soon though, but here's the poor picture anyway.

Welded in, better picture coming soon -

F3C87F1B-12AC-4D4B-81C3-25A6C2D51BAF_zps

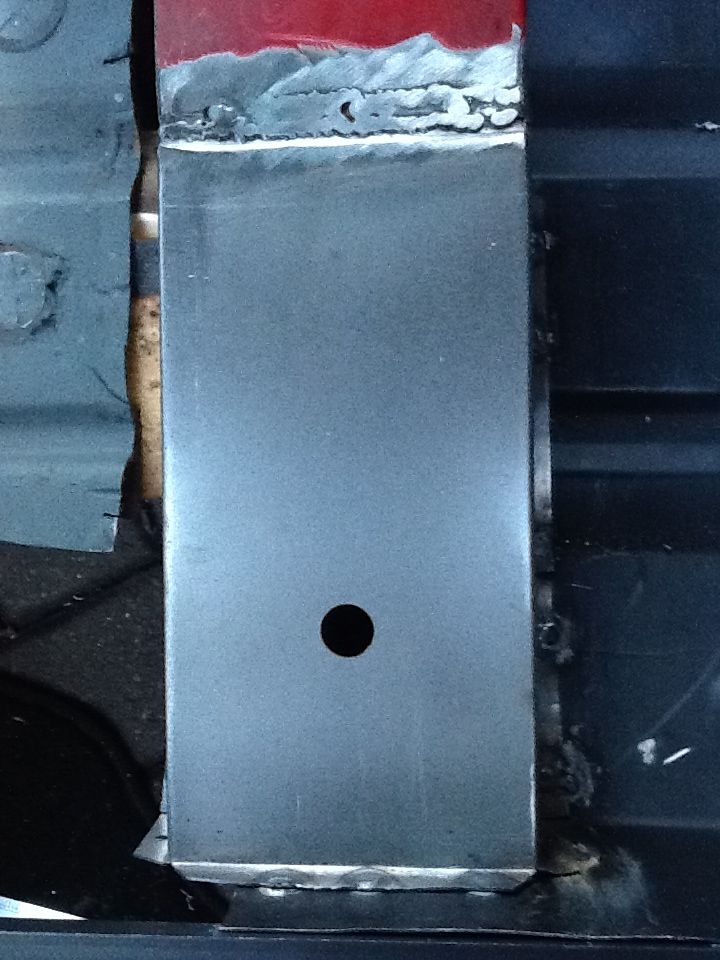
Plug welded it to the front inner sill and the new crossmember, which I'll show you how we fitted.

I positioned the crossmember in place and then used an old cobra subframe I had knocking around in the shed to make sure the gaping was right between the two seat securing brackets, then we tacked it in place and then seam welded it. Really impressed with M-Machine panels, great fitting and quality !

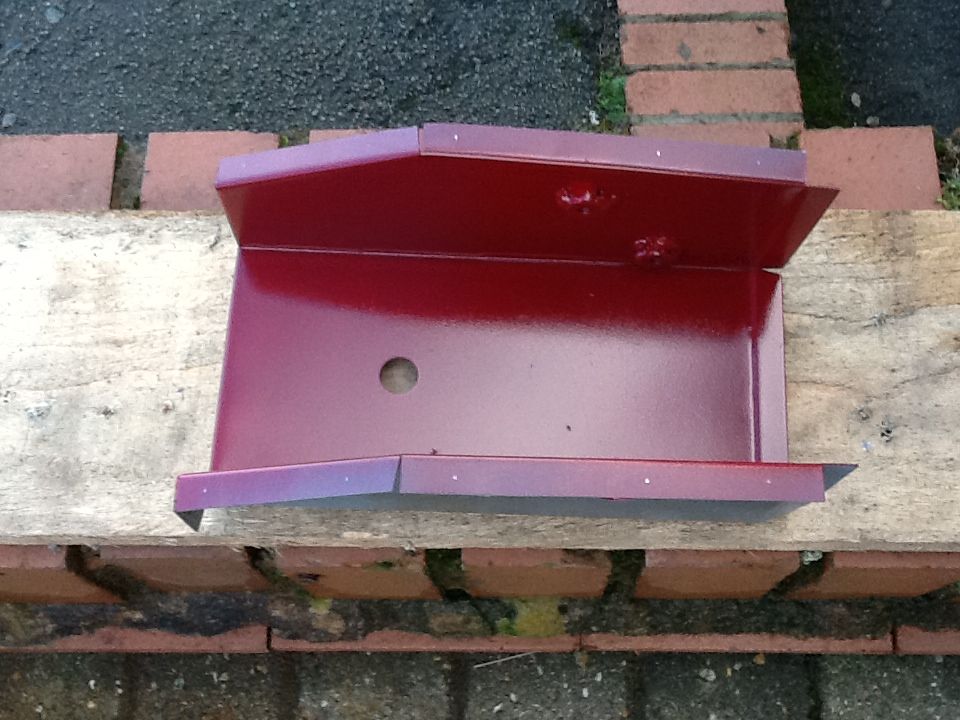
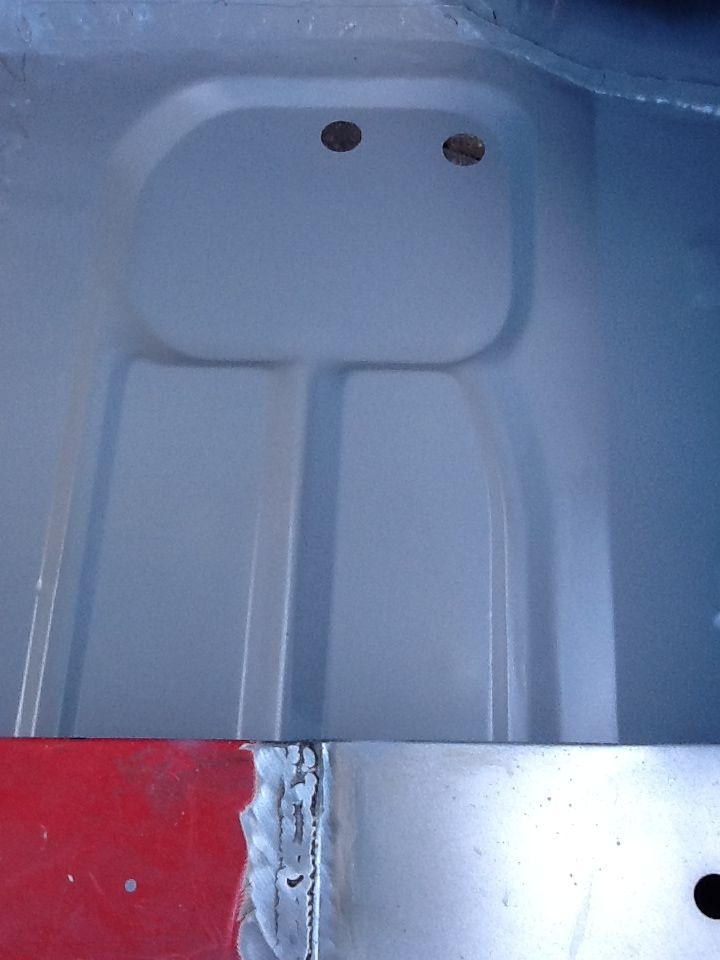
Painted the inside for some protection -

3003A4E7-411A-4705-A64F-191804278B54_zps

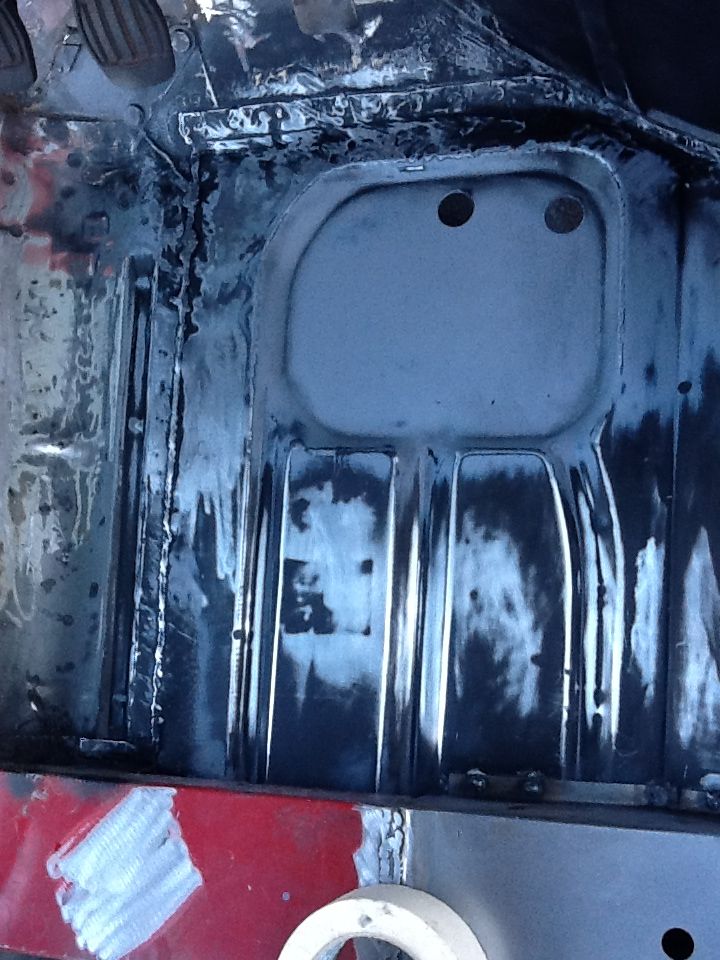
Then we drilled the holes for the plug welds and seamed welded the top and sides -

F1F3F700-1ECD-4088-AD21-6604503164E0_zps

Still needs more welding along the top to fill the gaps, will get a lick of filler after as well, but daylight was running out so had to call it a day.

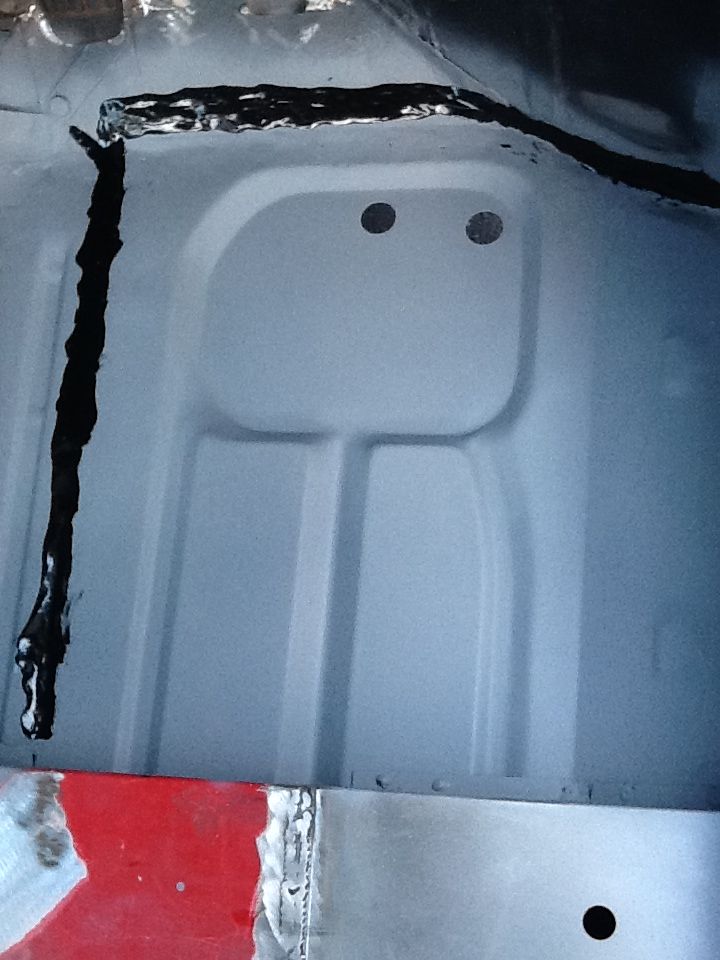
Then I started to do some seam sealing of the stuff we've already welded in.

Sanded back mostly to bear metal -

BB811A83-B595-472B-A989-5D365AD20931_zps

Etch primed -

482D6E08-C7E6-4C25-948E-A085F3CE23D9_zps

Tiger seal applied, will prime again and top coat -

B750AA56-553F-4255-B57B-2F100783FB86_zps

Also done the flitch, same as above -

057DDCEC-D5F2-4258-A741-875770AE1B5F_zps

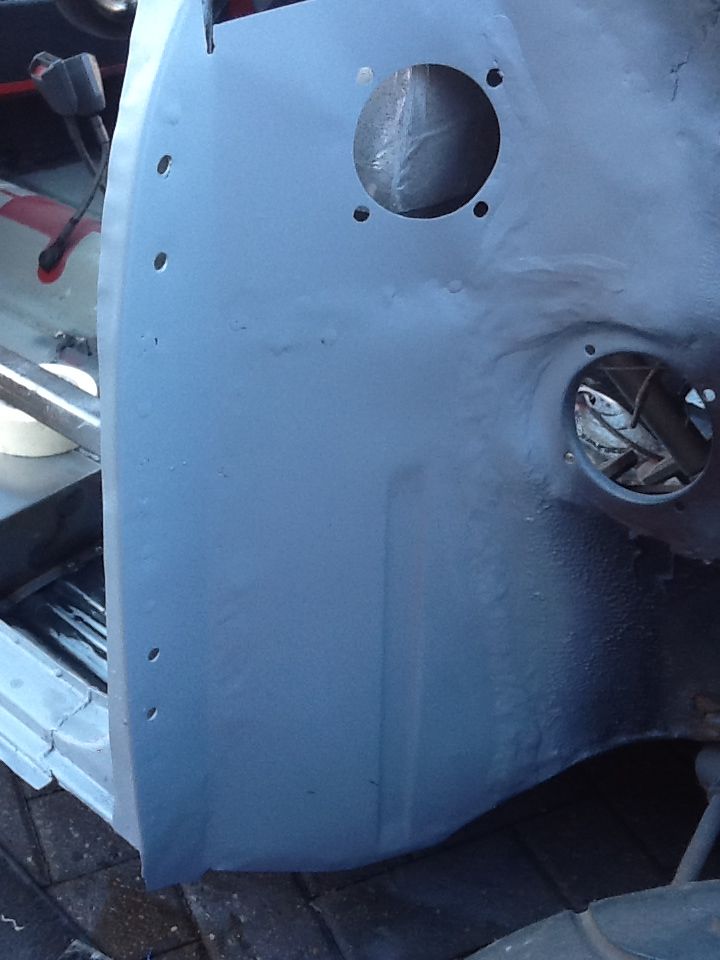
Had a bit of a reaction with the flitch though so will have to be rubbed down and primed again !

That's all the body work I've got done, but I've still got more to update.

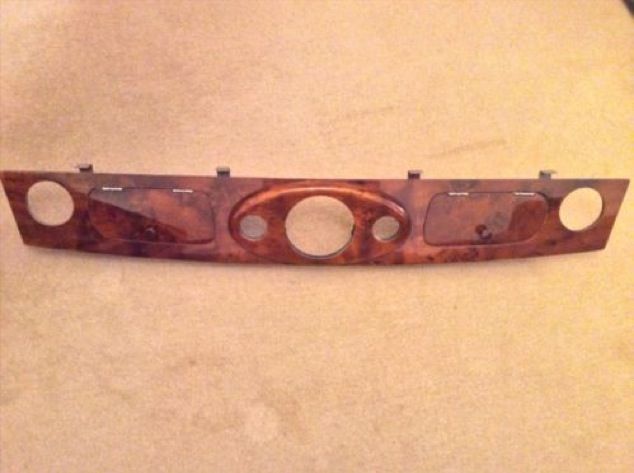
Won this beauty on eBay for an absolute bargain, brand new, never installed, the guy brought it for his own project but never finished it. Just waiting for it to arrive now and I'll take some piccys of it, have got the eBay picture though so here you go.

C3A866E1-1350-4F3D-ACE7-155092C9466C_zps

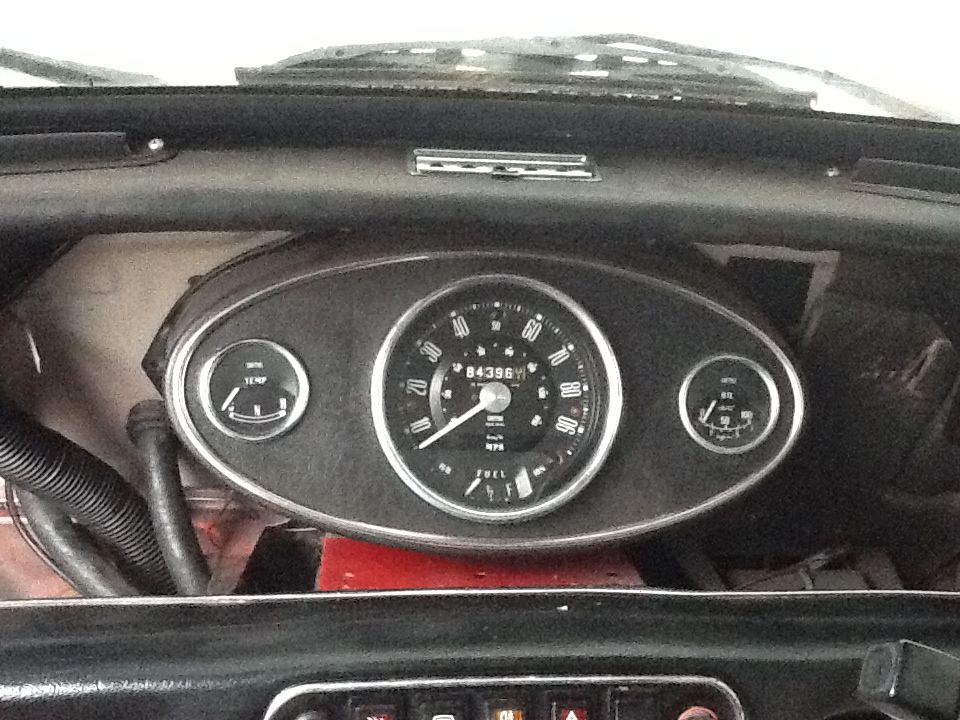
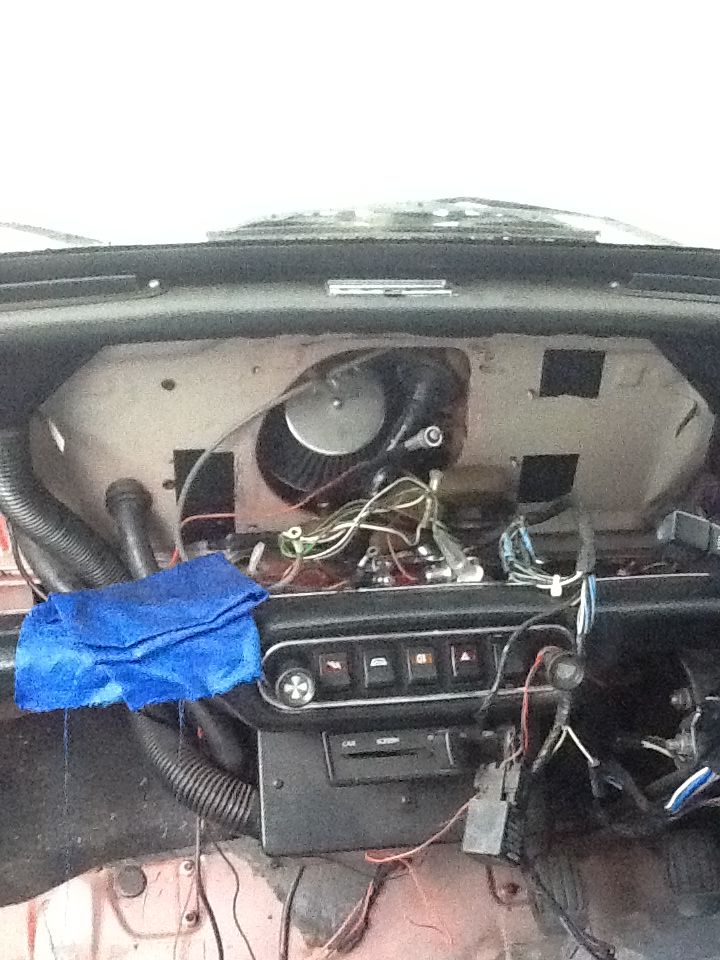
So today I started stripping down my current dash set up to clean the clocks and what not and get them ready to go in the new dash, which won't be being installed until the cars finished though so it will be safely tucked away in my room till then :-)

Before -

129CB50B-7AD7-439E-9FDF-D3FEE5046E43_zps

Removed -

A35B0974-07AC-40D2-947E-D3A7FC78DEF0_zps

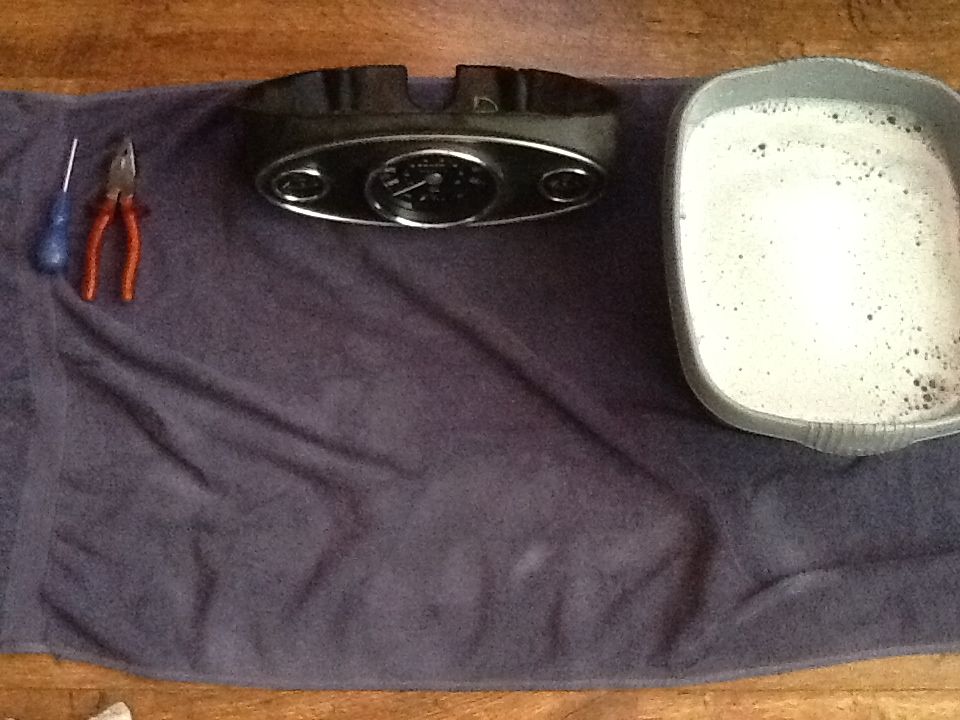
Took it inside and stripped it down and cleaned it.

Before -

D4EDC290-62F6-4CCE-8A8E-DB1753522F84_zps

After -

308C5651-3747-40F5-8993-81D5CB41F8AB_zps

I'm going to Repaint all the back plates and renew all bolts etc, also thinking of getting some magnolia fascias from sticky fingers as that will finish the clocks off nicely !

So that's where I'm currently at and am going to do some more work tomorrow, going to Bingley Hall on Sunday and cannot wait, going to relieve my self of some hard earned cash :D.

Edited by big-jay, 27 June 2014 - 10:15 AM.


#24 big-jay

big-jay

    Super Mini Mad

  • Members
  • PipPipPipPipPipPip
  • 518 posts
  • Location: Birmingham
  • Local Club: British Mini Club

Posted 25 January 2014 - 03:45 PM

Update,

Decided to repair the shock mount today but couldn't get it completely finished as it started lashing down, hail stones and everything, don't you just love the British weather !! Anyway here's some pictures of the process.

Hole in question -

279BAC85-2BC4-48E7-ADE7-55D3EC31D1B6_zps

Kurust, etch primer and top coat applied -

B722F02C-ACEC-4721-95DF-E8380C3280A2_zps

We then made this plate from thicker gauge steel, 1.2mm and etch primed it -

67CF2613-6A3F-4E14-9B08-EF95FF2D79AF_zps

Top coat applied to the back of the plate -

D1185232-4078-4BAA-98D0-40EE97F9B80F_zps

Plug welded, used the shock mount bolts to keep it all tight -

DD3C28C8-B23B-4A26-B707-926DD077A06E_zps

Seam welded, not finished though as it started p***ing down, had to quickly apply some etch as you can see its already started to get wet -

97539B6D-9C77-44C8-A36D-285992BDFBF1_zps

Will have to finish this off on Monday as its Bingley Hall Tomorrow, booked a couple of nights off work next week to work on the car anyway. Also started sanding and seam sealing the underneath of the new floor pan and flitch, but haven't finished this yet so I'll take some pictures when I'm done.

That's all for now folks :-)

#25 big-jay

big-jay

    Super Mini Mad

  • Members
  • PipPipPipPipPipPip
  • 518 posts
  • Location: Birmingham
  • Local Club: British Mini Club

Posted 26 January 2014 - 09:10 PM

Update,

Went to Bingley Hall today, what a great day out it was, was packed out there all day, got some really good bargains :-)

I got an upper dash rail, MK2 rear lights, doorstep plates, loads of smiffy's bits bolts, scuttle repair panel, a couple of knotted wire cups, and some roloc pads of different grades to put in the drill all for a really good price !

27134528-89B3-4592-92B7-46A302DB0D3D_zps

50712347-5766-467A-98C3-1291DDBDECA1_zps

1CA7CAD5-F48A-4A1B-9E05-4EF0B4870B32_zps

Also I think I've got the only top dash rail with no rust haha ;-)

01082B3C-C7C7-484F-BD37-38E42B55024A_zps

A85F29BB-0D61-4D69-9BAA-C639F875B073_zps

C5BAD5BB-BE92-4ECA-8444-78BE3EF9B6A4_zps

My dash should be arriving Wednesday with any luck so will post some piccys when it does !

Doing some more work on the car tomorrow so updates to follow :-)

Edited by big-jay, 27 June 2014 - 12:21 AM.


#26 big-jay

big-jay

    Super Mini Mad

  • Members
  • PipPipPipPipPipPip
  • 518 posts
  • Location: Birmingham
  • Local Club: British Mini Club

Posted 27 January 2014 - 08:14 PM

Small update,

One of those days today, don't feel like I've achieved much, but just couldn't be bothered with the grinder etc, so I got on with some of the niggly but necessary jobs.

First off I cleaned up the speedo casing along with the oil and temp cases -

CC1F2538-BB50-46F8-BFD8-75FDE842E6D5_zps

After, (poor picture) -

452B0AF0-26F5-4201-B795-978C32FF676D_zps

Finished up seam sealing the underneath of the floor pan -

28DFF4F8-566E-4403-9414-AE6EEF3D0A90_zps

A0F94CD2-583A-4E83-9A2E-D39802CD700D_zps

Also I removed an old alarm system I had and some other things I no longer want -

97DFE5B4-4642-403E-A132-3743B96321B8_zps

Stripped back the underseal on the inner wing and to be fair it's pretty decent apart from where it meets the front panel, it's been bodged there so something else to put right -

51DE815D-FBA4-40B6-B5CC-E4CAFADB03F1_zps

Problem area -

CA47F96F-1FF2-4C9D-9B8C-793E2C27B907_zps

Also removed the lower dash rail as i think I may be sending it, plus my newly acquired top dash rail, off to the trimmers next week to be covered in some sexy black alcantara ;-)

Removed the chrome trim, very delicately -

18C530EB-CF32-451C-B2C9-D1FB5BA94E09_zps

And I couldn't resist trial fitting the MK2 lights -

65051A38-5952-47FF-95A8-D1695B1F1EF4_zps

They look fantastic, even though my paintwork doesn't, respray on the cards soon thankfully. Took them back off and stored them away safely.

That's all today but I'll get the grinder out tomorrow and remove the companion bin, some of the rear quarter section and might finish of my doorstep. Still lots to do but got to keep it moving !

Edited by big-jay, 27 June 2014 - 10:17 AM.


#27 big-jay

big-jay

    Super Mini Mad

  • Members
  • PipPipPipPipPipPip
  • 518 posts
  • Location: Birmingham
  • Local Club: British Mini Club

Posted 28 January 2014 - 07:08 PM

Update,

So I got a fair amount done today, I started off by removing the companion bin as it was rotten where it meets the floor.

How it was when I started -

86D02430-947D-4F61-9BB8-158C19C9588C_zps

Partly cut out with the grinder, you can see the inner sill wasn't even welded to anything where it meets the inner sill stiffener, just moving freely, bodger's paradise, what a joker ! -

1C1DE878-A0B3-47CD-911D-D942AA3C645A_zps

D37F9CA7-75ED-4FF1-BB11-58F6A11924D8_zps

I officially hate drilling out spot welds, took forever ( EXTREMELY poor picture ) -

DABB2CE7-F5DE-433C-8FC4-73F34F5B9FB9_zps

Hammer meets thumb trying to remove spot welds, all beautifully swollen and bruised now :D

85D8AD4B-459F-4EA9-92F4-429D811F2E13_zps

Removed what was left of the 'inner sill' -

F40A253D-F947-4C8B-83D8-A3C04210AE33_zps

Need to remove this cup thing for the seatbelt as the companion bin from M-Machine doesn't come with it -

A3079DE2-BEFF-4FE3-9B92-3AFBAD745944_zps

Think I got my money's worth out of this cutting disk :D -

A10E6497-C523-498C-A5C0-135331D62026_zps

Removed the rest of the companion bin and then I turned my attention to the rear quarter. I jacked her up and removed the arch and then set about it with a knotted wheel brush on the drill.

Before wheel brushing -

762BF828-E3EA-4385-AE6E-58FBF00810C4_zps

After wheel brushing -

C166346E-E086-4B95-BCAE-318239E037BD_zps

Area of rot -

FFBB0B70-D9AB-4290-A566-9156235381FC_zps

Area of rot -

D1016143-2C46-4468-A01B-C59F8AA771AE_zps

Chopped out the rot with the grinder and could not believe what greeted me -

F0BC11BA-A3AE-4334-8808-0570359A551E_zps

Bodged full of some sort of sealant and no closure plate in sight -

D1ECE47D-75DC-425E-BCDB-04918DB25B7B_zps

Anyways removed all that nastiness and this is what I was left with -

F7396CA2-591F-4DDE-A317-FDC04D385DF8_zps

Another headache as its all wrong, no wonder my car was flooded with water when it was on the road. It's all going to have to be redone so will be removing the subframe this weekend to sort this area out properly.

I decided I'd had enough of looking at the messy welds on the door step so I set about them with a 1mm cutting disk and I'm quite pleased with how It came out. Ill also use some Roloc Disks to get the final finish but it still needs some small holes filled and some filler to perfect it but for a quick dressing up its not bad !

ADDC605D-33FE-4FB7-B957-13B3EF09D49F_zps

C6509E98-4F8B-4E17-9B2B-281B74B3F64B_zps

Primer applied and it all looks fairly tidy -

DA307DEE-1AB1-4B09-9FC3-48BBD0A4A789_zps

B41812AC-DB03-4200-AC6F-615DF733F8EE_zps

That's as far as I got today but I'll get some more done tomorrow before work.

Edited by big-jay, 27 June 2014 - 12:31 AM.


#28 big-jay

big-jay

    Super Mini Mad

  • Members
  • PipPipPipPipPipPip
  • 518 posts
  • Location: Birmingham
  • Local Club: British Mini Club

Posted 30 January 2014 - 12:22 AM

Update,

Nothing major but an update all the same. Got some seam sealing done today around the fresh air vent and flitch panel inside of the car.

Weld ground down -

3CD0C4AA-8C0B-40C0-BA32-E90B75A7639C_zps

I split the seam with a large flat head screw driver and flooded it with Zinc rich primer in order to protect it against rust, then closed it back up and primed the rest of the air vent -

1C552C14-819A-43E2-A5AA-F7EB8F84075E_zps

Tiger seal applied, not the prettiest but as long as it keeps the water out I don't care -

A0C0B8B1-6CB0-4F7A-9E6C-BC9D9742CE2E_zps

As you can see I've still got to fabricate a piece for the top of the flitch but will have to wait till the weekend now. Planning on removing the rear subframe this weekend as well so I can start work on the heel board.

Ive ordered some panels from M - Machine today, RH Rear Floor Pan, Heel Board Repair, Inner Sill Stiffener, and also the subframe closing panel so hopefully that will arrive by the weekend !

Got my dash today but it arrived damaged because of the delivery guys, it's got a small crack in the lacquer in one corner. I think I'll have it repaired though as the rest is in pristine condition and I did get it for a dirt cheap price. Don't think I can be bothered with the hassle of sending it back to be honest !

DA55B4F5-D61B-46AF-985B-89237E5D5BD8_zps

Edited by big-jay, 27 June 2014 - 10:20 AM.


#29 Minimoke8394

Minimoke8394

    Mini Mad

  • Members
  • PipPipPipPip
  • 223 posts

Posted 30 January 2014 - 07:54 AM

Great write up so far, and that dash looks lovely. Keep up the good work dude! 


#30 big-jay

big-jay

    Super Mini Mad

  • Members
  • PipPipPipPipPipPip
  • 518 posts
  • Location: Birmingham
  • Local Club: British Mini Club

Posted 31 January 2014 - 06:07 PM

Great write up so far, and that dash looks lovely. Keep up the good work dude!


Thanks for the kind words !


Also tagged with one or more of these keywords: roundnose

0 user(s) are reading this topic

0 members, 0 guests, 0 anonymous users