Jump to content


Photo
- - - - -

92 City, My First Rebuild.

roundnose

  • Please log in to reply
670 replies to this topic

#46 Minimoke8394

Minimoke8394

    Mini Mad

  • Members
  • PipPipPipPip
  • 223 posts

Posted 12 February 2014 - 06:31 PM

Must feel good getting through the list yeah. '82 Mayfair 998, 30k on the clock  and not a single bit of rust :) New subframes, lovely shell etc. Have got a build thread going but won't be adding to it until I get the car in my workshop. Looking forward on getting stuck in! 


20140210_133546_zpscdaab822.jpg


#47 big-jay

big-jay

    Super Mini Mad

  • Members
  • PipPipPipPipPipPip
  • 518 posts
  • Location: Birmingham
  • Local Club: British Mini Club

Posted 12 February 2014 - 06:37 PM

That's looks pukka mate, you've done well to get a shell with no rust, let the fun begin then ;-). Ill be sure to check out your build thread !

Edited by big-jay, 27 June 2014 - 10:27 AM.


#48 Minimoke8394

Minimoke8394

    Mini Mad

  • Members
  • PipPipPipPip
  • 223 posts

Posted 12 February 2014 - 09:47 PM

I'd say I'm lucky yeah mate, thanks. I've got a lot of ideas for it, notably some Mk1 mods and lowered on 10's. Will hopefully be getting stuck in very soon. 


#49 alex-95

alex-95

    I am THE CLAMP MAKER

  • TMF+ Member
  • PipPipPipPipPipPipPipPipPipPip
  • 6,017 posts
  • Location: l

Posted 12 February 2014 - 10:09 PM

good work, I would add some more weld to the subframe mount bolts, much easier to do it know than them turning when you need to take the subframe off.


#50 big-jay

big-jay

    Super Mini Mad

  • Members
  • PipPipPipPipPipPip
  • 518 posts
  • Location: Birmingham
  • Local Club: British Mini Club

Posted 12 February 2014 - 11:58 PM

Minimoke8394 - MK1 mods and lowered on 10s will look the business !

Alex-95 - I'll be sure to add some extra weld, better to be safe than sorry !

#51 1293gt

1293gt

    Speeding Along Now

  • TMF+ Member
  • PipPipPipPipPip
  • 305 posts
  • Local Club: nonw

Posted 14 February 2014 - 11:47 AM

I like this!


#52 big-jay

big-jay

    Super Mini Mad

  • Members
  • PipPipPipPipPipPip
  • 518 posts
  • Location: Birmingham
  • Local Club: British Mini Club

Posted 14 February 2014 - 01:13 PM

I like this!


Thanks !

Edited by big-jay, 27 June 2014 - 10:29 AM.


#53 big-jay

big-jay

    Super Mini Mad

  • Members
  • PipPipPipPipPipPip
  • 518 posts
  • Location: Birmingham
  • Local Club: British Mini Club

Posted 15 February 2014 - 08:57 PM

Update,

We got the rear floor in today, can't believe I've got a whole floor again :D. Can't tell you how good it feels !! Here's some pictures of today's work.

Went out early this morning and got a few panels primed up as they were starting to go rusty, even though they were in the house !

Inner Sill Stiffener, Closing Panel and Rear Quarter Repair Panel Primed -

014e5e804a30b2d7f97950a8fafad9c1_zpsddb7

Rear Floor Pan cut to size and primed with zinc primer on the flanges -

0562605e3606b619c9e273db47b44f32_zps605b

Then we cut the rest of the rear floor out -

3455c00d64592dbd395dc6be0ae7b8f2_zpsf6b2

And then started to drill some holes ready for the plug welds -

d5f203129975c6673efe5f146a3e3f02_zpsa2b3

AND THEN THIS HAPPEN'D !!!!!

420ab9da76c041dae0fd6be553dd55b8_zps441e

866ad03f1d75856f8445dd39d679e6b0_zpsbec7

04f65820a355572352b919210f50b43f_zps12d2

This isn't coming off in a hurry -

3edcf674141e1bec77f6b83402151911_zps11ab

A shot from underneath -

ead3c0c0ff100e40f84a0eea4603b682_zpsce77

And the finished thing -

32a81f990154d3b8f2015cb8c3832601_zps0d60

We'll be welding in the other bits tomorrow to finish this side off hopefully, weather looks good for tomorrow, had to keep stoping today as it kept raining on and off, but still managed to get that done.

Anyway more updates tomorrow :-)

Edited by big-jay, 27 June 2014 - 10:30 AM.


#54 Minimoke8394

Minimoke8394

    Mini Mad

  • Members
  • PipPipPipPip
  • 223 posts

Posted 15 February 2014 - 11:26 PM

Sweeeeeet. Massive step forward man. Keep it up!

#55 will_

will_

    Mini Mad

  • Members
  • PipPipPipPip
  • 201 posts
  • Location: Harborne, Birmingham

Posted 16 February 2014 - 04:20 PM

Just read all 4 pages, top banana mate !! well done, wish i could weld, mine is still sat looking equaly sad !!


#56 big-jay

big-jay

    Super Mini Mad

  • Members
  • PipPipPipPipPipPip
  • 518 posts
  • Location: Birmingham
  • Local Club: British Mini Club

Posted 16 February 2014 - 10:15 PM

Minimoke8394 - Thanks, feels like a big step too !

Will_ - Thanks for the comment, as for welding practise makes perfect, just have a crack at it !

Update,

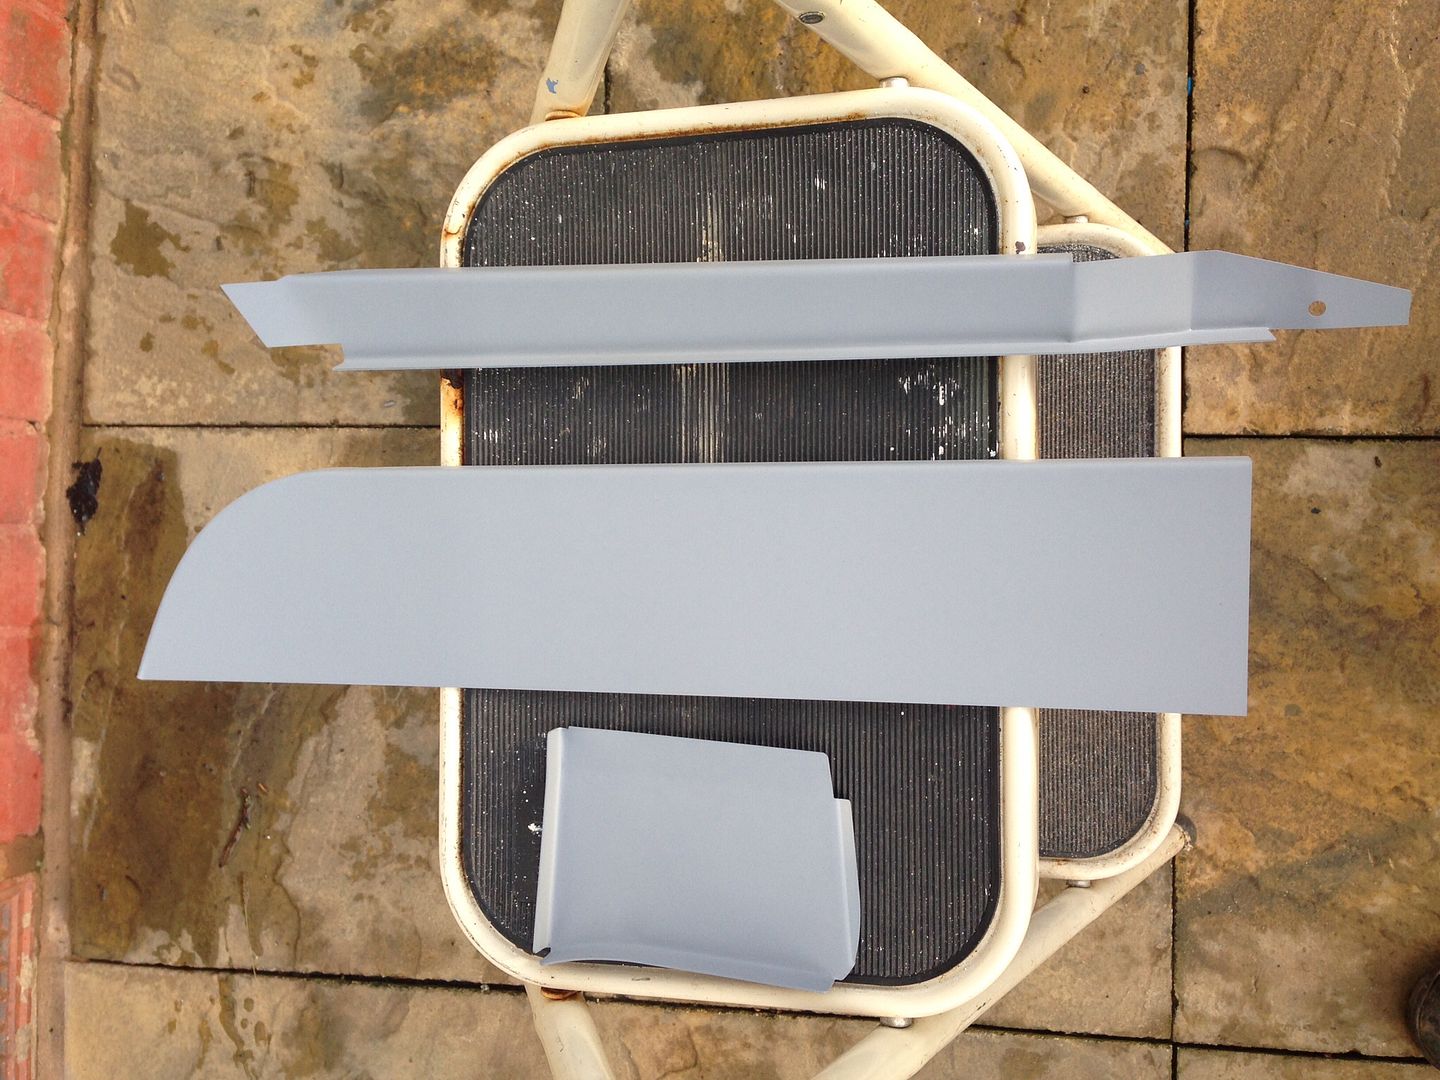
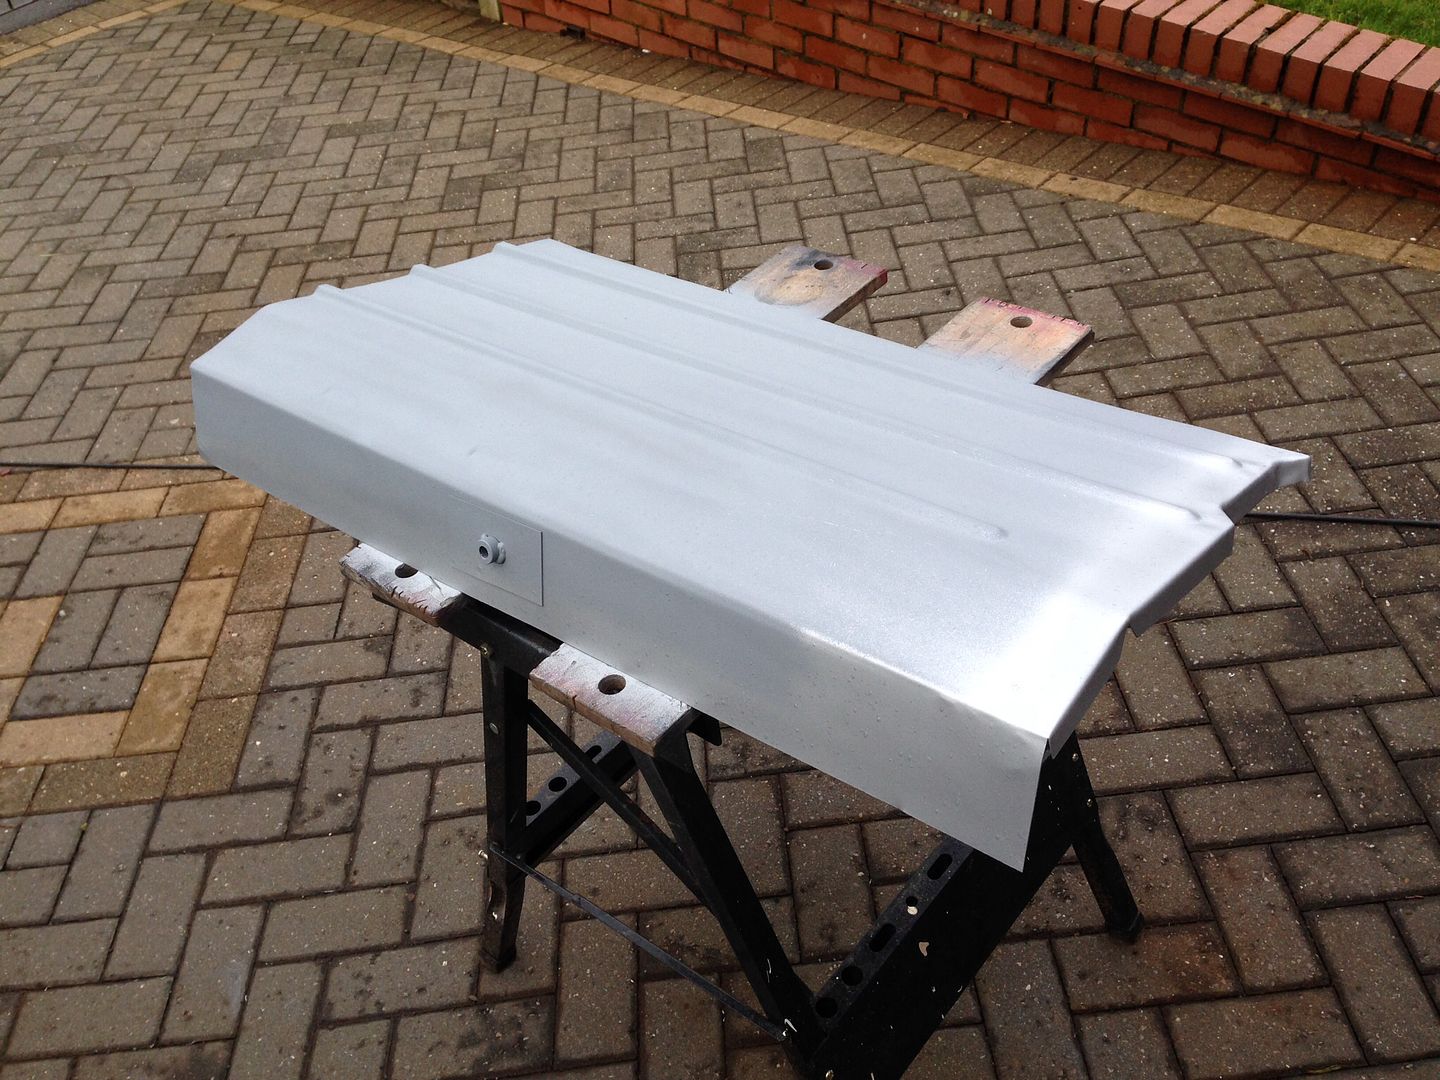
We got a load done today, pretty much finished the drivers side, I'll let the pictures talk !

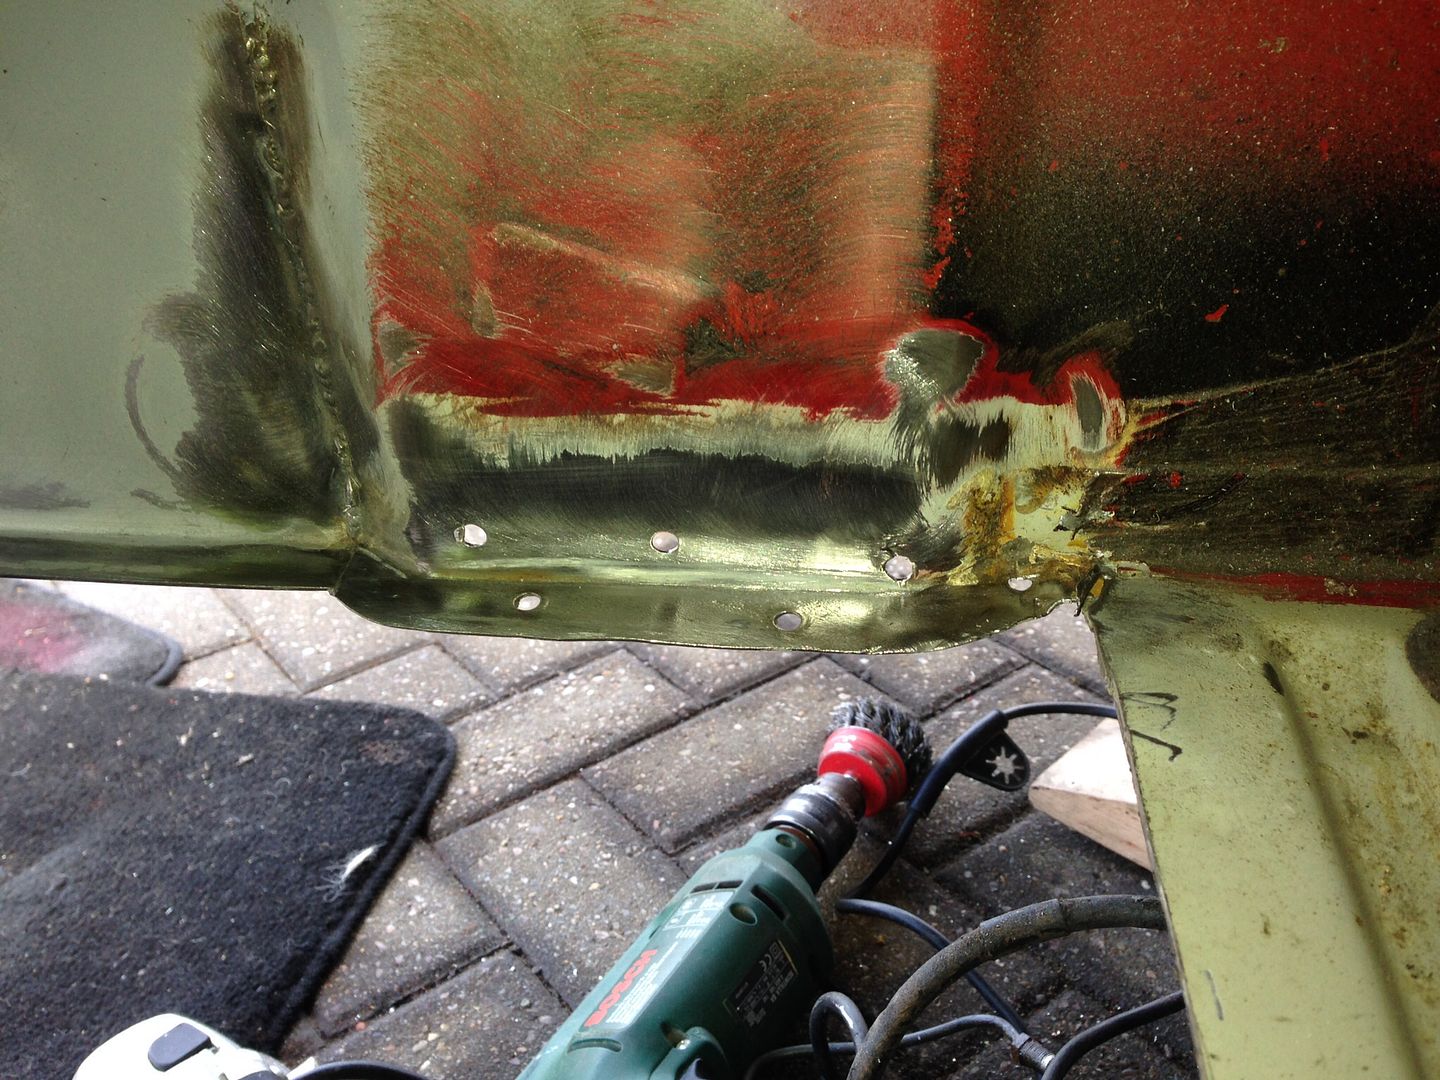
Chopped out the rot from the arch -

6384110db3c6ac10bcdfce73380b7677_zps2546

Made a peice and welded that in -
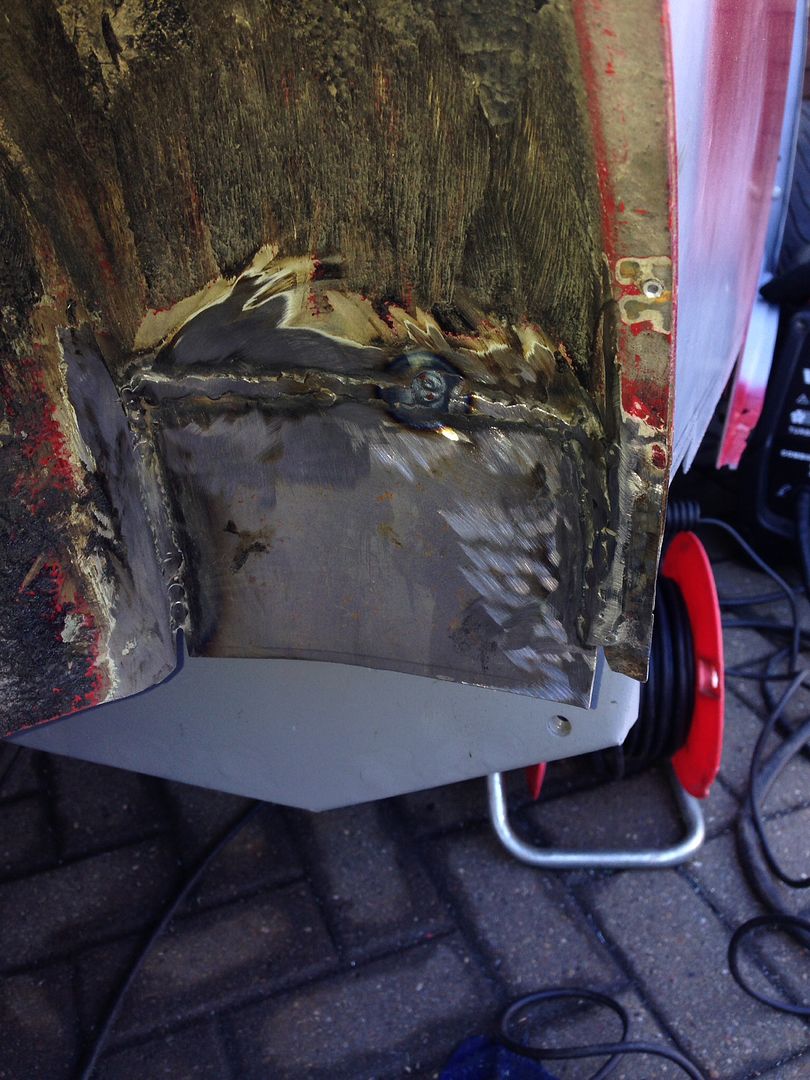
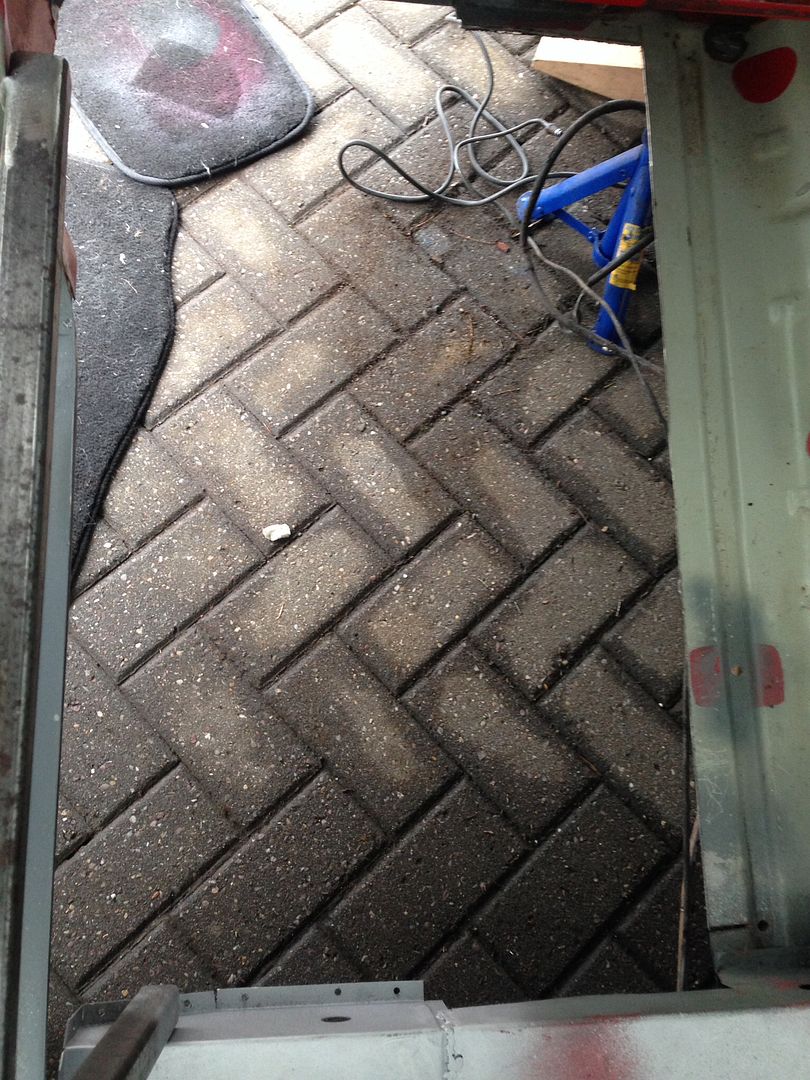
889baf8a84d22fbeb4640d882753f2b3_zpsa6fb

View from the back -

25127dec8e8e1bba037da3c0ff737920_zpsbecd

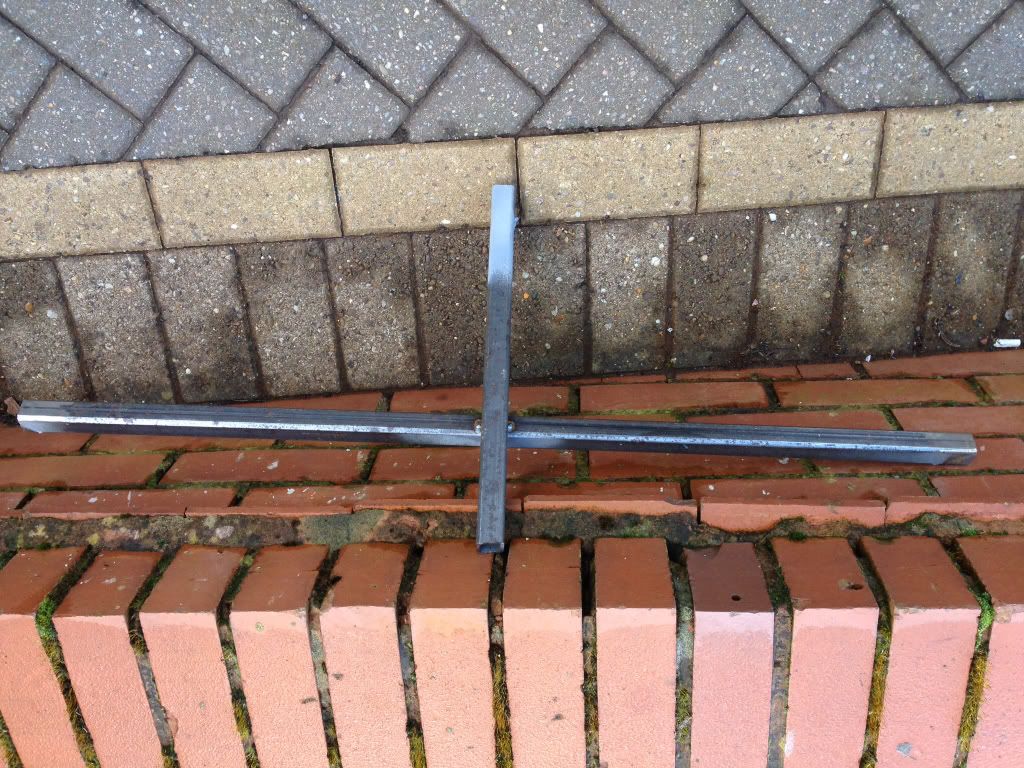
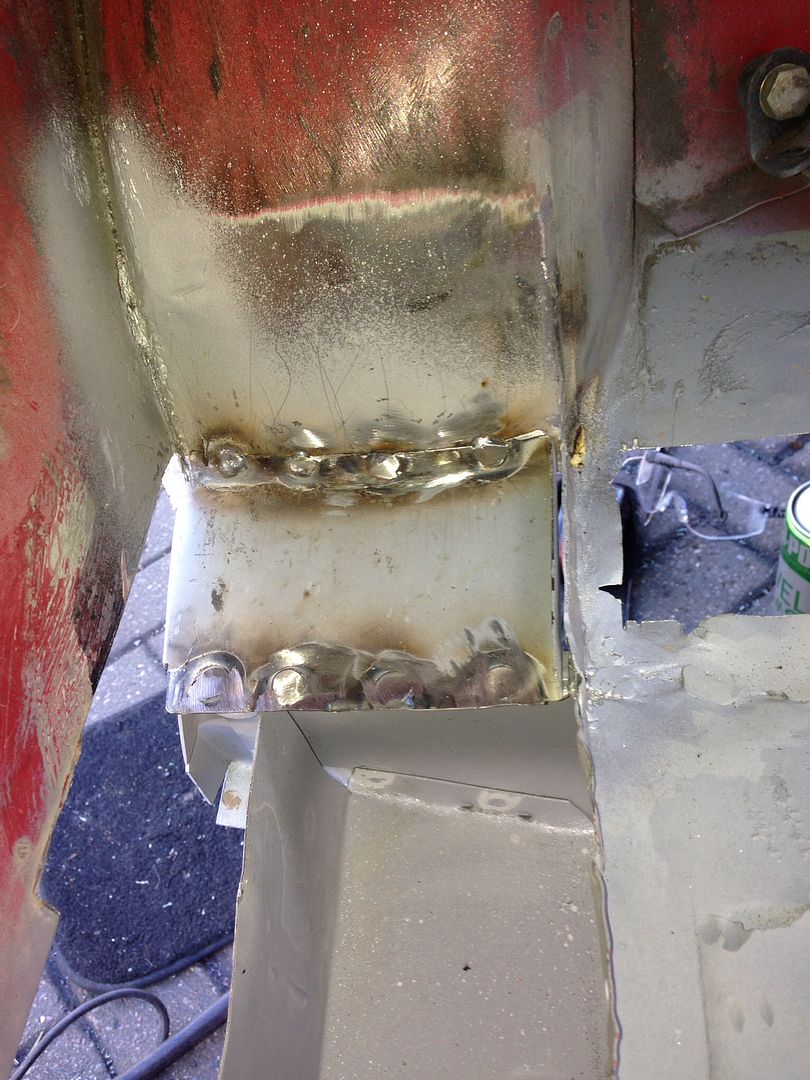
Then the bracing came out -

065fb46dda5d22de0a560b6122a89d8a_zps2a91

925c19c0e2ff95c5254213bb75dabbe2_zpsa5f4

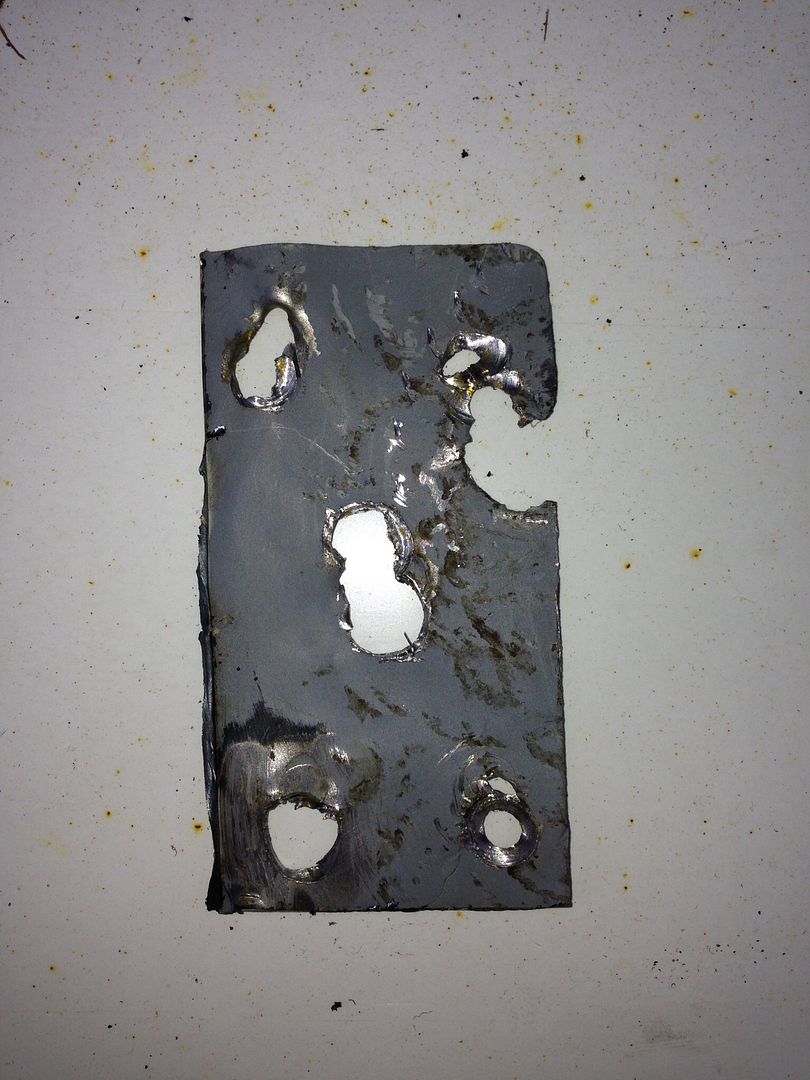
Drilled the holes in the closing plate ready for plug welding -

cfaee042d8c6e04e29d43933c2fdebf9_zps279f

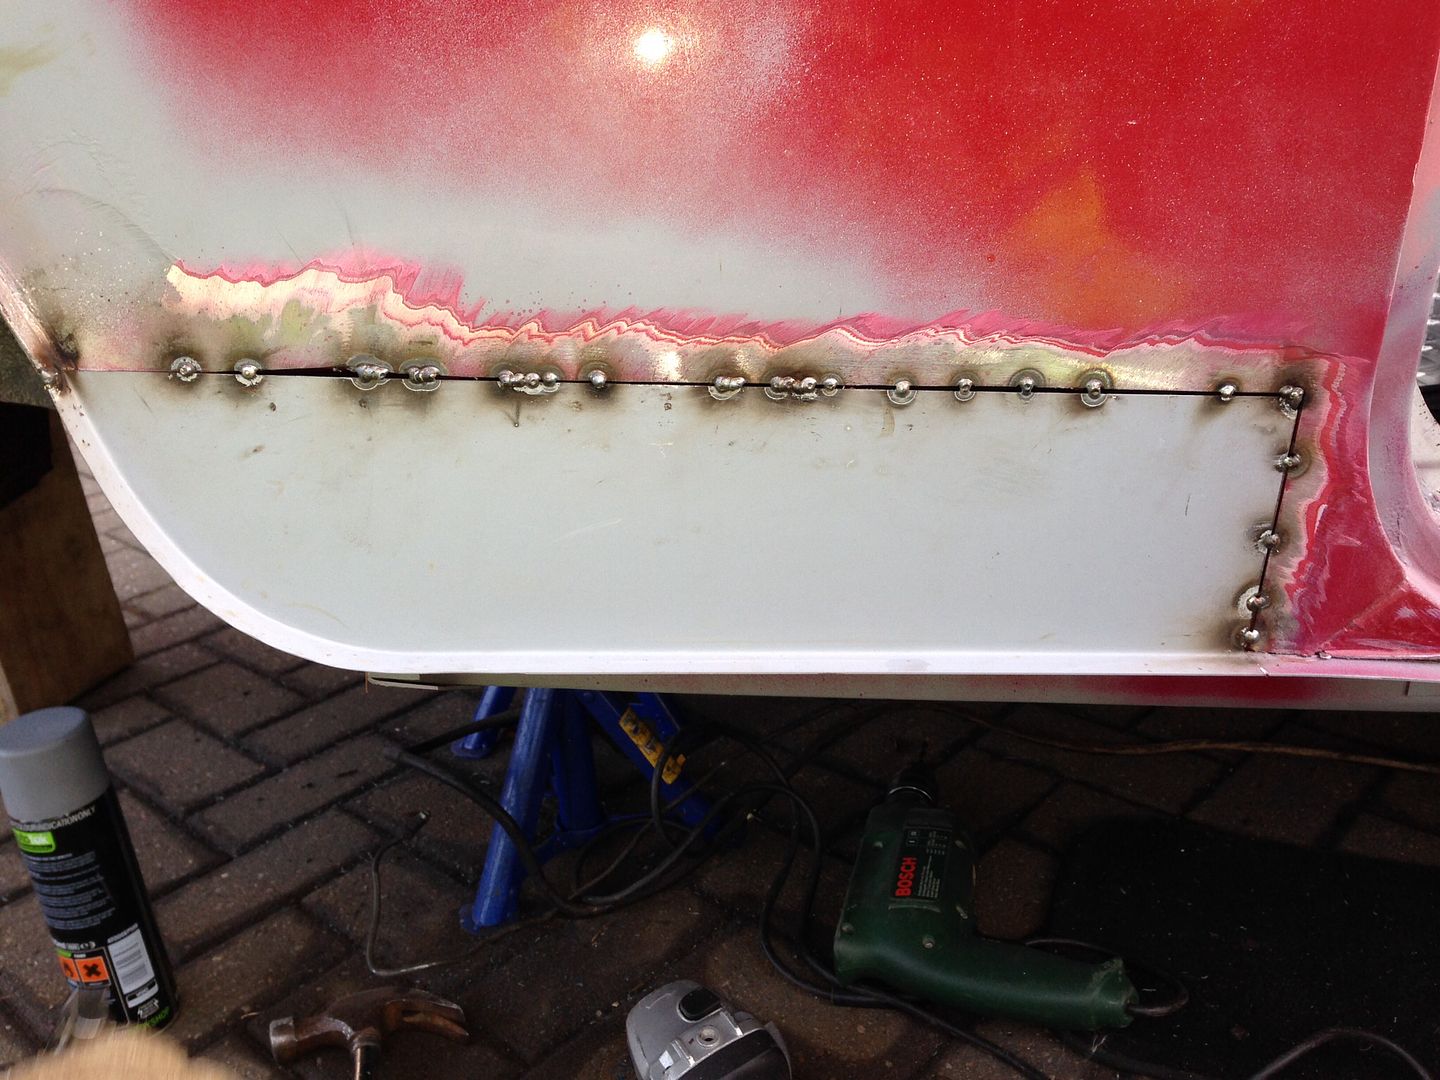
Welded that in and trimmed the arch repair back to suit -

d8acc7ea210da3dd8a4556f6b6d4640a_zpsa425

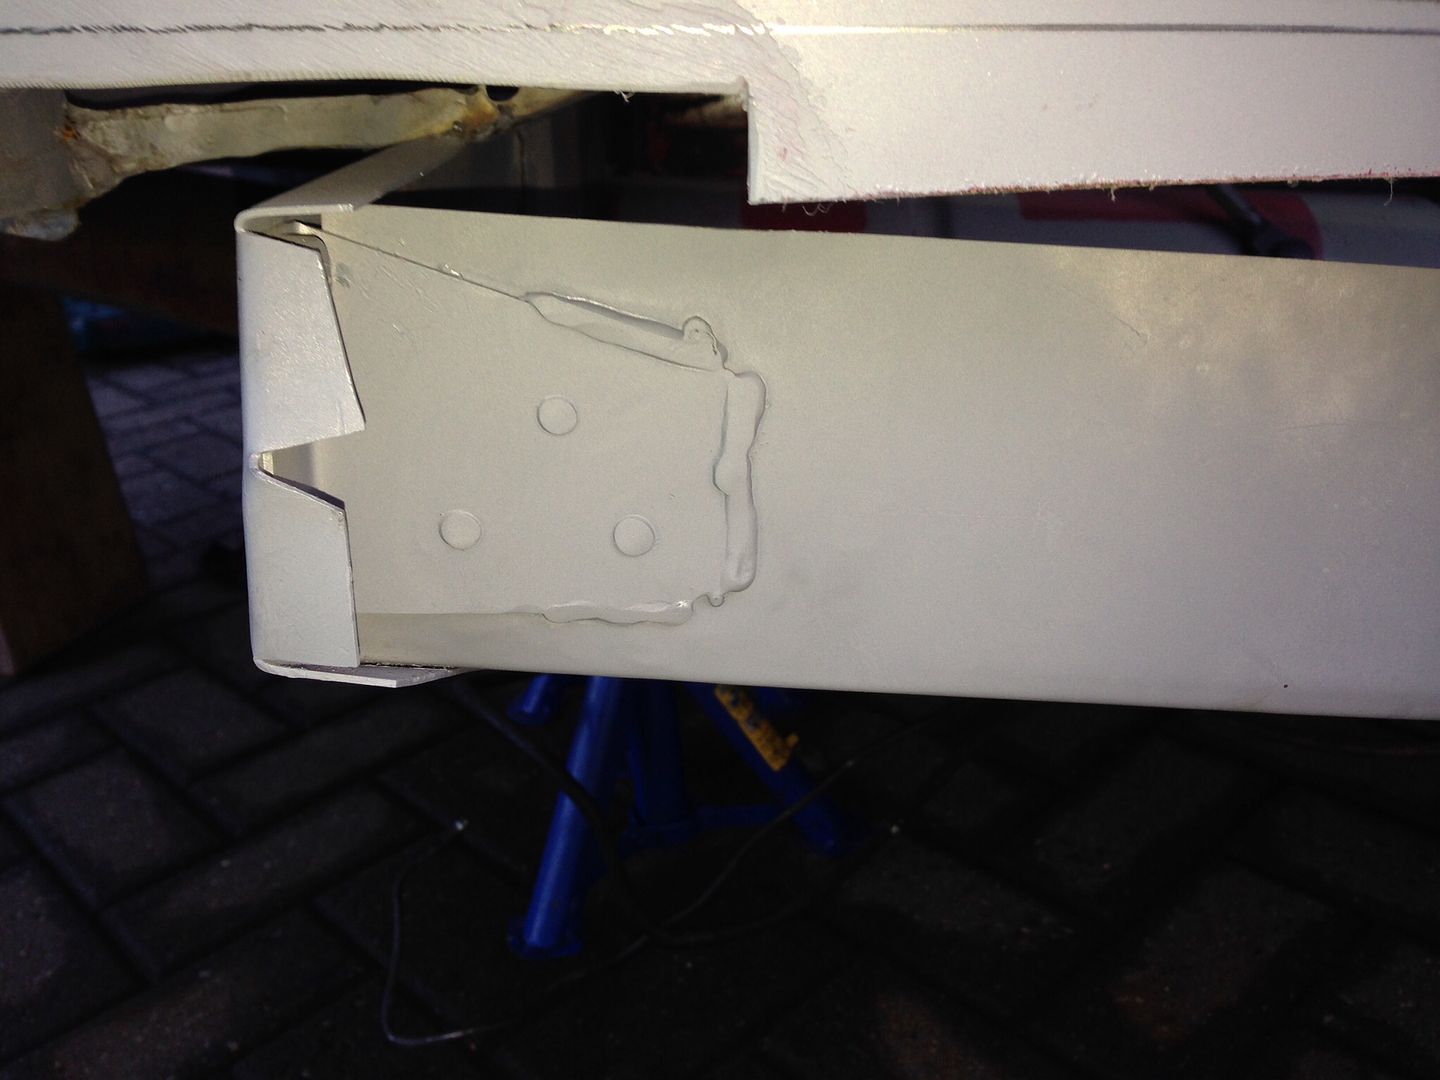
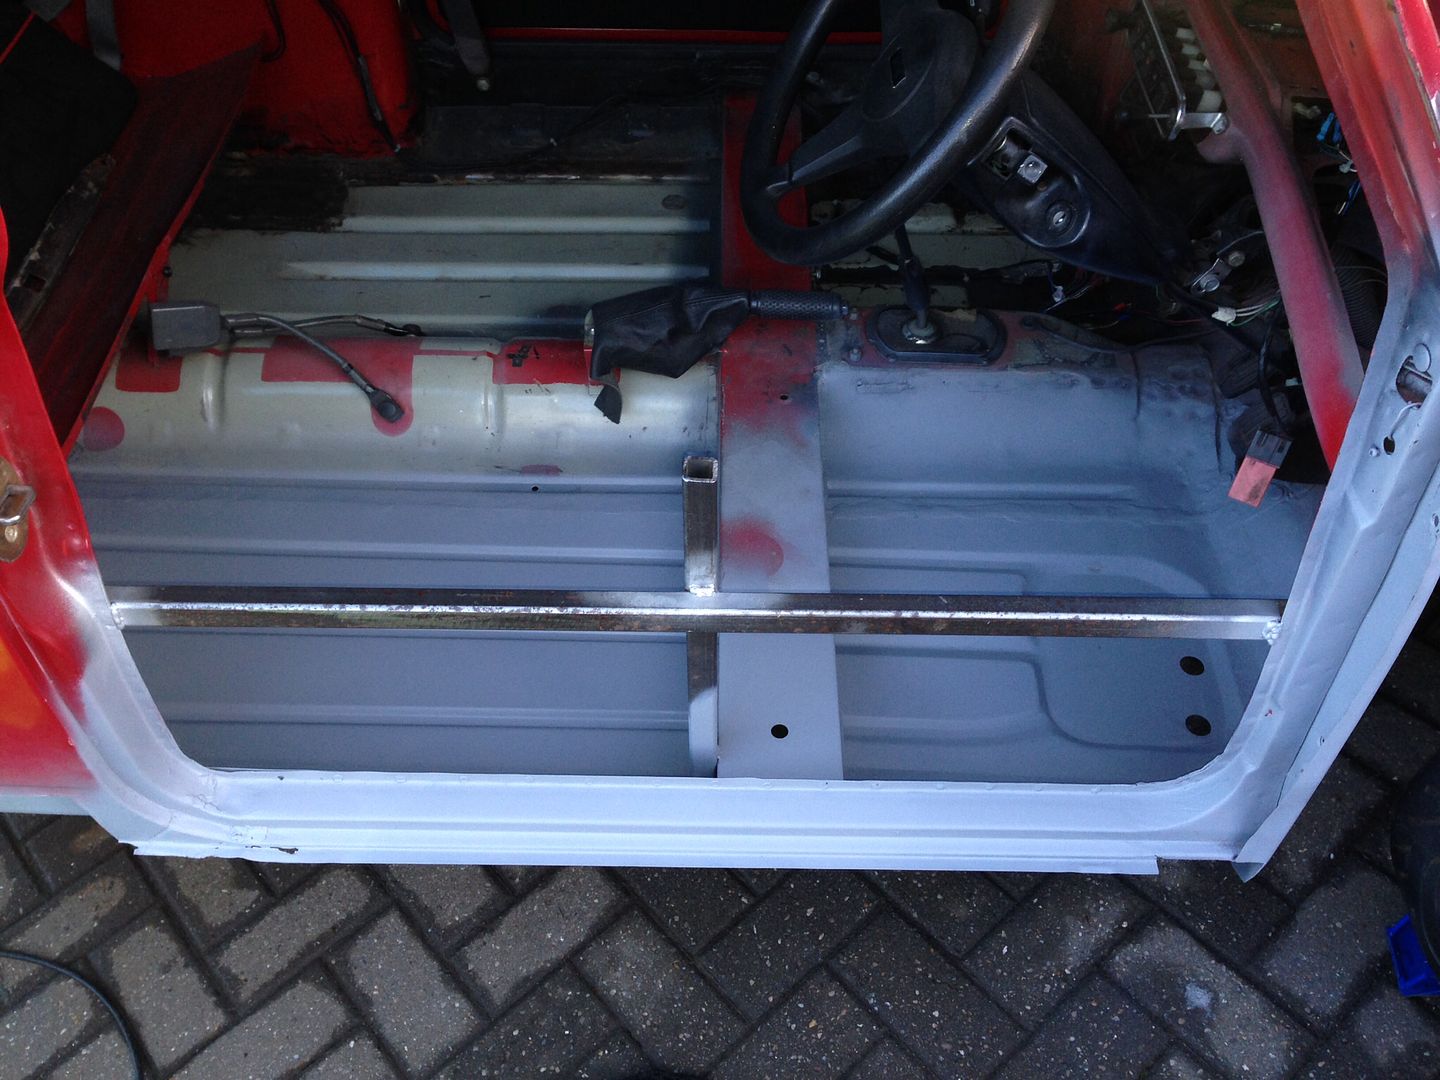
And then we fitted the inner sill stifferner -

399405e8f194b4551e1d0899bfc1a40f_zps716f

3013c75dee9fdf502fe6b8a906c4f081_zps03a1

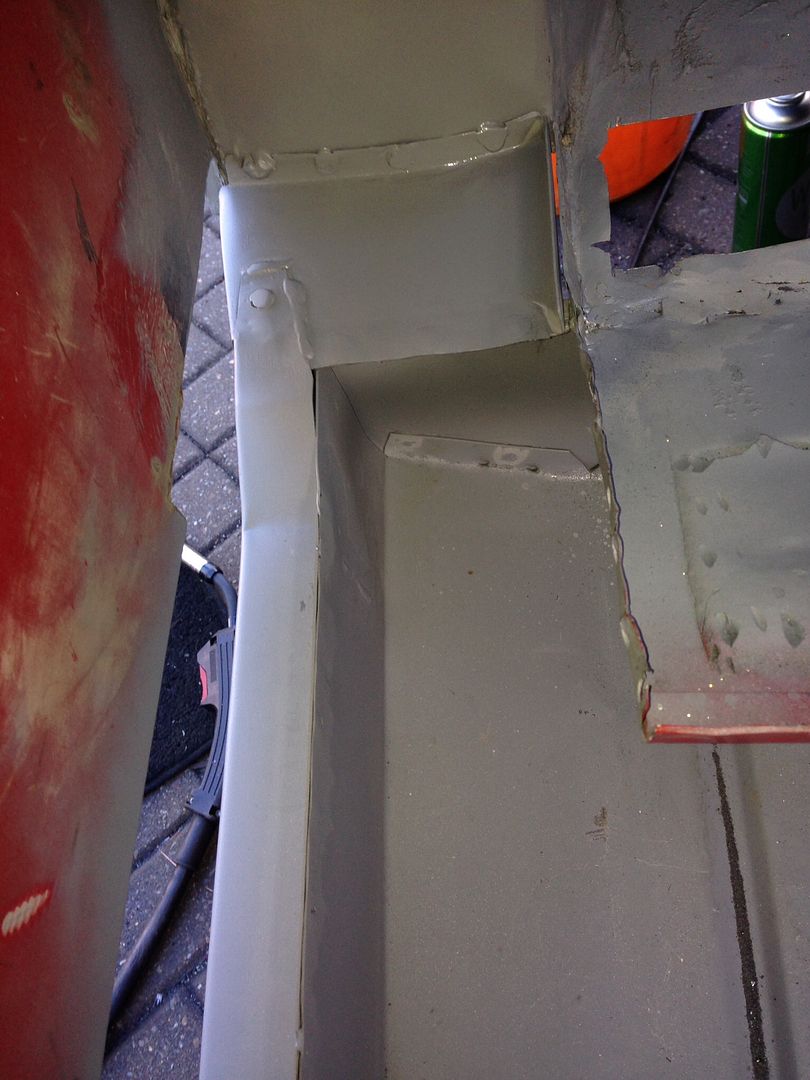
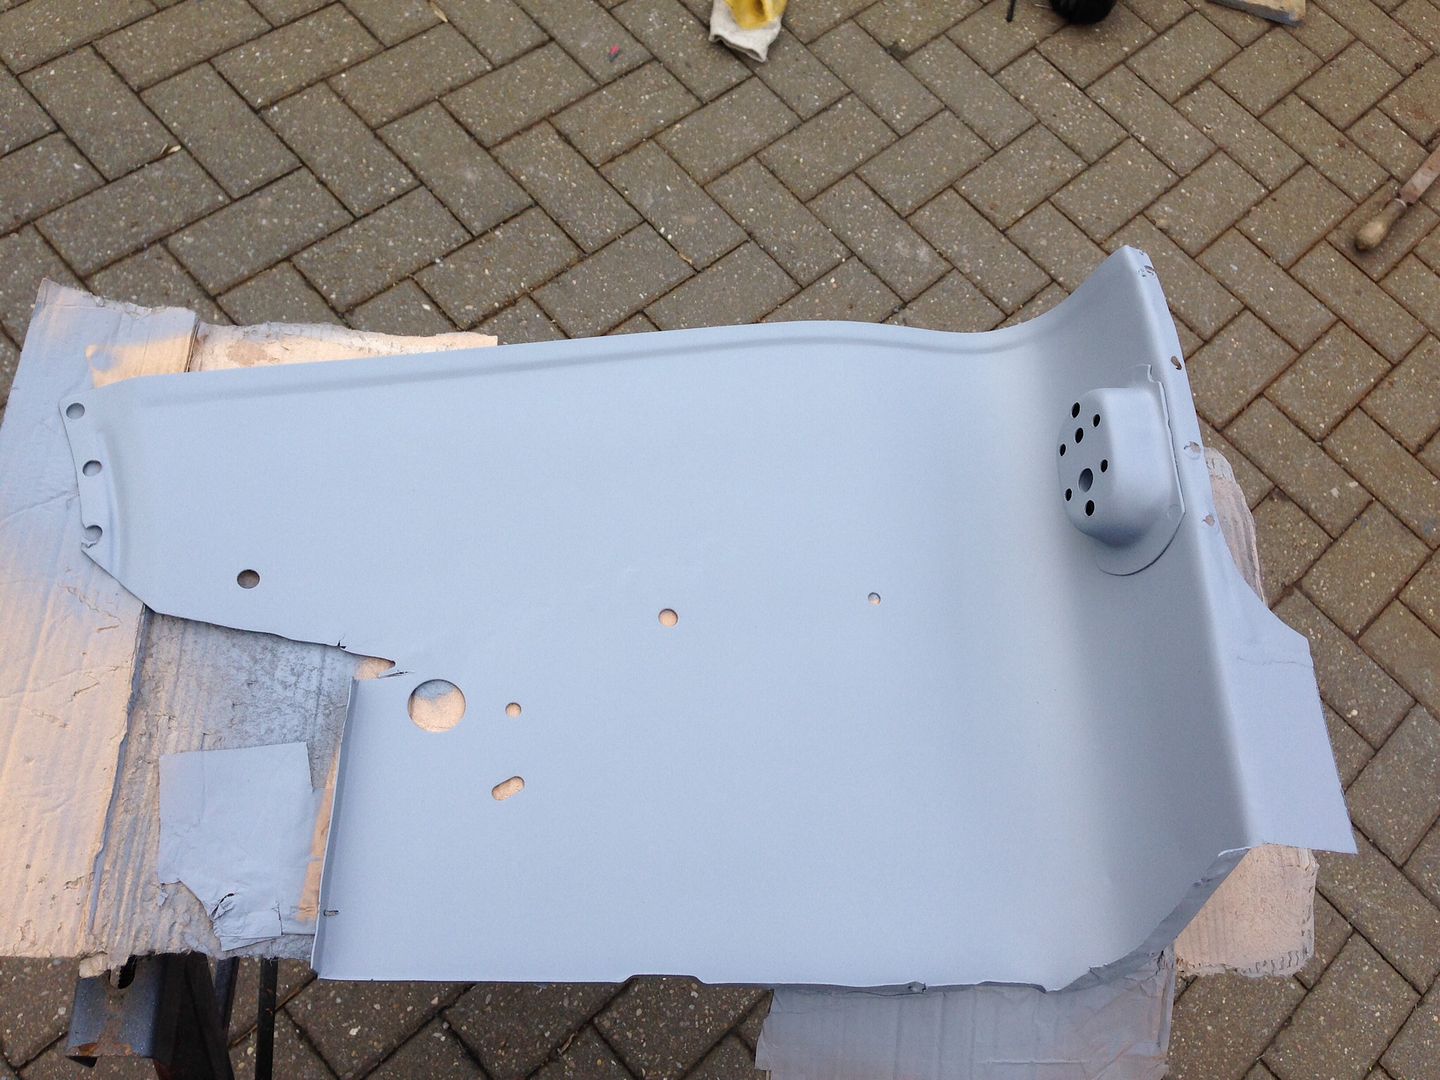
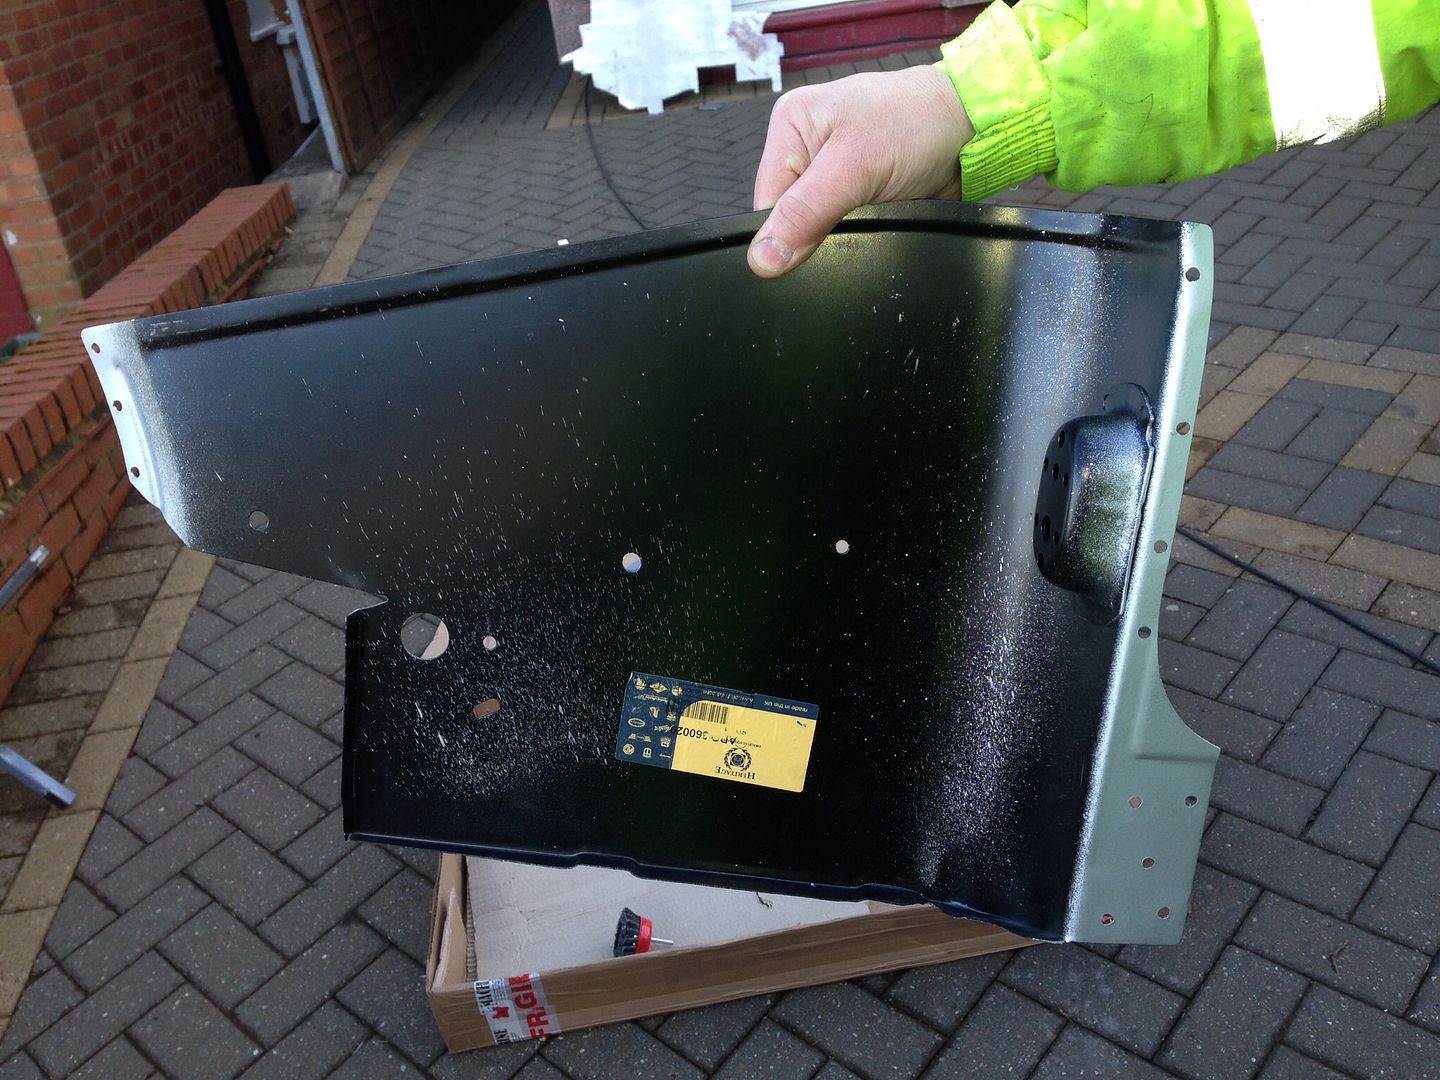
Drilled the holes in the companion bin ready for plug welding and sprayed with Zinc primer -

7e6740d5bdc27dfc6066035712226fe6_zpse8c9

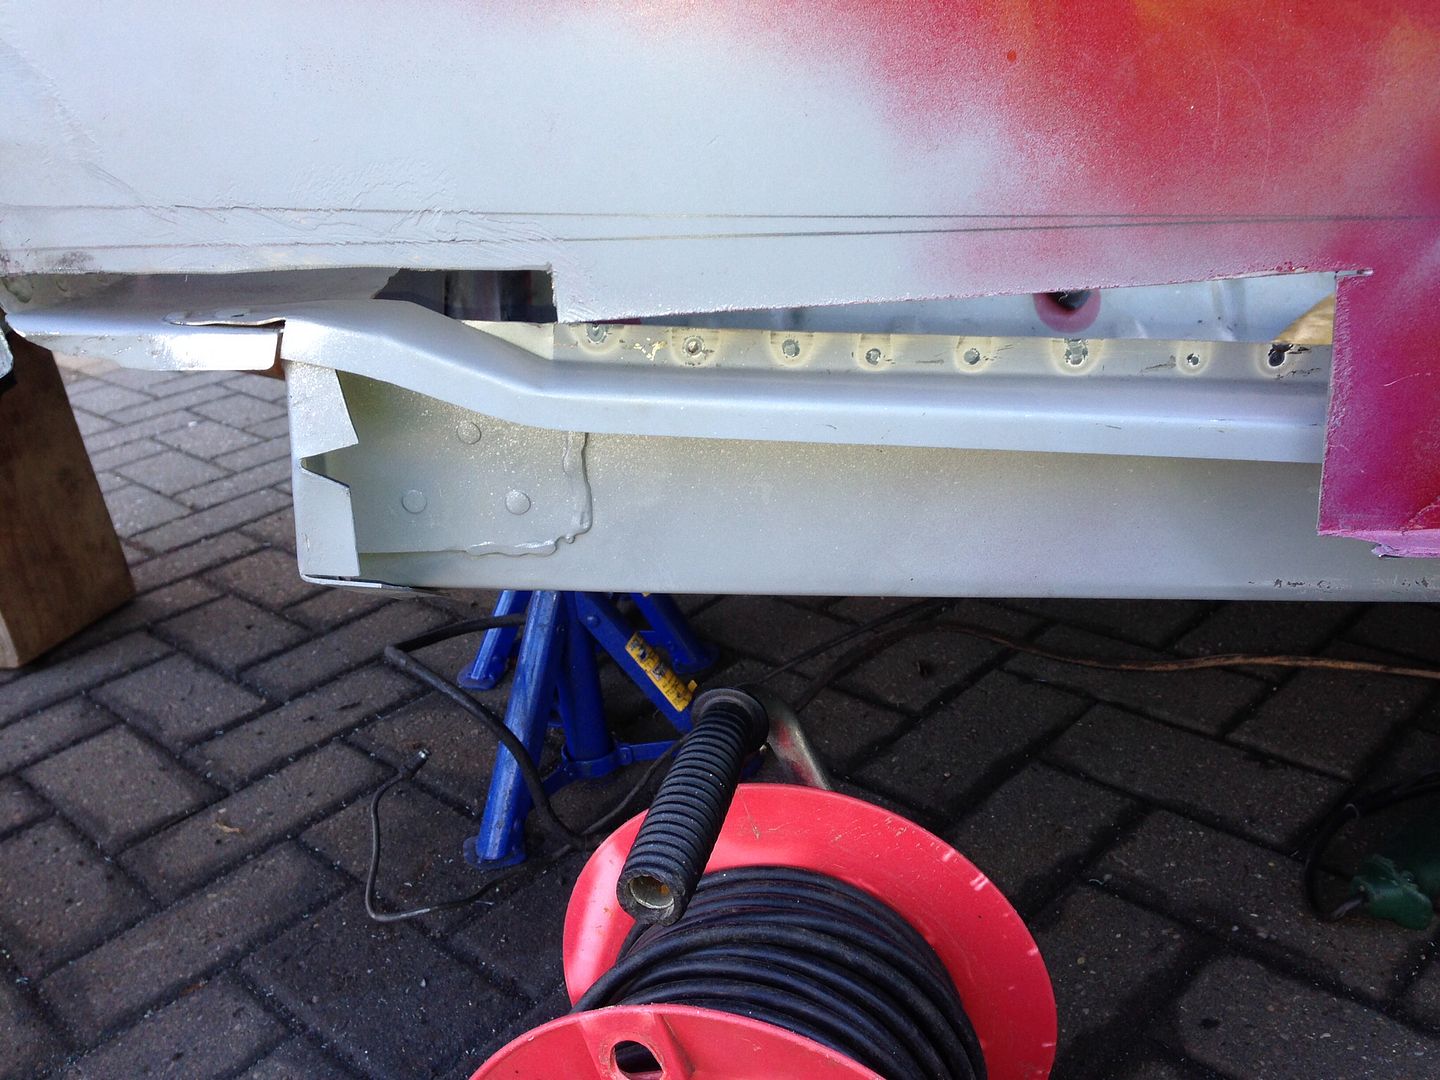
Welded that in, will need some trimming back around the door step -

a9afbf0379d7d19d627aa2d081a1c5c9_zps82e5

48f9d7efba4956cefbd1e5f09b247626_zpsd14e

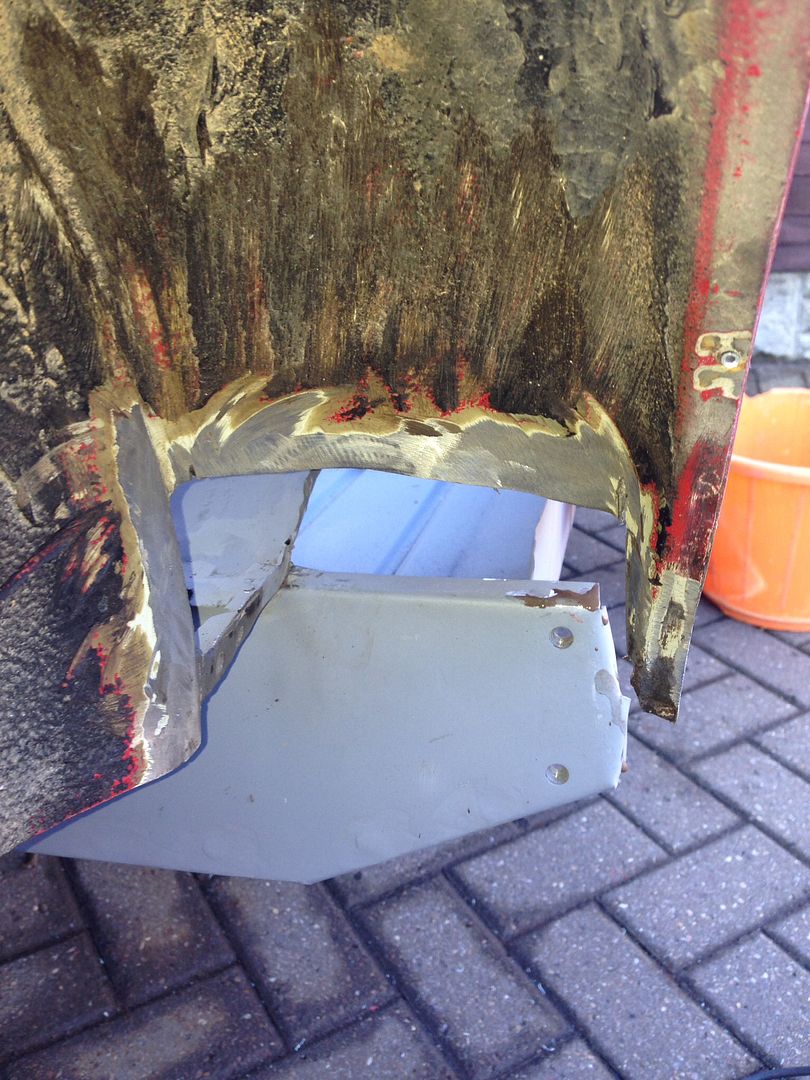
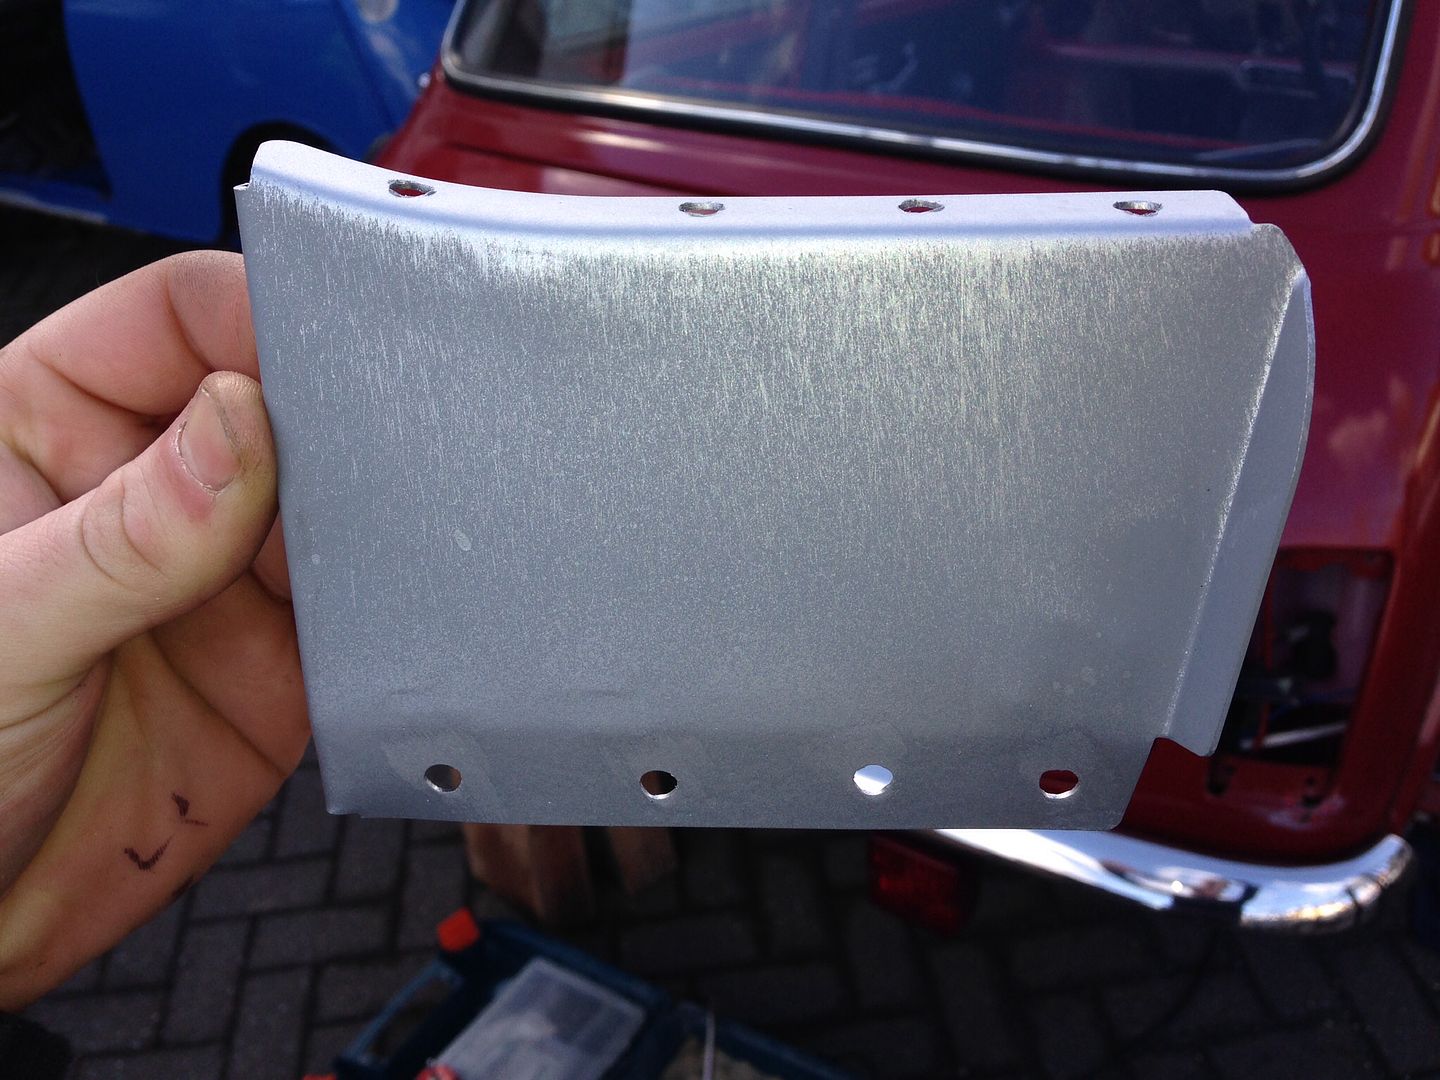
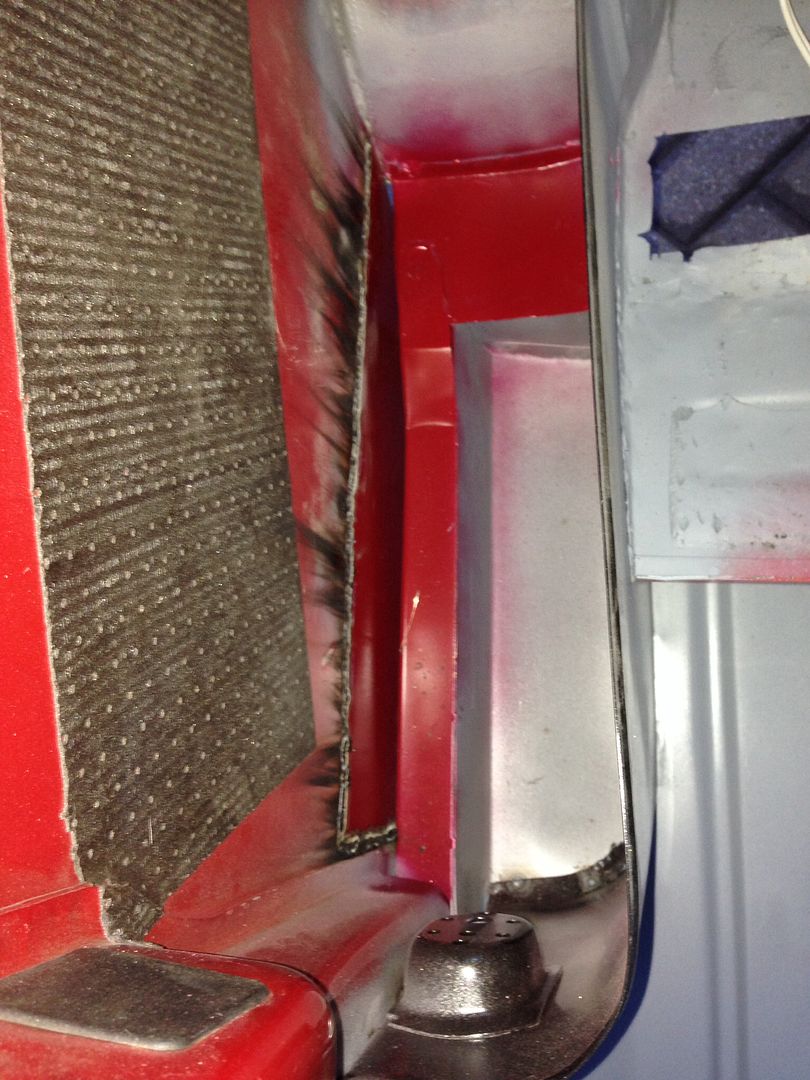
And then chopped out the rear quarter ready for the repair -

bc382f8d23aa174b570155bdf9d807e5_zps098e

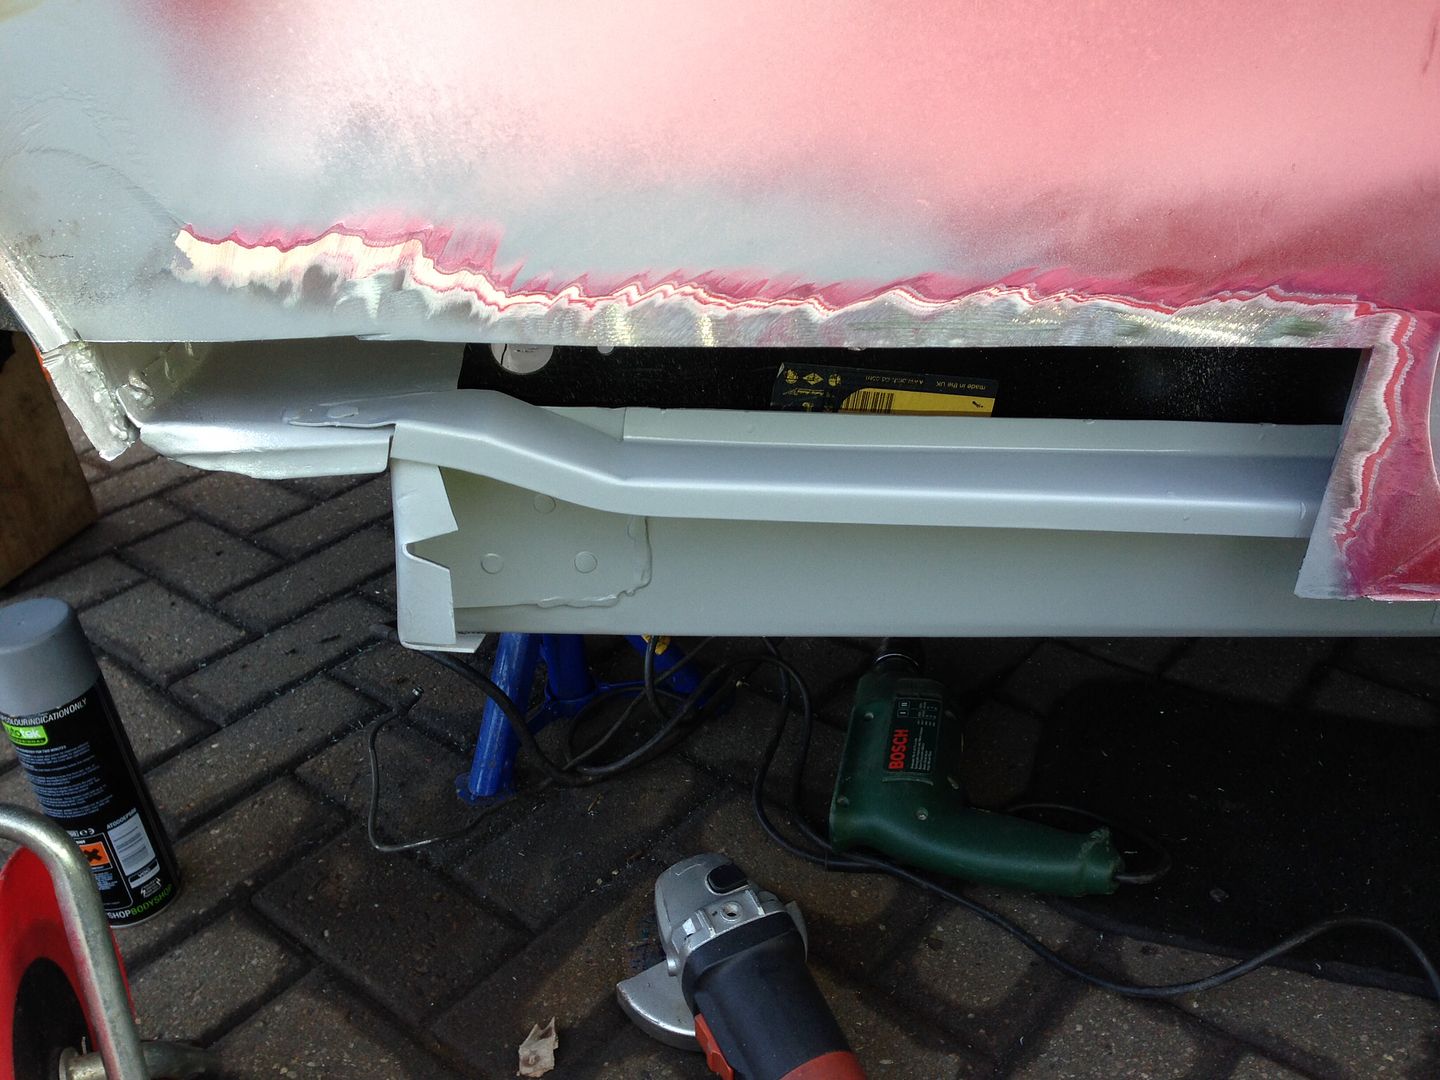
Applied top coat to places I can't reach when this repair goes in -

792c89dd1f57e63208efe3f125df193d_zps7334

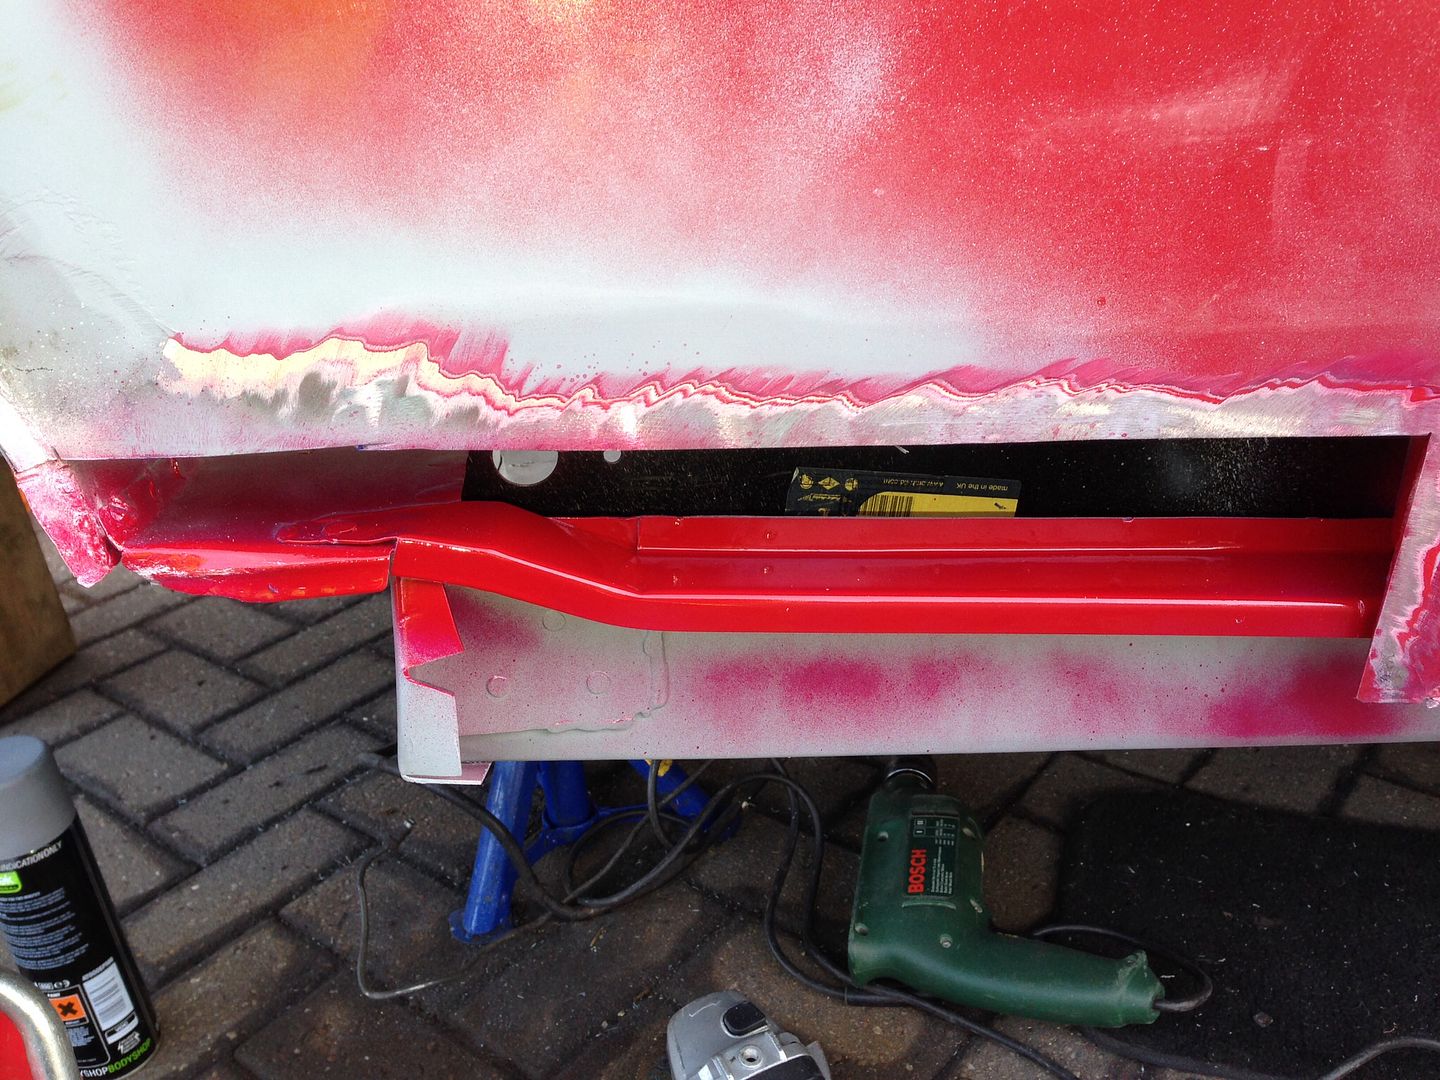
Held in place with inter grips -

c677e821491e57272fff8bbb7d8587c8_zps8dd9

Tacked in place, making sure to let the panel cool as we didn't want distortion -

4f8714236971620c1670d17a36ad8c17_zpsd65c

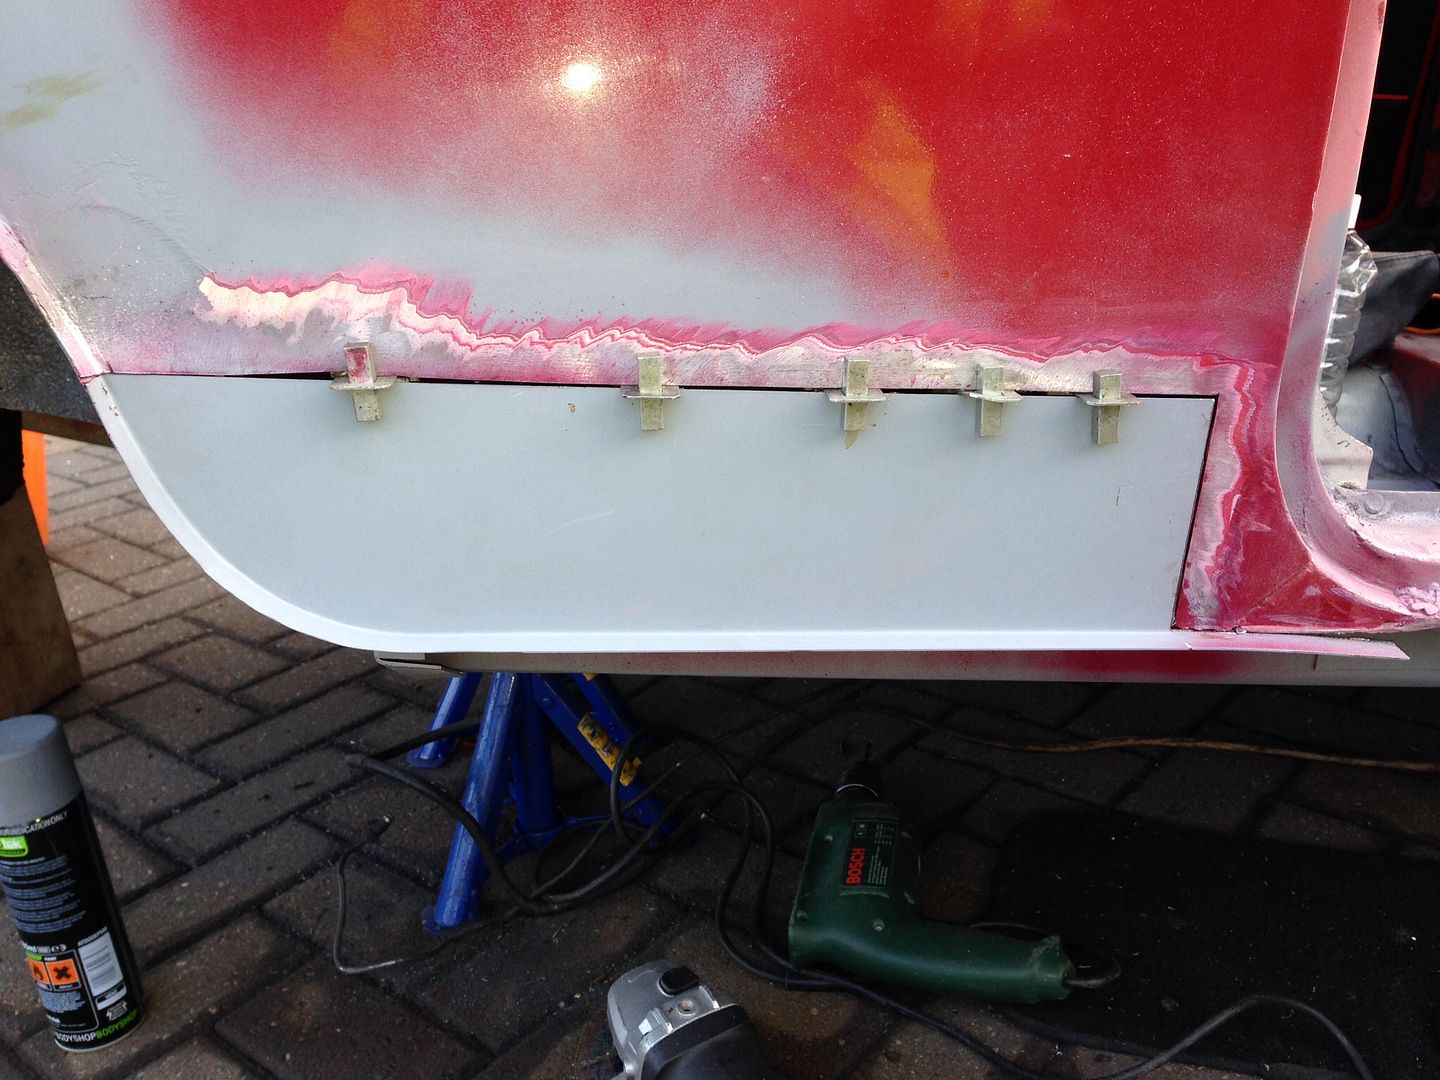
Welded in fully and ground down -
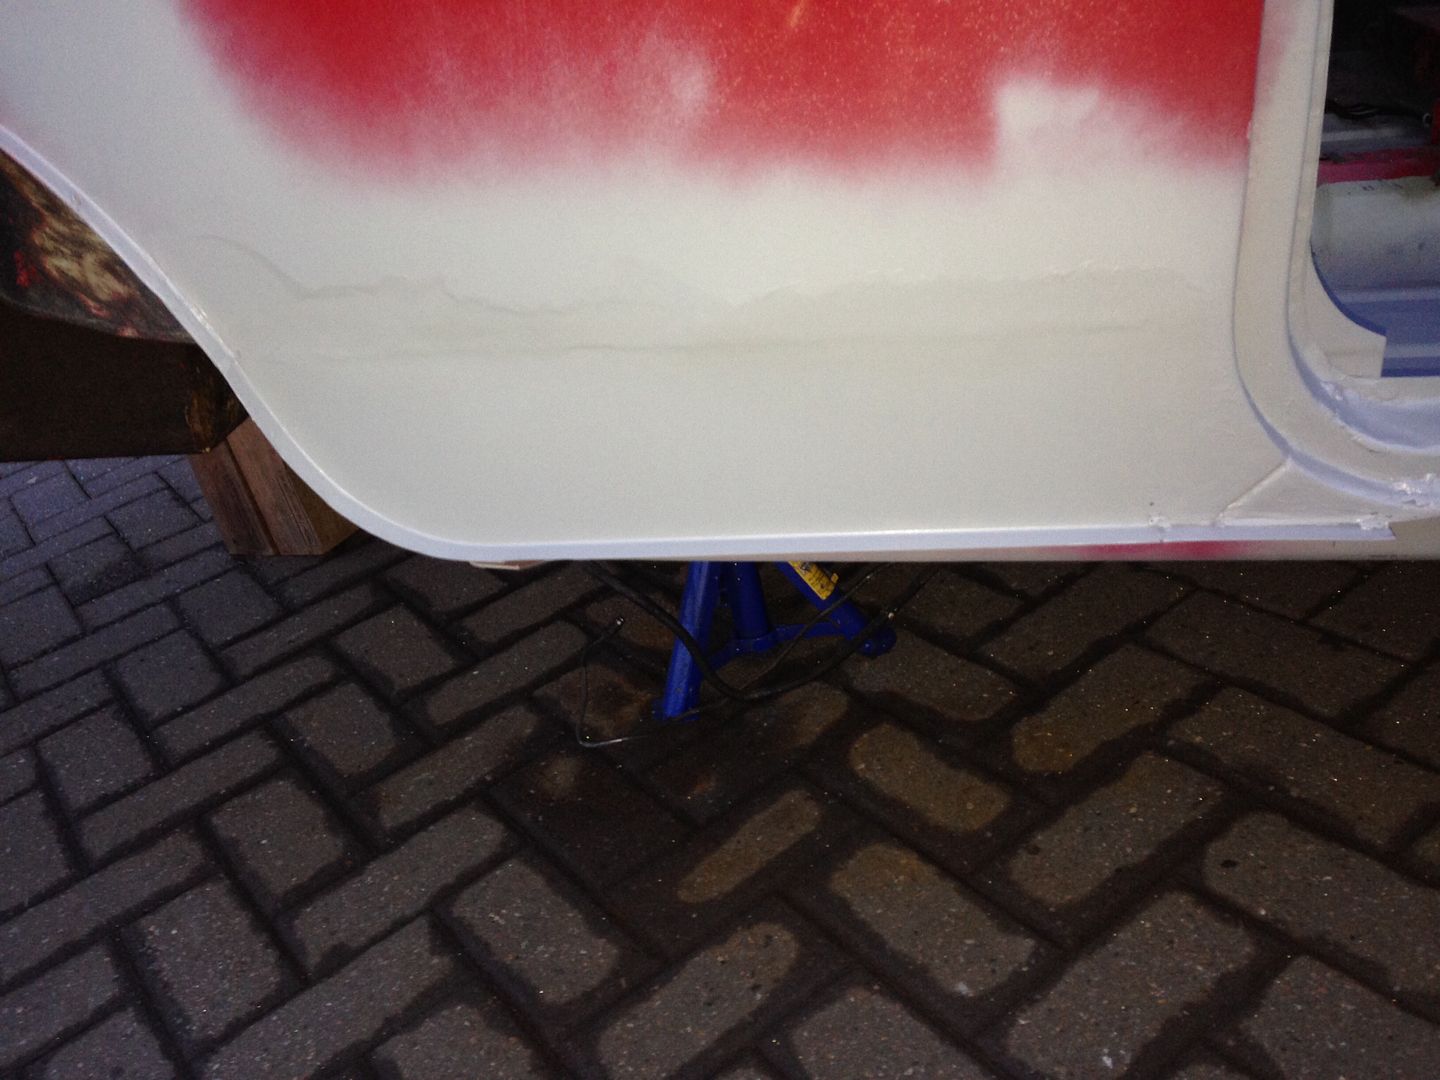
160a5a92a20aa65e13df5b153ac65baa_zpsa63f

Primer applied -

4bdab10a3fc30cffba0a7e580dba2e04_zpsbab6

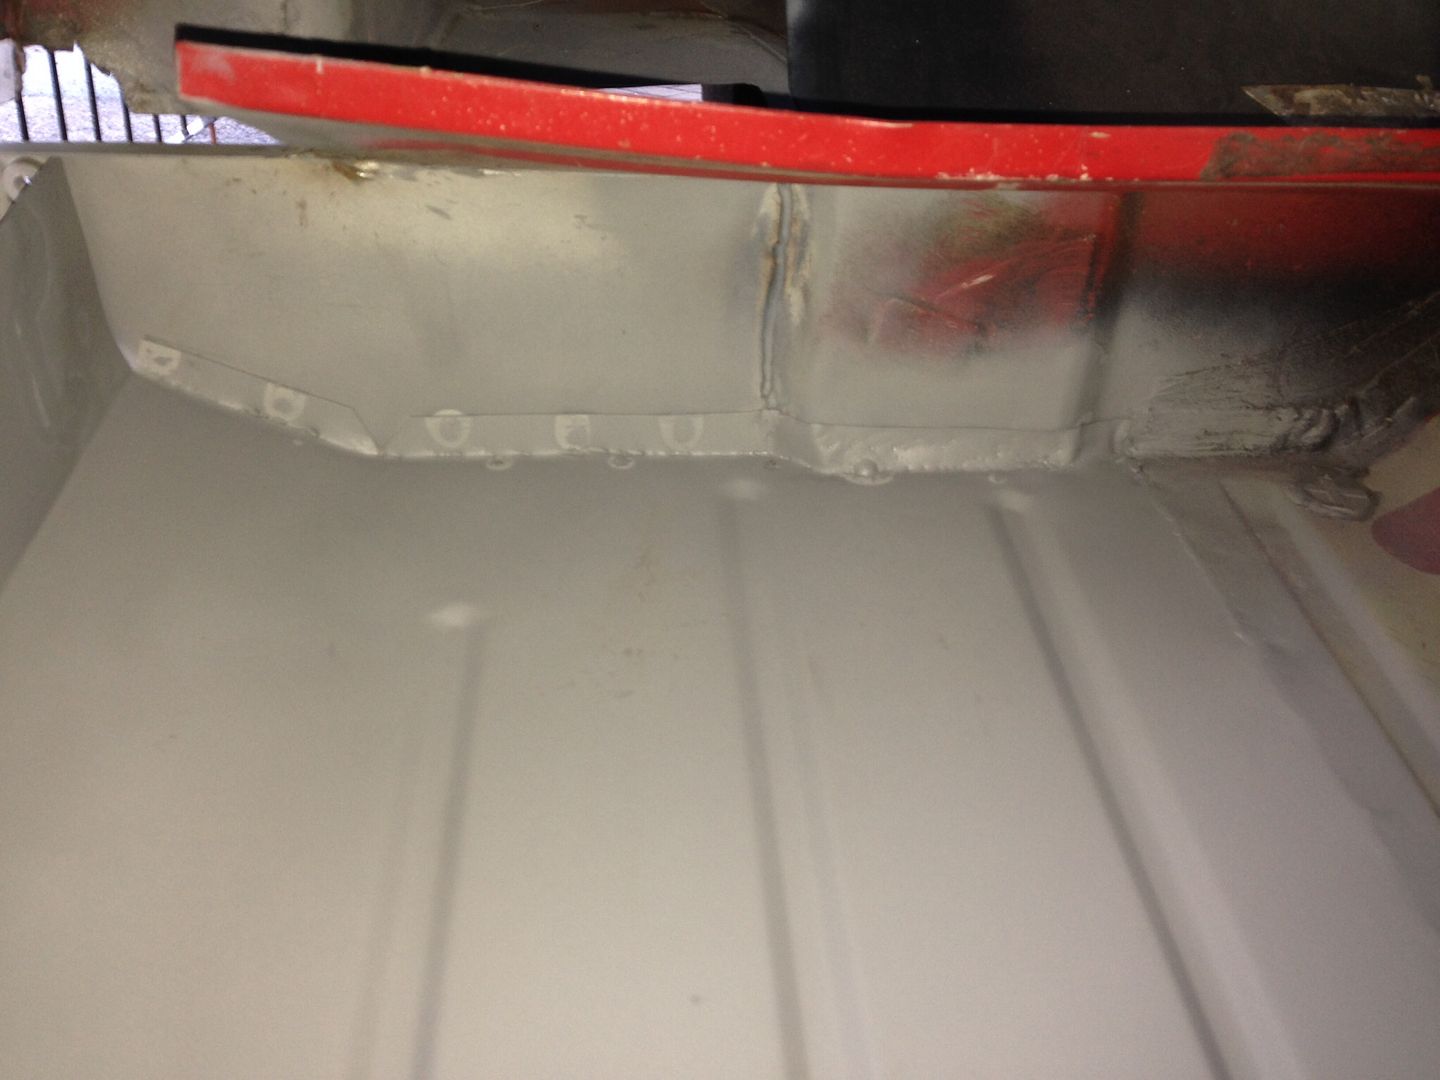
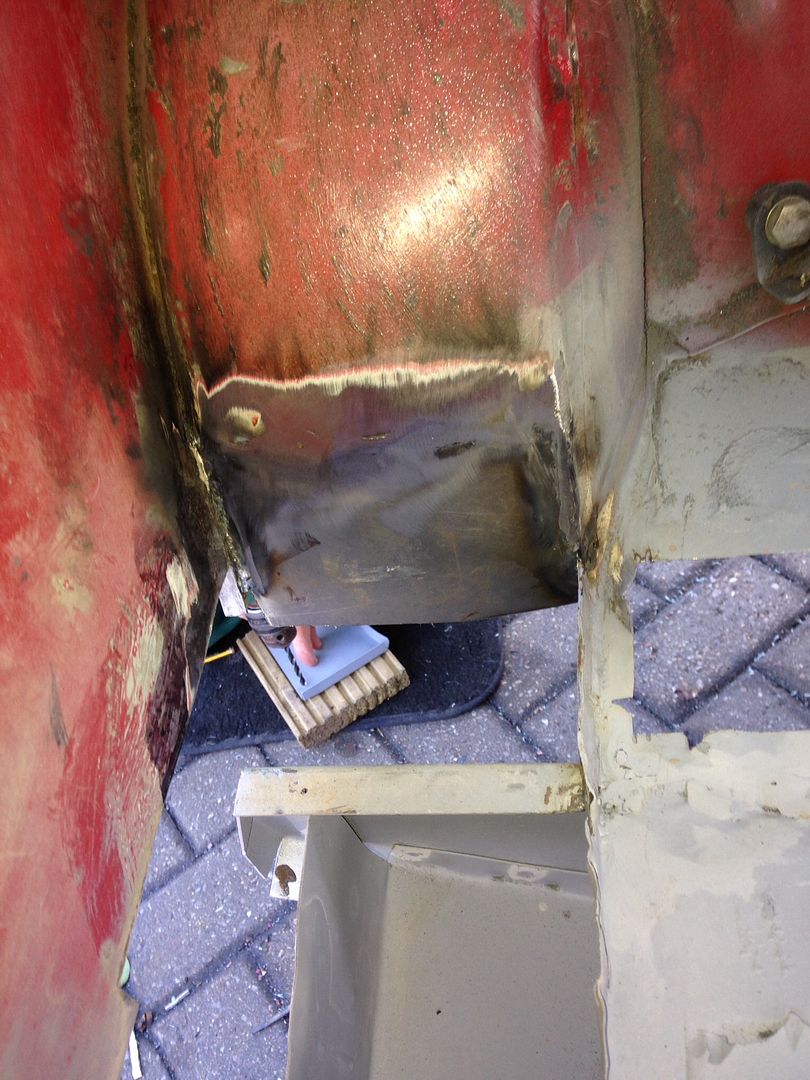
View from inside the companion bin (still needs the closing plate on the back welding in) -
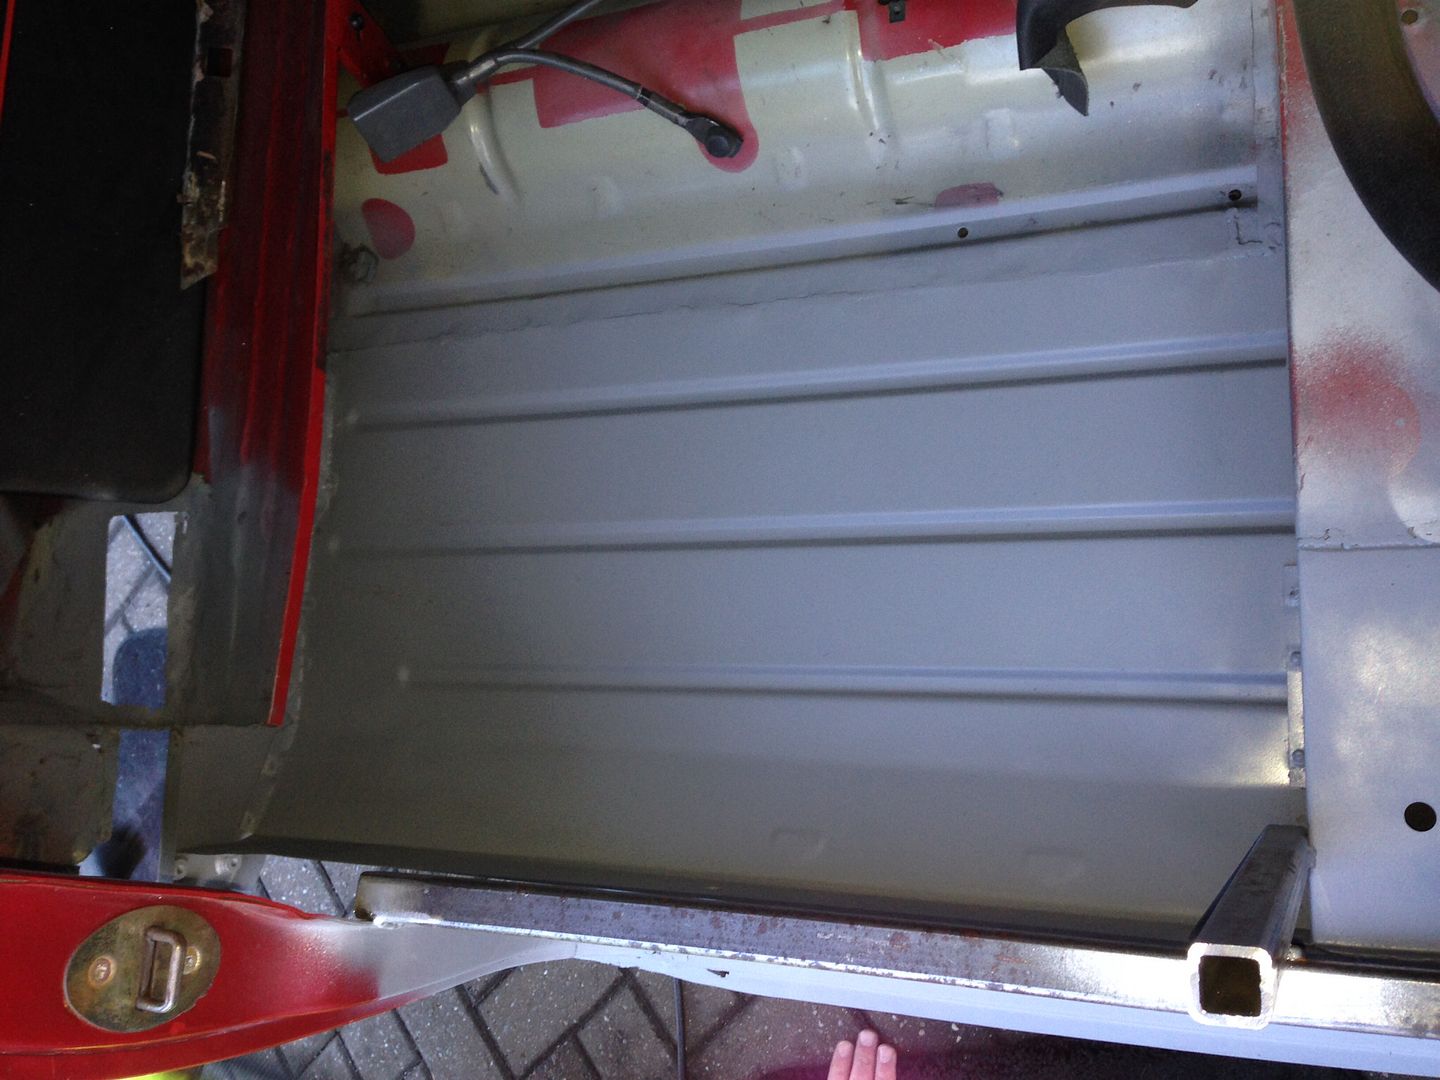
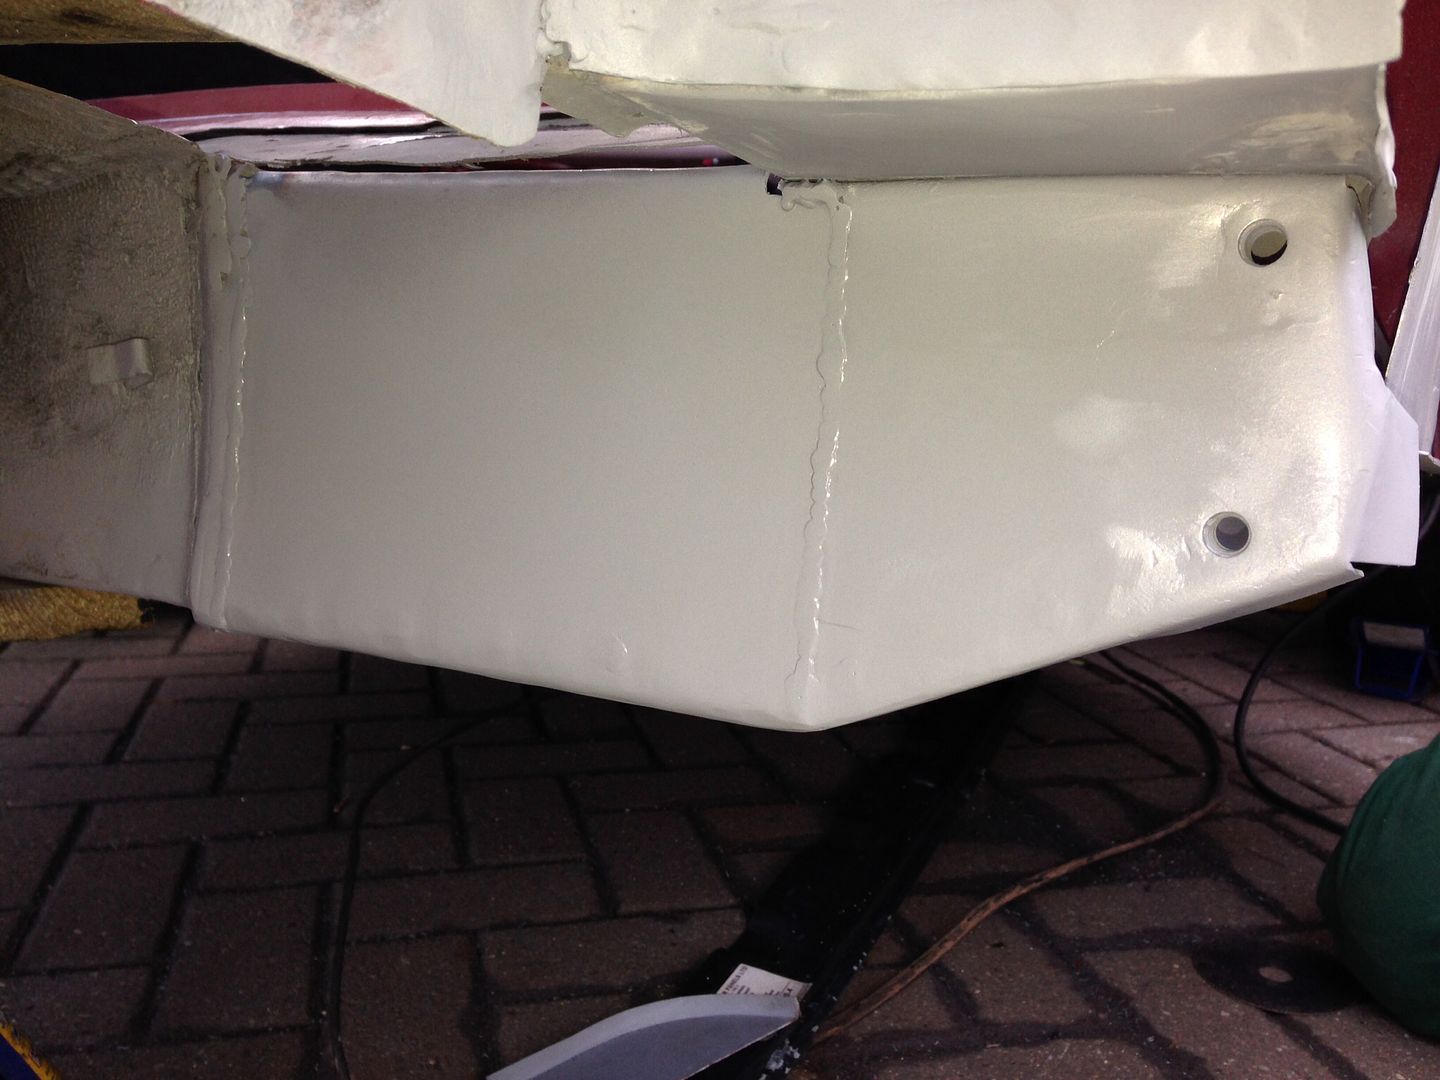
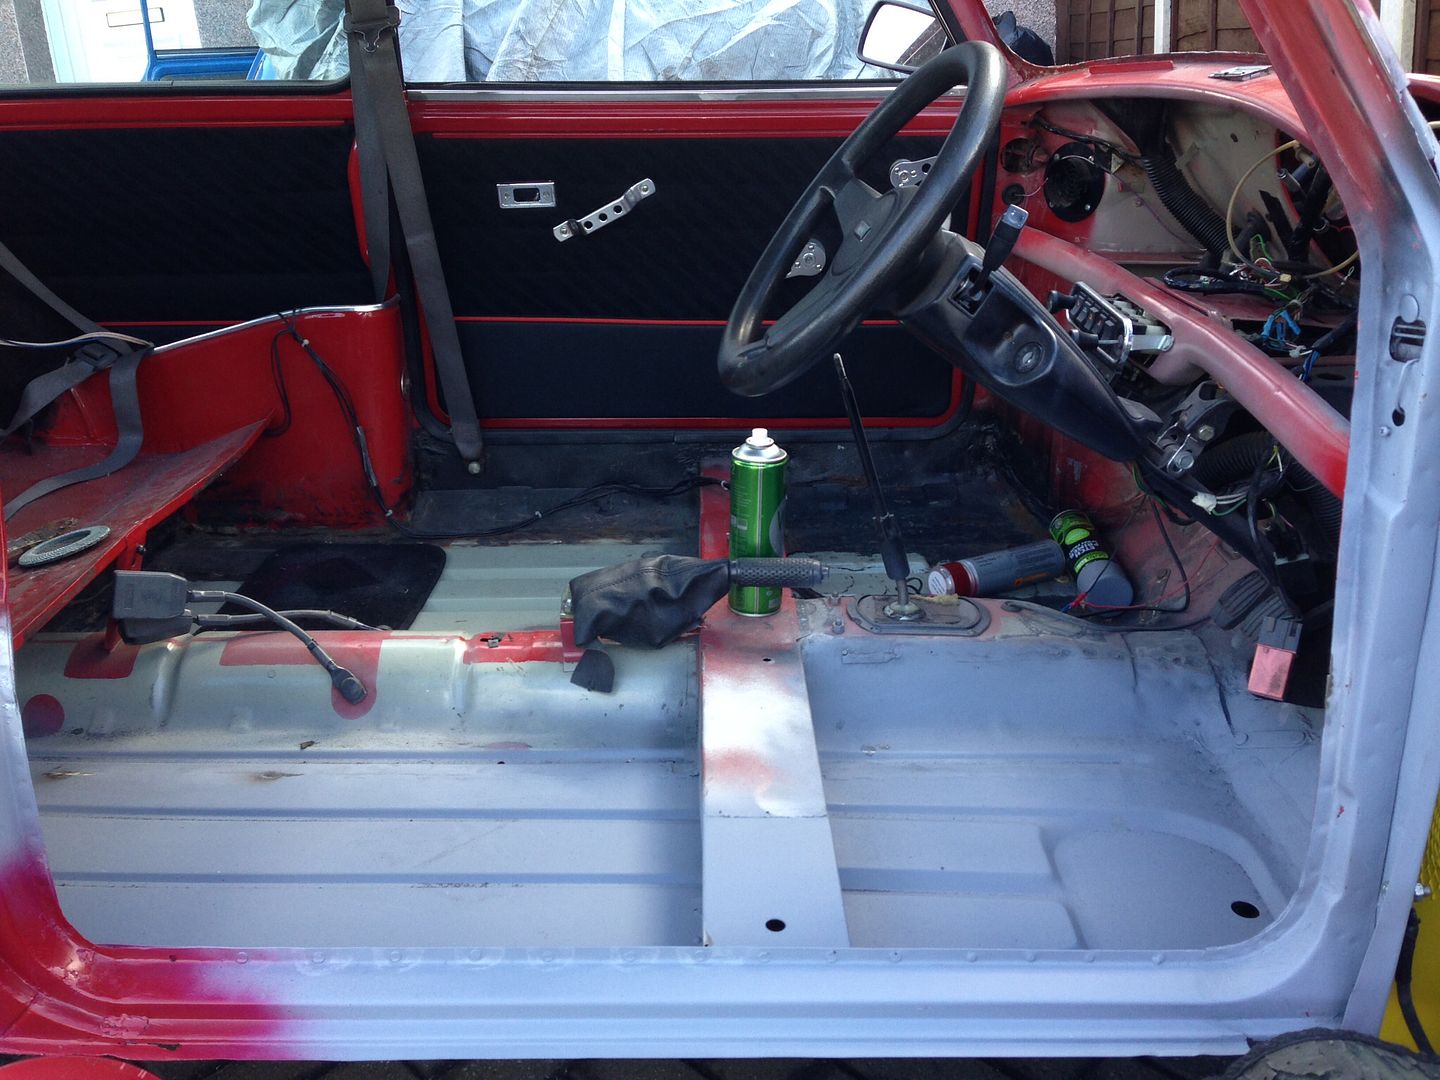
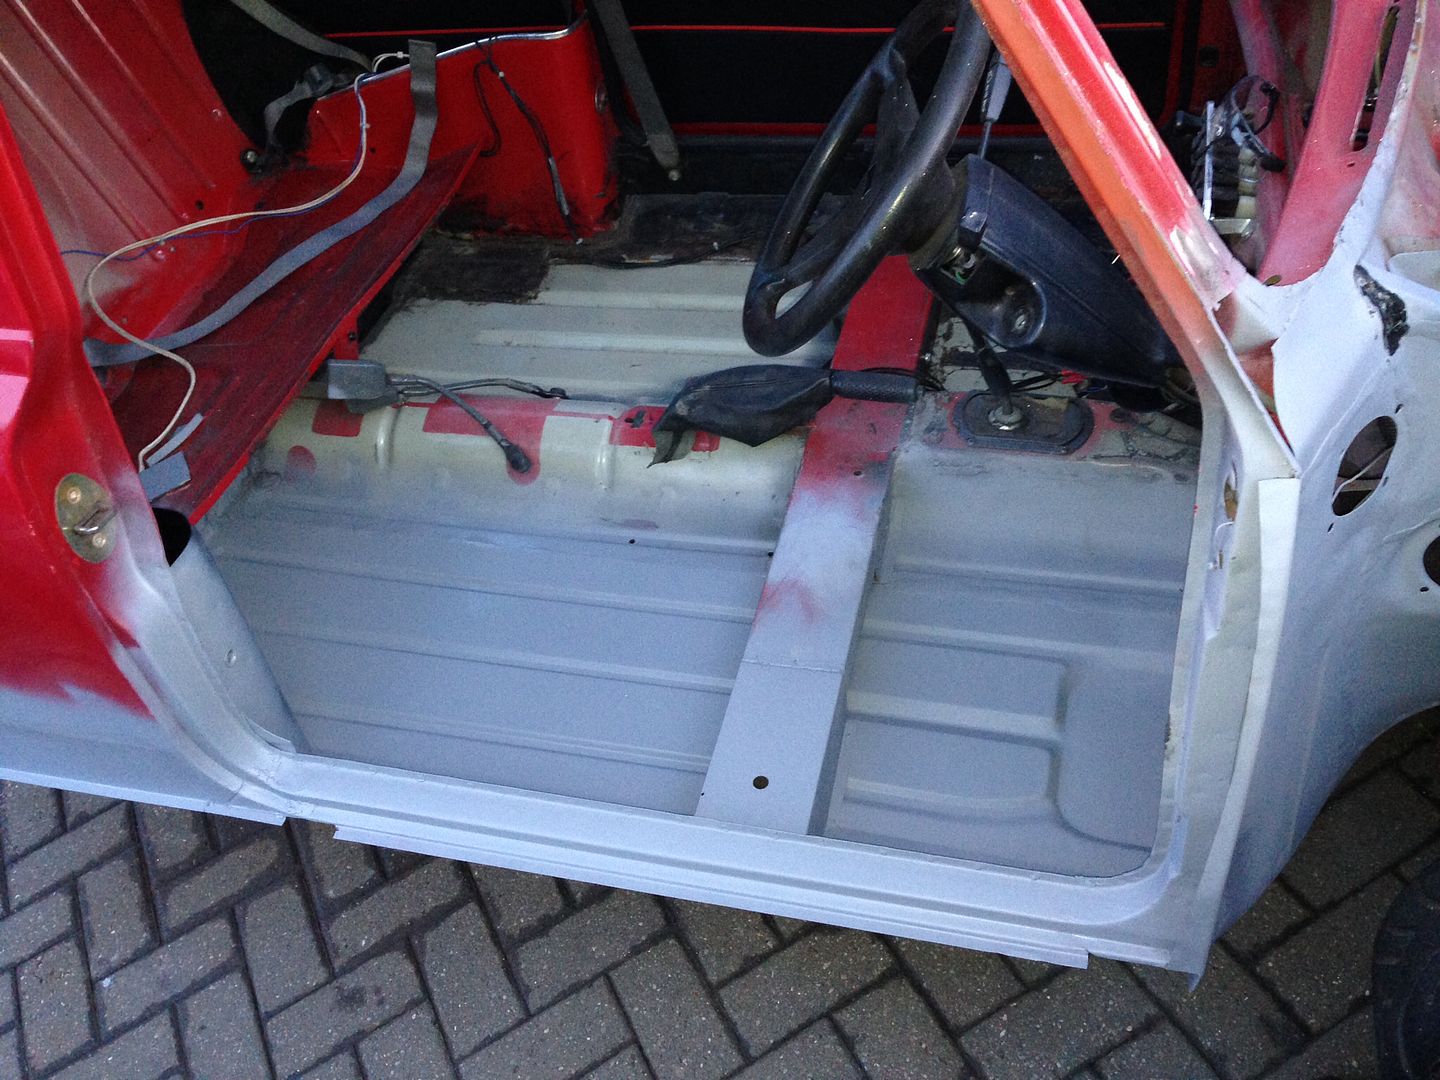
bdc8481f5ffaf57be21b54105b5a334b_zps6789

a2fca78bd13a7ea30025184b0d0ee153_zps2042

Overall look -

01d80ddf7d541f17b8072680f34b1d19_zps7bc9

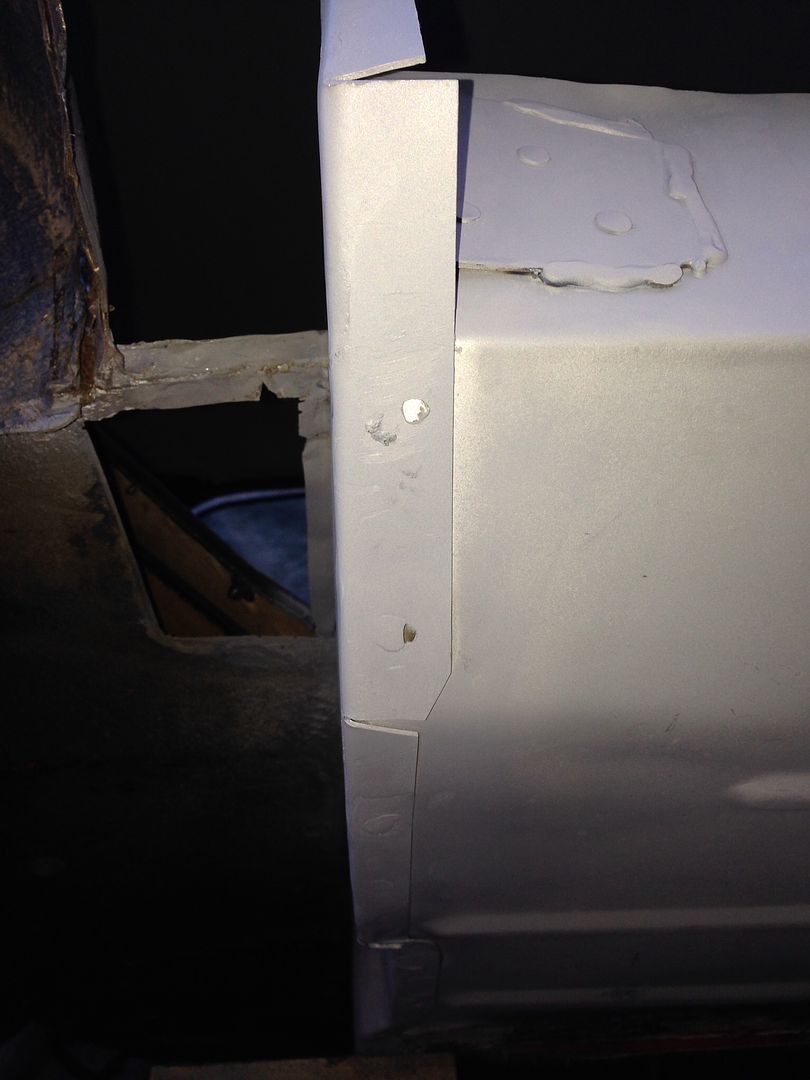
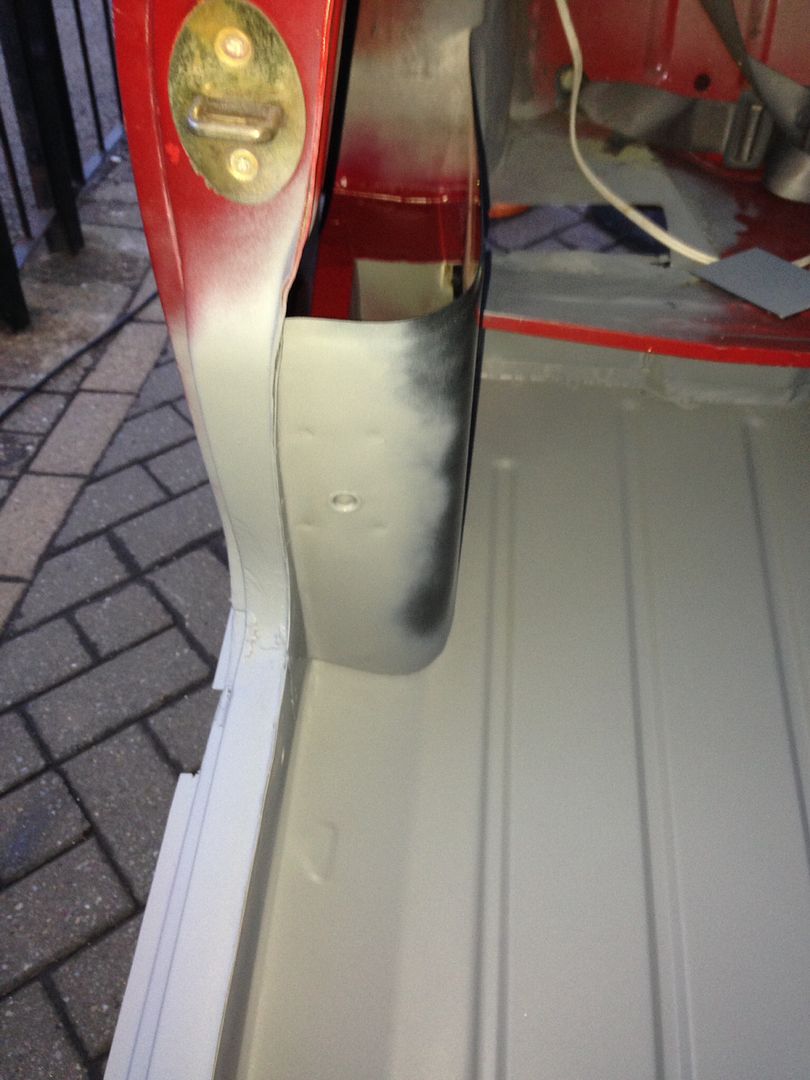
Good speedy progress today, had some sunshine for a change so that made a huge difference. Looks like the rear quarter repair is off in the picture but it's not, I've made accurate measurements from two different minis and there the same, also I don't think the heelboards to blame either as again I took accurate measurements and have dry fitted the subframe a couple of times with no problems, I measured and re-measured and both sides matched up and was plumb straight so I think it's got something to do with the pattern floor I bought, but then again it lines up perfectly with the door step, which again is dead straight !

What a mouthful, but at the end of the day its 1000 times better than it was and won't be as noticeable when the outer sill goes on !

Anyway I've not got much left to do with this side now so will finish that and then start the other side within the next couple of weeks :-) !

Edited by big-jay, 27 June 2014 - 10:36 AM.


#57 big-jay

big-jay

    Super Mini Mad

  • Members
  • PipPipPipPipPipPip
  • 518 posts
  • Location: Birmingham
  • Local Club: British Mini Club

Posted 18 February 2014 - 12:28 AM

Parts update,

Received some parts I won on eBay today.

Used Vented Disks for my 4 pot conversion, still plenty of meat left on them, they've just been sitting around for a while. I won them for the massive sum of 99p :D

860a9e1f99fca1ffdc28bf36b49442ec_zps7147

I've put them into a bucket of ASDA'S special own brand rust remover :D, it's good stuff, removes rust like nobodies business -

79e51f6a0ca557e703d7398c3e094c5b_zps9165

In the bucket -

63f2e68510781eb38fb944d096ac7b2e_zpsf308

Going to leave them to soak until Friday and then attack them with the wire Brush on the drill ! Then I'll use some fine wire wool on the disk and paint up the hub part black I think, just to make it all look tidy really !

Edited by big-jay, 27 June 2014 - 10:37 AM.


#58 Minimoke8394

Minimoke8394

    Mini Mad

  • Members
  • PipPipPipPip
  • 223 posts

Posted 18 February 2014 - 02:41 PM

Nice big update there dude, I'm keeping an eye on this one. I've never done welding before so I was glad my project was rust free, but seeing the quality of your work makes me think I wouldn't mind giving it a go sometime. Would be a great thing to learn. Interesting about the vinegar....Never would have guessed that. 


#59 big-jay

big-jay

    Super Mini Mad

  • Members
  • PipPipPipPipPipPip
  • 518 posts
  • Location: Birmingham
  • Local Club: British Mini Club

Posted 22 February 2014 - 09:14 PM

Minimoke8394 - Thanks for the kind words mate, yeh vinegars brilliant at removing rust. I didn't know that it did it either until I read Deathrows thread.

Update,

We'll more of a step backwards really ! Completed all that work last week only to find that when I retried the subframe it didn't fit. Don't ask me how this Happen'd because I have absolutely no idea, as you can see from my previous photos I had the subframe bolted on so I have no clue as to what caused this.

I've had a complete nightmare these past few days trying to correct the problem, it's been horrible cutting back into all the fresh panels I've put in and believe me theres been blood, sweat and A LOT of swear words !

Me and my dad have finally sorted it today and we will hopefully be finishing this side of tomorrow, it's put me back a good weekend as I was planning on starting the boot area this weekend. I've learnt a valuable lesson and I WILL NOT let this happen again !

Ohh and on a side note, I HATE HEEL BOARDS !

Anyway I've got a few pictures of some of the modifications We've had to do.

Cut the heel board and dropped it down about an inch -

50809fdedf262bf412ff4c8ad8e22db2_zps3d37

Also had to chop out my Heritage Companion bin which destroyed the lip part that welds to the inner sill by the doorstep, so I chopped it out and made a new lip, welded that in and primed the whole inside of it. Quite happy with it as it's almost an invisible repair -

057aab03f745d923eed9dd3b665d4efa_zps8458

881fac5d76f5cbb76566f853e8b26c3e_zps31e5

Some top coat on the inside as it's easier to paint off the car -

47a54ef9c7d29380c9c6c88fca5ccfcf_zps8d7e

Also had to cut out my rear quarter repair panel in order to reposition the heel board strengthening bracket which I wasn't happy about but it had to be done unfortunately -

6c5cceb451b0a469815c99bf0b753ce9_zpsc686

I've retired the subframe and it now fits BEAUTIFULLY, So tomorrow I should be finishing this side off, I'll take more pictures as I go along, as you can imagine I haven't been in the mood to be taking photos over the last few days.

What a disaster. At least things seem to be on track again now !

Edited by big-jay, 27 June 2014 - 10:40 AM.


#60 Rocket.

Rocket.

    One Carb Or Two?

  • Members
  • PipPipPipPipPipPipPip
  • 1,441 posts
  • Location: UK

Posted 22 February 2014 - 09:26 PM

lovely work !


Also tagged with one or more of these keywords: roundnose

0 user(s) are reading this topic

0 members, 0 guests, 0 anonymous users