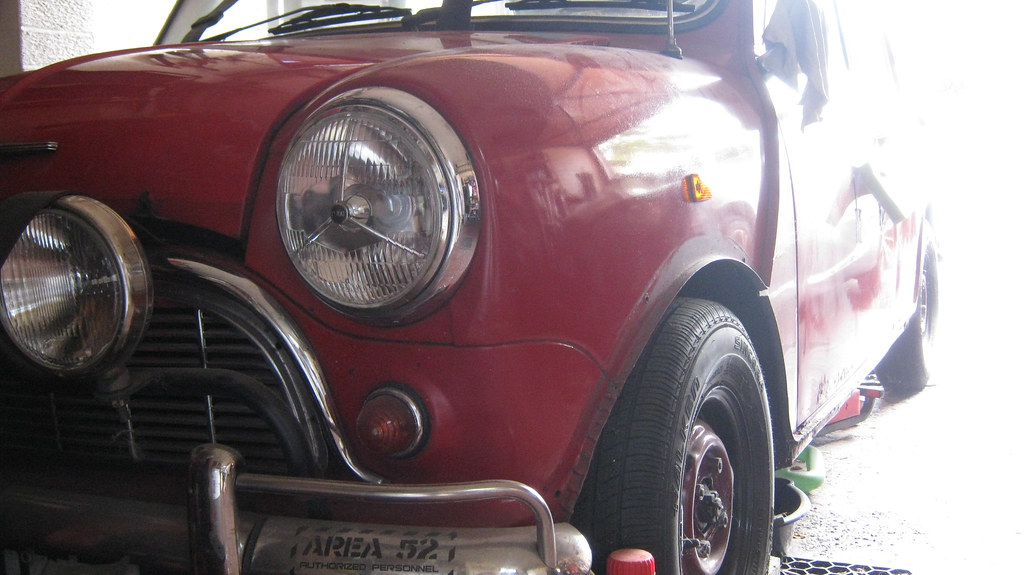
I'll post them tomorrow mate. I have loads of your mini lol.


'92 City E - Mk1 Fraudster - Attempt To Shine (16/05/16)
Started by
The Otter
, Mar 08 2012 05:38 PM
297 replies to this topic
#242
: post #242")
Steely
-

- Members
-

- 1,764 posts
Camshaft & Stage Two Head
Posted 17 April 2015 - 07:39 PM
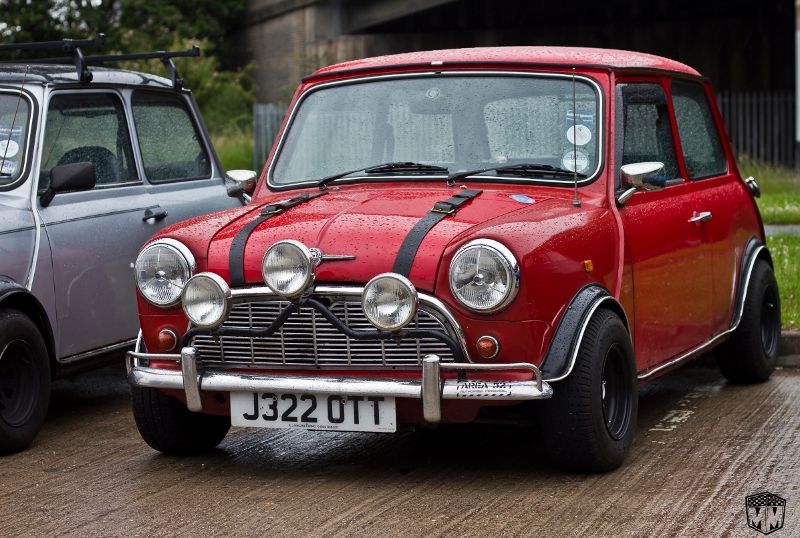
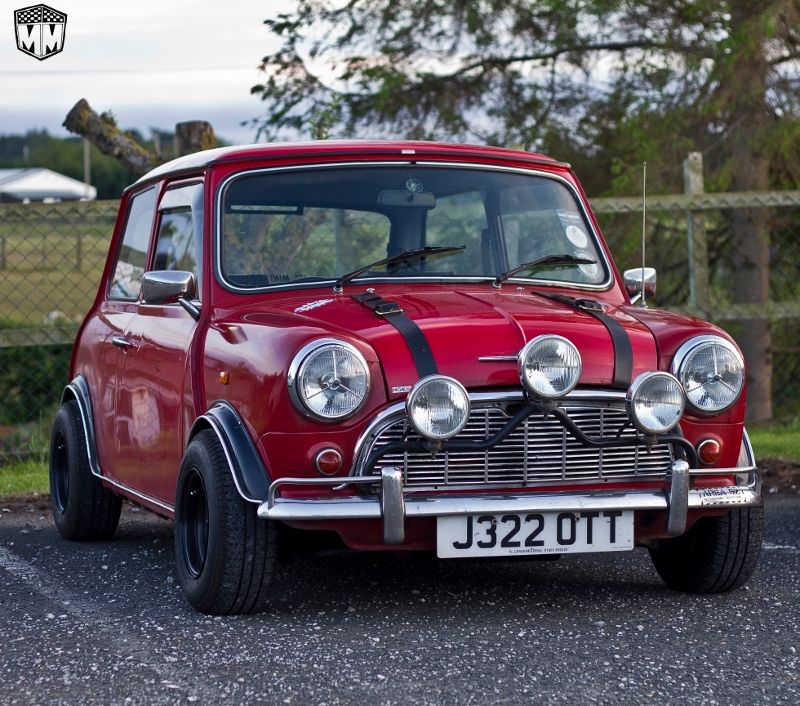
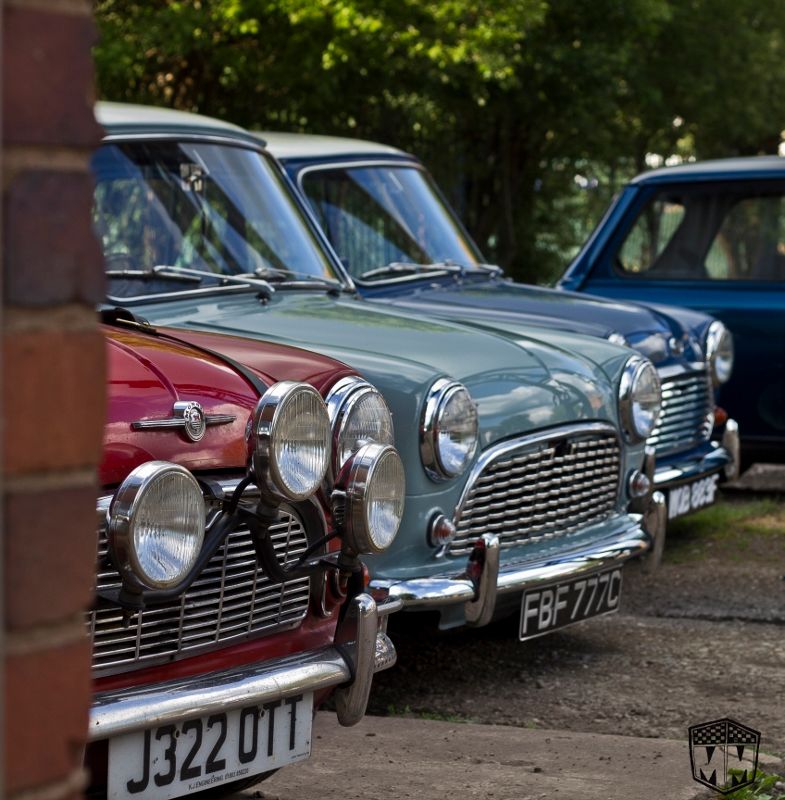
Are these the ones you wanted Mate? 
Please like Mini Madness on Facebook ;)
#243
The Otter
-
- Members
-
- 620 posts
The artist formally known as j322overthetop
- Location: Midlands
Posted 17 April 2015 - 08:59 PM
Yes yes, that's what I had in mind, thanks for posting them here, lovely snaps, reminds me just how much I love this car. 
...and yes peeps, go and like Mini Madness on the book of Face, you won't regret it. 
#244
Steely
-
- Members
-
- 1,764 posts
Camshaft & Stage Two Head
Posted 17 April 2015 - 10:10 PM
Cheers for the shout out ;). You at POL tomorrow?
#245
The Otter
-
- Members
-
- 620 posts
The artist formally known as j322overthetop
- Location: Midlands
Posted 29 August 2015 - 09:11 AM
Wakey wakey...
 IMG_0521 by Sven Cumner, on Flickr
What is this... an update? Well... I got myself a job (almost three months ago now) so I have no excuse not to start giving the Mini some love again!
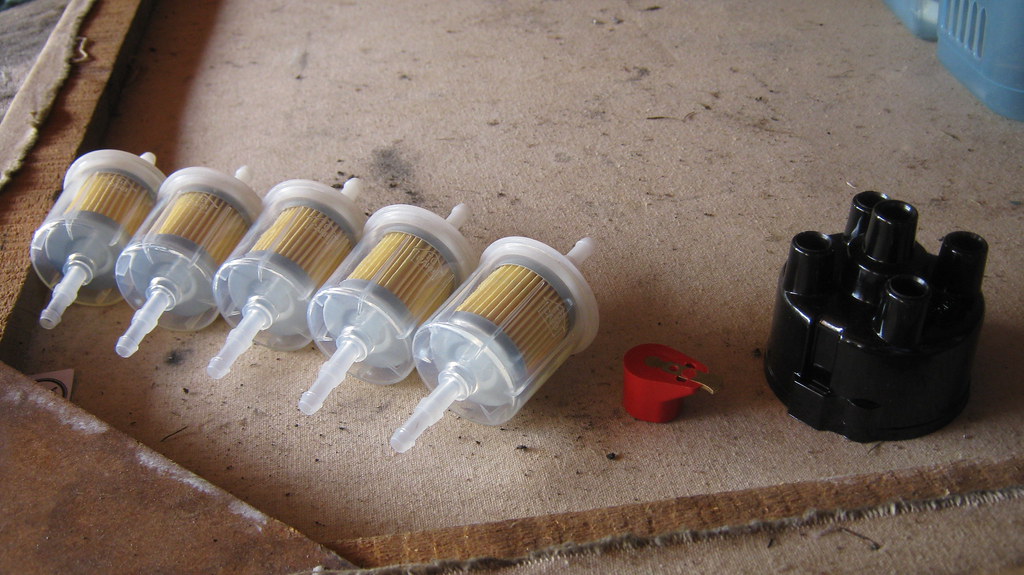
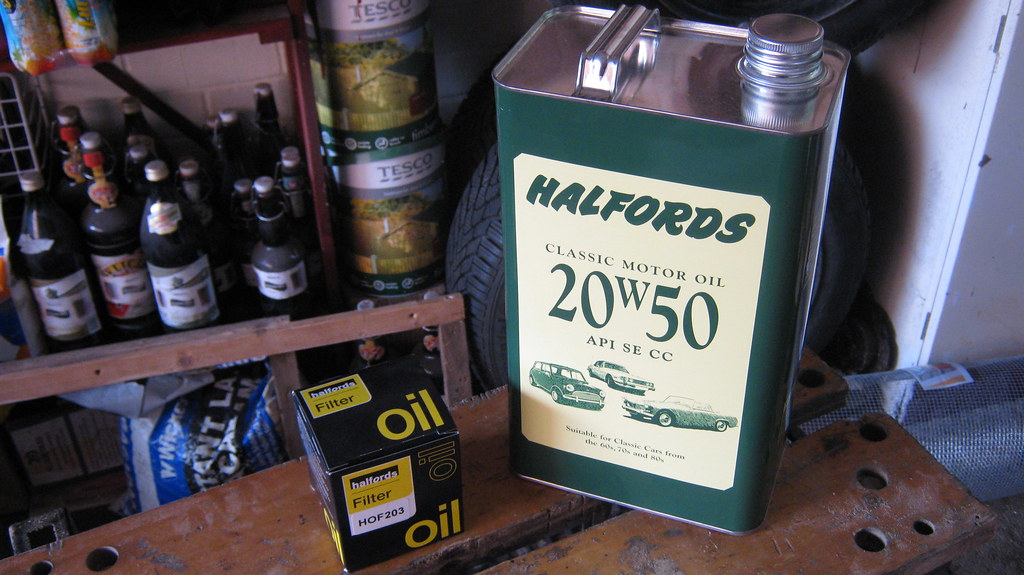
I've bought a few things in the hope to get it running again, hopefully today if I can. Dizzy cap, rotor, 'some' fuel filters, a tin of oil and an oil filter.
 IMG_0518 by Sven Cumner, on Flickr
 IMG_0519 by Sven Cumner, on Flickr
I'm still very much planning to build a fast engine for it, hopefully over the winter and I can fit it in Spring/Summer next year. I've got a bit of bodywork still to do as well, hopefully that'll get done through winter as well. So hopefully this thread will become a little more active again, after 2 years of the Mini being in hibernation!
Oh if anyone's interested, this is my current daily... it hasn't broken too spectacularly yet, so hopefully all my car money can be dumped in to the Mini. 
 IMG_0520 by Sven Cumner, on Flickr
I shall try and update later on the status of the Mini and if it's running or not, with the very worn out old 998!
#246
Ben_O
-

- Paint Doctor
-
- 9,794 posts
Mill Road Garage
- Location: Isle of Wight
Posted 29 August 2015 - 04:06 PM
What happened to the BMW?
Good to see the Mini getting love again
Ben
#247
Alex_B
-

- TMF+ Member
-
- 4,573 posts
Doesn't put foot in mouth enough!
- Location: Eastbourne
Posted 29 August 2015 - 08:40 PM
Wahay, glad to see this getting some love! Plus one on the e30? Was a nice estate, it still around and kicking?
#248
The Otter
-
- Members
-
- 620 posts
The artist formally known as j322overthetop
- Location: Midlands
Posted 01 September 2015 - 04:28 PM
Ahh, familiar names still around I see, hope you guys are well!
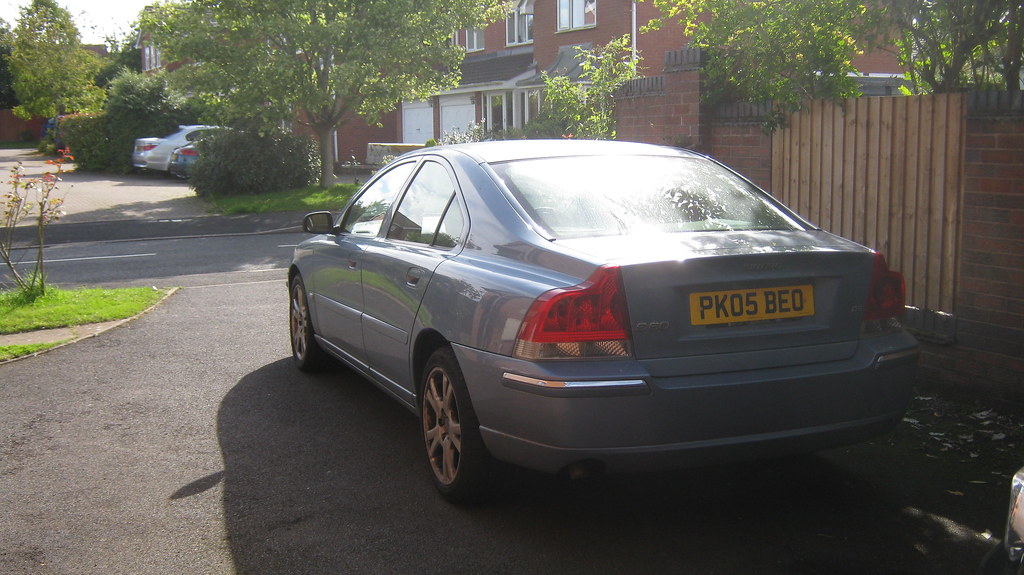
Unfortunately no, the E30 isn't with me any more, I sold it straight after getting the Volvo, which I bought when I got my job sorted. I commute around 45 miles a day now, so it would've been stupid to keep the BMW and put up with 25mpg at best, hence buying the Volvo, which is just as fast but does 50mpg instead, and has all the modern creature comforts... granted it's nowhere near as cool or as good to drive as the BMW, but I still really like it  .
.
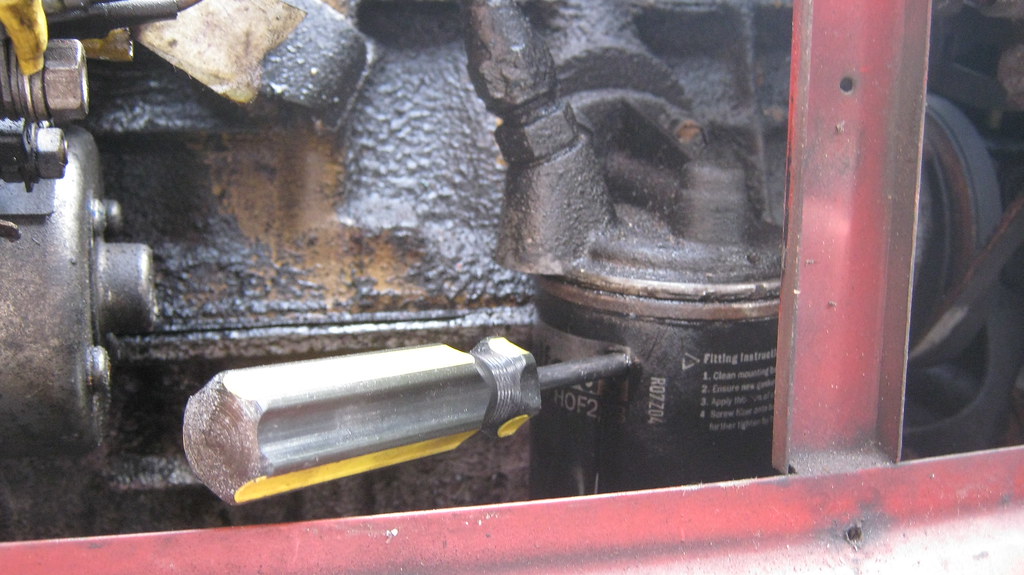
Anyway, the Mini... is it 'later' yet?  I spent the morning/afternoon the other day prepping to start it up, firstly doing the oil change. Of course the filter didn't want to come off by hand, so I resorted to a familiar technique:
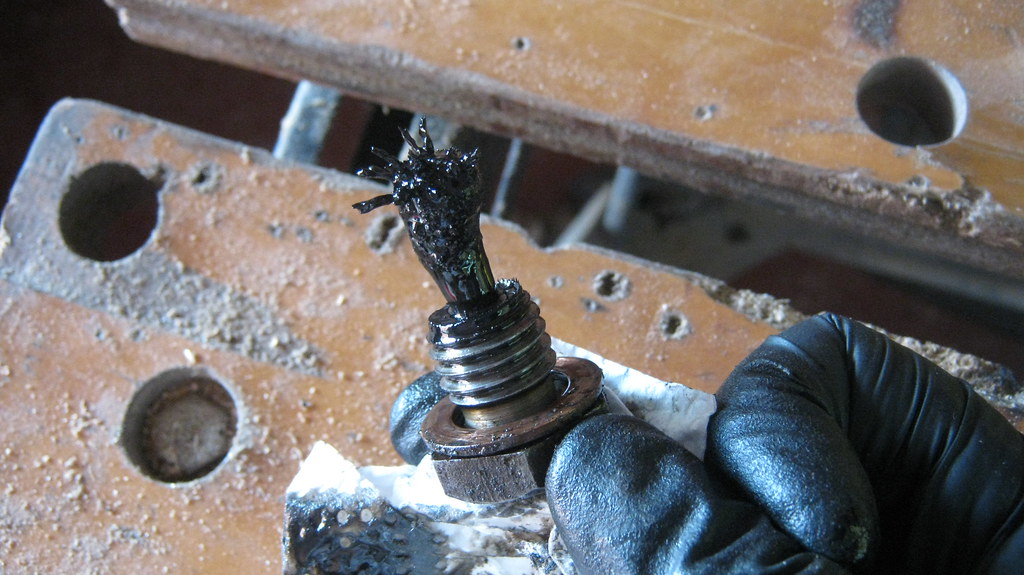
The sump plug magnet shows the general status of this engine, which is of course 'tip top'...
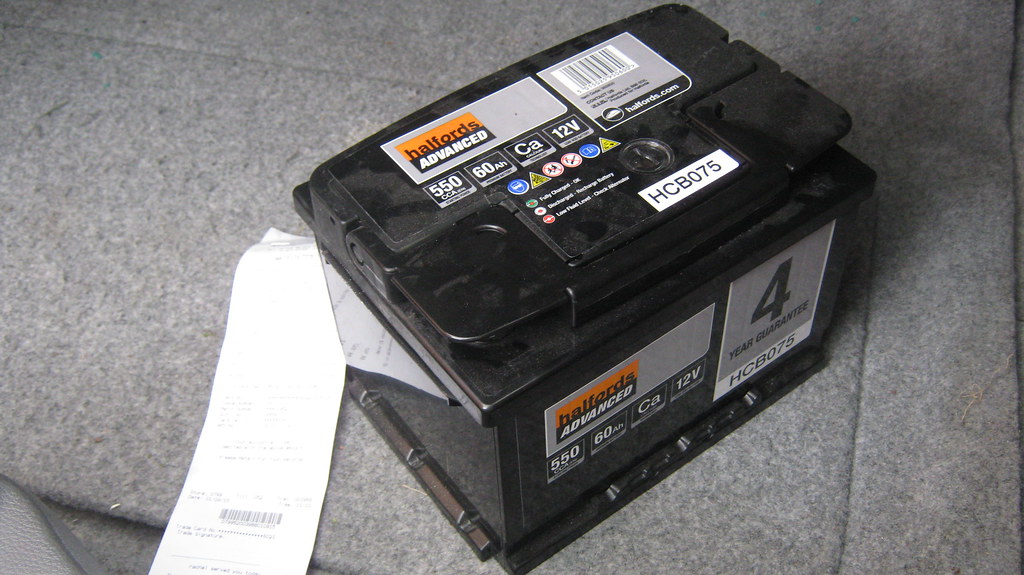
Then after doing the oil change and fiddling around with the ignition/fuelling for a while, I realised that it might be a bit hard to try and start it without a battery...  So, when I had some free time this morning I went and got myself a battery
Oh yes, I have the week off work at the moment, hence playing with the Mini today. Hopefully I'll get cutting out some of the rust in the next few days as well.
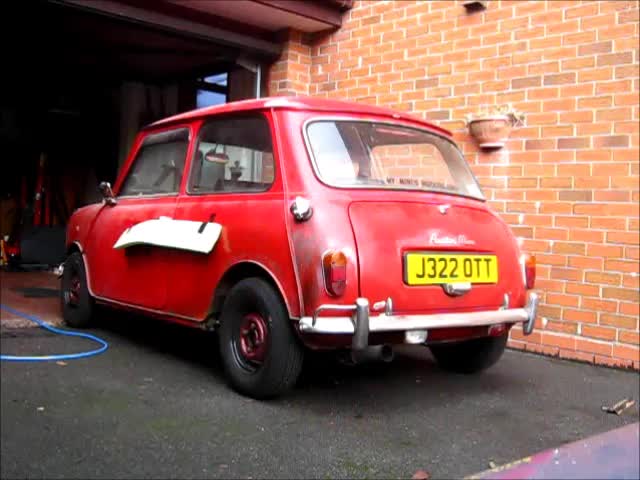
Anyway, battery fitted, it didn't take much turning over until... (click on the image to go to the video)
 [url=https://flic.kr/p/xNGi1s]
Not bad for not being touched in over 2 years, ran like a champ.
Then it started raining, so I put it back in the garage... hopefully another couple of updates will surface soon if I get anything else done!
Cheers everyone 
Edited by The Otter, 01 September 2015 - 04:32 PM.
#249
Tamworthbay
-

- Members
-
- 7,025 posts
Crazy About Mini's
- Name: Clive
- Location: Tamworth
- Local Club: A5 minis
Posted 01 September 2015 - 05:05 PM
Good to see you are getting it back on the road. Have you missed it? It will feel very different after driving the Volvo.
#250
Ben_O
-
- Paint Doctor
-
- 9,794 posts
Mill Road Garage
- Location: Isle of Wight
Posted 01 September 2015 - 05:41 PM
Good to see you are getting it back on the road. Have you missed it? It will feel very different after driving the Volvo.
he missed it alright, spot the grin on his face while he is revving it in the video
#251
minimissions
-

- Members
-
- 3,427 posts
Up Into Fourth
- Location: North West
- Local Club: M.M.O.C
Posted 01 September 2015 - 06:42 PM
Nothing wrong with a Volvo bought a v70 D5 myself as a daily few months ago it's an ace car and wicked mpg from it :)
#252
The Otter
-
- Members
-
- 620 posts
The artist formally known as j322overthetop
- Location: Midlands
Posted 07 September 2015 - 12:25 PM
Good to see you are getting it back on the road. Have you missed it? It will feel very different after driving the Volvo.
To be honest I haven't missed it as much as I thought I would, perhaps because the BX and E30 were still quite 'involving' cars to drive. I can feel myself building up the need for a go in a proper drivers car like the Mini though, as the Volvo is obviously much more detached from the feel of driving when you're really pushing it, compared an older car - and yes, it feels very strange sitting in the Mini after getting used to the Volvo!
Good to see you are getting it back on the road. Have you missed it? It will feel very different after driving the Volvo.
he missed it alright, spot the grin on his face while he is revving it in the video
I had a feeling someone would spot that, I was trying my best to contain my excitement
Nothing wrong with a Volvo bought a v70 D5 myself as a daily few months ago it's an ace car and wicked mpg from it :)
They are great aren't they, you get so much car for the price you can get them for now. I drove a '13 plate BMW 320d for work a few weeks back and I honestly prefer the Volvo! Way comfier, better stereo (minus the awesome media interface), actually has more gadgets (the BMW was poverty spec though), although the BMW can get 70mpg whilst still being as quick as the Volvo  . Anyway, I digress...
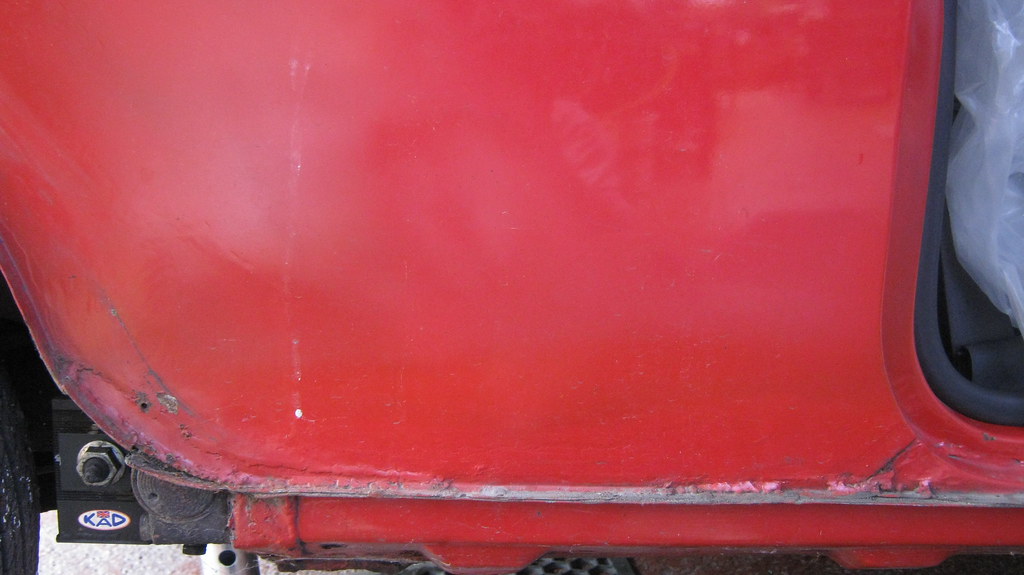
I got cracking with a bit of rust repair on the Mini the other day. As I've already done the front end and driver's side sill/front floor, I figured I'd work my way round the car from there, so I went about changing the driver's lower rear quarter section as it was a bit scruffy.
First I got the car up in the air to give me better access.
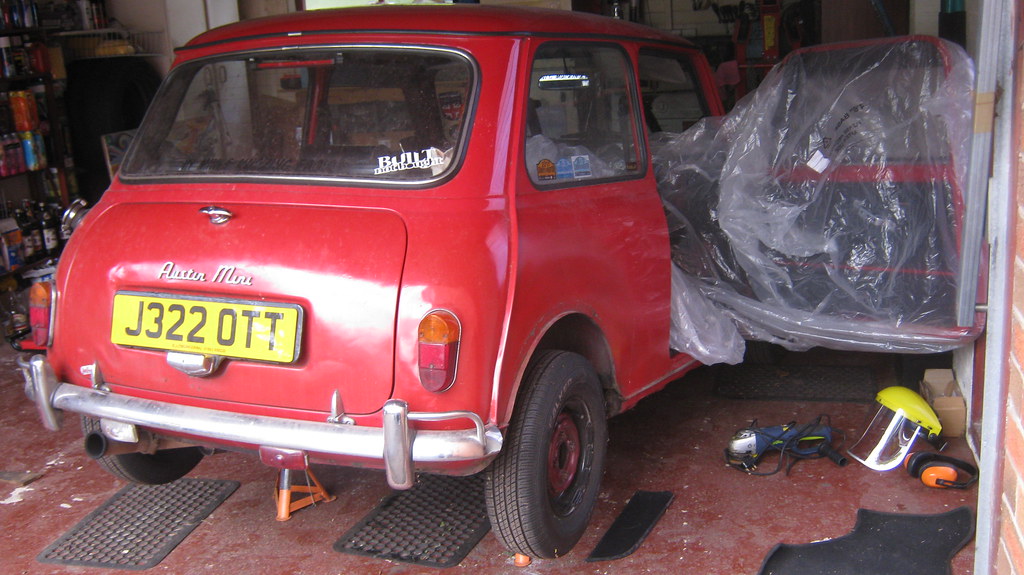 IMG_0533 by Sven Cumner, on Flickr
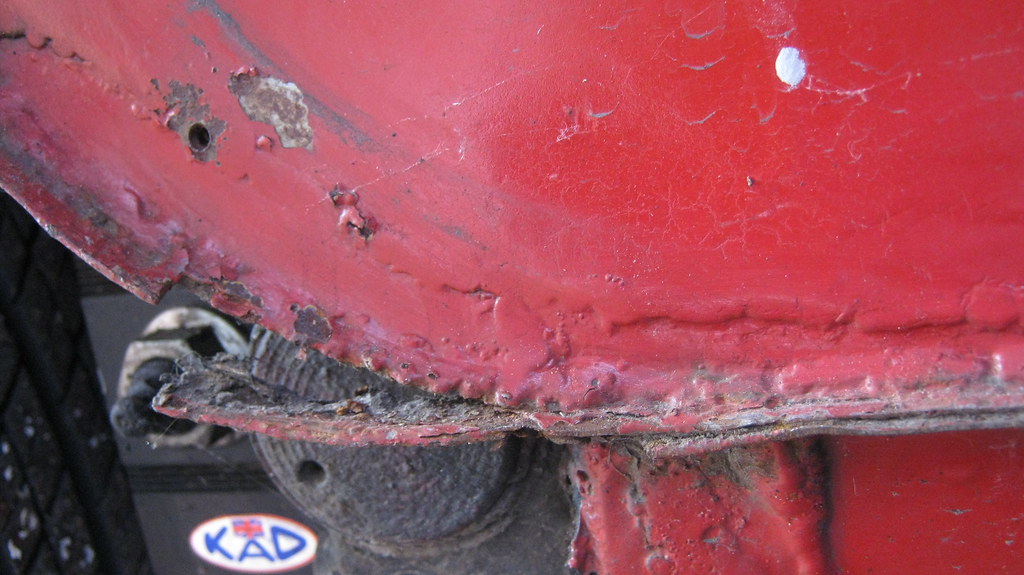
This was what was there before.
 IMG_0534 by Sven Cumner, on Flickr
I'd already made a couple of small, crude patches a while back, but I wanted it to be done a bit more properly.
You can see some of the mess here, along with a bit of the lip falling off.
 IMG_0535 by Sven Cumner, on Flickr
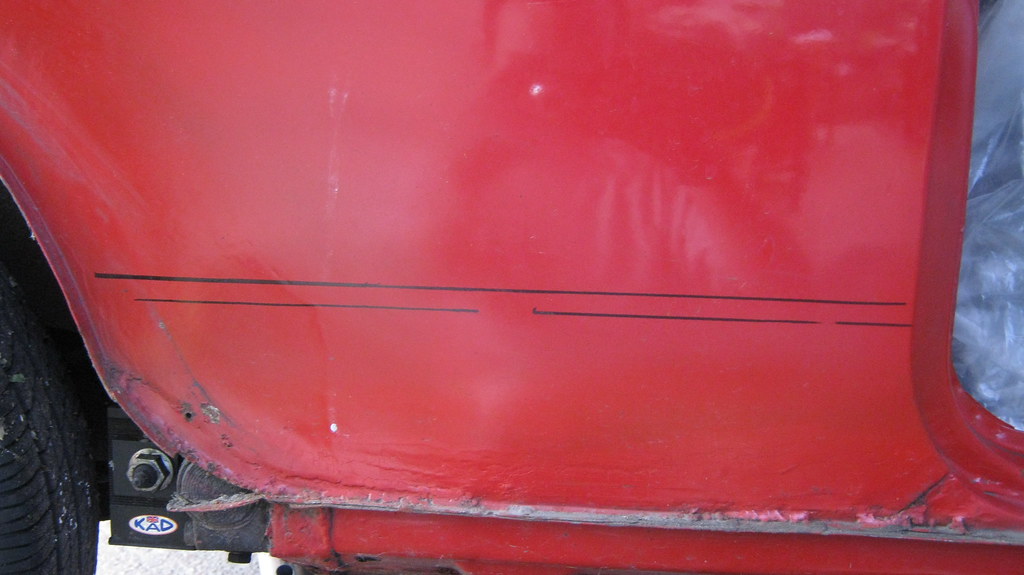
I marked out the cut line, then made another one a bit lower down to accommodate for the joggled lip.
 IMG_0536 by Sven Cumner, on Flickr
Then I cut it out.
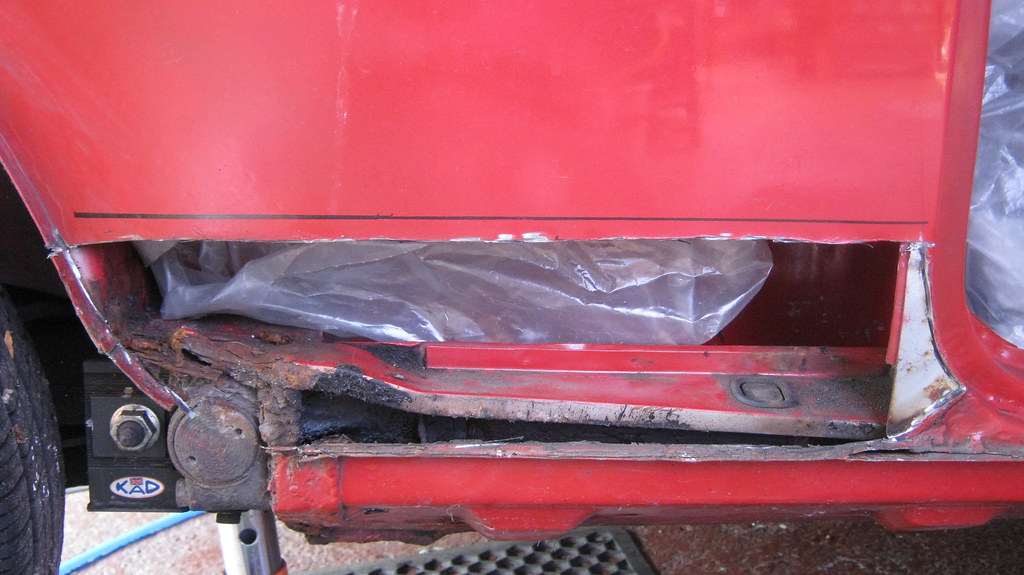 IMG_0537 by Sven Cumner, on Flickr
Of course whilst I was in there I found some more rust! This little area needed a patch letting in.
 IMG_0538 by Sven Cumner, on Flickr
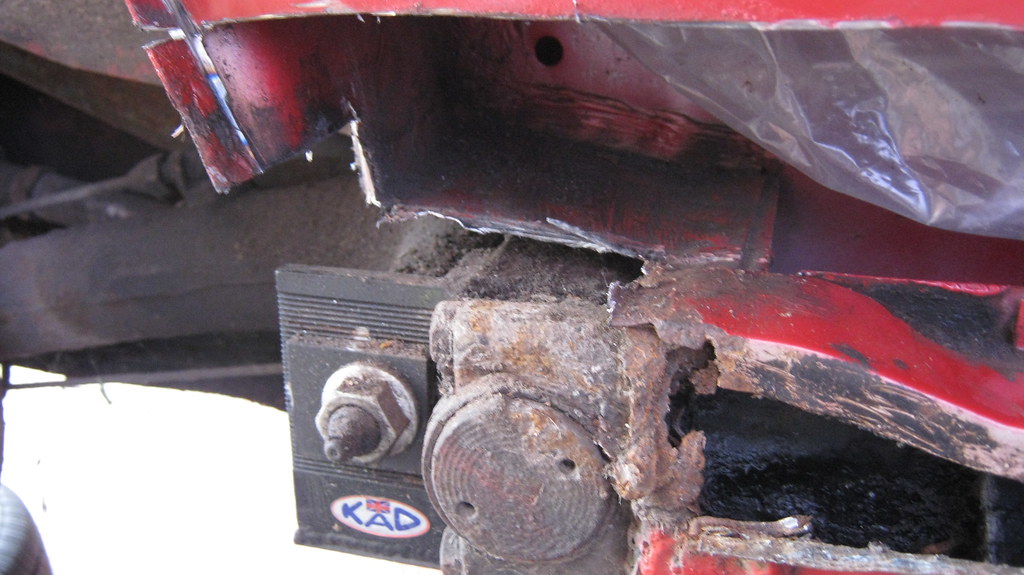
Then whilst I was poking old rust away, I thought I'd have a poke around some other areas. A few more patches needed I think, and a new rear valance...
 IMG_0539 by Sven Cumner, on Flickr
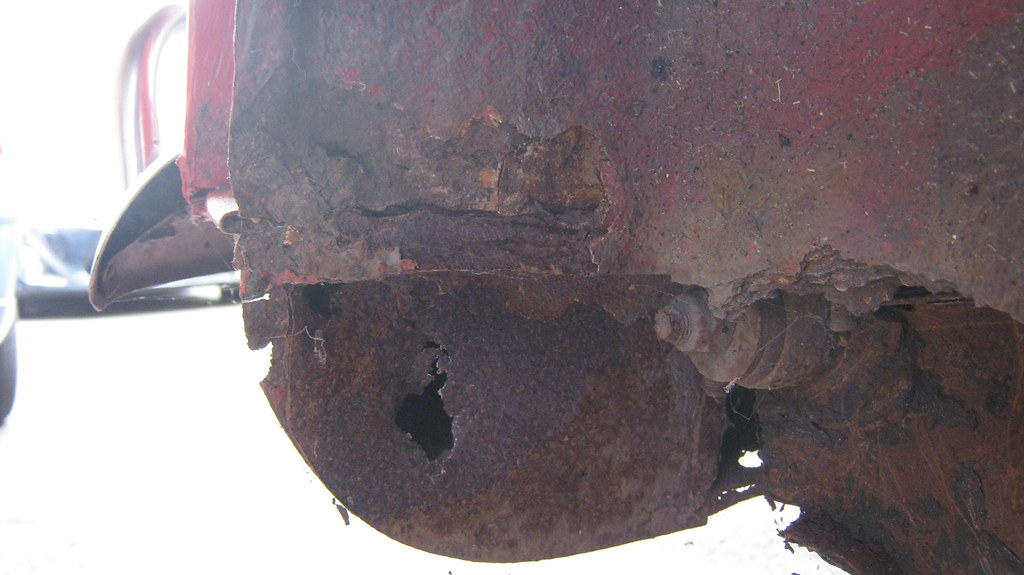
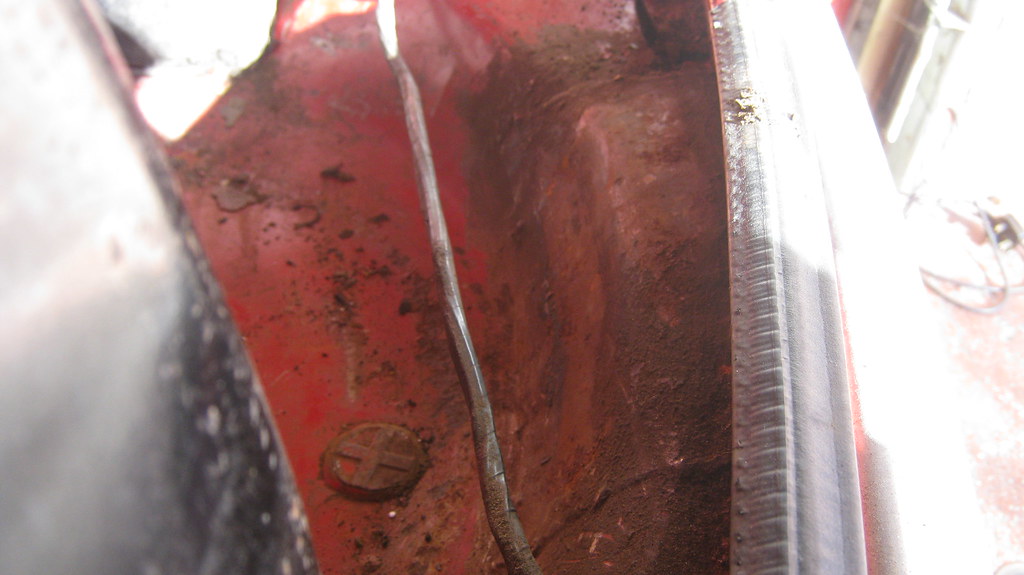
This is the rear of the driver's side floor pan.
 IMG_0540 by Sven Cumner, on Flickr
 IMG_0541 by Sven Cumner, on Flickr
 IMG_0542 by Sven Cumner, on Flickr
I wasn't expecting to find/make all these holes, but I'm so used to it now it's more funny than depressing
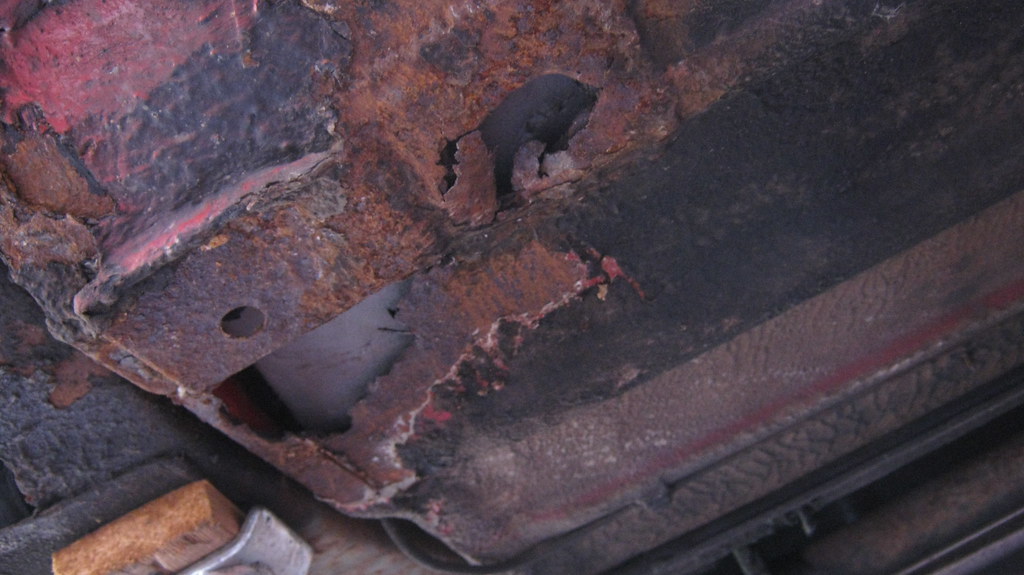
I know the passenger side floor is in even more of a state, overall, than the driver's side was, so here's the rear of the passenger's side.
 IMG_0543 by Sven Cumner, on Flickr
I did get some compensation from all my poking though, the car must've felt sorry for me!
 IMG_0544 by Sven Cumner, on Flickr
Ahh, a familiar sight, the remains of the Mini lying in a pile on the floor.
 IMG_0545 by Sven Cumner, on Flickr
The next day I made up a patch for that little area behind the quarter panel section I cut out.
 IMG_0546 by Sven Cumner, on Flickr
As it was so close to the subframe and the KAD camber/toe bracket, I used a piece of copper that I'd bought for welding assistance, to slide in between the subframe and the patch I was welding in.
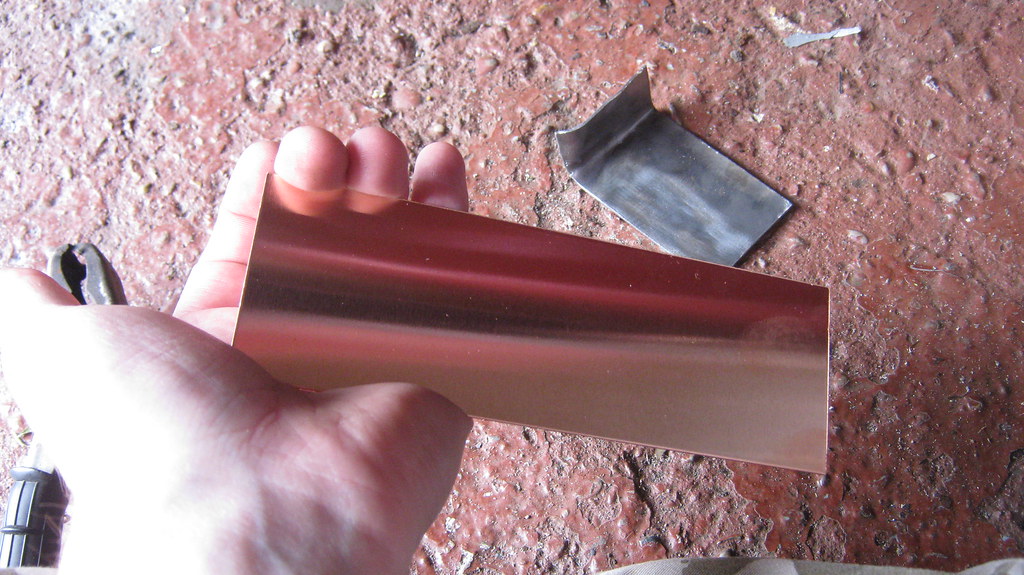 IMG_0547 by Sven Cumner, on Flickr
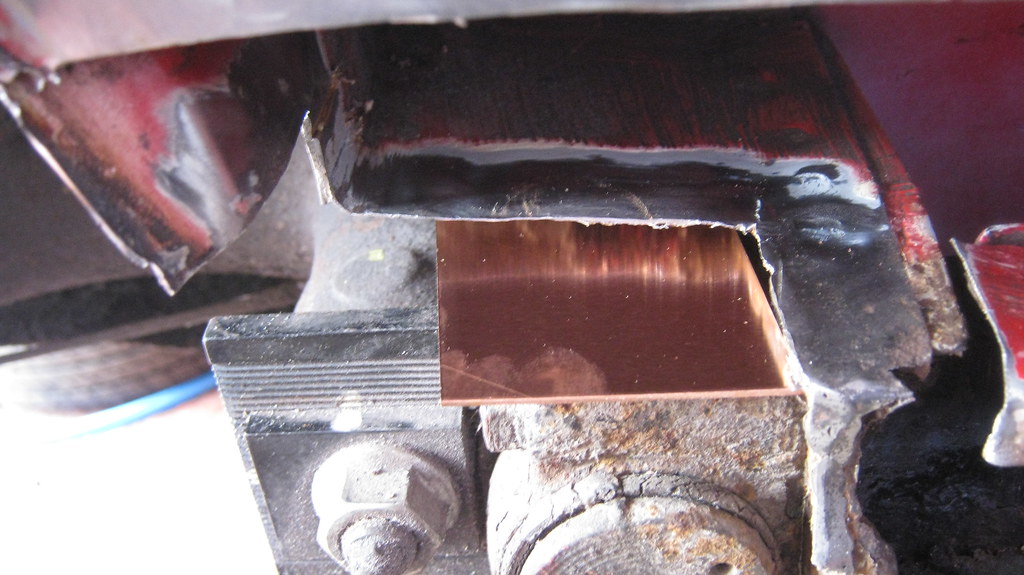 IMG_0548 by Sven Cumner, on Flickr
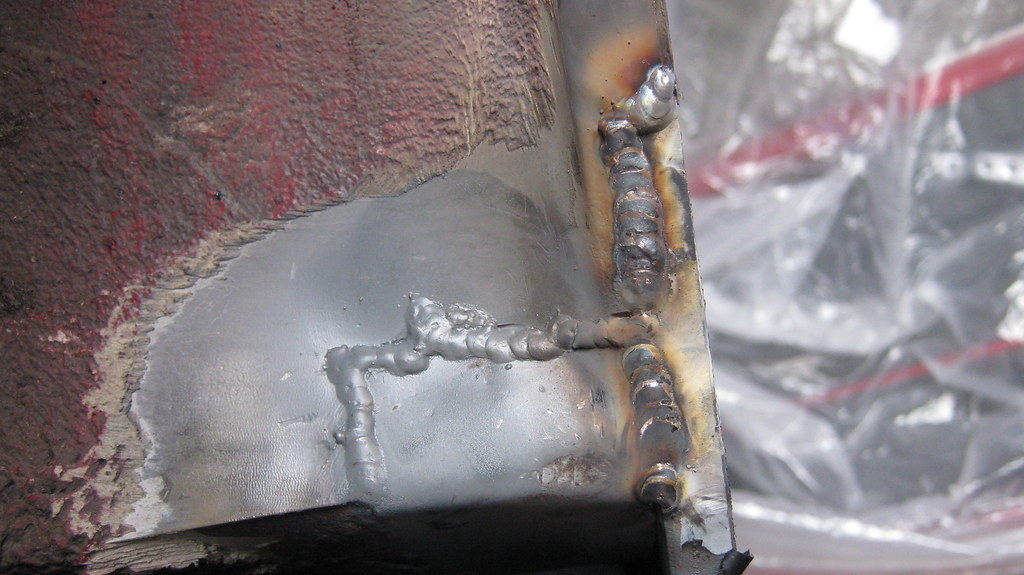
Here's the patch welded in.
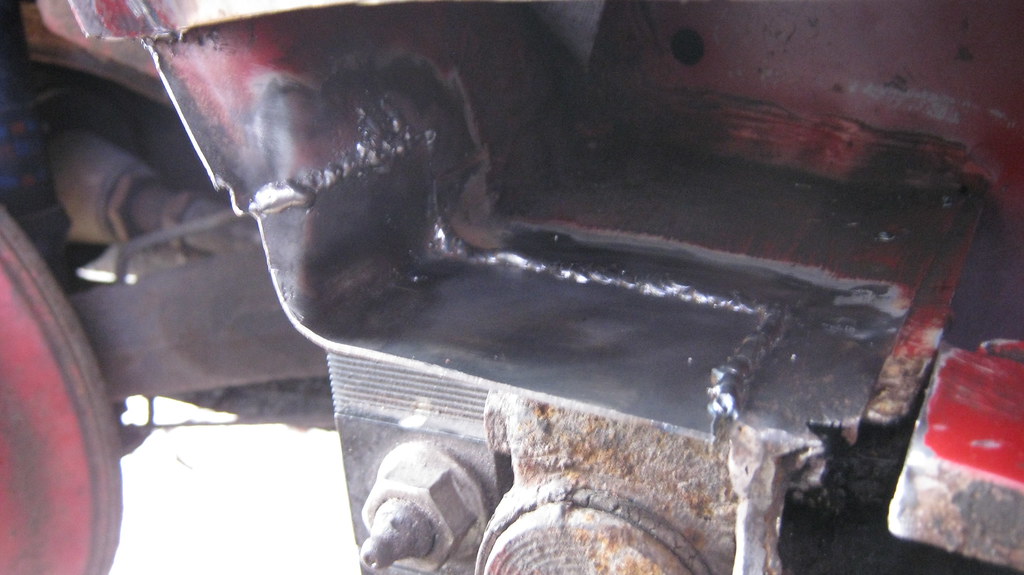 IMG_0549 by Sven Cumner, on Flickr
Then I had my first go at joggling with my new air powered joggler/punch (I recently bought a compressor and a few tools with my first pay packet from work ). It came out a bit messy but that's only down to me not being careful enough - awesome tool though!
 IMG_0550 by Sven Cumner, on Flickr
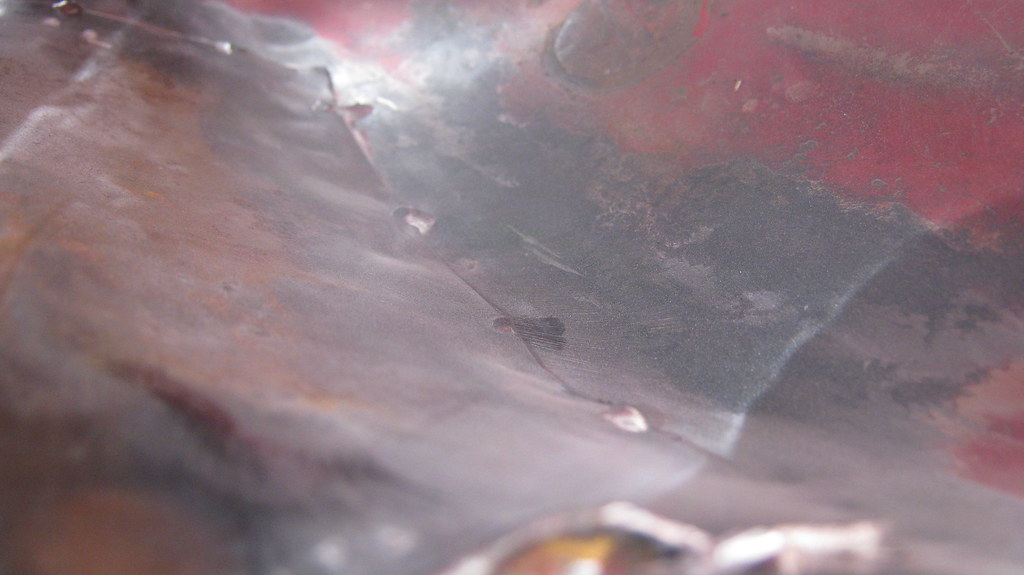
Before I welded on the repair panel, I decided to scrape off some of the sound deadening on the rear of the panel that was close to the weld line, just to be safe.
 IMG_0551 by Sven Cumner, on Flickr
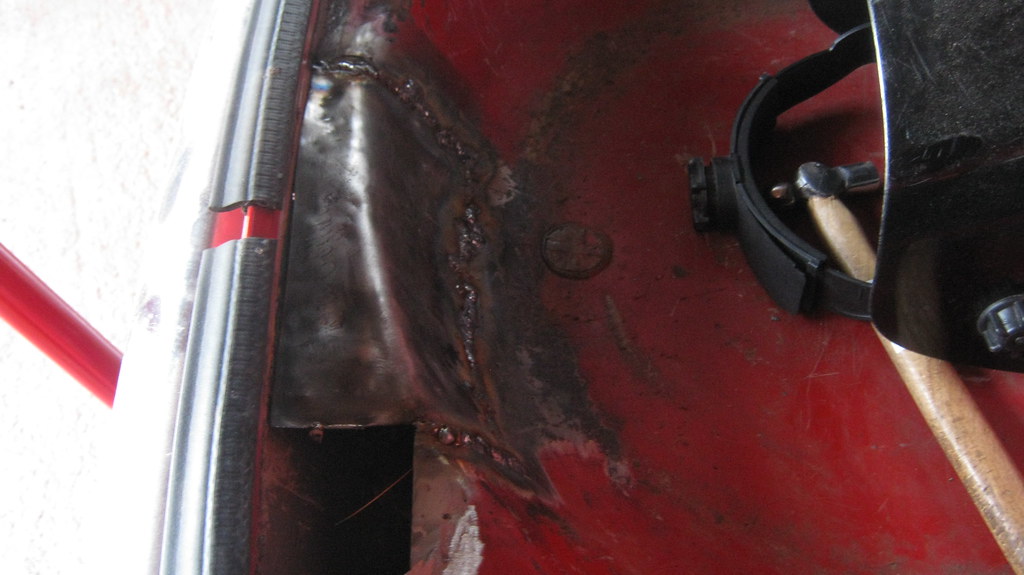
Here's the repair panel in place, before any dressing.
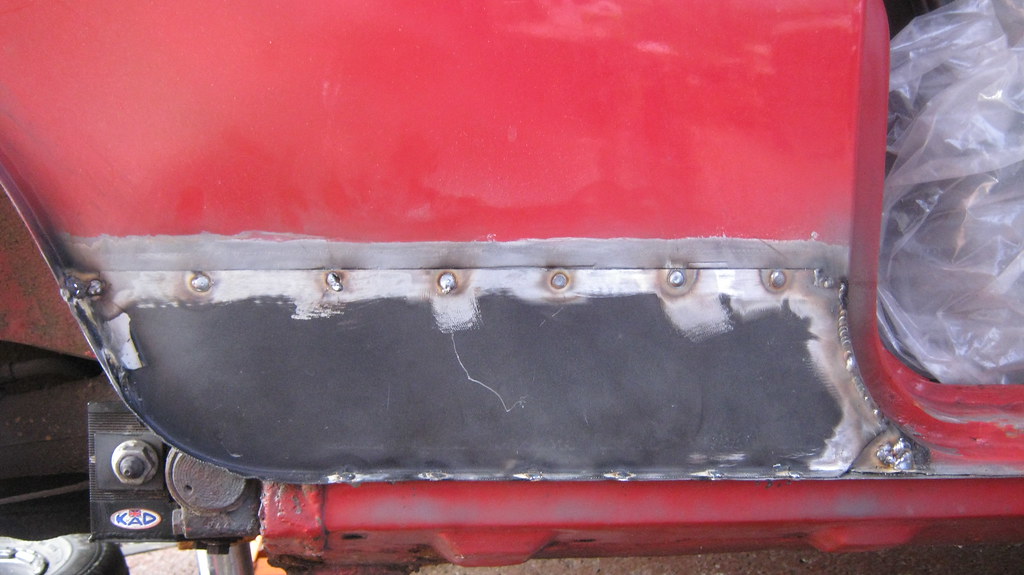 IMG_0552 by Sven Cumner, on Flickr
Maybe I was just lucky here, but I like to think I'm getting better at welding nowadays.
 IMG_0553 by Sven Cumner, on Flickr
Here's the panel after an initial rough dress down.
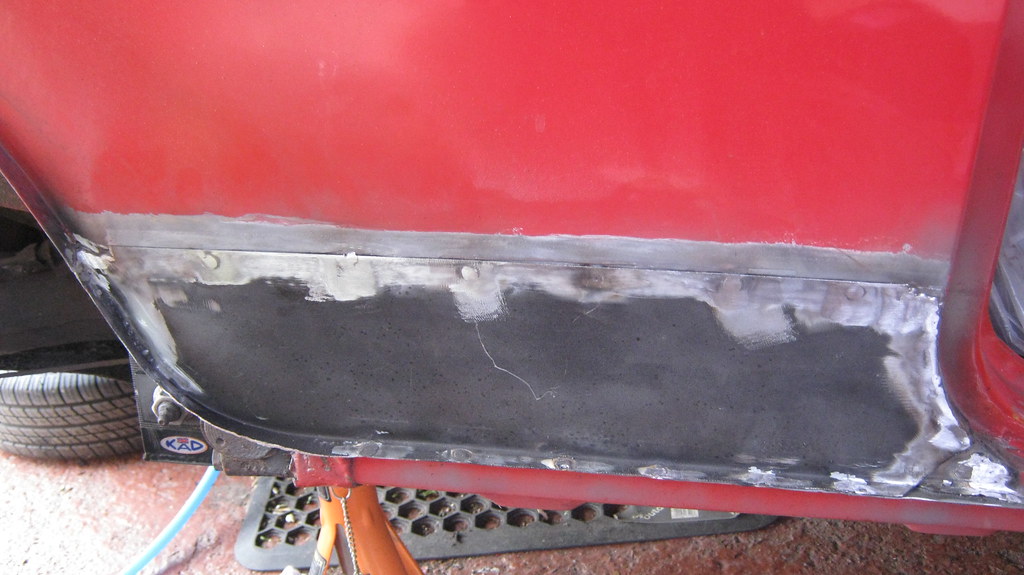 IMG_0554 by Sven Cumner, on Flickr
That's as far as I got, so next step will be to spend hours and hours with a tub of filler trying to make things look decent! Then I need to start patching up all the other bits of rust I found... oh well, one bit at a time eh!
Thanks for reading.
Edited by The Otter, 07 September 2015 - 06:50 PM.
#253
minimissions
-
- Members
-
- 3,427 posts
Up Into Fourth
- Location: North West
- Local Club: M.M.O.C
Posted 07 September 2015 - 03:24 PM
The Volvos are great dont regret getting mine at all, top motor and excellent motorway car with better than most new cars mpg. Nice to have a fellow fan lol
On other things the mini is looking great mate you making short work of that rear quarter repair :) Keep the working and pics coming :)
#254
The Otter
-
- Members
-
- 620 posts
The artist formally known as j322overthetop
- Location: Midlands
Posted 08 October 2015 - 12:30 PM
Blimey, time flies when you have a job, felt like I only posted the last update last week...
I've made a bit of progress, but not as much as I'd like - I haven't done anything on the Mini in the past couple of weeks. I could make up excuses, but I've just been a bit lazy really, although I did slice through my finger a bit with the grinder the last time I did anything on it - top tip, never try to hold a still-spinning grinder from the guard and then accidentally wrap your finger underneath, it doesn't end well .
I have now repaired the rear of the driver's floor; that started by removing the subwoofer from the area so I could get the carpet up.
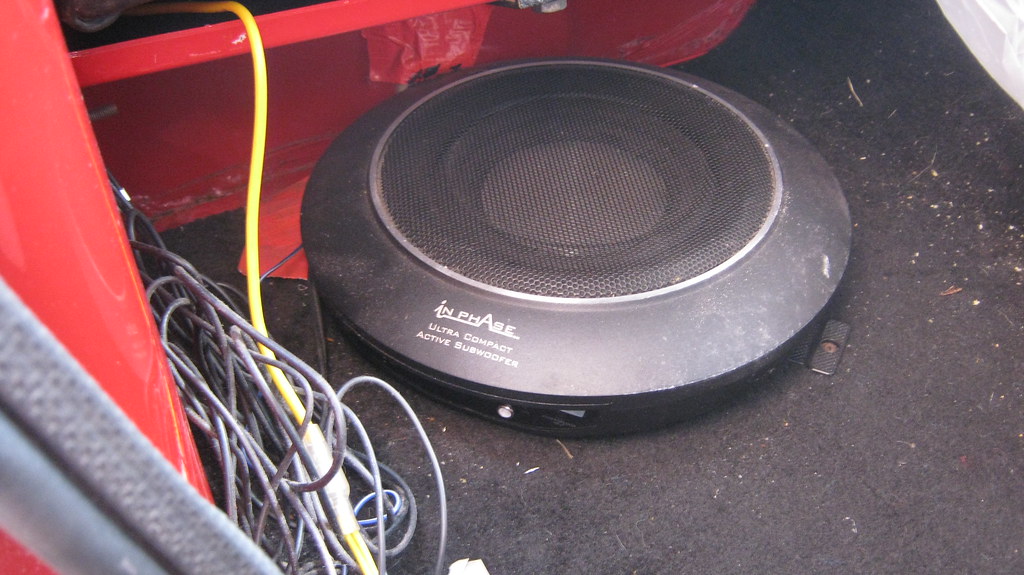 IMG_0555 by Sven Cumner, on Flickr
Here's an utterly terrible photo of what greeted me under the carpet.
 IMG_0556 by Sven Cumner, on Flickr
Then after I'd chipped away some of the sound deadening with a mallet and chisel.
 IMG_0558 by Sven Cumner, on Flickr
Then out came the wheel of truth, to tell me what was still steel and what bits had dissolved in to Britain's salty roads...
 IMG_0559 by Sven Cumner, on Flickr
I thought I'd have a go at the rear of the driver's arch whilst I was there, which went well.
 IMG_0560 by Sven Cumner, on Flickr
All that factory underseal/seam sealer doesn't half make a stringy mess though...
 IMG_0561 by Sven Cumner, on Flickr
Here's the floor pan area after the 'wheel of truth' had revealed it's secrets.
 IMG_0562 by Sven Cumner, on Flickr
Here is said area cut out and lying on the floor.
 IMG_0563 by Sven Cumner, on Flickr
Nice chunk of Mini missing right there. The rot continued in to the bottom of the rear pocket, thankfully the lower edge of the pocket lip was pretty much just surface rust.
 IMG_0564 by Sven Cumner, on Flickr
I made myself a repair patch out of some new Zintec coated steel I bought off ebay - first time in a long time that I haven't used an off cut of some random panel, so it's nice to have proper sheet steel to work with.
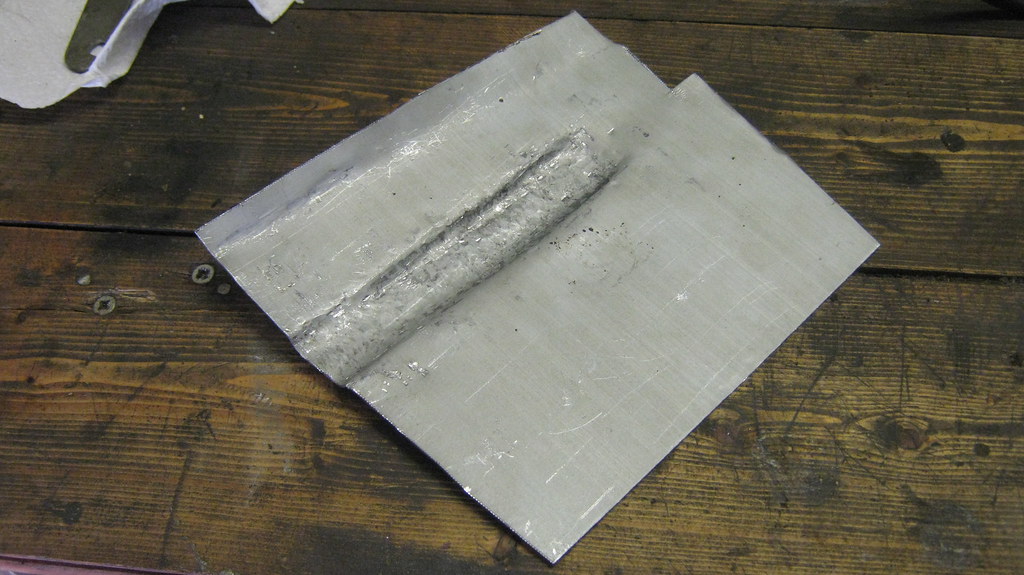 IMG_0565 by Sven Cumner, on Flickr
 IMG_0566 by Sven Cumner, on Flickr
The channel was very crude and I didn't smooth it out much more than in the photos - it'll be getting covered by carpet and underseal anyway so as long as I had a rough shape I was happy.
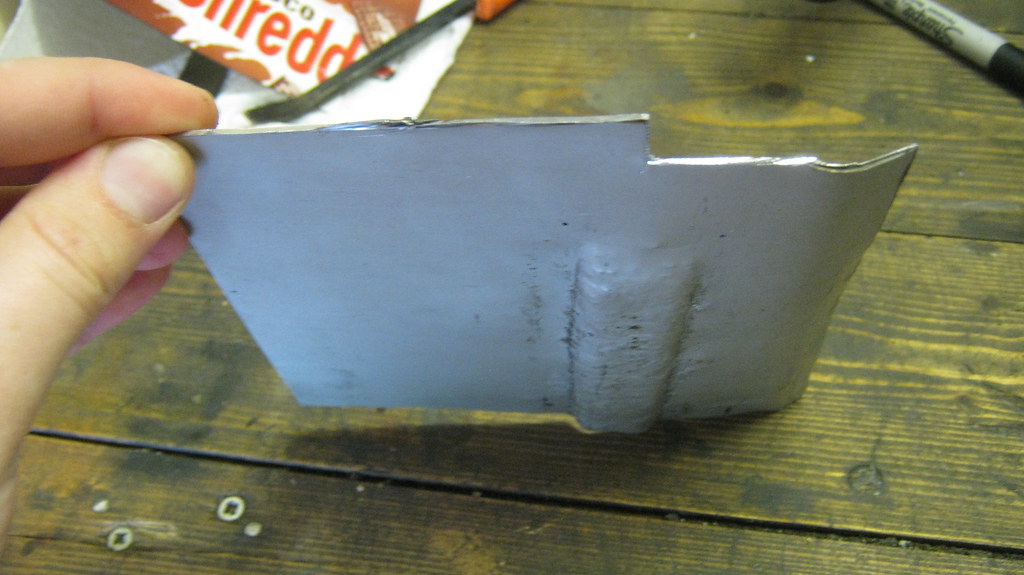
Here's another terrible photo of the above patch welded in from the inside. I'm still working on seam sealing it and painting it...
 IMG_0568 by Sven Cumner, on Flickr
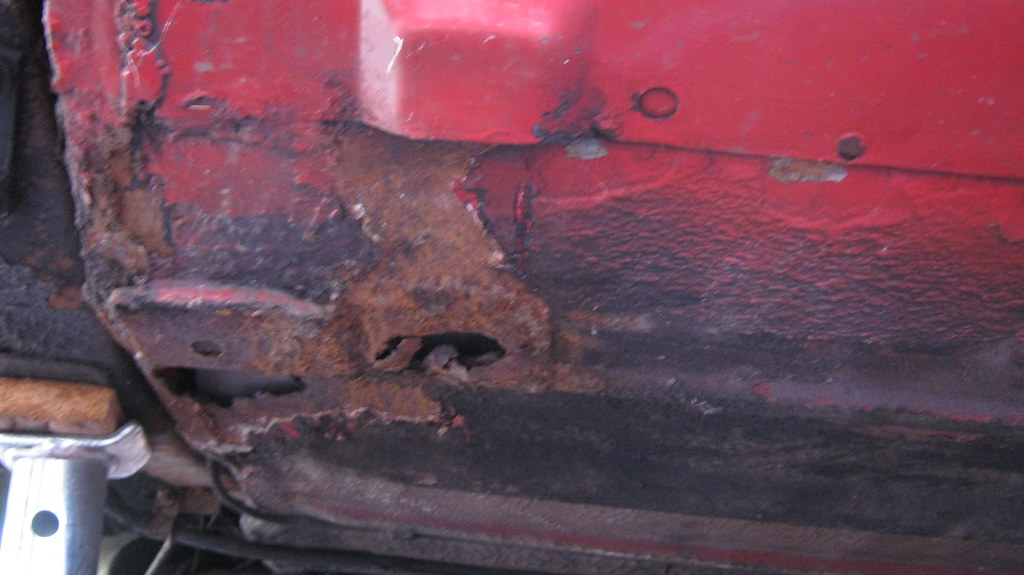
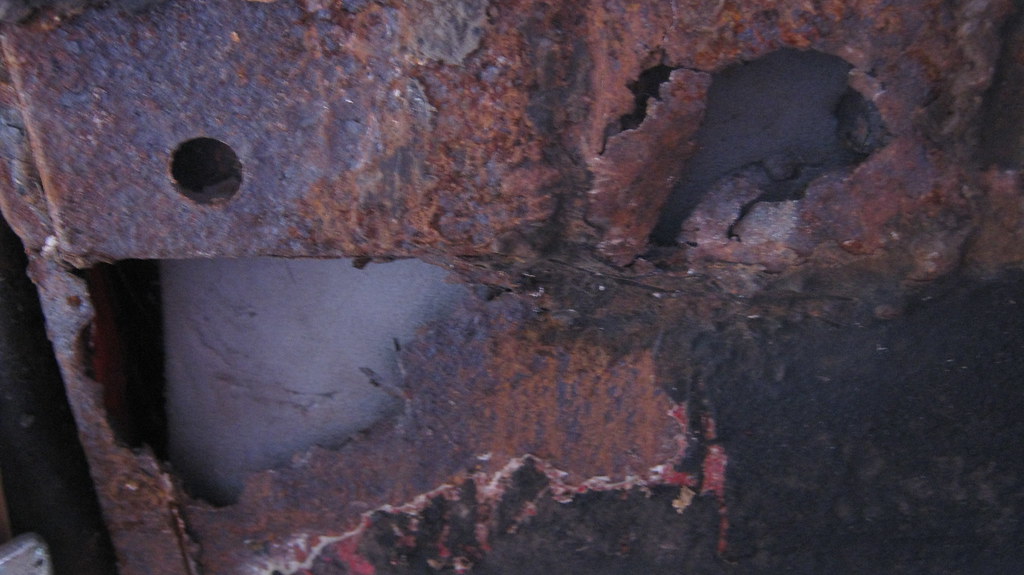
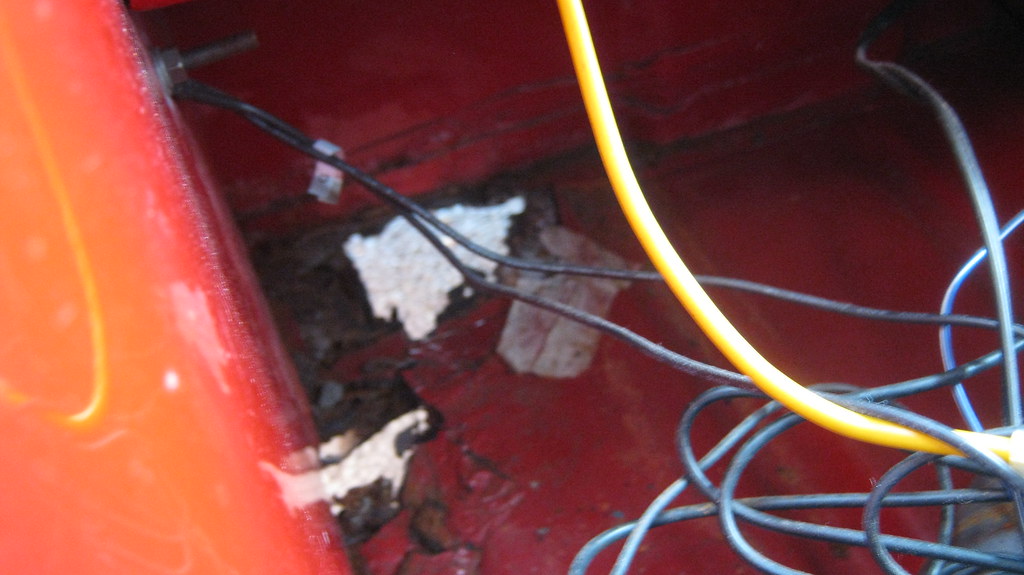
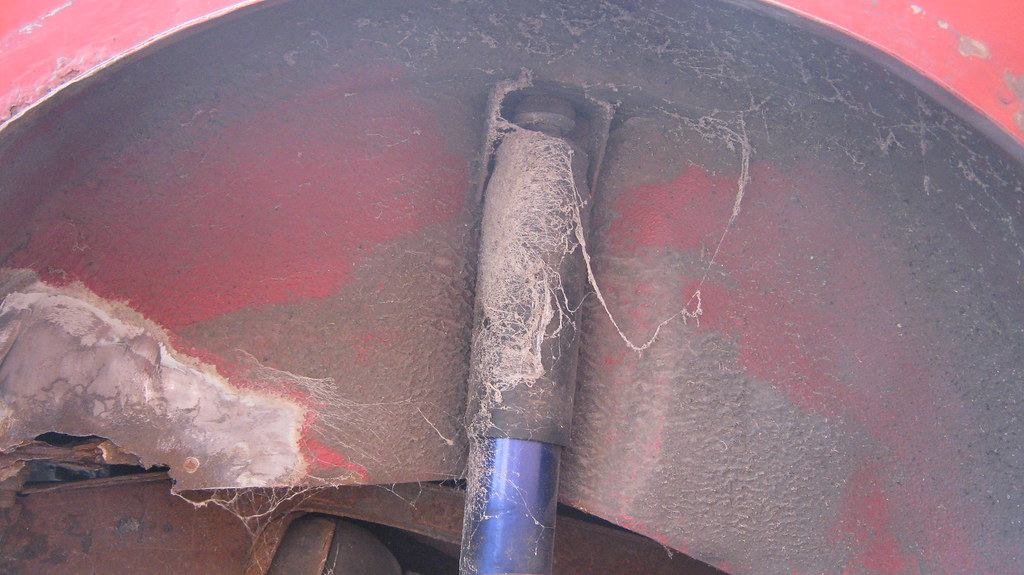
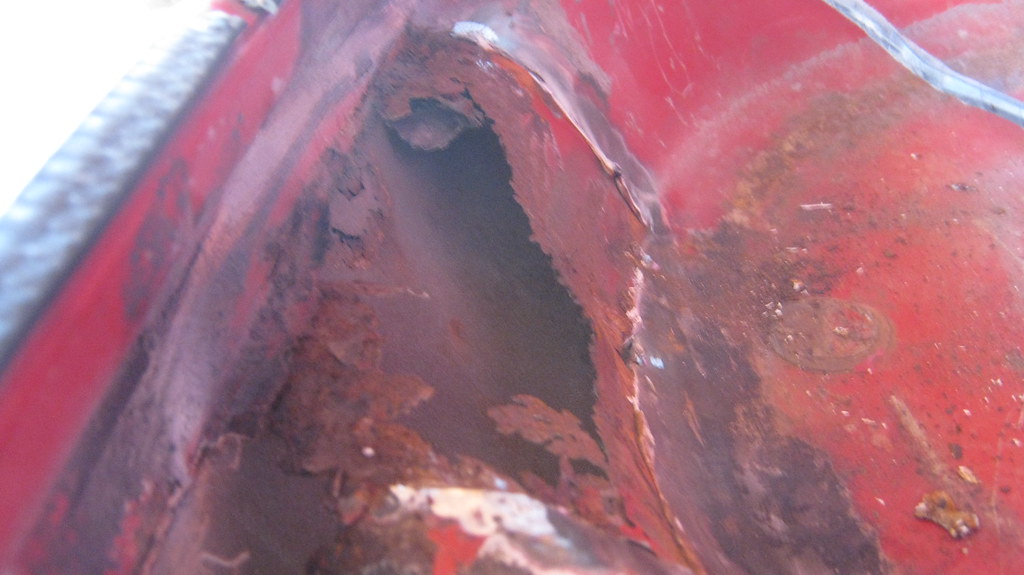
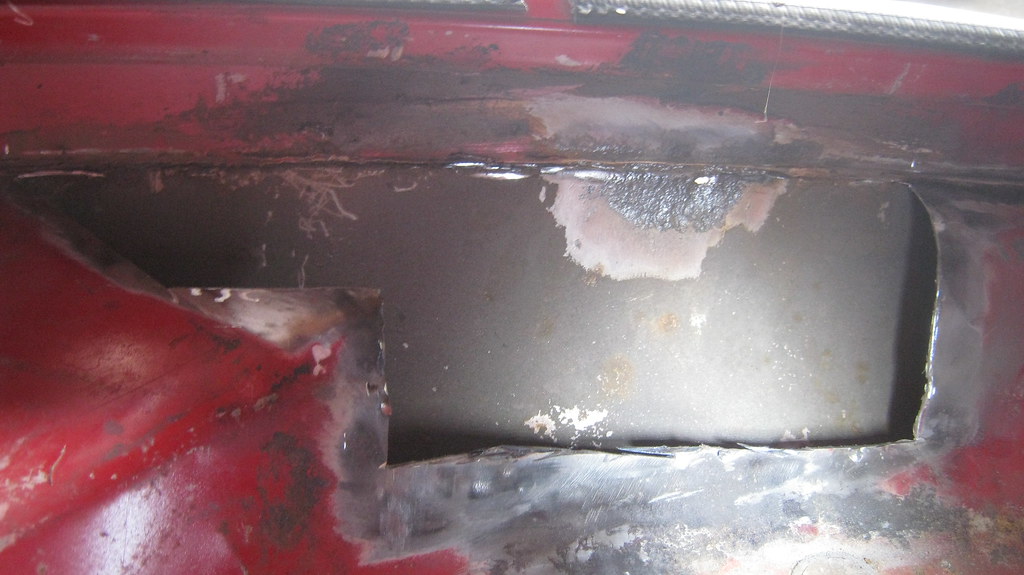
Whilst I was poking around underneath the car, I noticed this at the rear of the boot floor, which I thought looked a bit strange...
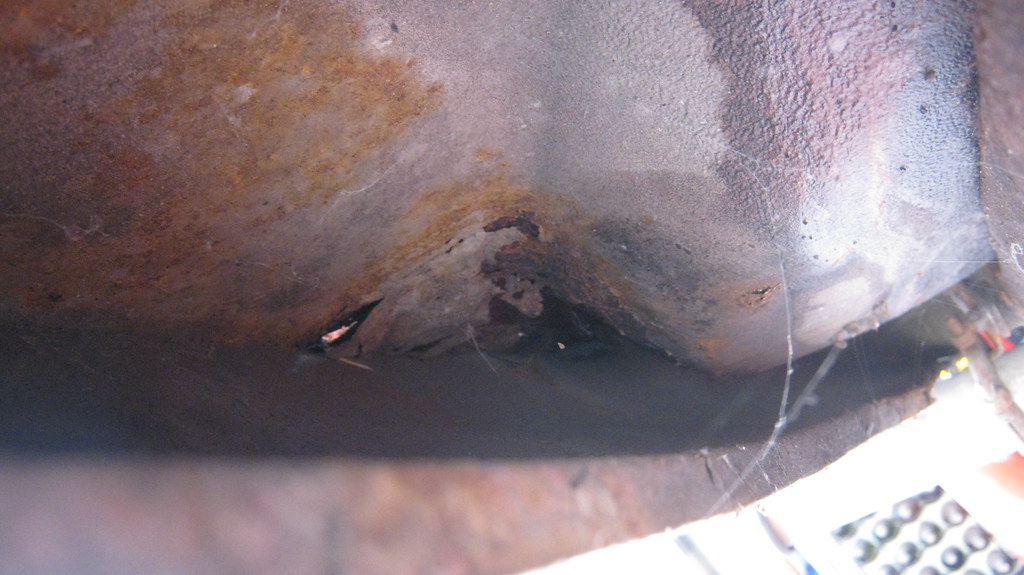 IMG_0570 by Sven Cumner, on Flickr
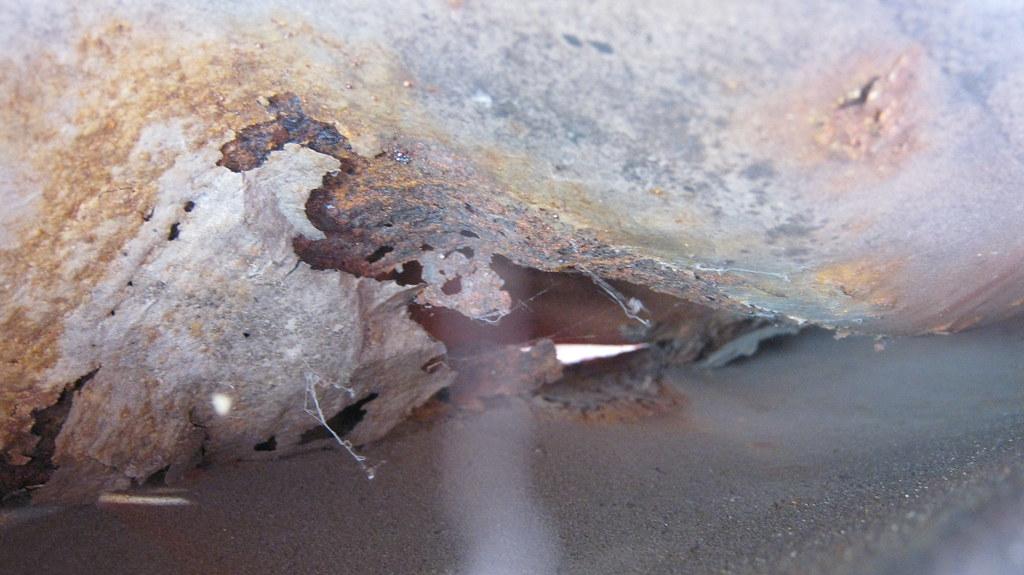 IMG_0571 by Sven Cumner, on Flickr
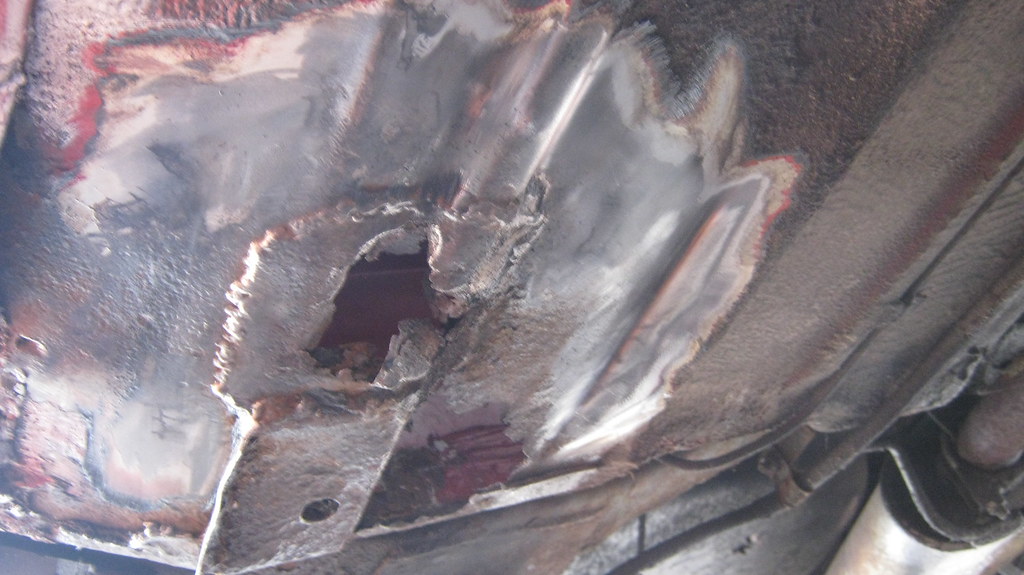
I'd always been aware of a repair patch in the boot, but I hadn't realised until now that it was just a patch over the top of the original rusty floor.  This is a view of the patch from the inside, on the right hand side of the photo.
 IMG_0573 by Sven Cumner, on Flickr
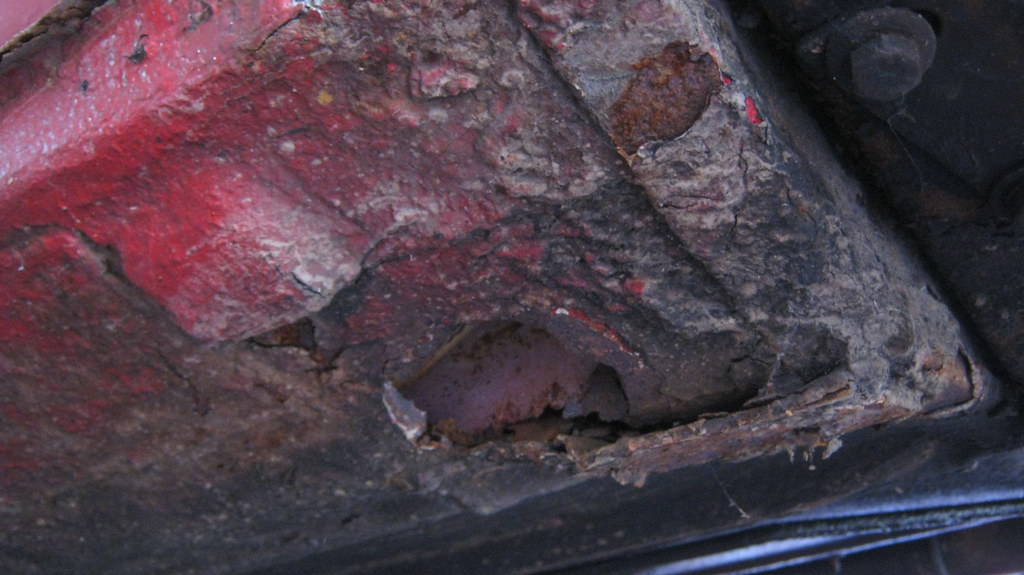
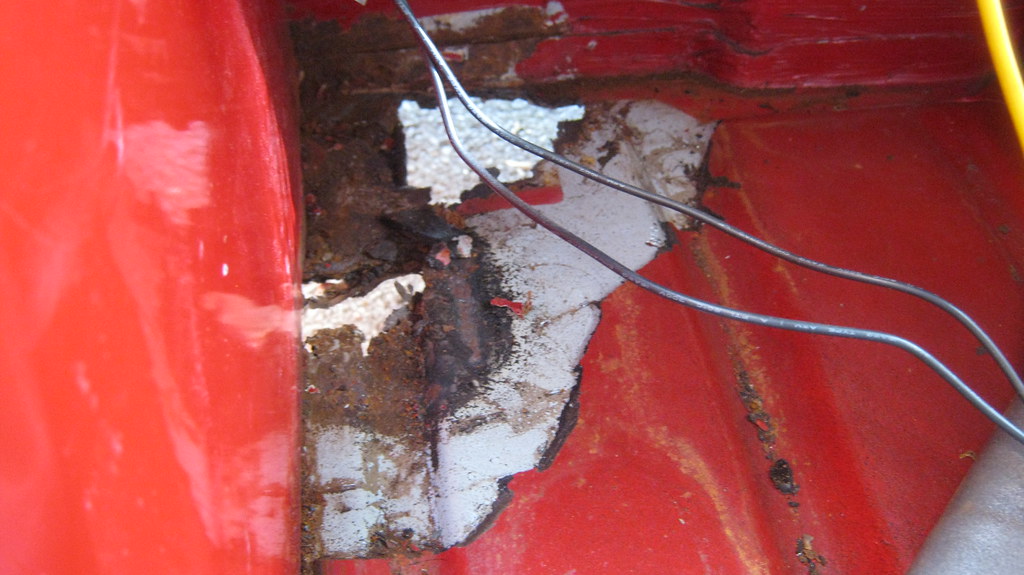
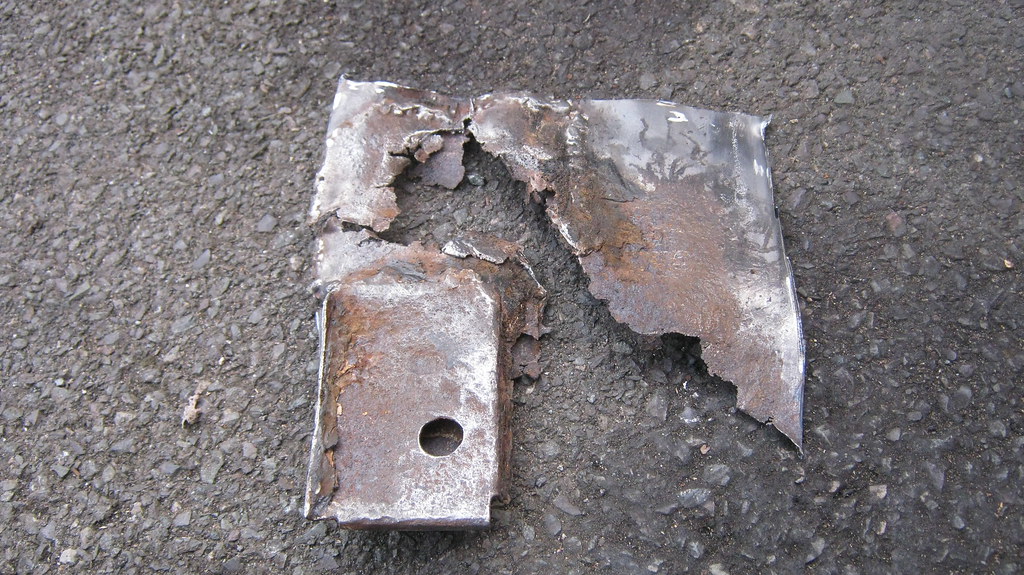
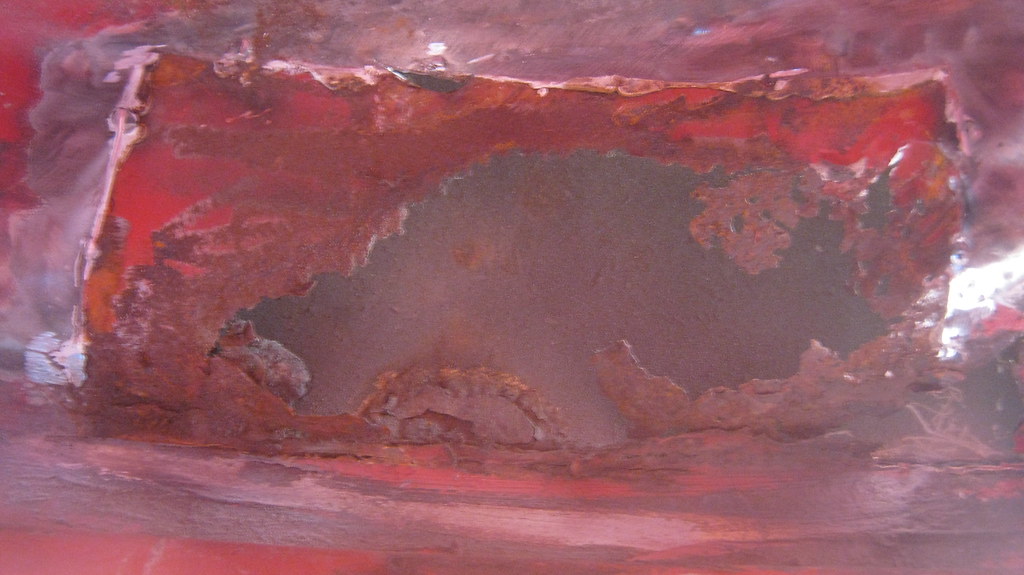
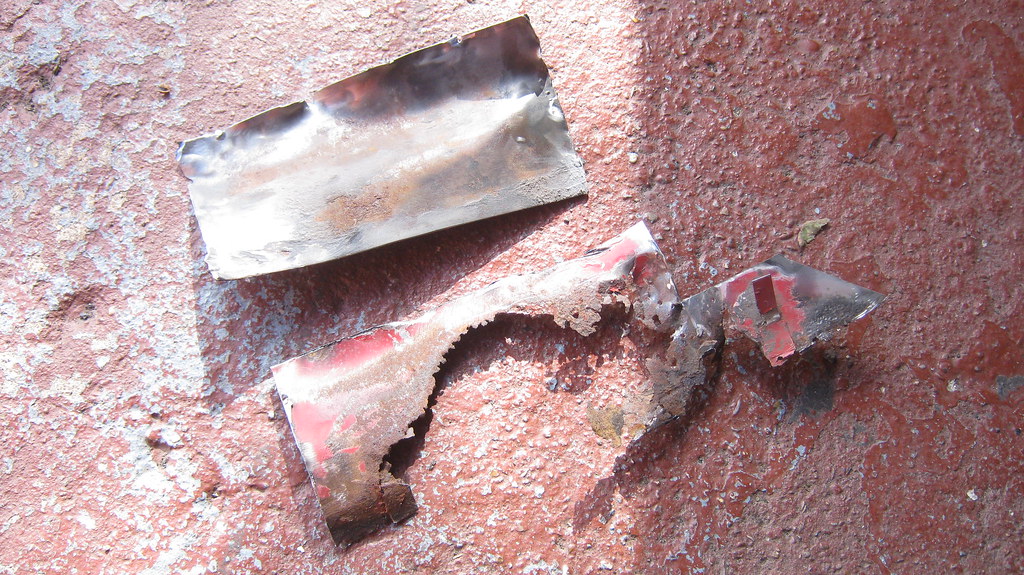
Poked a little rust hole next to it, where the original rust had spread past the covering patch.
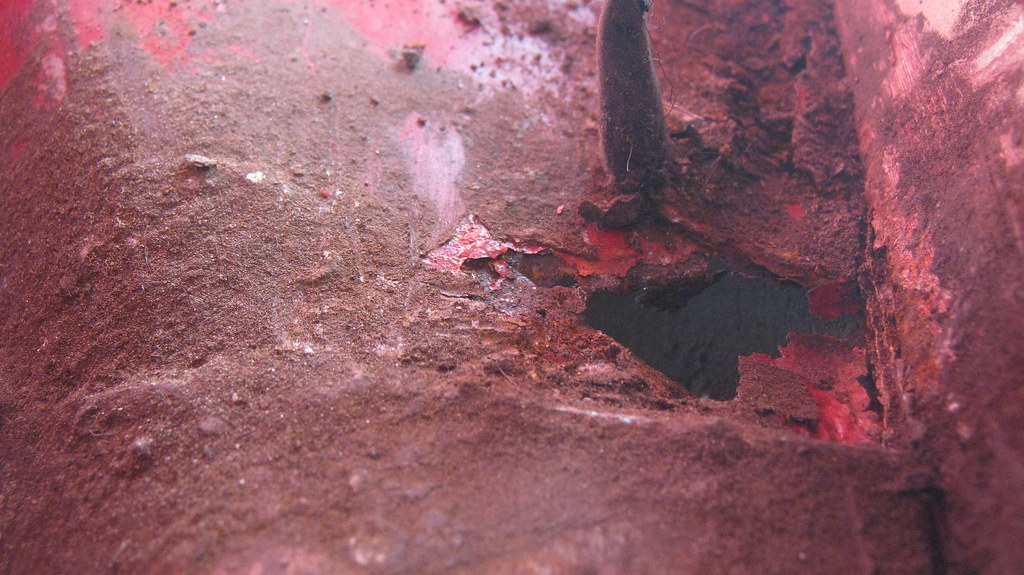 IMG_0575 by Sven Cumner, on Flickr
Here's a really weird photo showing that the patch had been, essentially, tack welded in place and then had a load of seam sealer/filler put over the overlapping join to smooth it in. They'd done a decent job because I'd never been able to tell it wasn't seam welded in... just ironic and annoying that the effort and skill went in to doing a bodge instead of repairing it properly.
 IMG_0576 by Sven Cumner, on Flickr
At least the tack welds meant it was easy to remove.
 IMG_0577 by Sven Cumner, on Flickr
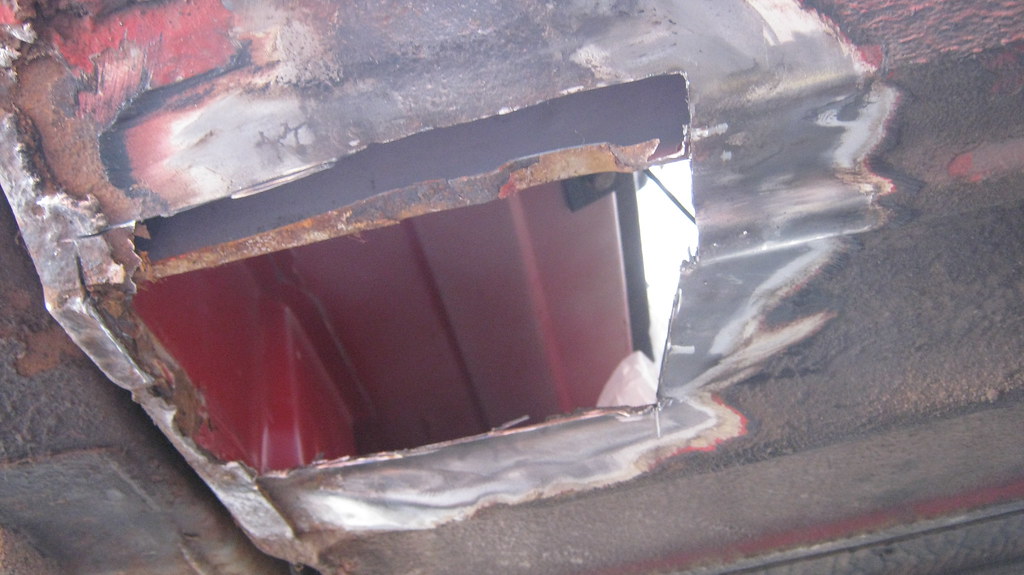
Here's what greeted me underneath.
 IMG_0579 by Sven Cumner, on Flickr
 IMG_0580 by Sven Cumner, on Flickr
So I cut it all out.
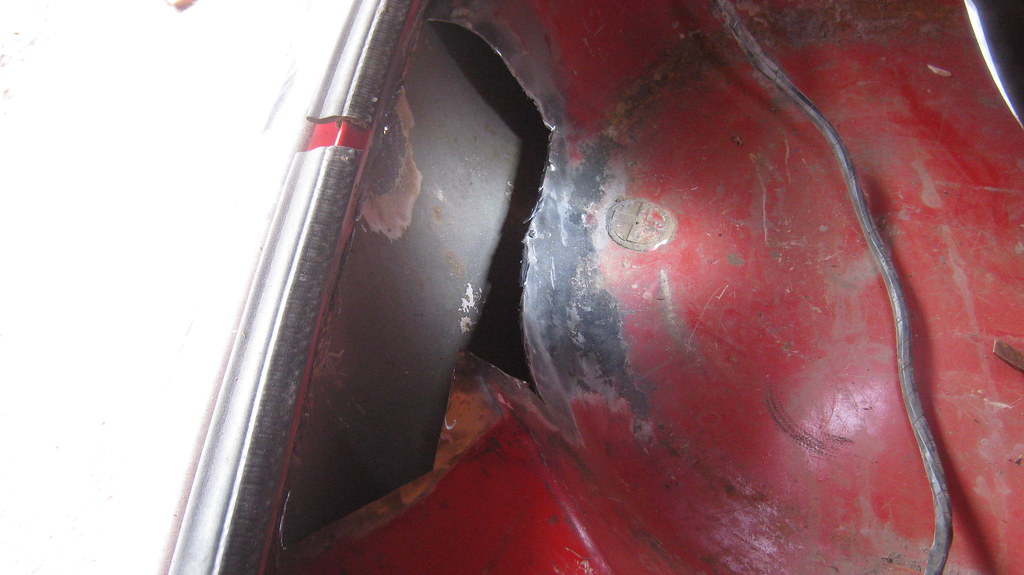 IMG_0581 by Sven Cumner, on Flickr
I'll buy and fit a new valance at some point, hence why I'm not doing anything with the rust hole in the valance in the photo below.
 IMG_0582 by Sven Cumner, on Flickr
 IMG_0583 by Sven Cumner, on Flickr
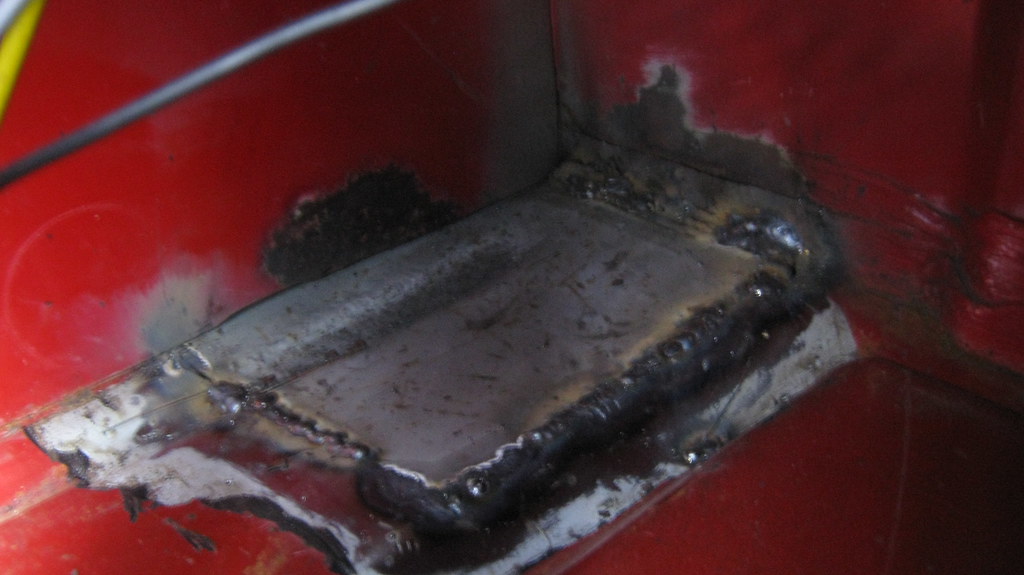
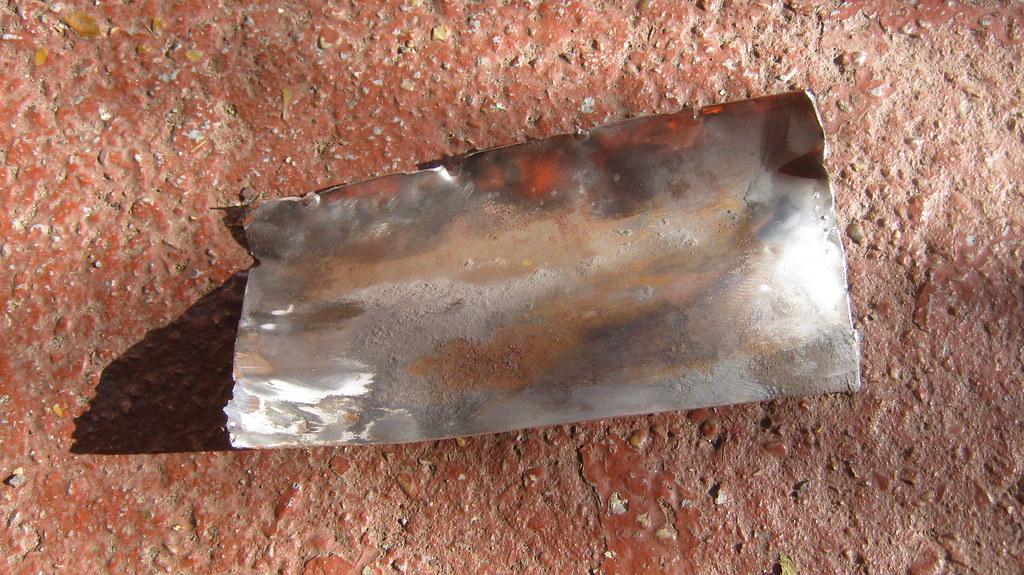
The tack welded patch I removed was actually in really good shape and had an actual 'good shape' to it, as in it fitted the curve of the boot floor panel and was the perfect size. So I just welded it back in . Seam welded this time though...
 IMG_0586 by Sven Cumner, on Flickr
That's as far as I got, hopefully will do some more this weekend! Need to make up a little patch to finish that boot floor repair and then make a couple of small patches to repair the rear edge of the arch.
Cheers everyone
Edited by The Otter, 08 October 2015 - 05:48 PM.
#255
Rocket.
-

- Members
-
- 1,441 posts
One Carb Or Two?
- Location: UK
Posted 08 October 2015 - 05:06 PM
I remember reading this a few years back ! Always liked the style of this car
Nice work


0 user(s) are reading this topic
0 members, 0 guests, 0 anonymous users


