
No worries mate, the coilovers are adjustable, I like them but the a bit more rattly than normal mini suspension, I had them adjusted as hard as they would go still got a bit of rubbing though , and your right it is unbarable to drive i didnt mind it at first but it got unbearable and by the looks of it I'd say your about an inch lower


Lenny - To Stance, Or To Track?
Started by
iTomKart
, Mar 10 2012 10:14 PM
216 replies to this topic
#62

Midas Mk1
-

- TMF+ Member
-

- 5,823 posts
Crazy About Mini's
- Location: Manchester
- Local Club: S.U.N.M.C
Posted 28 June 2012 - 03:38 PM
Yup, had to buy a new set as they won't sell you singles, I take speedbumps at slower than crawling pace now 
Low enough? Actually have raised the front a tad now
Low enough? Actually have raised the front a tad now
Edited by Midas Mk1, 28 June 2012 - 03:43 PM.
#63
iTomKart
-
- Members
-
- 351 posts
Speeding Along Now
- Location: Nottingham
- Local Club: TMF
Posted 11 July 2012 - 12:06 AM
Yup, had to buy a new set as they won't sell you singles, I take speedbumps at slower than crawling pace now
Low enough? Actually have raised the front a tad now
no picture?!

#64
iTomKart
-
- Members
-
- 351 posts
Speeding Along Now
- Location: Nottingham
- Local Club: TMF
Posted 19 July 2012 - 06:15 PM
Been a while since I've updated because I've been in Greece for a bit, but here's how it's coming along:
I've started building up the new subframe having coated it in two coats of hammerite, and decided that I want everything that goes onto it to be shiny. I know you won't see it and will get caked in mud, but it's for peace of mind and the fact that in refurbishing everything I get to check out the condition of everything and looks for cracks/wear/failures.
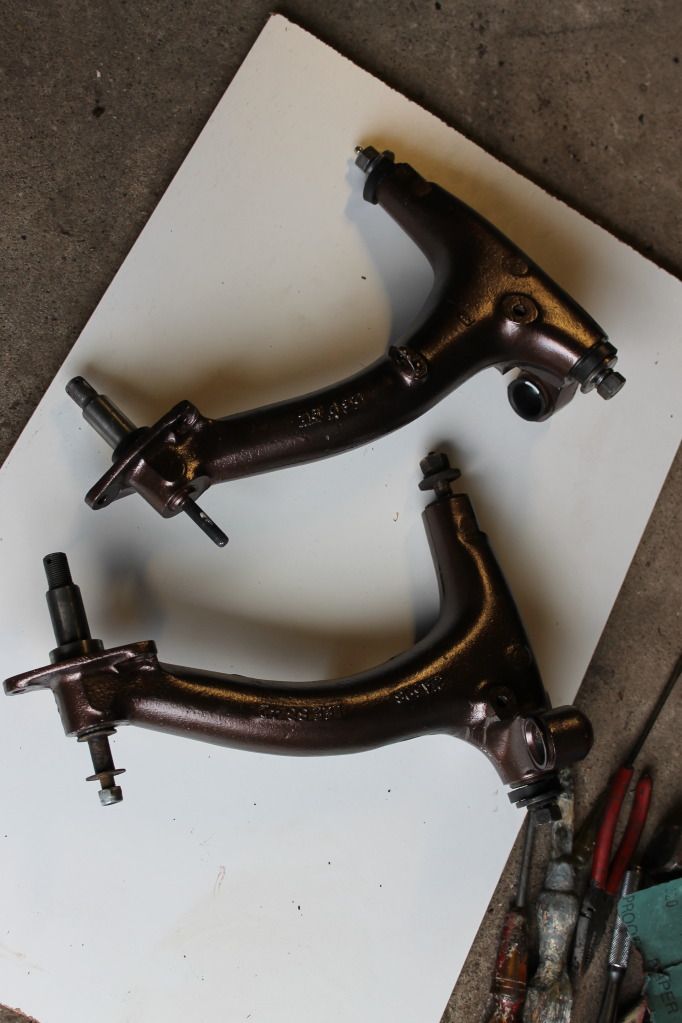
Excuse the poo-brown colour of the parts, Holts told me it would be 'ford bronze' which I thought would look classy so went and blew £25 on the stuff. Turns out theres a reason why the colour wasn't very popular... I think it's growing on me though, better than bright blue or something.
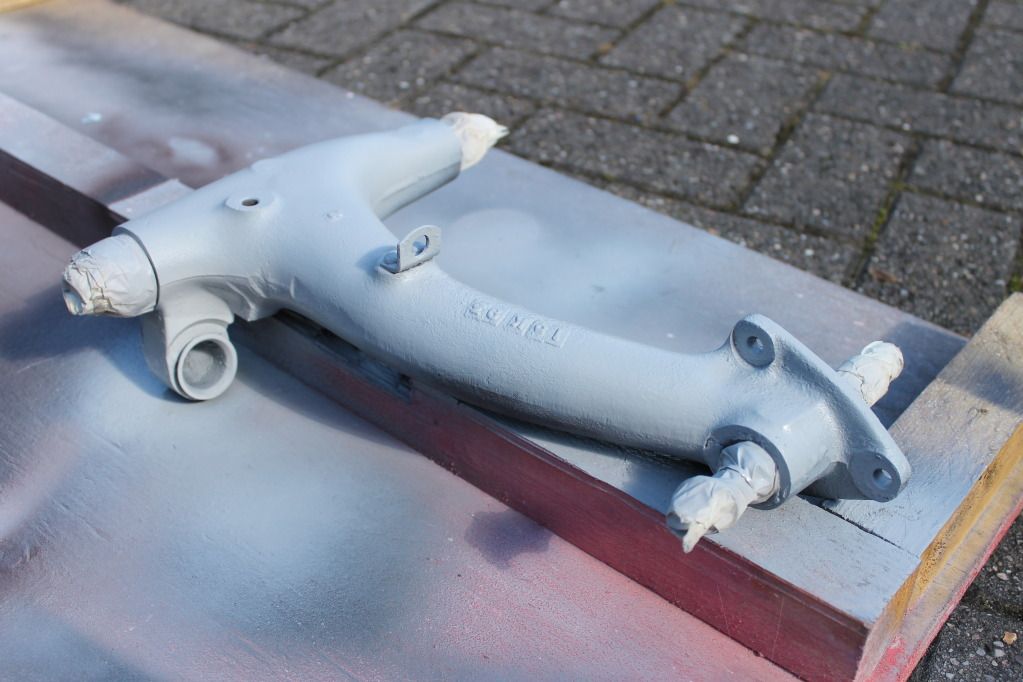
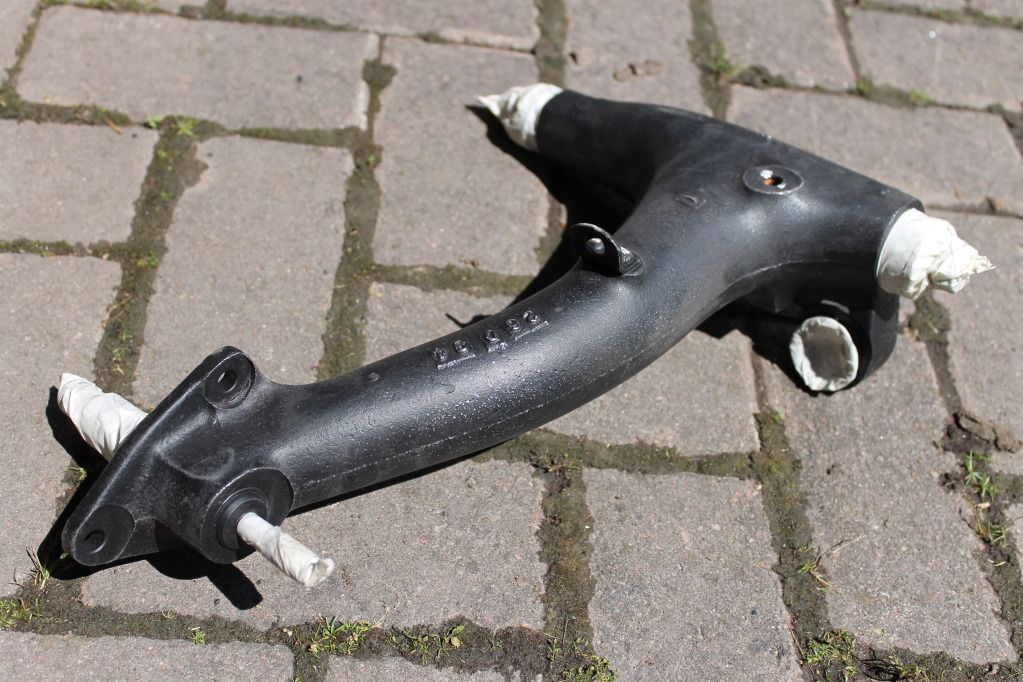
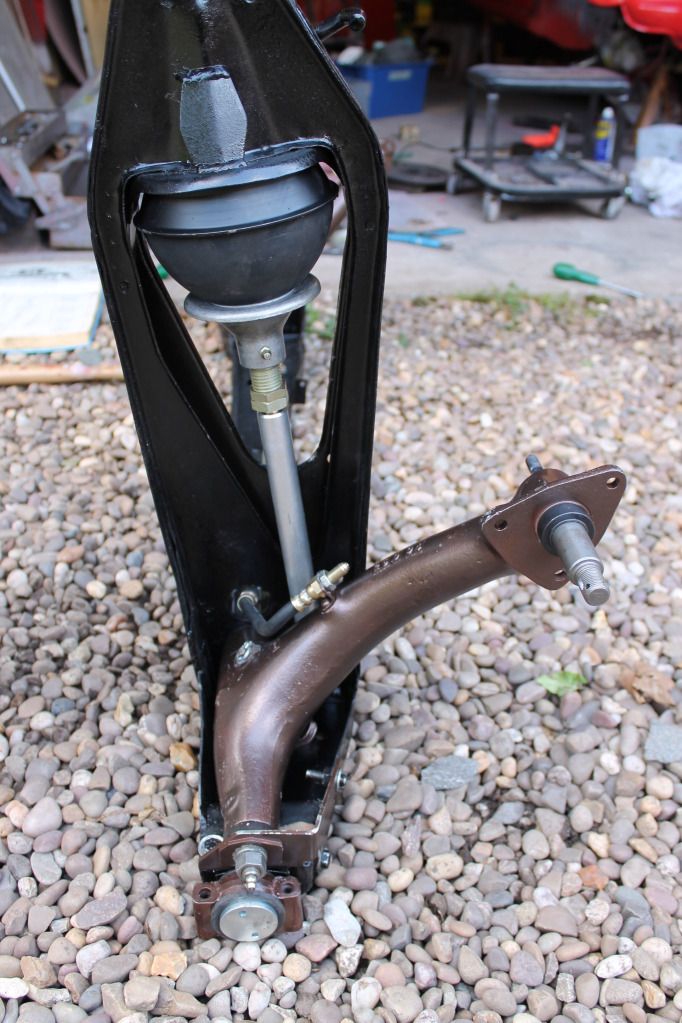
So I did my radius arms which took a while (had to replace one because it had seized):
Old One:


New One:

Finished:
Then got to work on the four trunions:
Then fitted the rear brackets for 1.5 degrees of camberrrrrrr, forgot pictures sorry
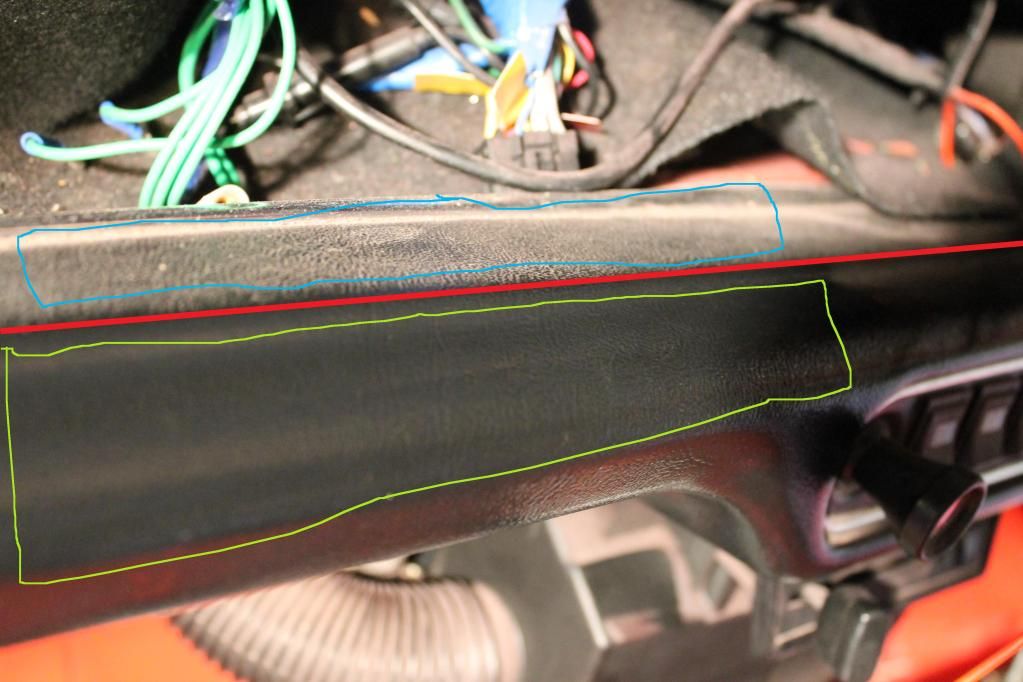
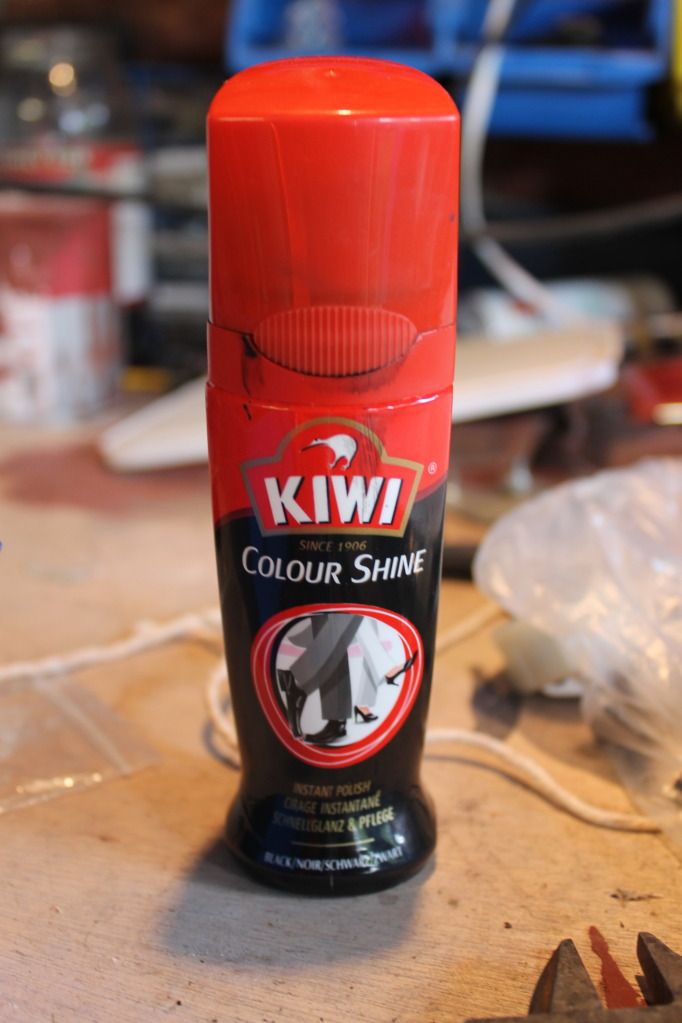
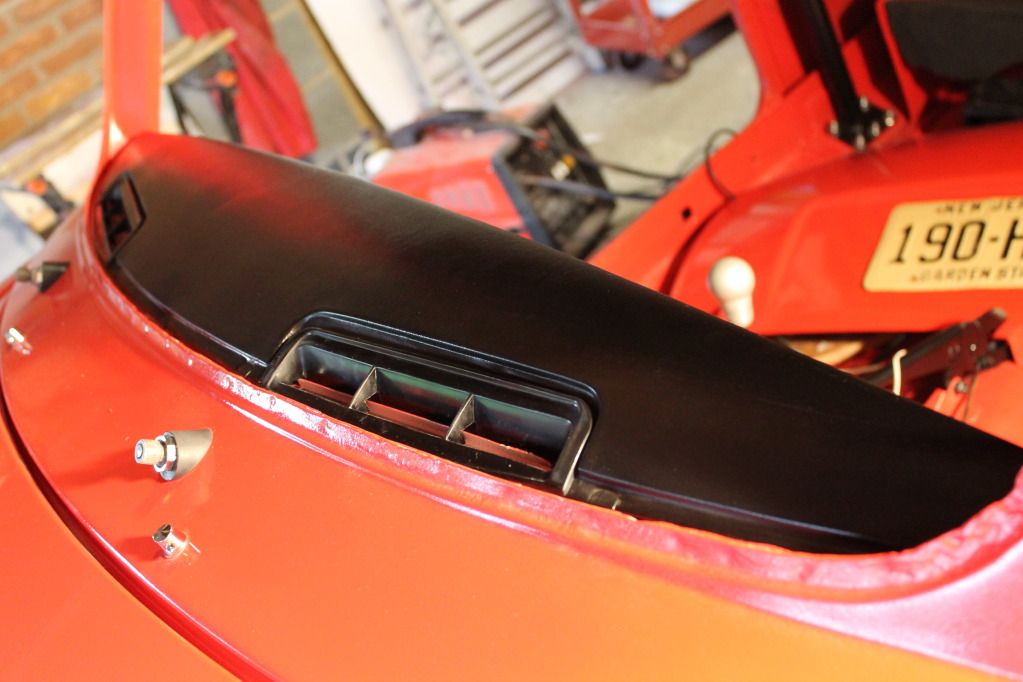
I then moved on to the interior and spruced up the dash rail cover things using shoe polish (blue is before, green is after):
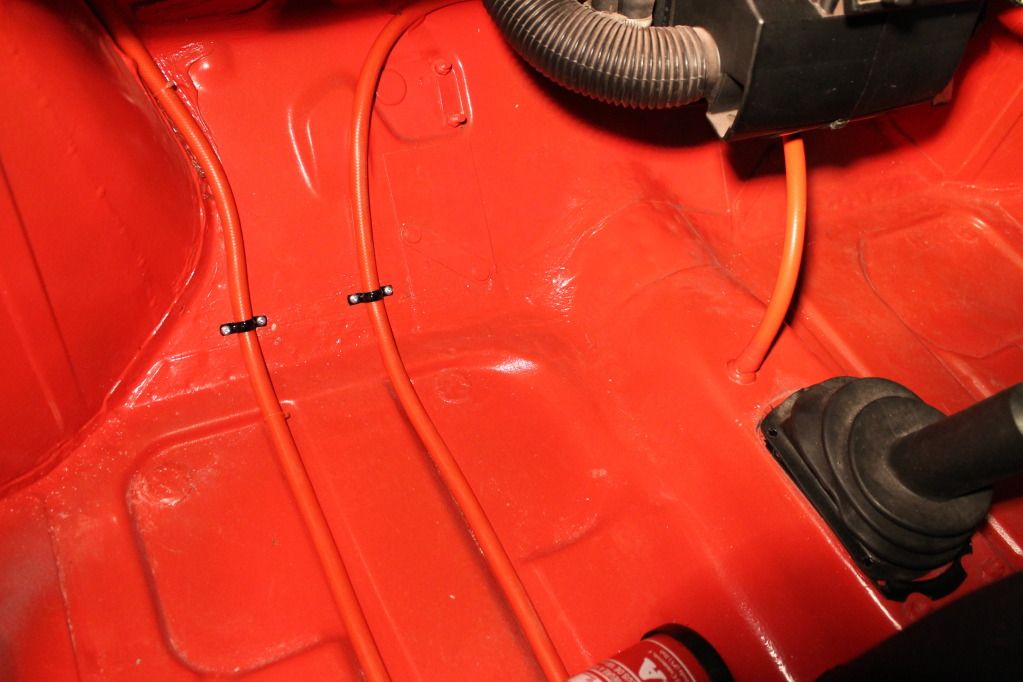
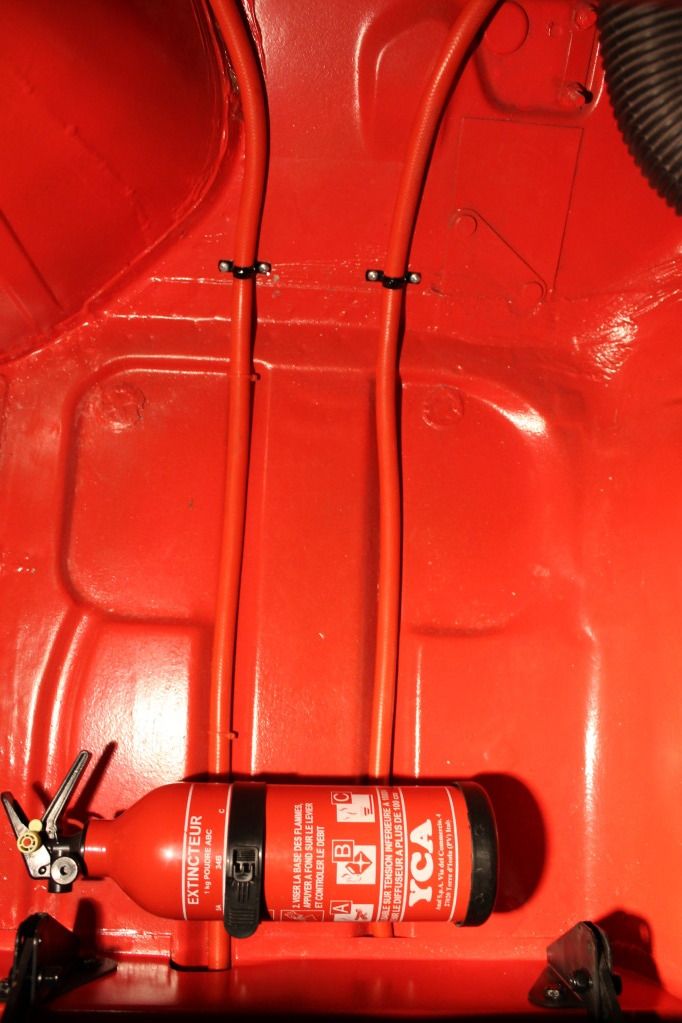
Then ran the wires through for all the stuff in the boot and tidied it up nicely with two shower hoses from B&Q and copper pipe brackets, and fixed a fire extinguisher to the floor behind the passenger's feet:
Then fitted the seats! :

This meant I could fit the doors as the interior is finished apart from small tidy-up jobs:

Then the door mirrors:


Next on the list is a grille, harnesses, and sort out the front suspension and brakes all round
Thanks for looking,
Tom
I've started building up the new subframe having coated it in two coats of hammerite, and decided that I want everything that goes onto it to be shiny. I know you won't see it and will get caked in mud, but it's for peace of mind and the fact that in refurbishing everything I get to check out the condition of everything and looks for cracks/wear/failures.
Excuse the poo-brown colour of the parts, Holts told me it would be 'ford bronze' which I thought would look classy so went and blew £25 on the stuff. Turns out theres a reason why the colour wasn't very popular... I think it's growing on me though, better than bright blue or something.
So I did my radius arms which took a while (had to replace one because it had seized):
Old One:
New One:
Finished:
Then got to work on the four trunions:
Then fitted the rear brackets for 1.5 degrees of camberrrrrrr, forgot pictures sorry
I then moved on to the interior and spruced up the dash rail cover things using shoe polish (blue is before, green is after):
Then ran the wires through for all the stuff in the boot and tidied it up nicely with two shower hoses from B&Q and copper pipe brackets, and fixed a fire extinguisher to the floor behind the passenger's feet:
Then fitted the seats! :
This meant I could fit the doors as the interior is finished apart from small tidy-up jobs:
Then the door mirrors:
Next on the list is a grille, harnesses, and sort out the front suspension and brakes all round
Thanks for looking,
Tom
#65
tom1234177
-
- Members
-
- 369 posts
Speeding Along Now
- Location: Nottingham
- Local Club: TMF & BMC
Posted 26 July 2012 - 02:52 PM
Mmmhhh good work Tom, canney wait to see it finished!
#66
59 Speed
-

- Members
-
- 674 posts
Formally know as Smackfiend
- Location: North West
Posted 27 July 2012 - 08:34 AM
Looks fantastic!
Brilliant shine for cellulose, my spraying is hit and miss - some glossy (but mostly matt).
I like your wing mirrors, if you don't mind me asking what type are they and where did you get them from?
Keep up the good work.
Cheers,
Ian
Brilliant shine for cellulose, my spraying is hit and miss - some glossy (but mostly matt).
I like your wing mirrors, if you don't mind me asking what type are they and where did you get them from?
Keep up the good work.
Cheers,
Ian
#67
Marc_mcq
-

- Members
-
- 353 posts
Speeding Along Now
Posted 27 July 2012 - 09:21 PM
Looks like a great build! Looking forward to seeing more progress!
#68
malcs_miniturbo
-
- Members
-
- 602 posts
Super Mini Mad
- Location: swindon
Posted 28 July 2012 - 03:53 PM
this is looking sweet mate good job
#69
grahama
-

- Members
-
- 2,442 posts
Up Into Fourth
- Location: Warrington
- Local Club: None in my area !!
Posted 28 July 2012 - 06:11 PM
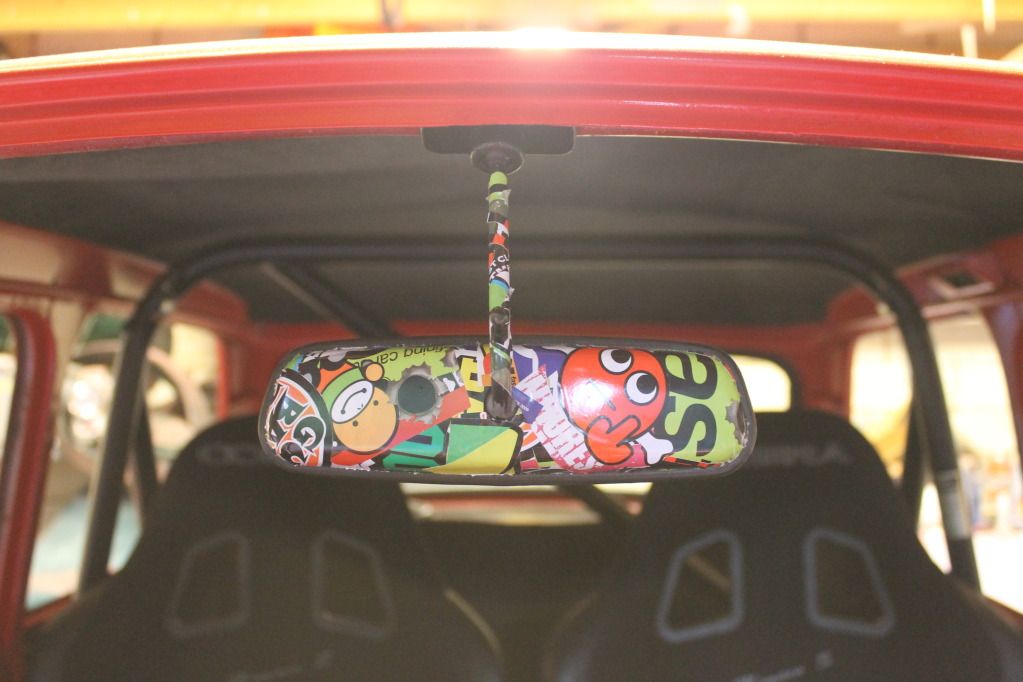
Rear view mirror is very nice, I do like sticker bomming, but at 43 I wont get away with it lol !!! Nice work.
Graham
Graham
#70
jb93
-

- Members
-
- 2,439 posts
TMF Noddy Badge holder officially.
- Location: .
Posted 28 July 2012 - 06:33 PM
Can't wait to see this finished 
#71
iTomKart
-
- Members
-
- 351 posts
Speeding Along Now
- Location: Nottingham
- Local Club: TMF
Posted 09 September 2012 - 06:57 PM
Cheers guys appreciate it, been busy with sorting uni stuff out but I've got a big update drafted so it's coming soon...
Tom
Tom
#72
iTomKart
-
- Members
-
- 351 posts
Speeding Along Now
- Location: Nottingham
- Local Club: TMF
Posted 02 October 2012 - 08:45 PM
.
Edited by iTomKart, 05 October 2012 - 05:51 PM.
#73
iTomKart
-
- Members
-
- 351 posts
Speeding Along Now
- Location: Nottingham
- Local Club: TMF
Posted 02 October 2012 - 08:48 PM
Okay so I haven’t posted on here for a while, but the good side of that is that it’s left more time for the mini!
So, a big update is due…
Firstly, I got into uni! I am currently writing this in my new room at Hull University where I’m studying mechanical engineering, so hopefully there’ll be many more ideas and projects to come with the knowledge gained from that. The bad news is that I’ve moved to Hull so work on the mini will stop until the Christmas holidays, but I’ll be drafting up ideas while I’m here ready for when I get back
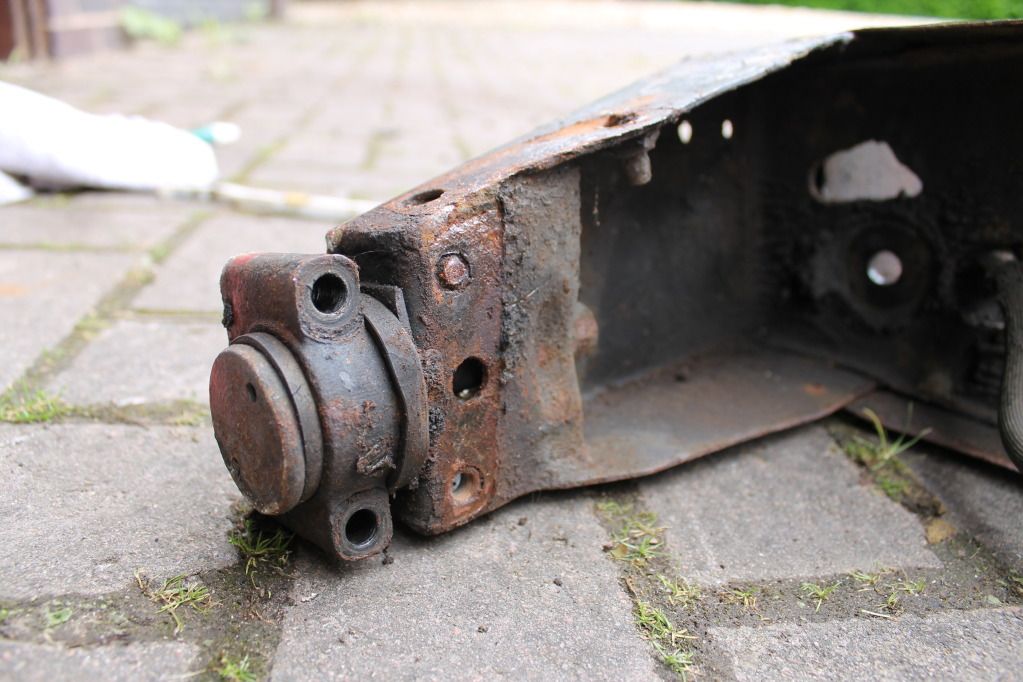
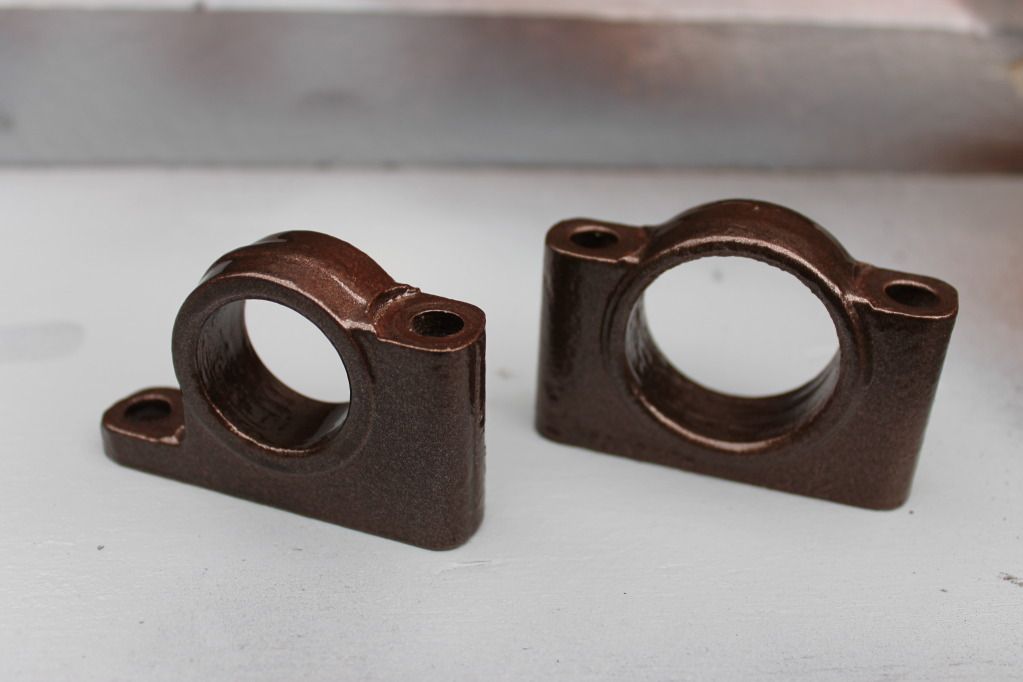
Anyway, about the car; the first job to be done before anything else was to build up the rear subframe. This meant bolting on the radius arms, but with the negative camber brackets the angle that they sat at had changed. This meant we had to take a grinder to the radius arm so that it didn’t scrape on the subframe every time it rotated:

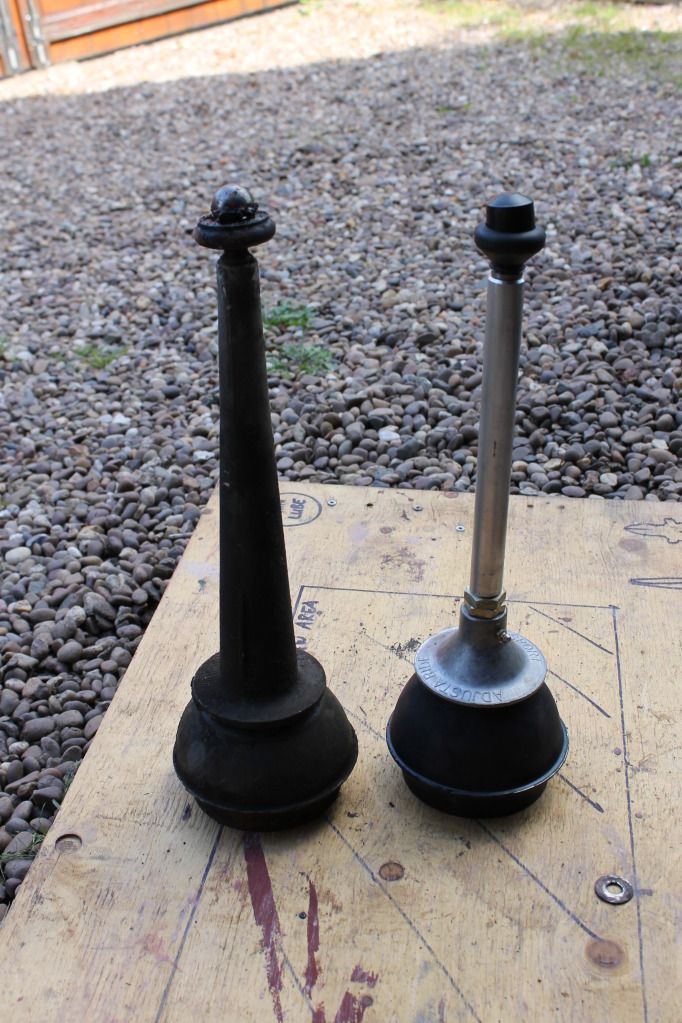
After this had been tackled, the new rubber cones and hi-los could be fitted. This was much easier once the hi-los were wound all the way down:
Comparison of old and new:
Then the new subframe was ready to be bolted on using shiny new stainless bolts, and the Gaz adjustable shocks could be bolted on meaning the fuel tank could be bolted in.
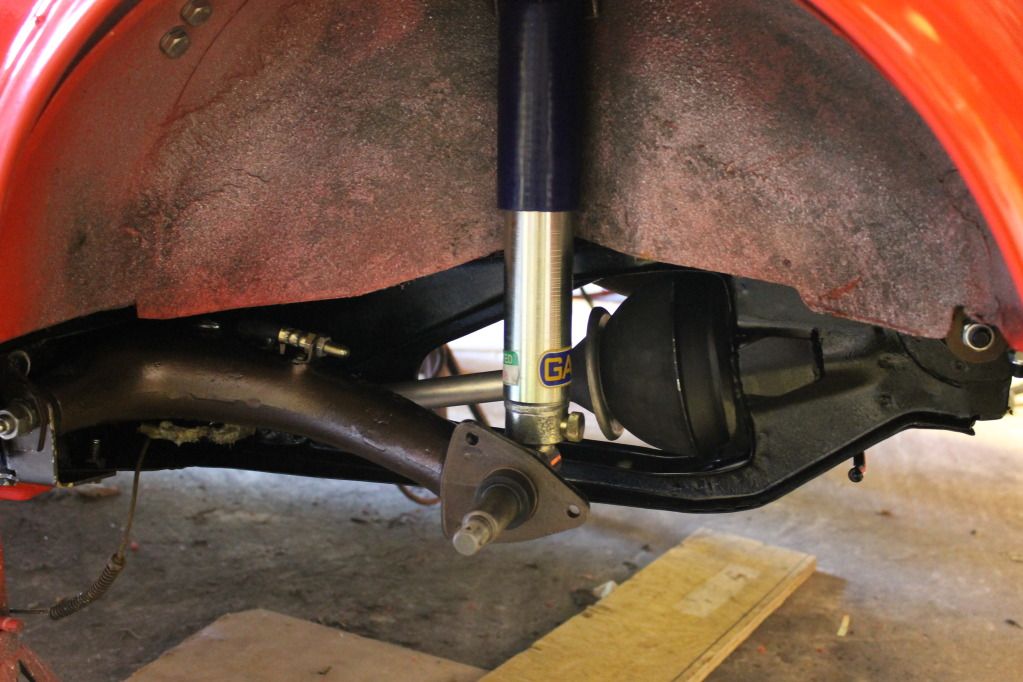
This meant the exhaust and boot lid could be fitted and that was the back finished! (Note number plate bolt lights wired in as well, this meant simply connecting the four wires meant for the standard lamp unit to the wires coming out of the bottom of the new bolts – simples)
We also refurbished the rear drums as they looked too new to replace, so a strip-down, clean, and greasing was all that was needed.
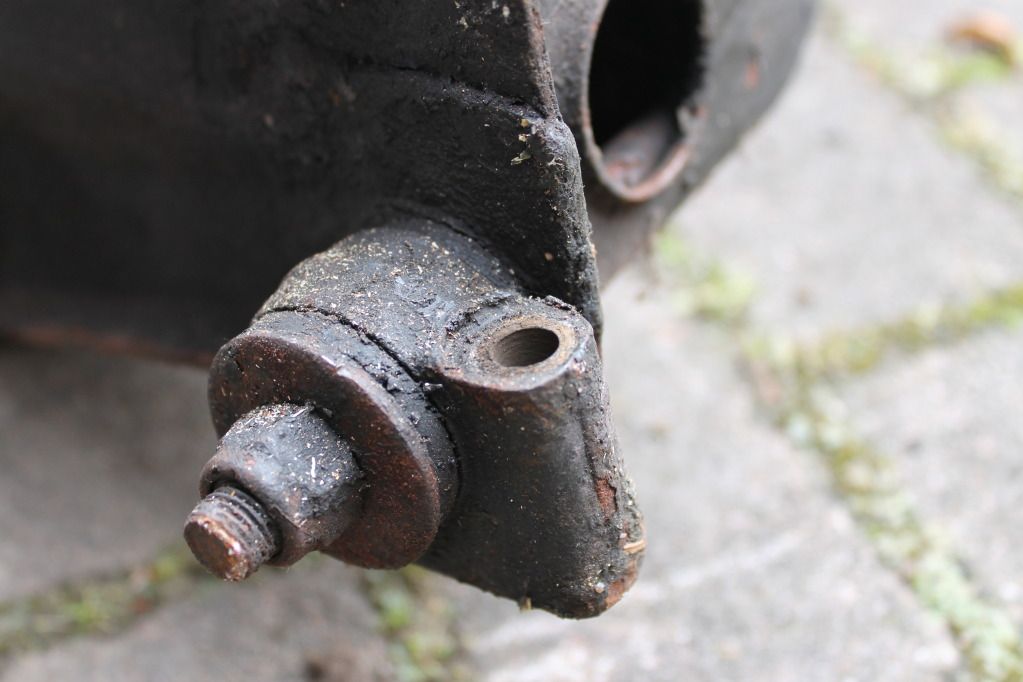
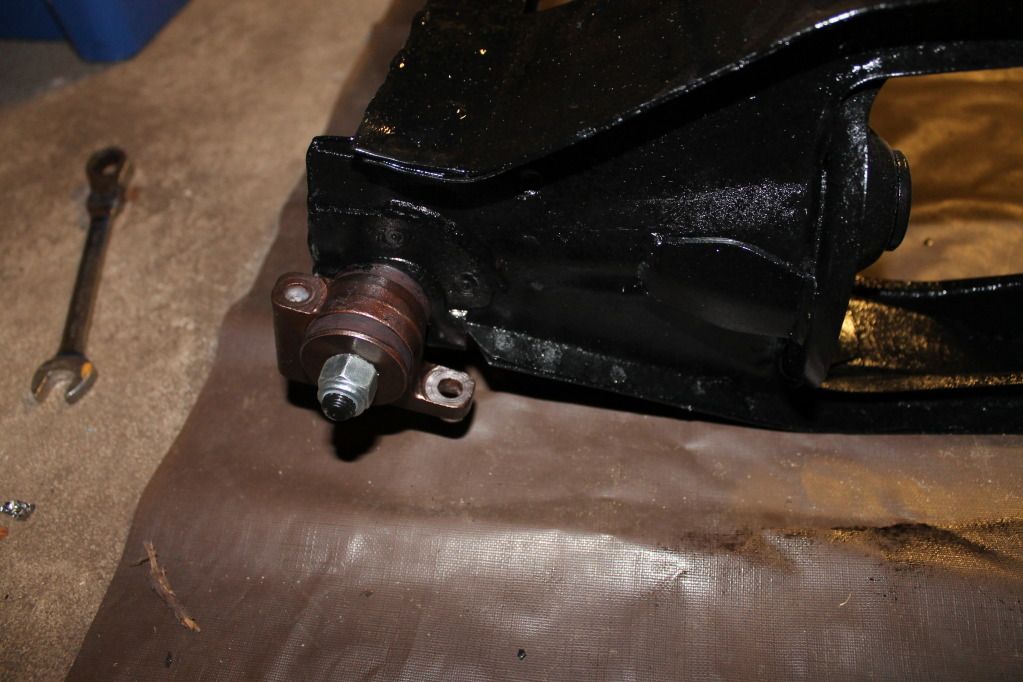
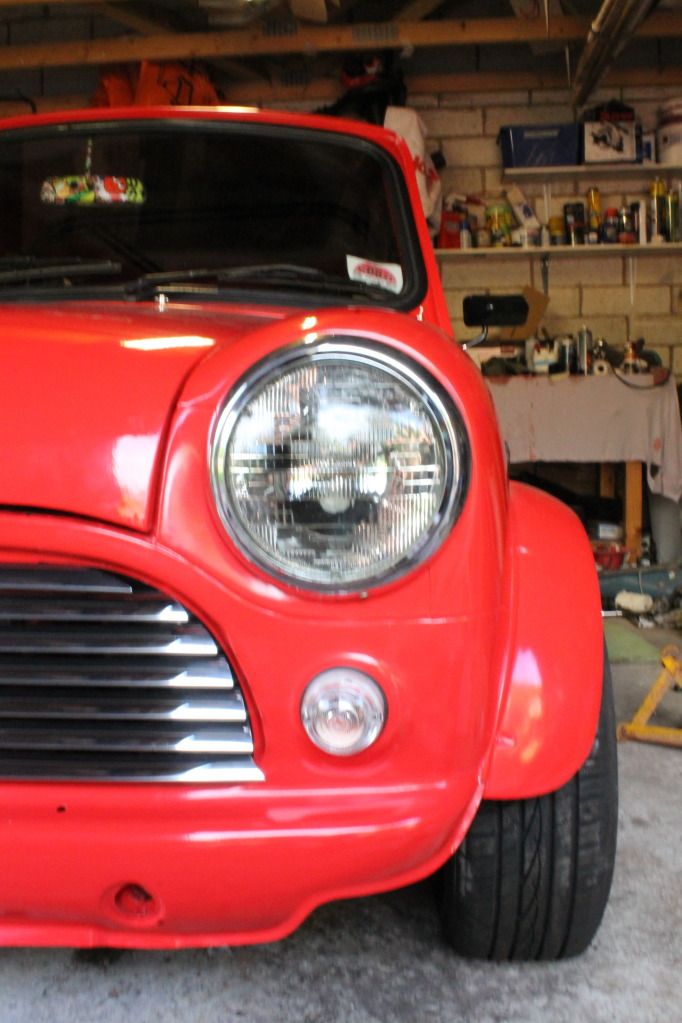
Next up was the front end. The work included new negative camber bottom arms, new heavy duty tie rods, all new ball joints, polybushes, new hi-los, new bump-stops, new discs and green stuff pads, new CV joints, and a rebuild of the swivel hubs and bearings.
Getting the CV joints in was a pain as the Haynes manual suggested pinching a greasy, awkwardly placed circlip with two screwdrivers while pushing the driveshaft on (need three hands??), so after hours of trying we opted for the ‘line up the teeth and hit it’ approach which worked first time! Then it was a case of bolting on the swivel hub, replacing the bottom arms and tie rods and attaching these and the top arm to the hub.
New brakes:


Shiny CV joints:

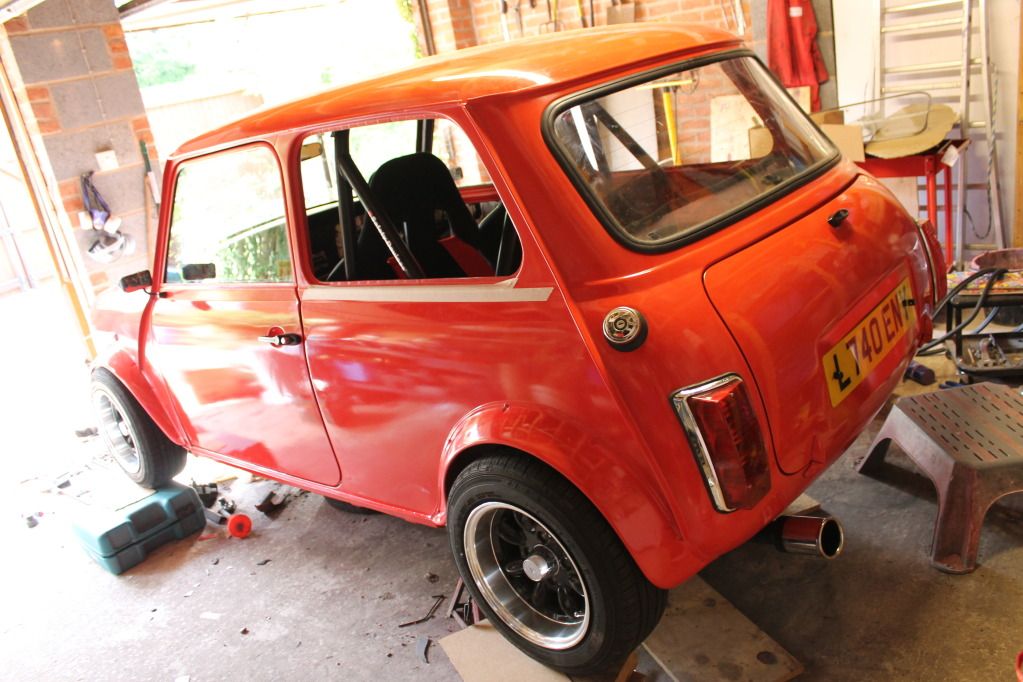
After this I decided to fit spacers as I was unhappy with the stance, so I opted for 3/8” on the front and 3/8” on the back and now the edge of the tyre tread sits flush with the lip of the arch – beautiful
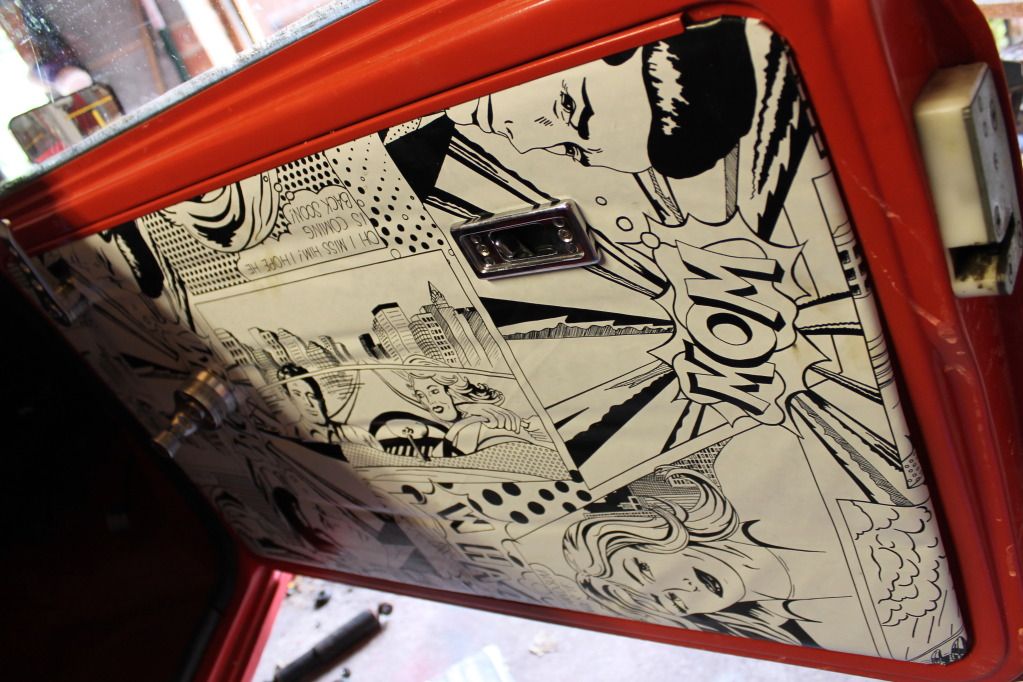
Then I went for a slightly alternative option for the door cards and wrapped them in a table cloth I found in a French supermarket, just sprayed with adhesive and job’s a good’n!
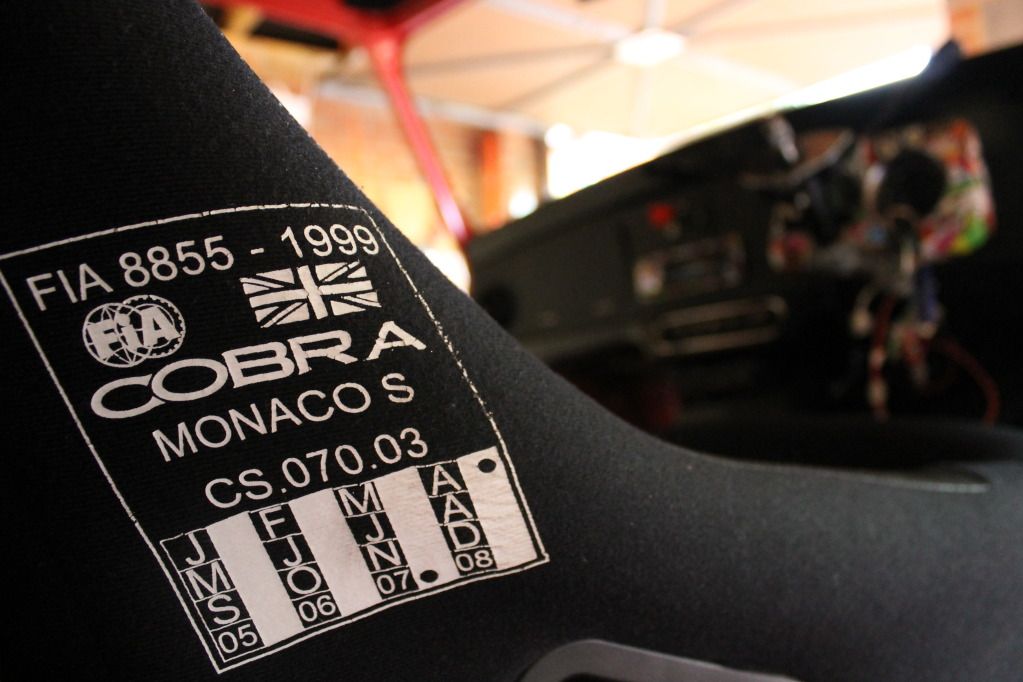
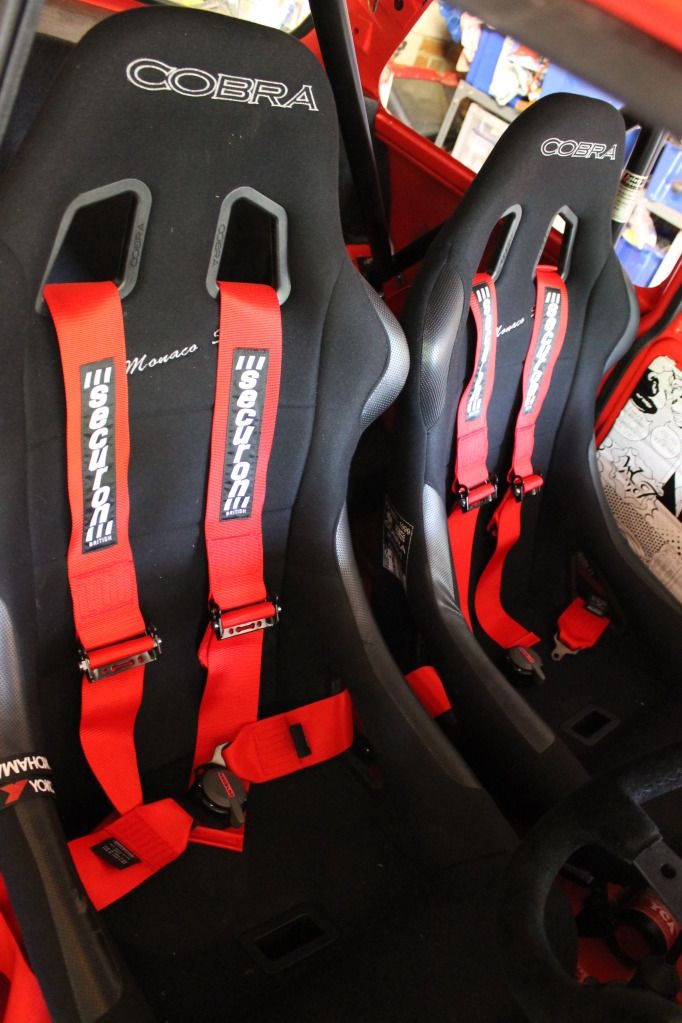
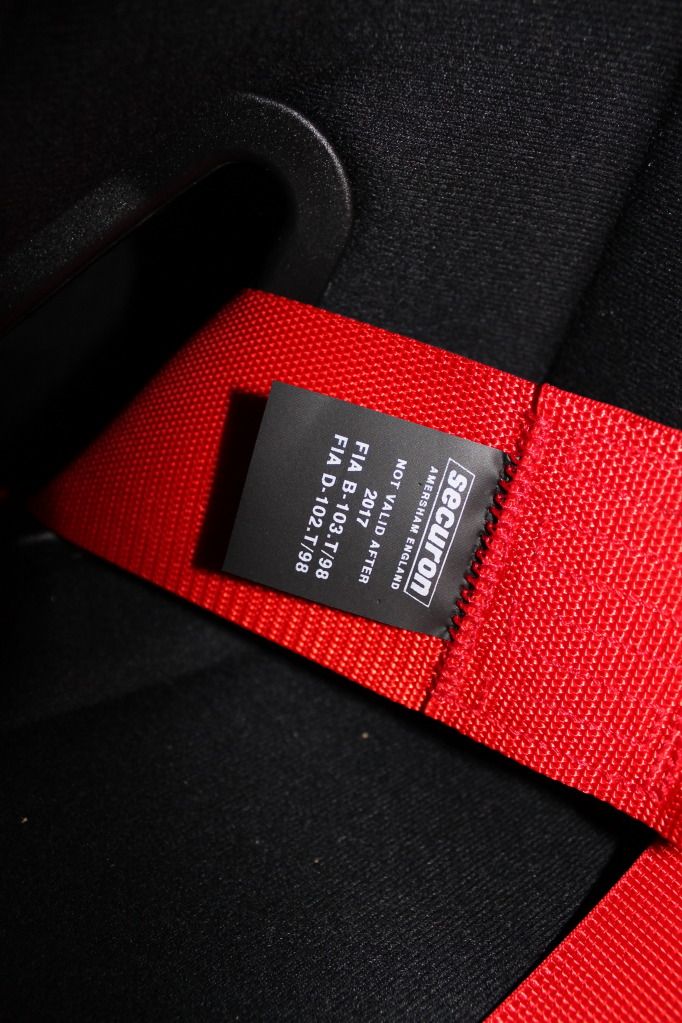
Staying with the interior, I also fitted some 3” FIA approved 4-point harnesses which look like this:
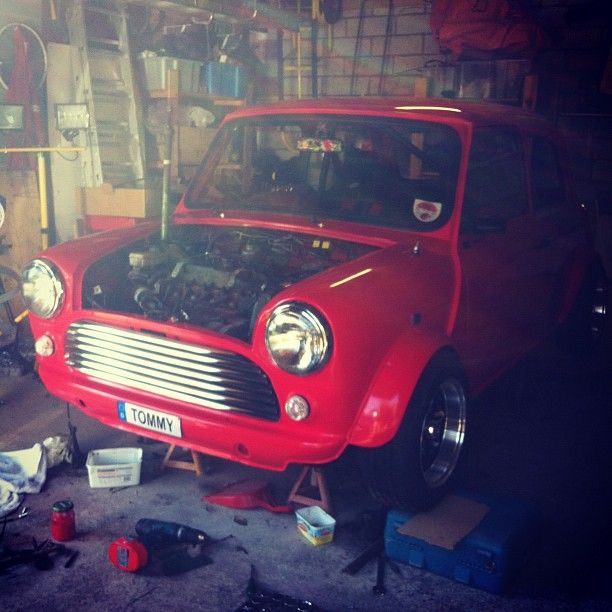
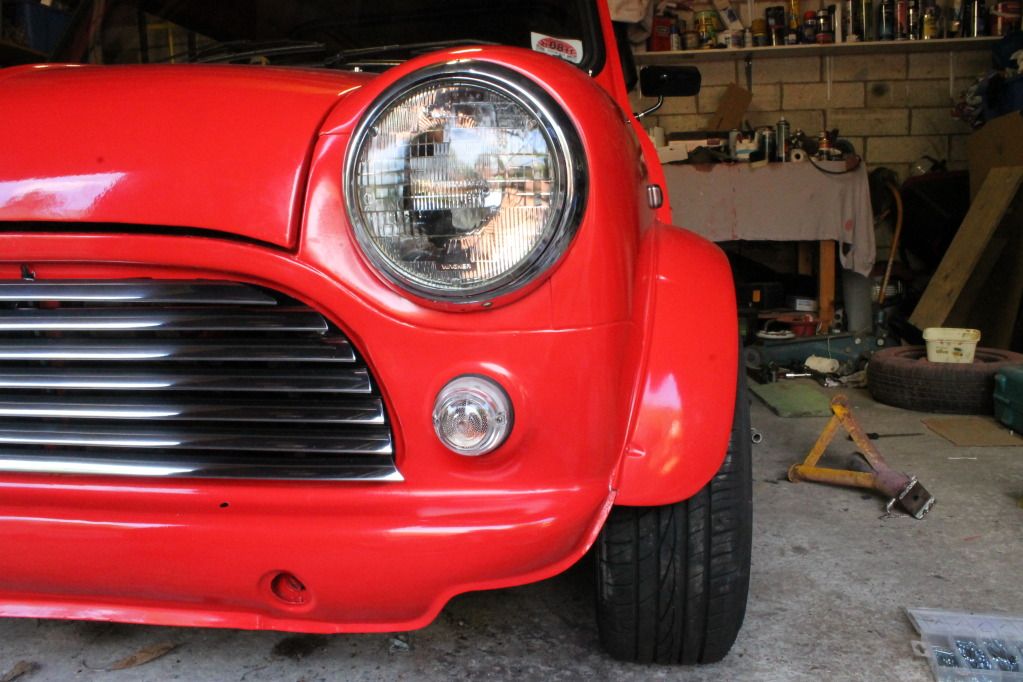
Then it was onto the satisfying jobs that really round it off like the lights, mk1 grille and wheels, and now it looks like this……!!
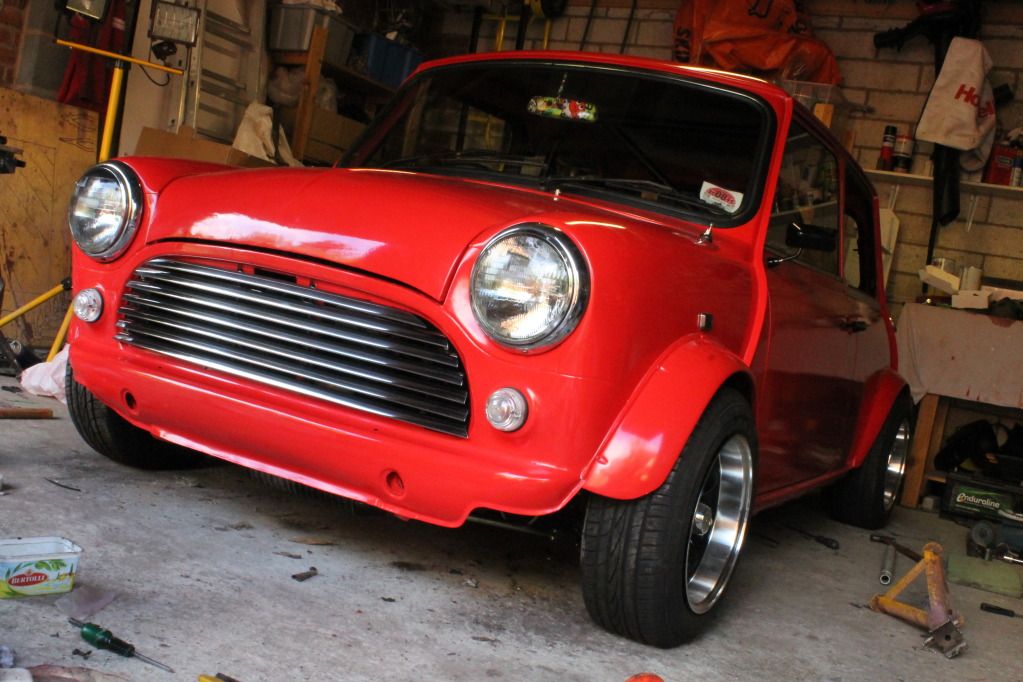
(**Ride height hasn't settled yet so it will be lower eventually!**)
There’s barely anything left to do, just gremlins making both indicators work individually, but when the hazards are on the right-hand ones decide to give up. Also the heat shield needs to be fitted between the exhaust and the underside, something I found out when I leant on the metal behind the handbrake after a few minutes of running… wow that pipe gets hot! Other than that it’s pretty much done, so dad’s going to sort them out and take it for a test soon, the get it on the road where she belongs!
I’ve enjoyed every second of the build and learnt so much, and it’s by no means over yet. Phase II will be coming soon, where the power plant will be the focus of the project (an ‘H’ bagde or two may be needed… ;) )
Stick with the thread though as this is where I’ll post pictures of photoshoots etc, and where I’ll update any small modifications/tricks in the meantime
Thanks for reading!
Tom
So, a big update is due…
Firstly, I got into uni! I am currently writing this in my new room at Hull University where I’m studying mechanical engineering, so hopefully there’ll be many more ideas and projects to come with the knowledge gained from that. The bad news is that I’ve moved to Hull so work on the mini will stop until the Christmas holidays, but I’ll be drafting up ideas while I’m here ready for when I get back
Anyway, about the car; the first job to be done before anything else was to build up the rear subframe. This meant bolting on the radius arms, but with the negative camber brackets the angle that they sat at had changed. This meant we had to take a grinder to the radius arm so that it didn’t scrape on the subframe every time it rotated:
After this had been tackled, the new rubber cones and hi-los could be fitted. This was much easier once the hi-los were wound all the way down:
Comparison of old and new:
Then the new subframe was ready to be bolted on using shiny new stainless bolts, and the Gaz adjustable shocks could be bolted on meaning the fuel tank could be bolted in.
This meant the exhaust and boot lid could be fitted and that was the back finished! (Note number plate bolt lights wired in as well, this meant simply connecting the four wires meant for the standard lamp unit to the wires coming out of the bottom of the new bolts – simples)
We also refurbished the rear drums as they looked too new to replace, so a strip-down, clean, and greasing was all that was needed.
Next up was the front end. The work included new negative camber bottom arms, new heavy duty tie rods, all new ball joints, polybushes, new hi-los, new bump-stops, new discs and green stuff pads, new CV joints, and a rebuild of the swivel hubs and bearings.
Getting the CV joints in was a pain as the Haynes manual suggested pinching a greasy, awkwardly placed circlip with two screwdrivers while pushing the driveshaft on (need three hands??), so after hours of trying we opted for the ‘line up the teeth and hit it’ approach which worked first time! Then it was a case of bolting on the swivel hub, replacing the bottom arms and tie rods and attaching these and the top arm to the hub.
New brakes:
Shiny CV joints:
After this I decided to fit spacers as I was unhappy with the stance, so I opted for 3/8” on the front and 3/8” on the back and now the edge of the tyre tread sits flush with the lip of the arch – beautiful
Then I went for a slightly alternative option for the door cards and wrapped them in a table cloth I found in a French supermarket, just sprayed with adhesive and job’s a good’n!
Staying with the interior, I also fitted some 3” FIA approved 4-point harnesses which look like this:
Then it was onto the satisfying jobs that really round it off like the lights, mk1 grille and wheels, and now it looks like this……!!
(**Ride height hasn't settled yet so it will be lower eventually!**)
There’s barely anything left to do, just gremlins making both indicators work individually, but when the hazards are on the right-hand ones decide to give up. Also the heat shield needs to be fitted between the exhaust and the underside, something I found out when I leant on the metal behind the handbrake after a few minutes of running… wow that pipe gets hot! Other than that it’s pretty much done, so dad’s going to sort them out and take it for a test soon, the get it on the road where she belongs!
I’ve enjoyed every second of the build and learnt so much, and it’s by no means over yet. Phase II will be coming soon, where the power plant will be the focus of the project (an ‘H’ bagde or two may be needed… ;) )
Stick with the thread though as this is where I’ll post pictures of photoshoots etc, and where I’ll update any small modifications/tricks in the meantime
Thanks for reading!
Tom
Edited by iTomKart, 02 October 2012 - 08:50 PM.
#74
iTomKart
-
- Members
-
- 351 posts
Speeding Along Now
- Location: Nottingham
- Local Club: TMF
Posted 02 October 2012 - 09:03 PM

#75
scotty_1987
-

- Members
-
- 874 posts
One Carb Or Two?
- Location: Dublin, Ireland
- Local Club: MiniBallers
Posted 02 October 2012 - 09:14 PM
looks sick man you gonna be using for the road yeah?!  also how you finding mechanical engineering just started the same course myself?!
Nathan
also how you finding mechanical engineering just started the same course myself?! Nathan


1 user(s) are reading this topic
0 members, 1 guests, 0 anonymous users


