I check the endfloat before fitting rods and the rest of the gubbins, the primeary gear will have its own measurment and if you dont have that right it will eat the gear its self.

Flubber!
Started by
Dog
, Mar 24 2007 12:18 PM
779 replies to this topic
#706

Rosslin Racing
-

- Traders
-

- 2,408 posts
Up Into Fourth
- Location: Burgdorf.
- Local Club: SMP beo BMC swiss
Posted 24 March 2008 - 06:21 PM
#707
Dog
-
- Banned from Buying/Selling
-
- 9,550 posts
Deathwish Fairy
- Local Club: Shatrats.com
Posted 24 March 2008 - 06:55 PM
Well thats ok then, all that area seems fine.I check the endfloat before fitting rods and the rest of the gubbins, the primeary gear will have its own measurment and if you dont have that right it will eat the gear its self.
So need to get a DTI now, so I can accuratly measure the end float, once I get that, I can fit it all back together...
#708
Rosslin Racing
-
- Traders
-
- 2,408 posts
Up Into Fourth
- Location: Burgdorf.
- Local Club: SMP beo BMC swiss
Posted 24 March 2008 - 07:43 PM
I would have come and helped you, its a bit far. you should get a DTI and stand any way its useful. try ebay lots to choose from.
Edited by Rosslin Racing, 24 March 2008 - 07:44 PM.
#709
Dog
-
- Banned from Buying/Selling
-
- 9,550 posts
Deathwish Fairy
- Local Club: Shatrats.com
Posted 24 March 2008 - 07:50 PM
Just a ickle bit 
I am prob making it sound a bigger job then it actually is, but I just want to make sure I've got it right. I don't fancy ripping it all out yet again.
So let me just get it right...
To check end flaot, I only need the crank, and caps on... (I have pistons etc in place already)
Guessing I would of known about it if the gap between the primary gear and crank was wrong by a massed thrust?
Also, do you think the fact I never set the clutch plunger stop nut, correctly would of cuased the thrusts to go the way they have?
#710
Rosslin Racing
-
- Traders
-
- 2,408 posts
Up Into Fourth
- Location: Burgdorf.
- Local Club: SMP beo BMC swiss
Posted 24 March 2008 - 08:14 PM
yer what a bummer taking it all out again errrr...
Ok take the rods off the crank put a stout bar in between crank and block and lever as far as it will go then measure, new bearing on the thrust side and old on the non side. put you corrected thrust in should the gap be to small you can clean the bearings up on an oil stone the steel side. put your rods on check the play on them as well so you dont get binding at high revs. got your engine back together the set the clutch properly its only takes a few minutes.
basic stuff: check all moving engine parts for the right tolerance beforehand.
good luck
#711
Leonard
-

- Members
-
- 784 posts
One Carb Or Two?
- Local Club: mini rebels
Posted 24 March 2008 - 08:20 PM
sorry i'm not great at explaining things. yes for crank endfloat, you only need the crankshaft, and cap with thrusts in. 4 thou should be fine for your engine. 3 is standard, so 4 gives a bit more expansion room for the extra heat a tuned engine gives.
The clutch plunger stop setting will have put extra force on the thrusts yes. check all the oilways in the crank etc while its out, to rule out that oil starvation wasn't the problem though. did the engine have good oil pressure with a new oil pump.
Nearly there now mate
The clutch plunger stop setting will have put extra force on the thrusts yes. check all the oilways in the crank etc while its out, to rule out that oil starvation wasn't the problem though. did the engine have good oil pressure with a new oil pump.
Nearly there now mate
#712
Dog
-
- Banned from Buying/Selling
-
- 9,550 posts
Deathwish Fairy
- Local Club: Shatrats.com
Posted 24 March 2008 - 08:26 PM
I've got completely new thrusts going in, and like I said, atm using feeler gauges, I have 0.004" but I don't trust feeler gauges, as it pushes the thrust bearing on the *yellow human water*, so a DTi IMO would be more accurate.
Well its a brand new crank, which I had to tidy up slightly... but oil pressure was iaround 100psi when cold, but after a good run, it'll drop to about 50-60psi. But I think this is slightly too high?
Its got a new oil pump, new ball bearing and spring oil pressure valve, oil ways were all clean etc... I will check to see if it was oil starvation, I doubt it though for some reason...
Also, while I think about it, there was some oil within the clutch area, small pool in the bottom, where the split pin drain plug jobbie is, and some items were in a very very light mist of oil over them... is this normal?
#713
Boab
-

- Members
-
- 1,610 posts
Camshaft & Stage Two Head
- Local Club: E*S*M*O*C
Posted 26 March 2008 - 10:17 PM
This has totally bamboozled me. What has gone wrong here and what is the crank endfloat? How can the gaps be adjusted on the crank. Just need to know what you are on about before I build mine, which I am bricking it in case it goes wrong.
#714
Boab
-
- Members
-
- 1,610 posts
Camshaft & Stage Two Head
- Local Club: E*S*M*O*C
Posted 26 March 2008 - 10:38 PM
Just watched my DVD, and now understand :doh:
#715
Dog
-
- Banned from Buying/Selling
-
- 9,550 posts
Deathwish Fairy
- Local Club: Shatrats.com
Posted 26 March 2008 - 10:43 PM
Well been ringing around again todayThis has totally bamboozled me. What has gone wrong here and what is the crank endfloat? How can the gaps be adjusted on the crank. Just need to know what you are on about before I build mine, which I am bricking it in case it goes wrong.

I finally bought myself a DTI
 £24 off eBay, should be good enough for what I want
Anyways, end float needs to be 0.004" - 0.005" I am going for 0.005". To adjust the gap, you need to get yourself a flat surface, (I am using a old Mini quaterlight window), some 800grit wet n dry, used with WD40 or Duck oil, and carefully just rub one of the faces (the back pref) and keep checking the size of the thurst, this way, you are litrally, taking shaves off, which is what u want.
What I can see went wrong, is I had not adjusted the stop nut correctly, thus letting the clutch bind more than it needed, putting extra pressure on the thrusts. Meaning they were being eatten very quickly, this meaning I had a slight build up of waste thrust on the corner of one thrust, making the End float smaller, in turn making the engine bind up.
So this time round, I have bought myself some genuine AE thurst washers, a DTI gauge that does 0.001" incraments. I am going to build the short engine up, and see what I have without touching the thrusts, if its not reading what I want it to read, then I'll tweak the thursts until I get the reading I want. Once this is done, I'll rebuild the enigne, time the new PH3 cam in, and while the enigne is out, do my tappets too, as I have now gone down from 1.5:1 rockers to 1.3:1 Cooper S Forged Rockers.
Once this is all complete I need to change one engine mount as one of the captive nuts has threaded, I might also ttreat the engine to another coat of paint too.
Also, while the engine is out, I am going to fit a pre-pump fuel filter, and tea cut the engine bay a bit, seems the short 50miles I have done, and discoloured the paint a bit

Another thing I want to do it change the thermostat, to a 88degree, as I am currently running a 74degree, and the engine just wasn't even getting warm enough... all the worries that it'll overheat bit me a little lol
Again, reassembale, moving a few things, altering a few things (mainly in the qiuest for tartness) and bobs your uncel, with a properly set clutch stop set, fa**y will be your aurt too
#716
Dog
-
- Banned from Buying/Selling
-
- 9,550 posts
Deathwish Fairy
- Local Club: Shatrats.com
Posted 27 March 2008 - 05:40 PM
Ok todays progress...
I recived my new cam Morspeed ph3. This has been installed, and waiting for me to dail it in.
The centre cap is back on, just need to wait for the DTI to arrive in zee post
I've also had a PM from Bert998, with some news on my headlining and custom door cards, and all I can say is WOW!!! Not seen them in person yet, but looking at the Photos my new interoir is going to be bob on
Not posting pics yet, as I want to complete the inside before showing off
I recived my new cam
Morspeed ph3. This has been installed, and waiting for me to dail it in.The centre cap is back on, just need to wait for the DTI to arrive in zee post
I've also had a PM from Bert998, with some news on my headlining and custom door cards, and all I can say is WOW!!! Not seen them in person yet, but looking at the Photos my new interoir is going to be bob on
Not posting pics yet, as I want to complete the inside before showing off


#718
Dog
-
- Banned from Buying/Selling
-
- 9,550 posts
Deathwish Fairy
- Local Club: Shatrats.com
Posted 28 March 2008 - 07:20 PM
I have 0.004" end float 
Unfortunatly, I won't be here most of the weekend otherwise I would of finished building the engine back up and getting it fitted over the weekend.
Unfortunatly, I won't be here most of the weekend
otherwise I would of finished building the engine back up and getting it fitted over the weekend.
#719
Dog
-
- Banned from Buying/Selling
-
- 9,550 posts
Deathwish Fairy
- Local Club: Shatrats.com
Posted 30 March 2008 - 07:59 PM
I've been at it allllll day, well since 10am, its now 9pm, I think 9 hours building an engine is long enough lol
anyways, went from this....

and alot of measuring, and acuratly dialing in the cam etc, new rockers, and adjusting tappets later, and I am left with this once again....
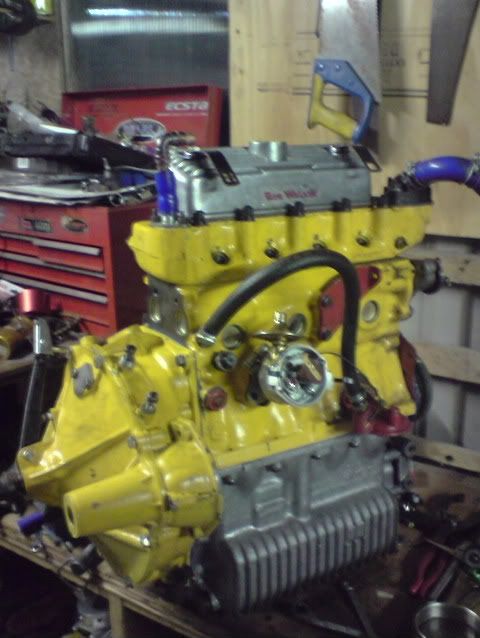
anyways, went from this....
and alot of measuring, and acuratly dialing in the cam etc, new rockers, and adjusting tappets later, and I am left with this once again....
#720
fishey798
-

- Members
-
- 562 posts
Super Mini Mad
- Local Club: Mini Rebels
Posted 30 March 2008 - 08:17 PM
Good work! I shall be interested to see what power yours makes, its the same spec as mine but ive stuck with 1.5:1 rockers.


1 user(s) are reading this topic
0 members, 1 guests, 0 anonymous users


