Jump to content


Photo
- - - - -

92 City, My First Rebuild.

roundnose

  • Please log in to reply
670 replies to this topic

#556 big-jay

big-jay

    Super Mini Mad

  • Members
  • PipPipPipPipPipPip
  • 518 posts
  • Location: Birmingham
  • Local Club: British Mini Club

Posted 13 February 2015 - 12:29 AM

Just finished reading this thread from start to finish. I must say the car looks absolutely awesome, and has given me some nice ideas for my mini.
 
Definately looking forward to seeing the finished article.


Cheers mate,

You and me both fella, Good luck with your Mini !

Jay.

#557 Spud21

Spud21

    Stage One Kit Fitted

  • Noobies
  • PipPipPip
  • 67 posts
  • Location: Bristol

Posted 13 February 2015 - 09:01 AM


Just finished reading this thread from start to finish. I must say the car looks absolutely awesome, and has given me some nice ideas for my mini.
 
Definately looking forward to seeing the finished article.


Cheers mate,

You and me both fella, Good luck with your Mini !

Jay.


Cheers chap.


It's off for its dreaded MOT on tuesday (it will fail as i havent touched it for a while with starting a new job, but it will give me an idea where to start or to think about a full rebuild)


#558 Ginge620

Ginge620

    Stage One Kit Fitted

  • Noobies
  • PipPipPip
  • 86 posts
  • Location: Chesterfield

Posted 20 February 2015 - 07:29 PM

Update,

Another big milestone has been reached today, she's now rolling for the first time in almost a year :-)
And got the running gear built up both sides ready to accept the drive shafts -
d9e4b668007b5700cc14525165cab4aa_zpsdf7c
 

Got a couple of questions if you don't mind answering them.

Are the GAZ shocks you have the lowered type or standard?

Is the steering rack a sport or standard type?

Also where did you get the the stainless bolts for the steering arms. Ive looked on smiffys bits but cant see them?

Thanks


Edited by Ginge620, 20 February 2015 - 07:29 PM.


#559 Daviewonder

Daviewonder

    Needs an extra inch!!

  • TMF+ Member
  • PipPipPipPipPipPipPip
  • 1,019 posts
  • Location: England

Posted 20 February 2015 - 08:01 PM

Damn you!!!  I thought this was an update   >_<


#560 big-jay

big-jay

    Super Mini Mad

  • Members
  • PipPipPipPipPipPip
  • 518 posts
  • Location: Birmingham
  • Local Club: British Mini Club

Posted 20 February 2015 - 08:26 PM

Update,
Another big milestone has been reached today, she's now rolling for the first time in almost a year :-)
And got the running gear built up both sides ready to accept the drive shafts -


Got a couple of questions if you don't mind answering them.
Are the GAZ shocks you have the lowered type or standard?
Is the steering rack a sport or standard type?
Also where did you get the the stainless bolts for the steering arms. Ive looked on smiffys bits but cant see them?
Thanks

Hi bud,

My GAZ dampers are the lowered type.

Ive got the MPI Sportspack Rack from minispares as I wanted to limit the steering lock due to the larger width of the split rims.

The steering arm bolts aren't stainless, they're just new replacement bolts from minispares.

Hope that helps,

Jay.

Edited by big-jay, 20 February 2015 - 08:28 PM.


#561 big-jay

big-jay

    Super Mini Mad

  • Members
  • PipPipPipPipPipPip
  • 518 posts
  • Location: Birmingham
  • Local Club: British Mini Club

Posted 20 February 2015 - 08:29 PM

Damn you!!!  I thought this was an update   >_<


There shall be one tomorrow ! :highfive:

Edited by big-jay, 20 February 2015 - 08:30 PM.


#562 Ginge620

Ginge620

    Stage One Kit Fitted

  • Noobies
  • PipPipPip
  • 86 posts
  • Location: Chesterfield

Posted 20 February 2015 - 10:17 PM


Update,
Another big milestone has been reached today, she's now rolling for the first time in almost a year :-)
And got the running gear built up both sides ready to accept the drive shafts -


Got a couple of questions if you don't mind answering them.
Are the GAZ shocks you have the lowered type or standard?
Is the steering rack a sport or standard type?
Also where did you get the the stainless bolts for the steering arms. Ive looked on smiffys bits but cant see them?
Thanks

Hi bud,

My GAZ dampers are the lowered type.

Ive got the MPI Sportspack Rack from minispares as I wanted to limit the steering lock due to the larger width of the split rims.

The steering arm bolts aren't stainless, they're just new replacement bolts from minispares.

Hope that helps,

Jay.


Thanks just what i was after. Im planning on lowing my Mini and im on 13's so i was looking at the steering racks that restrict the amount of turn. Im looking forward to your next update :D


#563 ToM 2012

ToM 2012

    Up Into Fourth

  • Members
  • PipPipPipPipPipPipPipPipPip
  • 4,066 posts
  • Location: halesowen

Posted 21 February 2015 - 11:02 AM

Looks sterlin that does mate well done. Should be on the road by June in the lovelly sun? Can't wait to see it at himly hall show? Cheers Tom

#564 big-jay

big-jay

    Super Mini Mad

  • Members
  • PipPipPipPipPipPip
  • 518 posts
  • Location: Birmingham
  • Local Club: British Mini Club

Posted 21 February 2015 - 06:22 PM

Looks sterlin that does mate well done. Should be on the road by June in the lovelly sun? Can't wait to see it at himly hall show? Cheers Tom


Thanks Tom,

That's the show I'm aiming for, should be on the road by then if all goes to plan !

#565 big-jay

big-jay

    Super Mini Mad

  • Members
  • PipPipPipPipPipPip
  • 518 posts
  • Location: Birmingham
  • Local Club: British Mini Club

Posted 21 February 2015 - 06:25 PM

jay, have you fitted your bonnet release and washerbottle?
 
any photos of where it all pokes through the bulkhead if so?

Hi Faz,

Sorry for the delay, been rather busy of late. Here's where the washer hose comes through the bulkhead, if you need anymore pictures of anything else just let me know !

19eb19ab84397d2d476959e996b1a2ec_zpsb79e

Update to follow shortly !

Edited by big-jay, 21 February 2015 - 06:26 PM.


#566 big-jay

big-jay

    Super Mini Mad

  • Members
  • PipPipPipPipPipPip
  • 518 posts
  • Location: Birmingham
  • Local Club: British Mini Club

Posted 21 February 2015 - 09:20 PM

Update,

Been fairly busy of late so haven't been able to make much progress on the Mini, but got out there today and got a fair bit done.

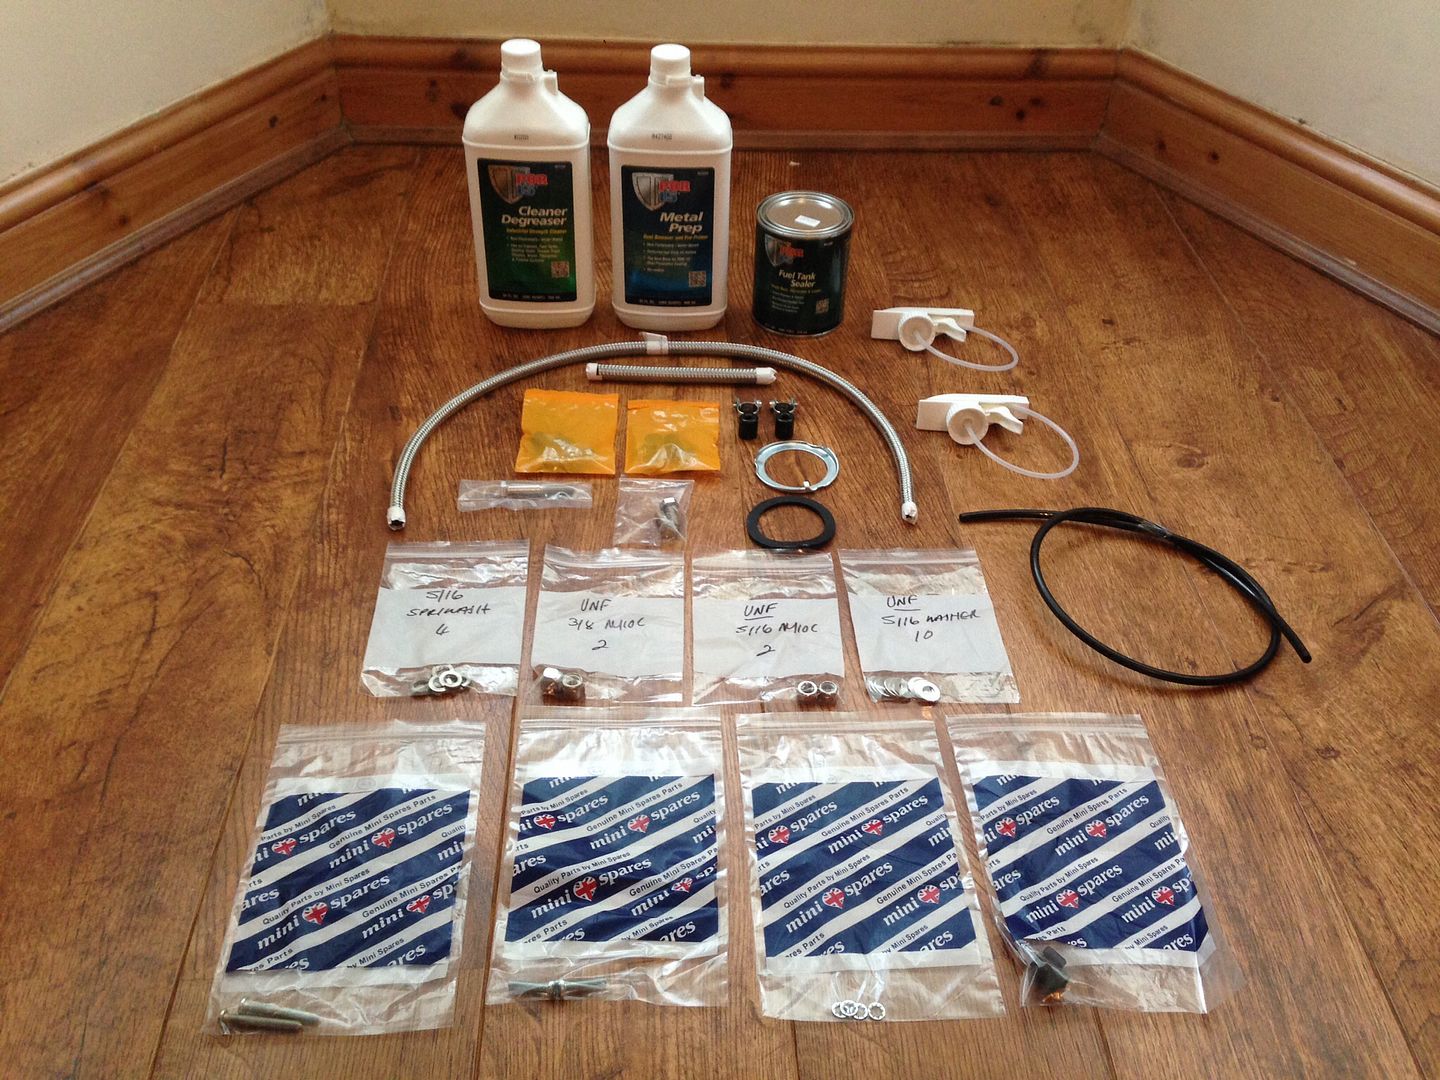
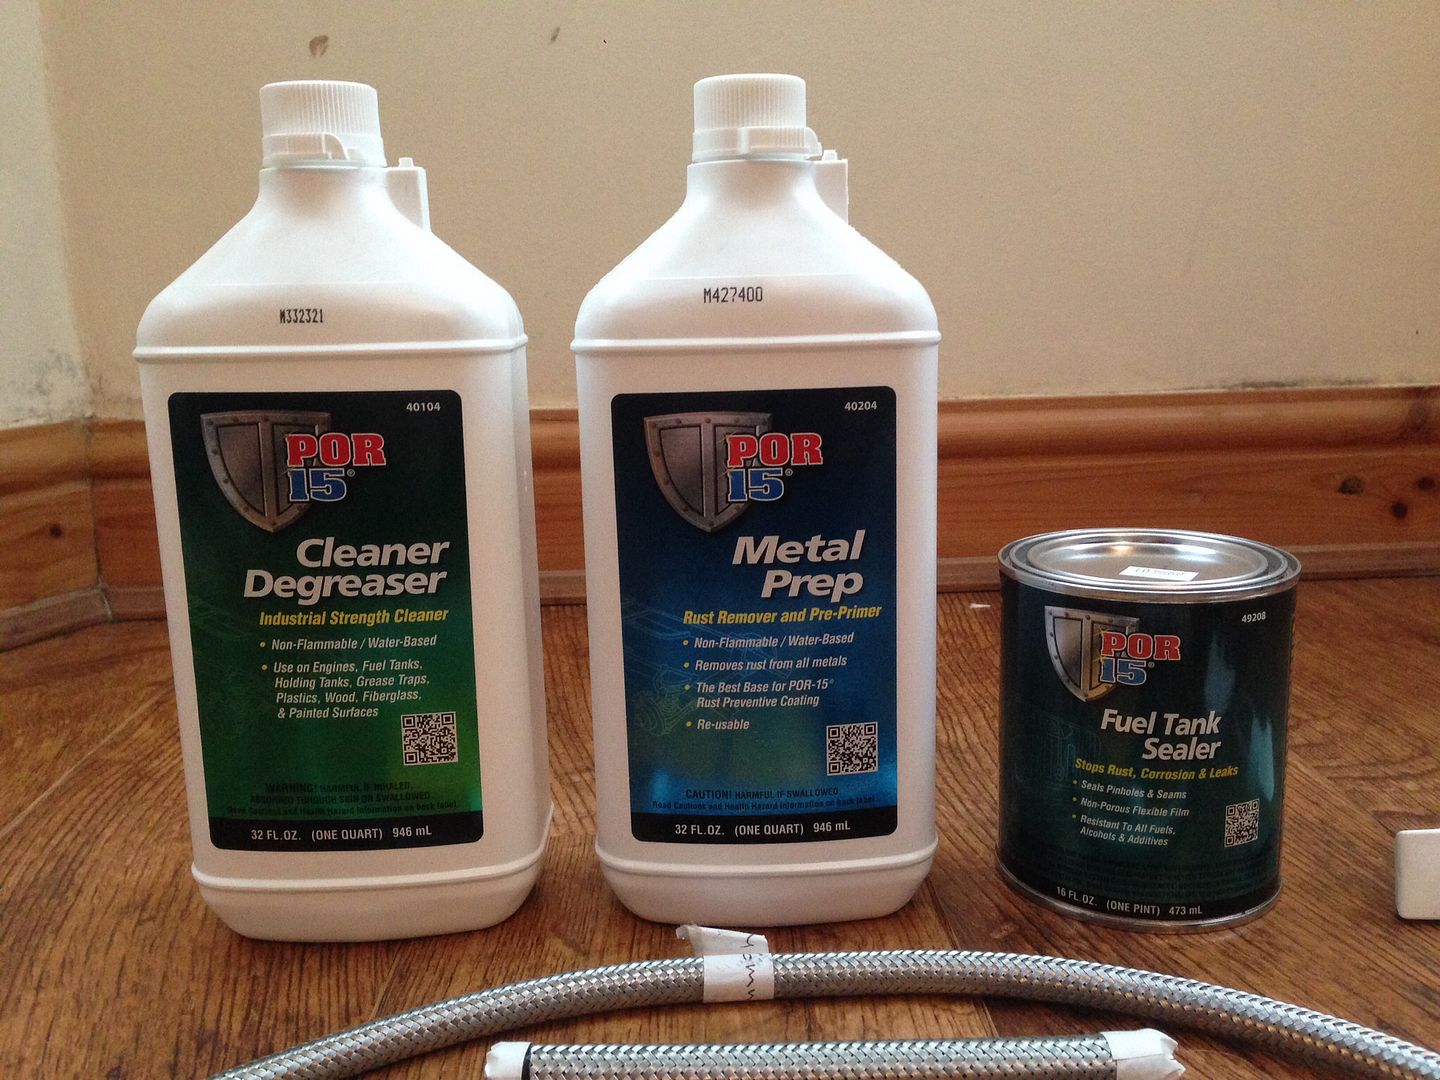
I'll start with the items purchased over the last couple of weeks, POR 15 fuel tank sealing kit, various stainless nuts and bolts, braided fuel hose and a few other bits -

ef82a33f3365bc756e88e37c1d66d48b_zps18ca

dca9c3cad8959651811dda479bfc4e56_zpsc774

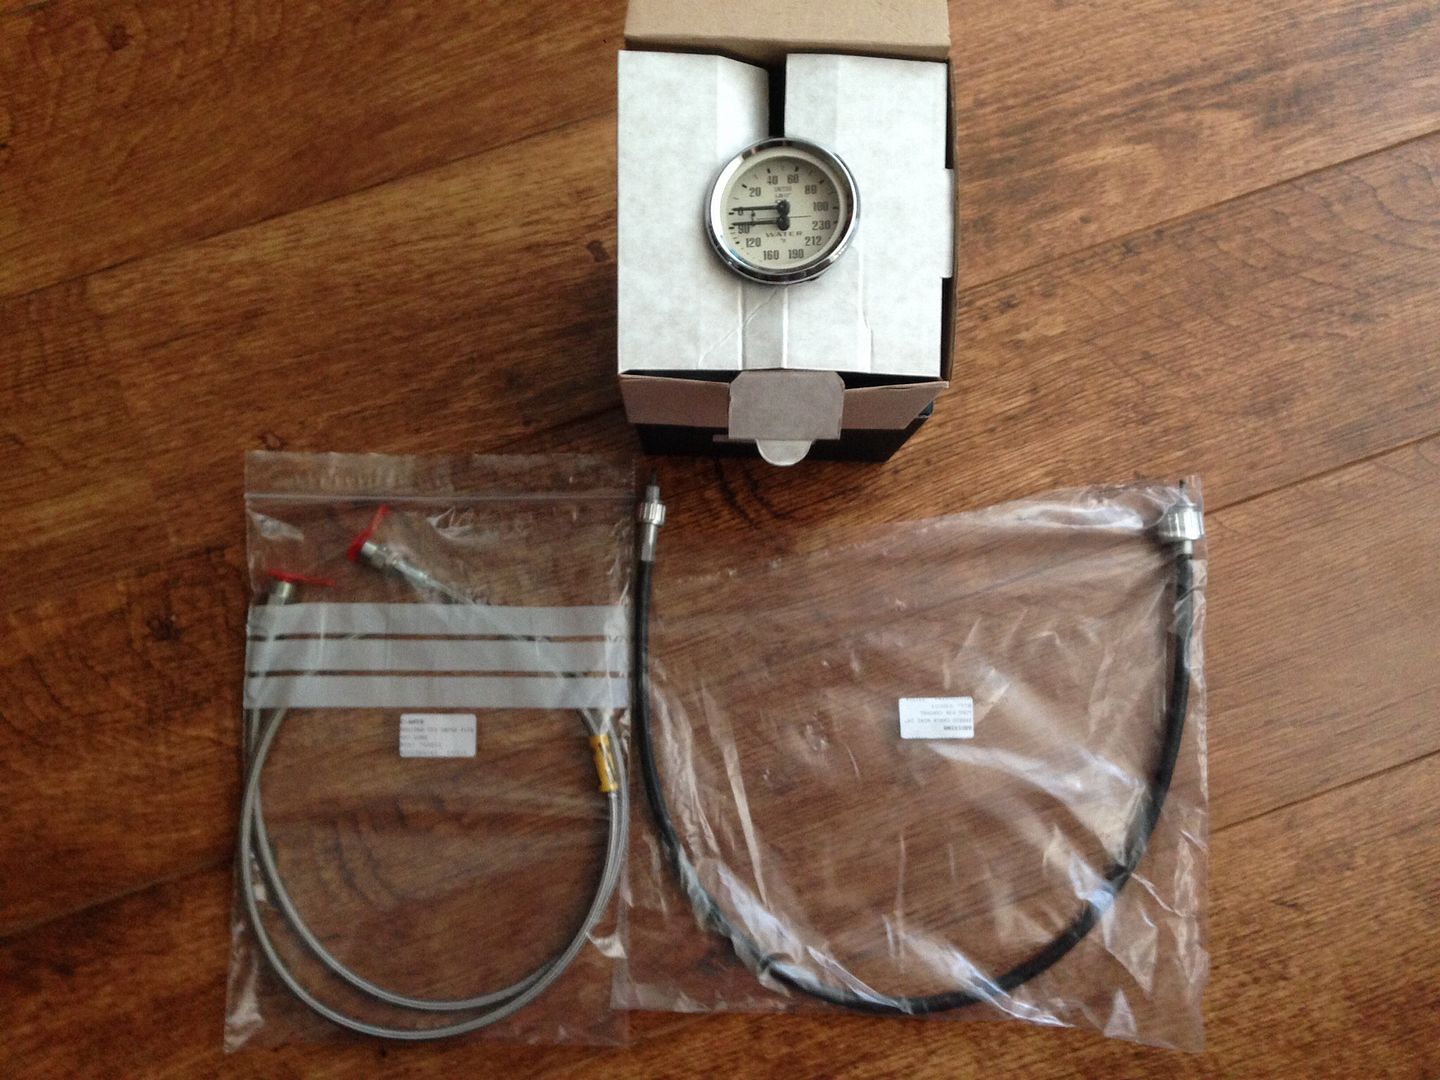
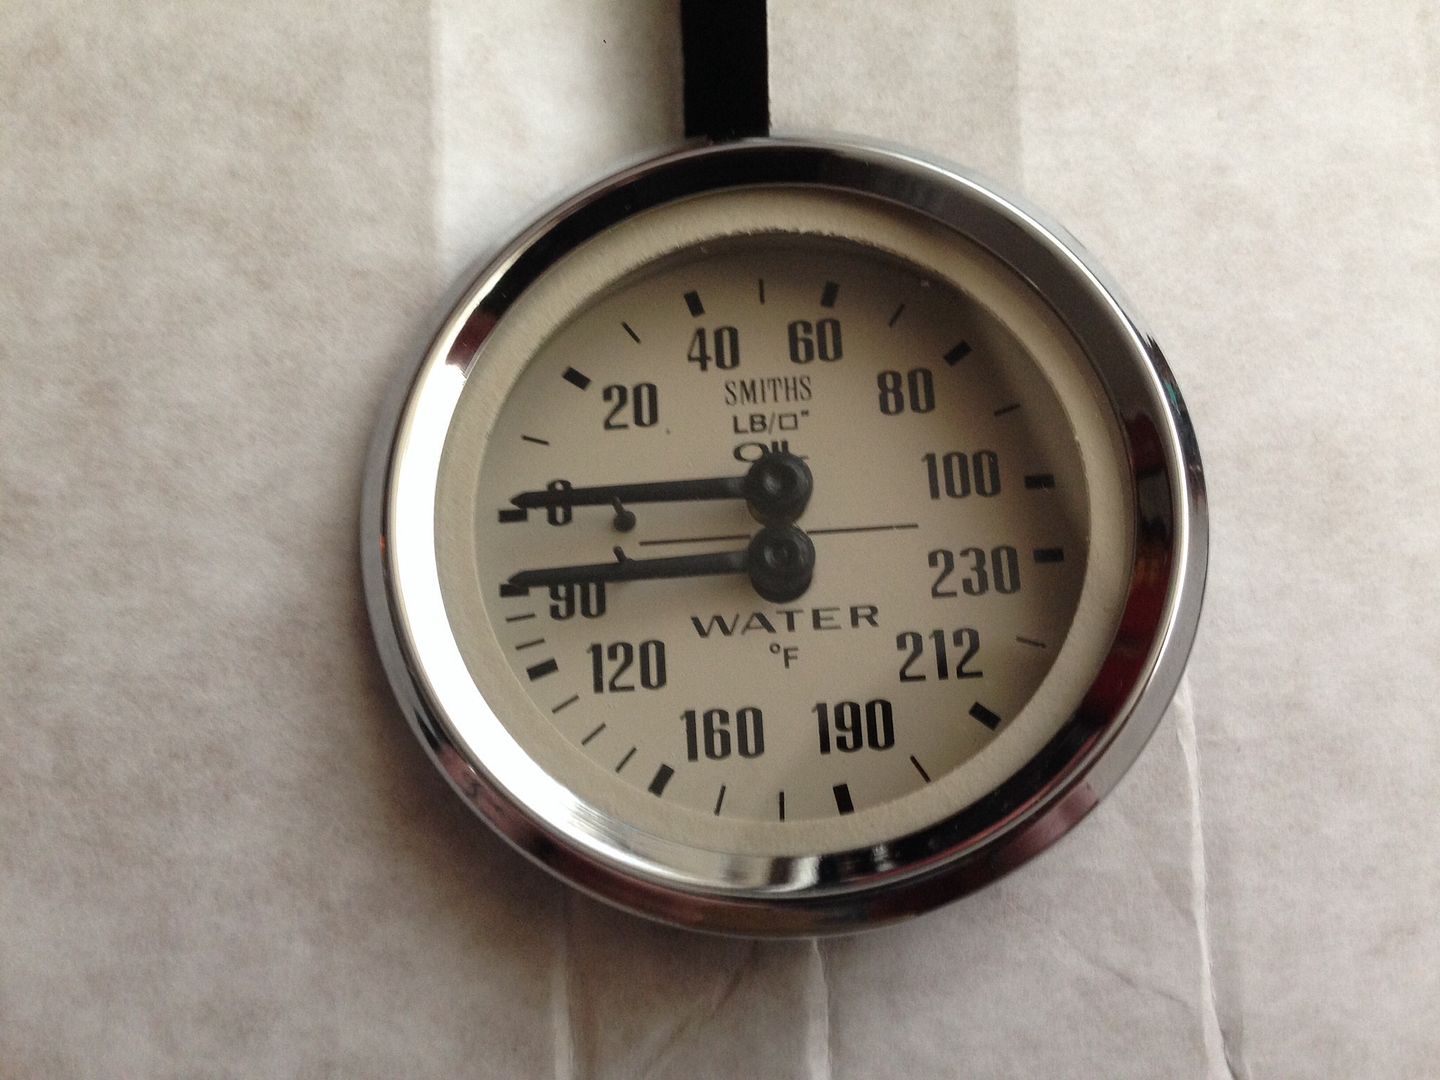
Finally purchased the last magnolia gauge, as well as a braided oil hose and a new speedo candle -

e0c50053cfc0d1e3a60ae0b079473f96_zpsf7f1

13b3655e3eded8f9fb2197b6d02e613a_zpsefb1

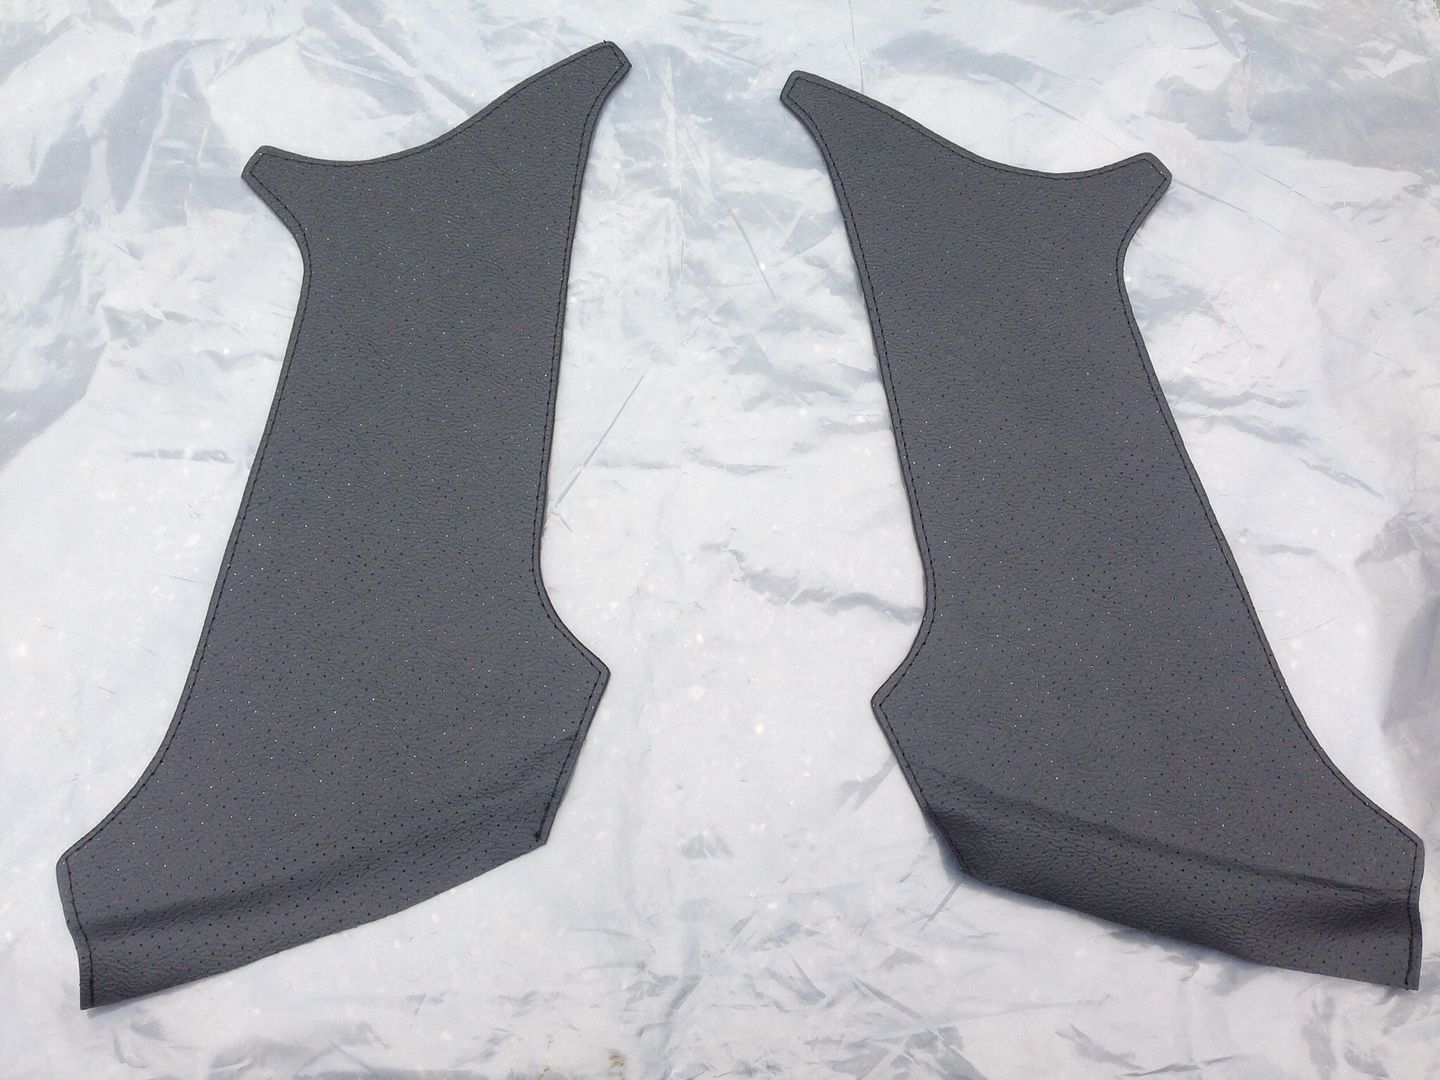
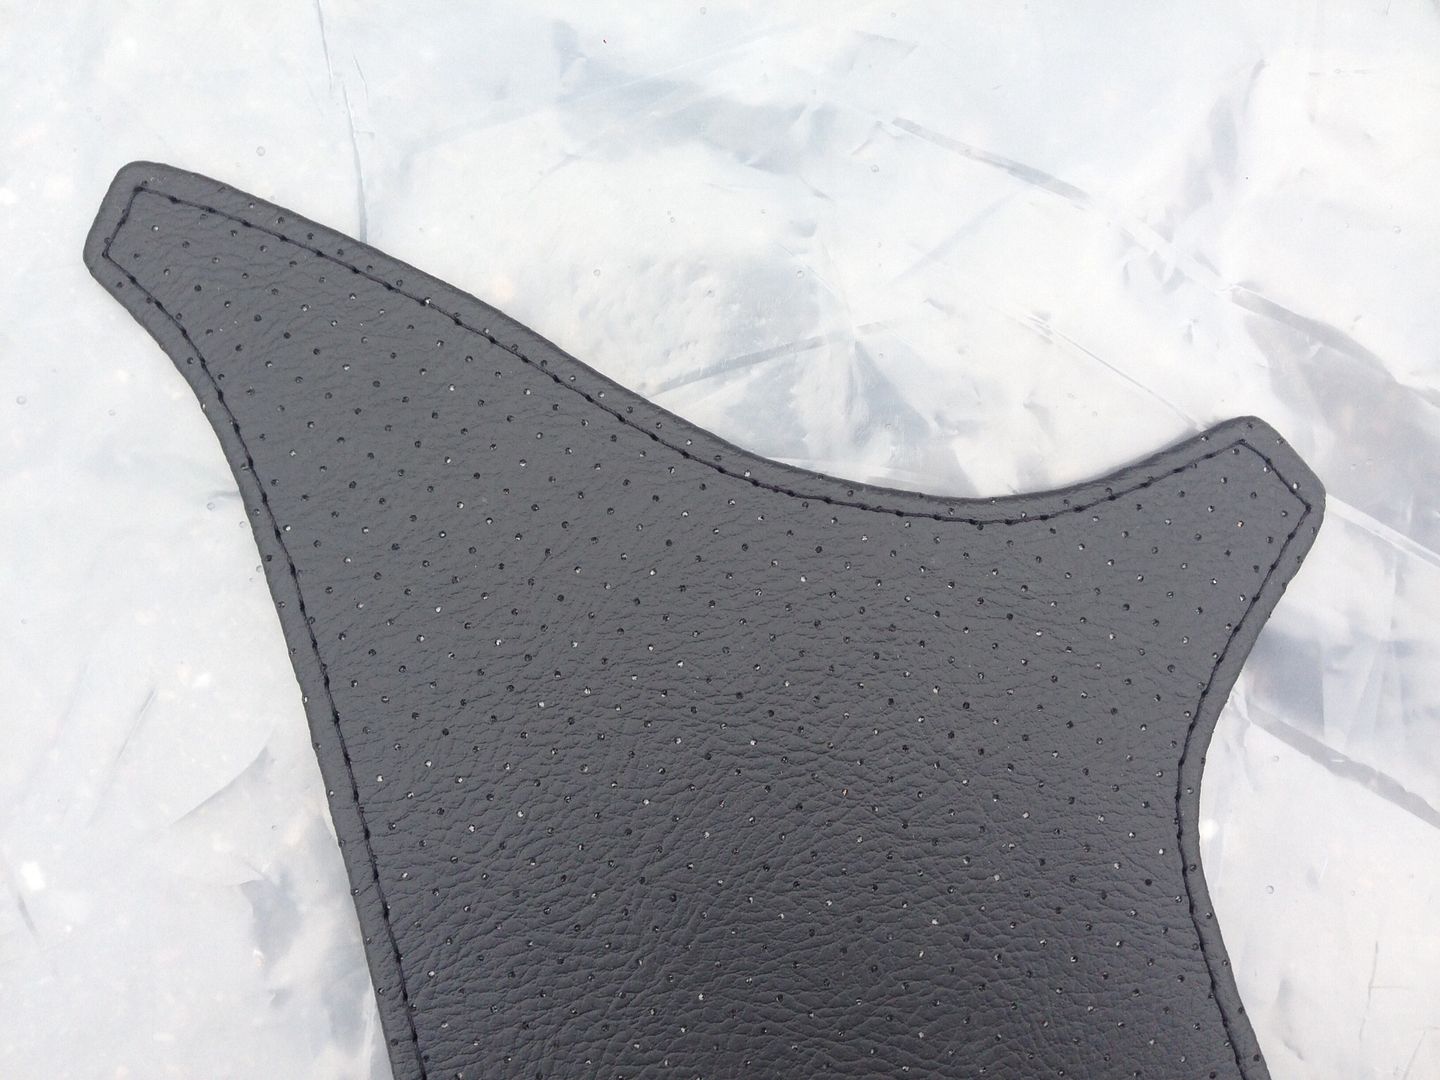
Had some new C-Pillars made by optimise as the ones that came in the headlining kit was a bit pants to be honest. There perforated vinyl with black stitching -

df6b32efe27a05f0f554284866ff2246_zps34b9

3e442913cc916e7abb3fc7fc809b498f_zps0da6

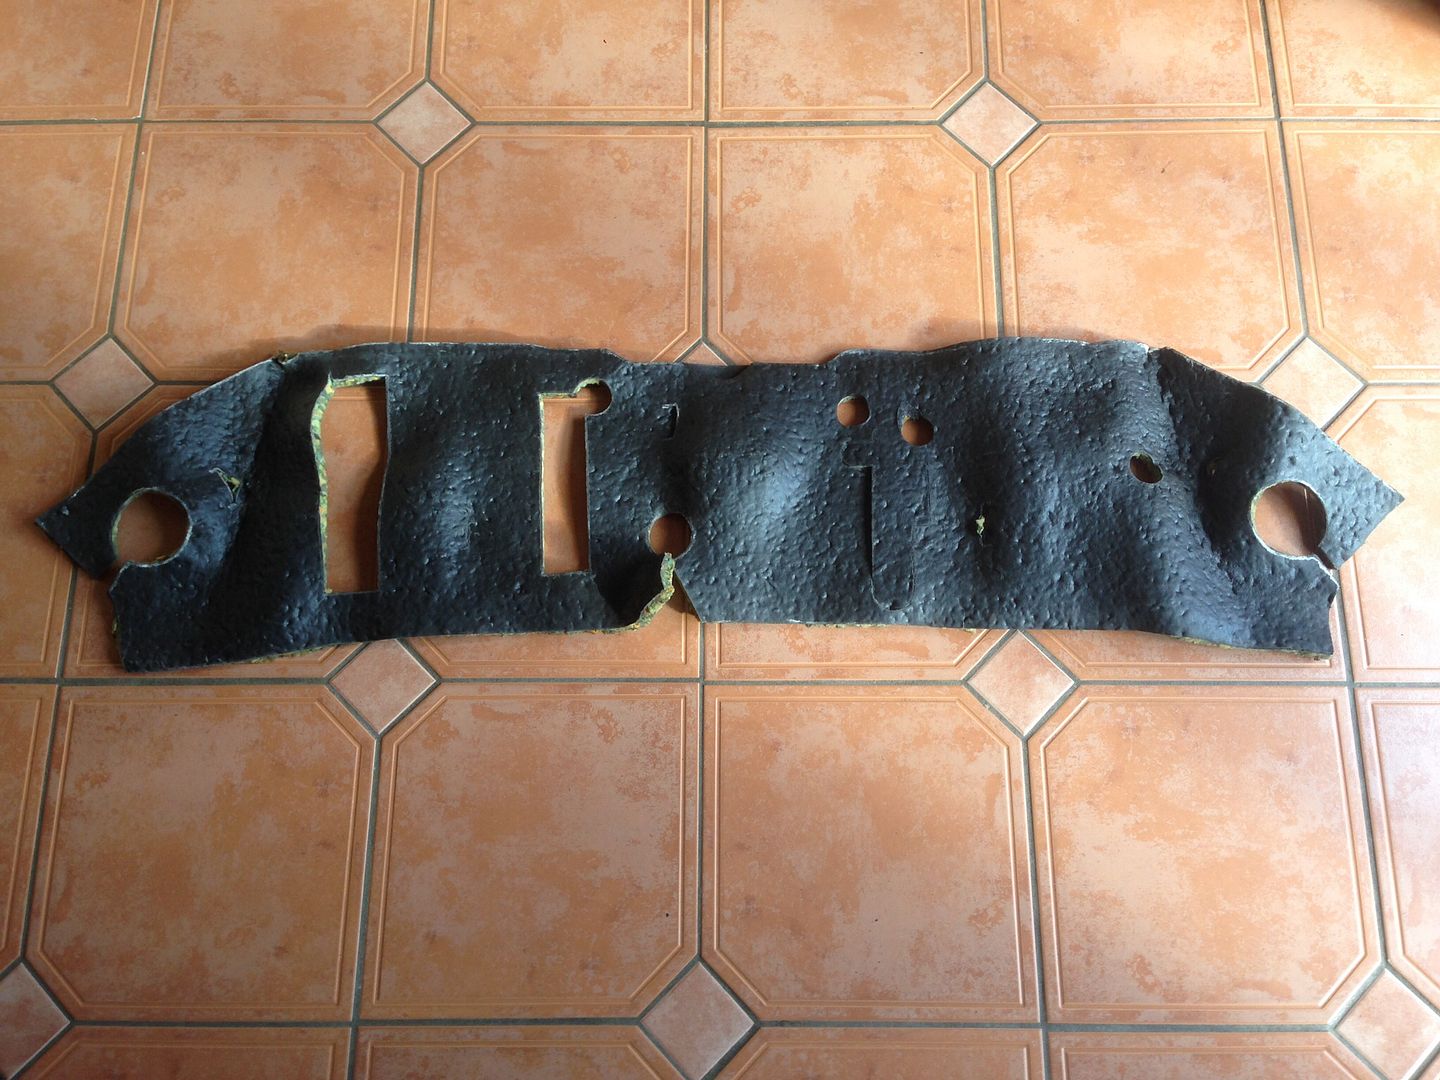
Managed to find some factory bulkhead sound deadening from a member on here in mint condition, needless to say I snapped it up straight away -

4e9ce9a982b2cec67c76853c2a48ea08_zps2109

And finally I purchased this little beauty -

a3ba665d7aa9e0696c03d95cb7eefe68_zps34e2

28d781242f4d95a973b5757d3060a256_zpse716

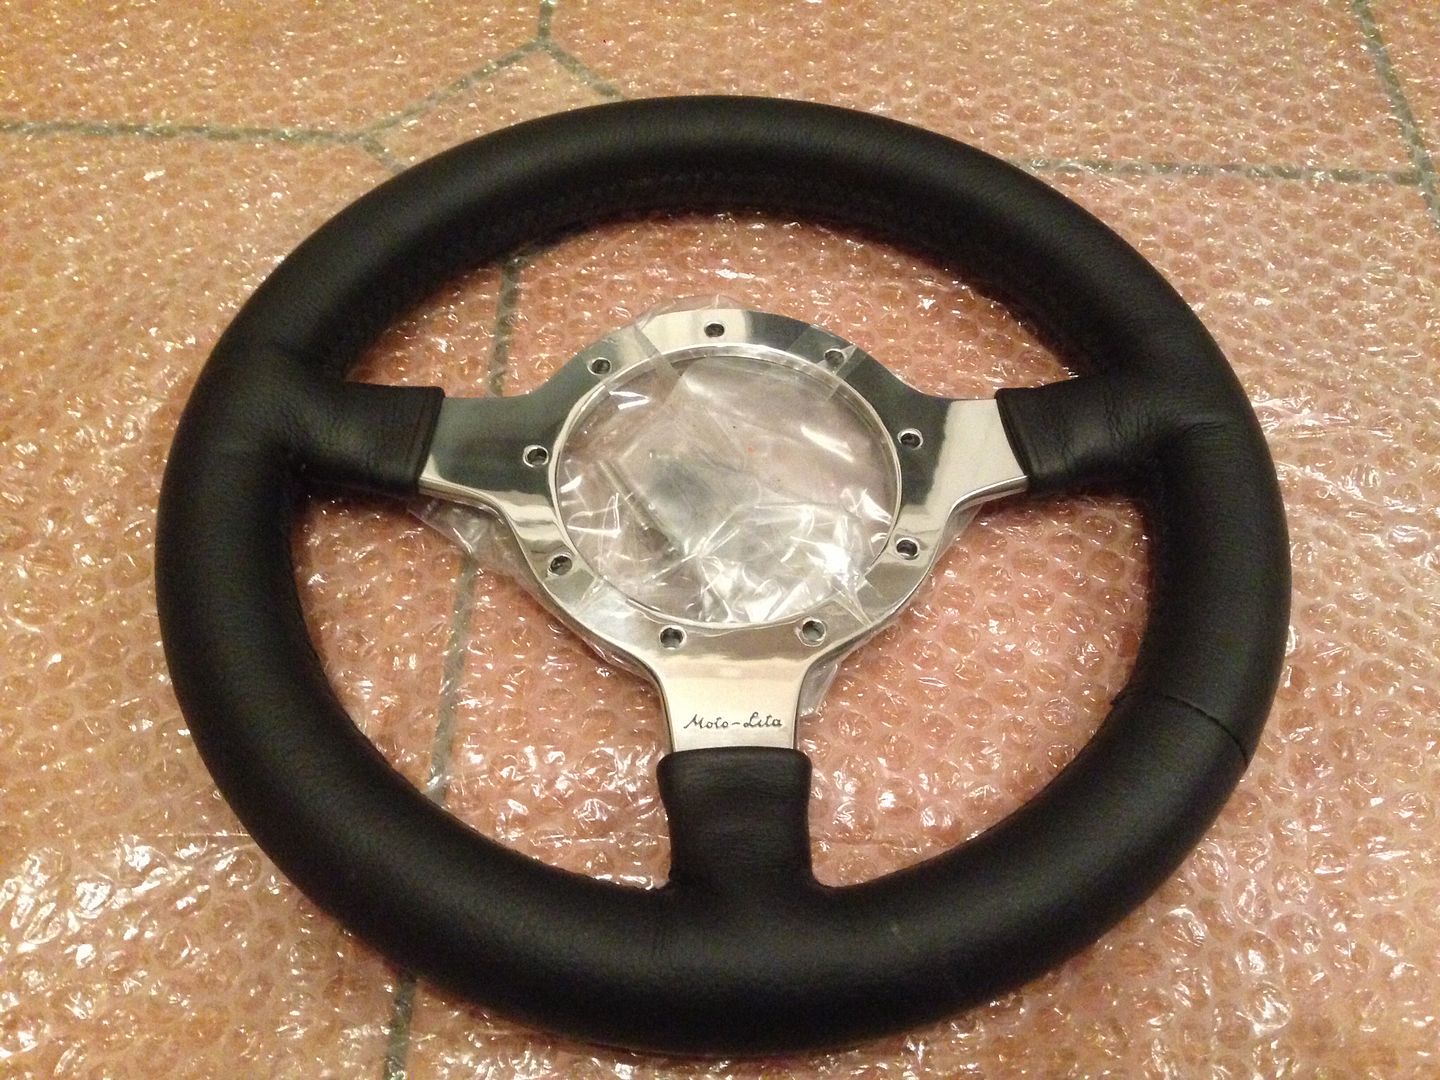
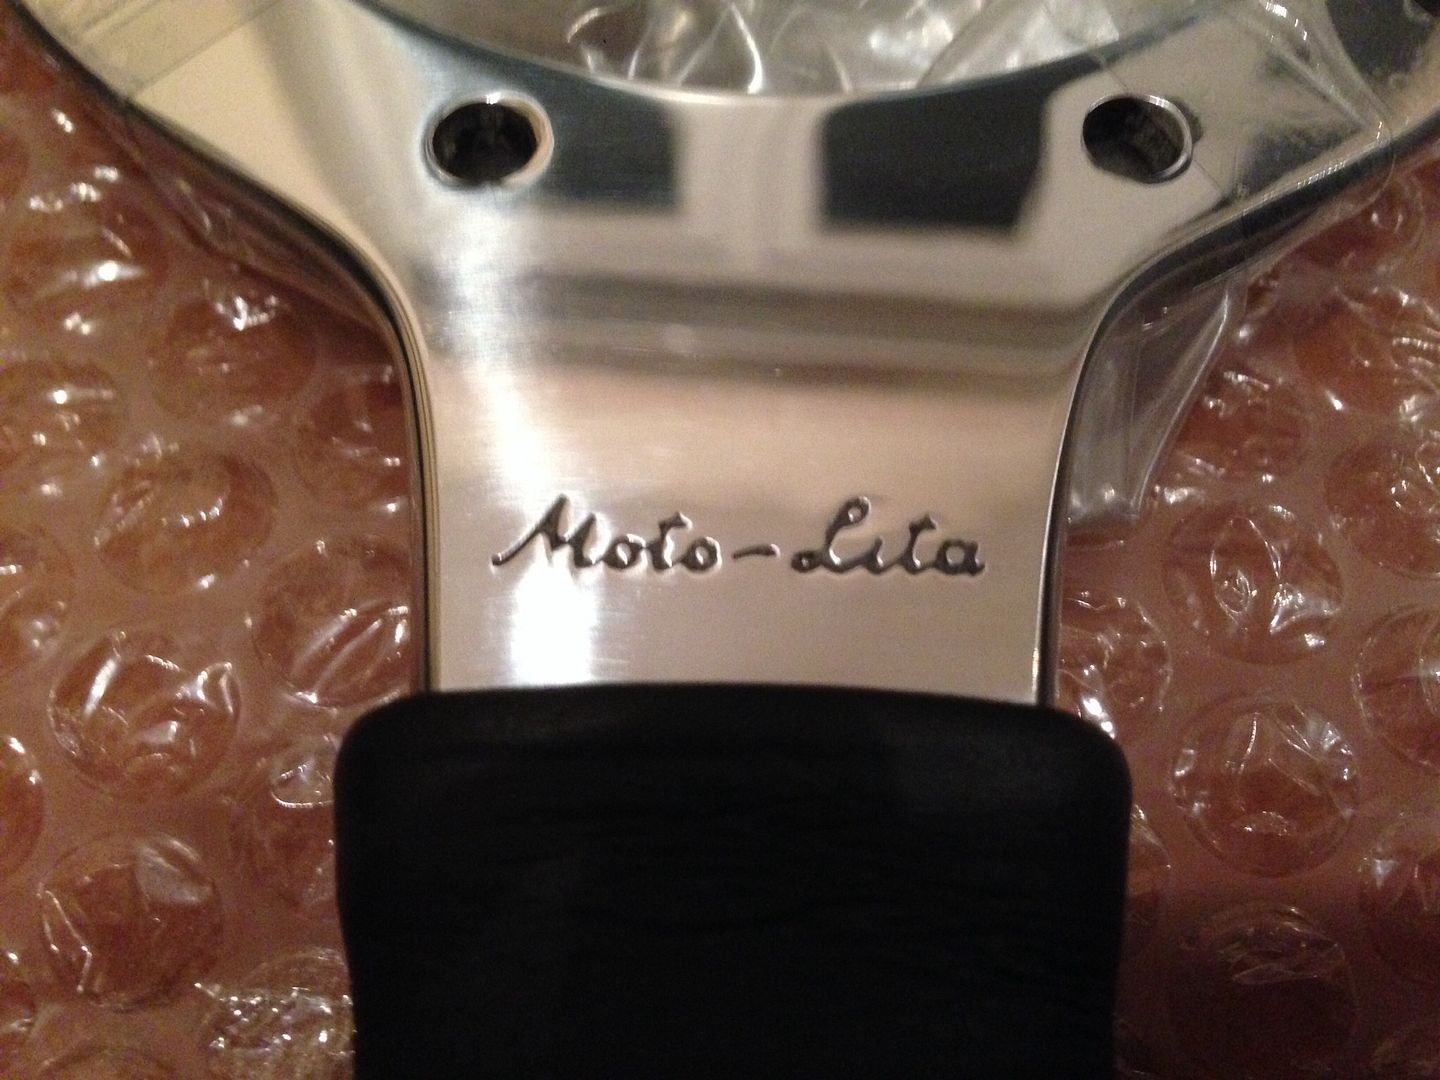
Not cheap but will finish off the interior nicely.

Now, onto the work that's been done. Started with the fuel tank and began the sealing process. First, we ran a magnet around the inside of the tank to remove any media that was left over from the blasting process, here's the results -

65e0807a6dca8f48abe801550db06c1f_zps846e

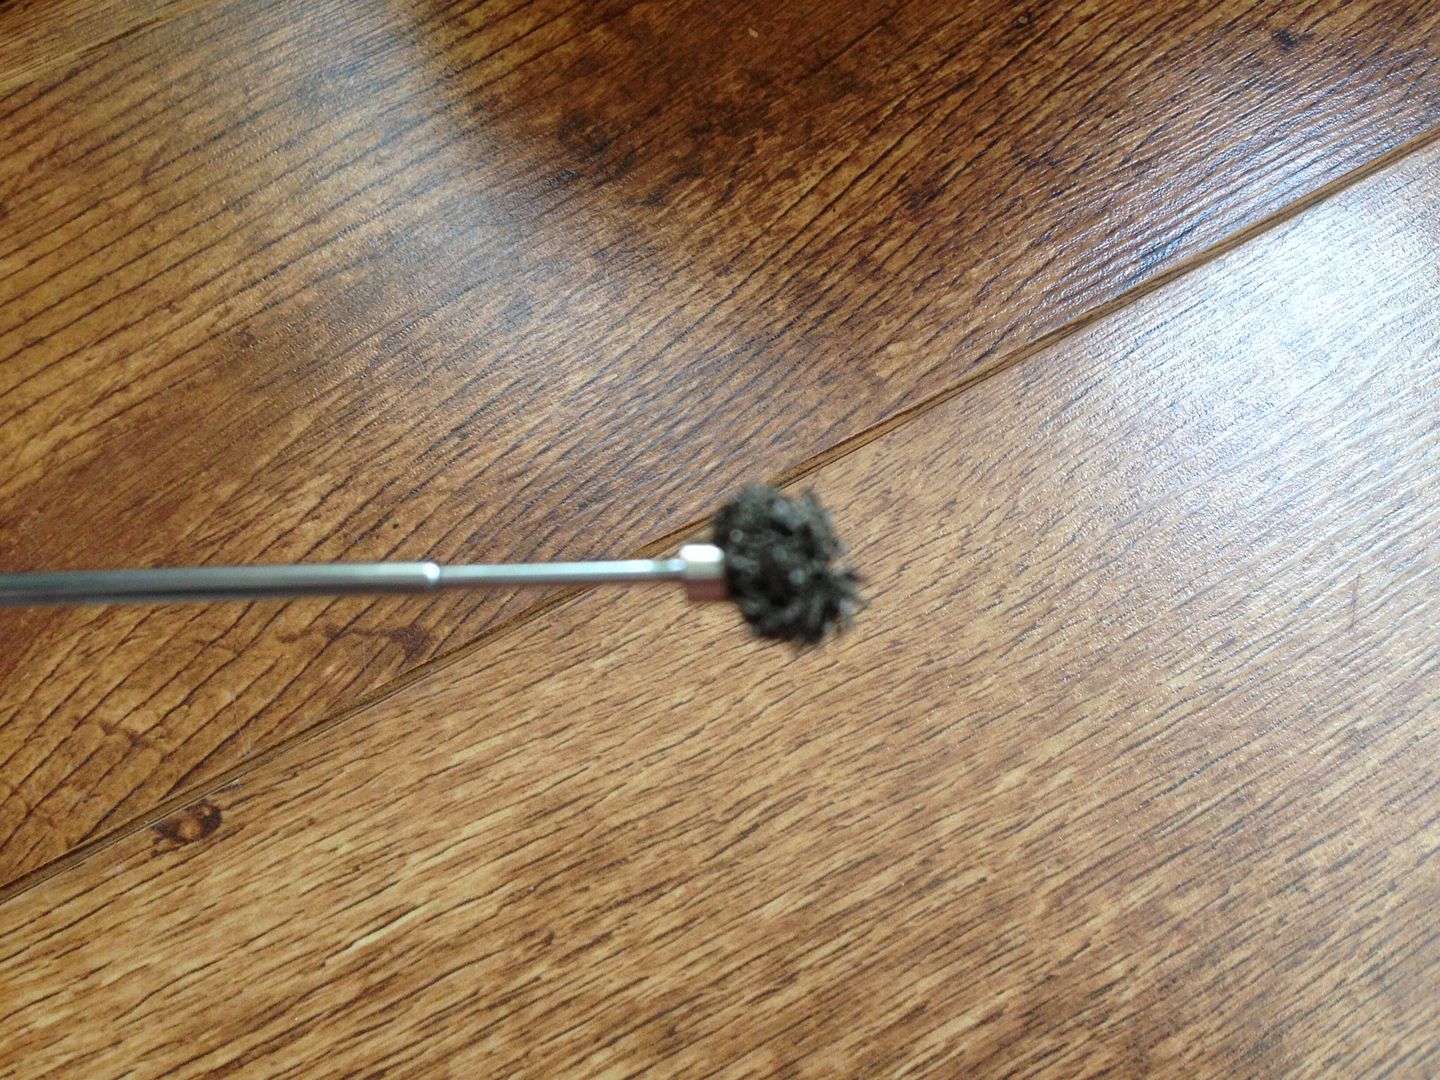
Done that a few times until it came out clean. Next we began the process of degreasing the inside of the tank using the POR 15 cleaning solution. No pictures of this stage as I forgot to take any but I can confirm its brilliant stuff, removes all of the gum and grease from inside the tank.

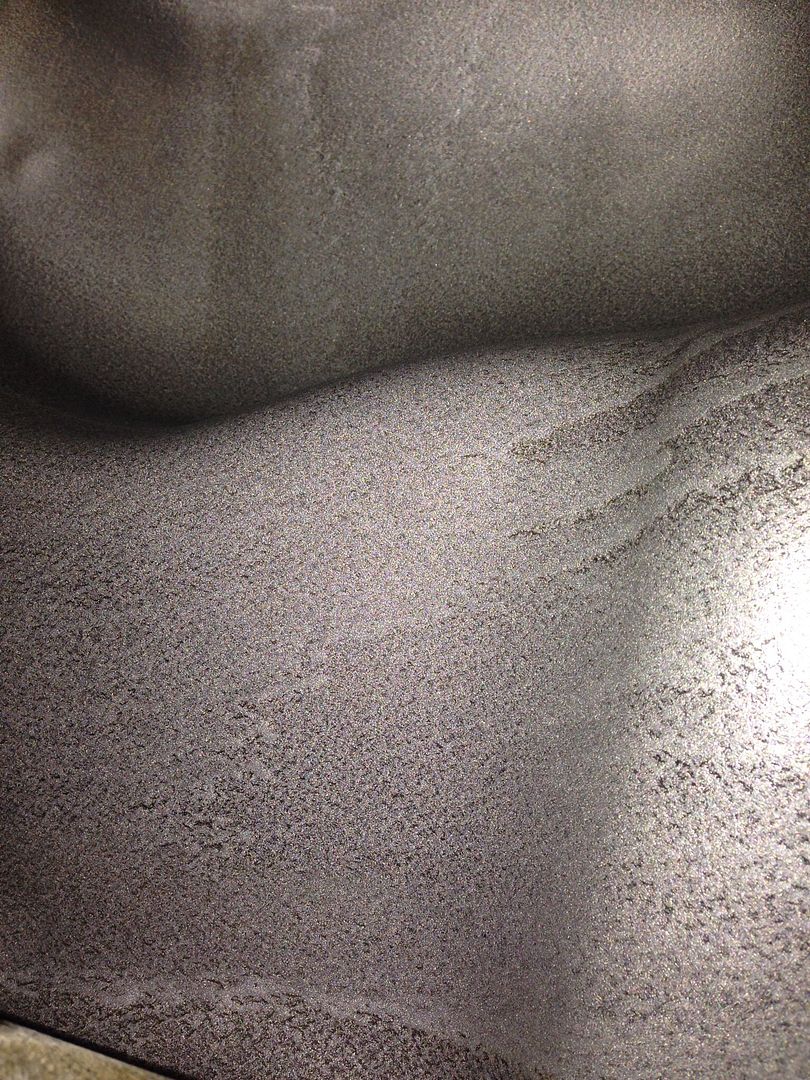
With that done it was time to put the metal prep in, here it is inside -

067C8F86-7F50-452B-9E61-AD315E80C075_zps

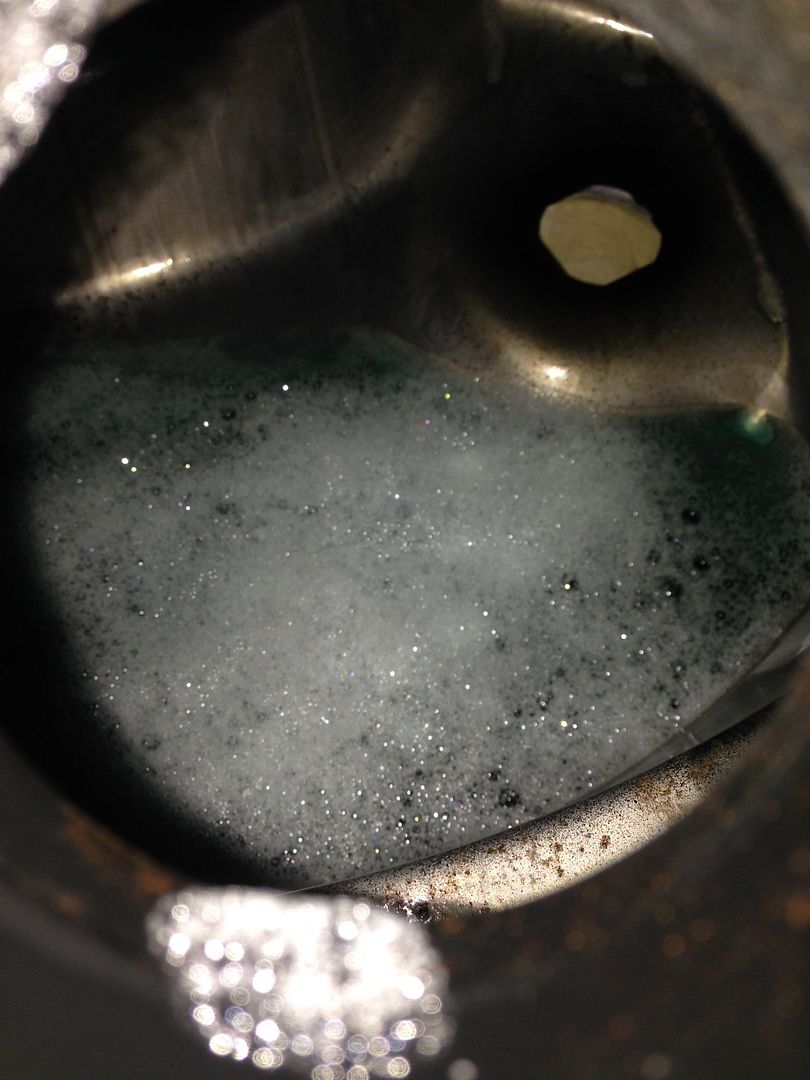
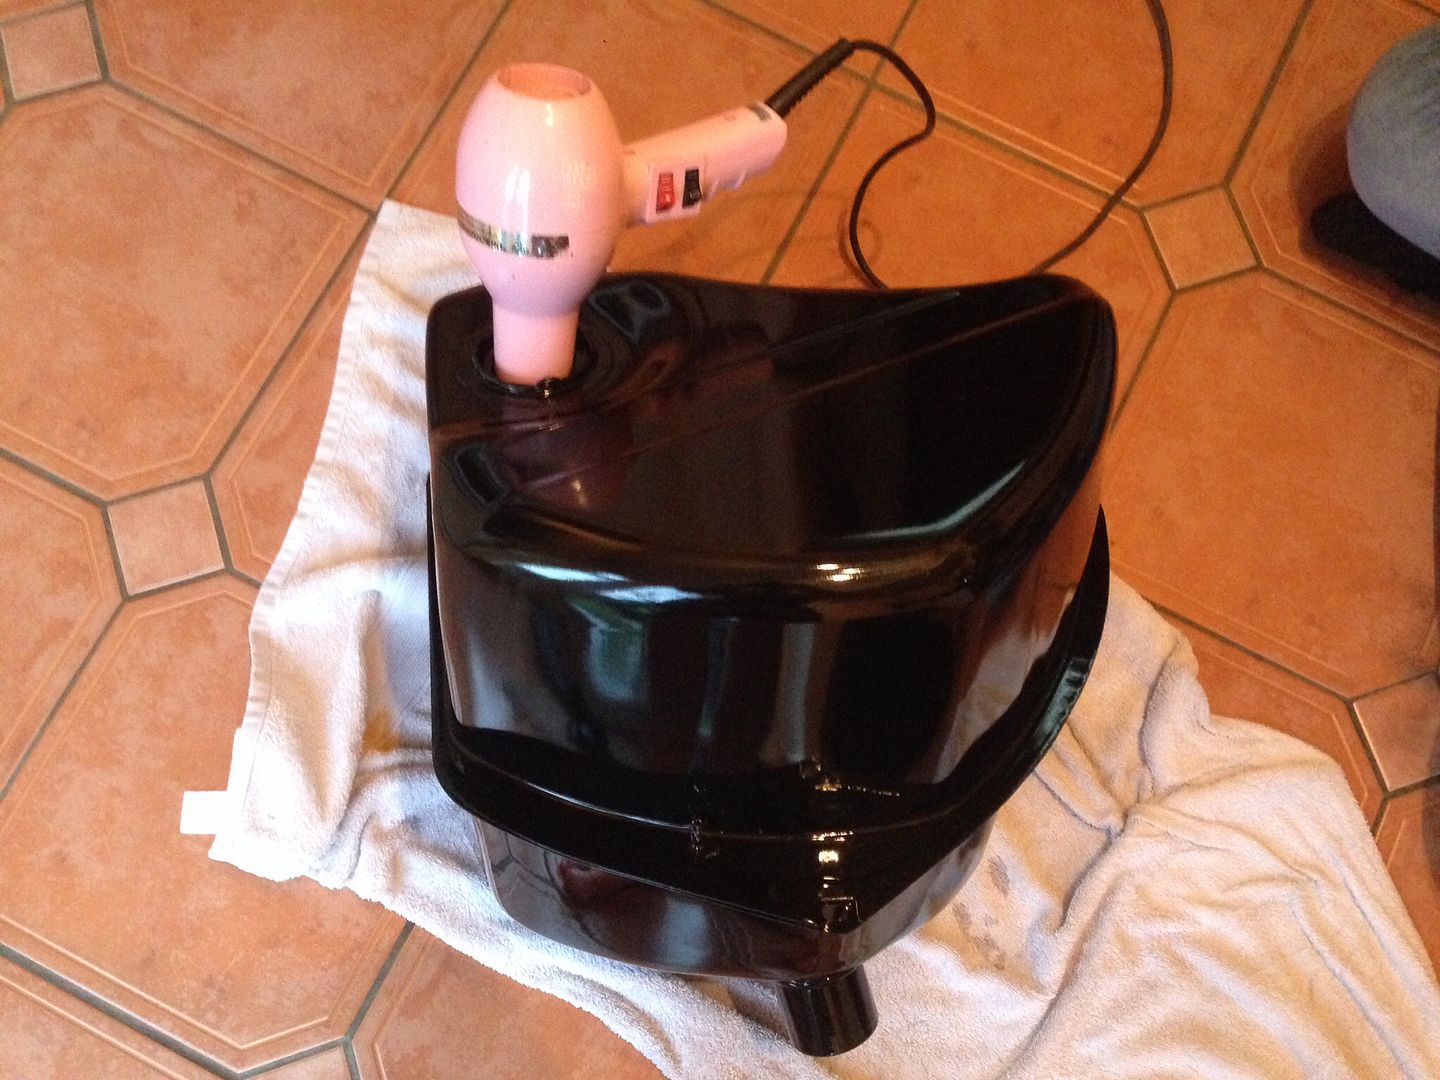
Left that in for around an hour, rotating the tank every 5-10 mins. As you can see from the picture above the metal is clean and rust free. Drained the solution from the tank back into the bottle, as it's re-usable, and placed a hairdryer into the filler nozzle on full blast for a while to dry it out -

c536b421d1ea5b3418ff7940b0b655f9_zpsc288

With it dry we began to pour the sealer in, here it is in liquid form inside the tank -

69C364D5-9210-4B6E-BDF9-6DD5D96B517C_zps

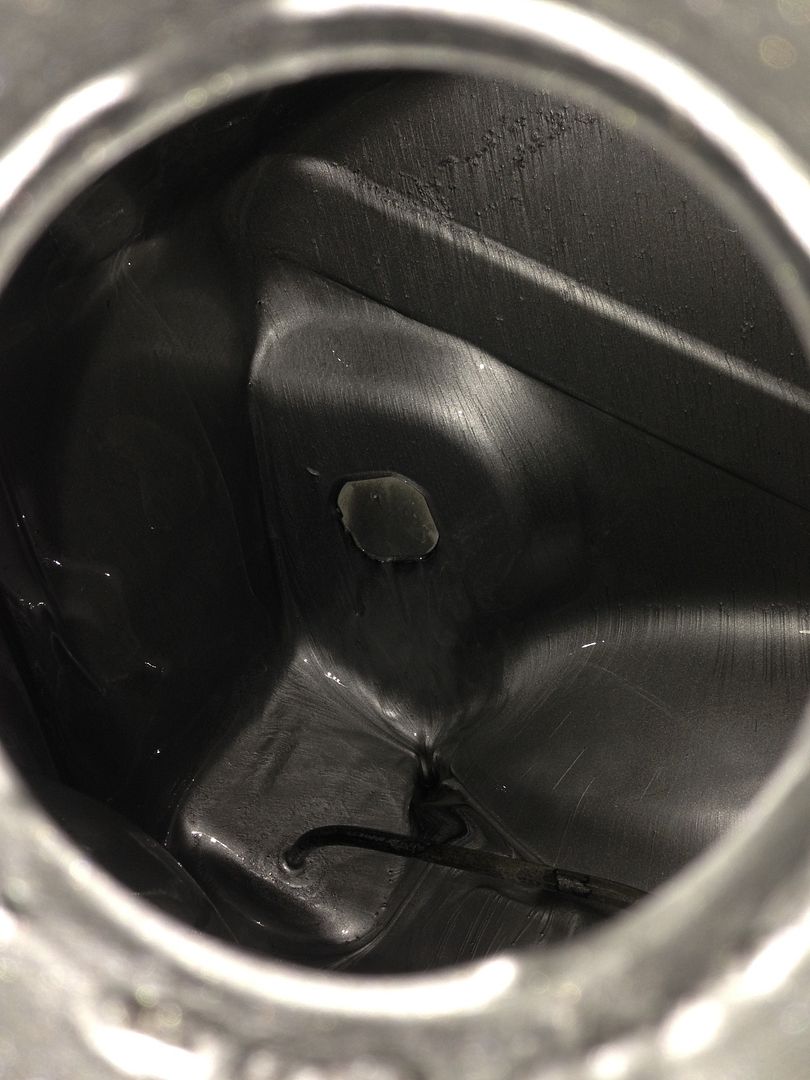
Rotated the tank around a few times and then poured out the excess and left it to dry for a few days, here's the inside now it's dry -

06f1de63404b0fc5dd12ad7b654e4e78_zps3511

Very happy with it, and even more so that we managed to keep the small inline filter inside the tank free from the sealer, so there was no need to break it off.

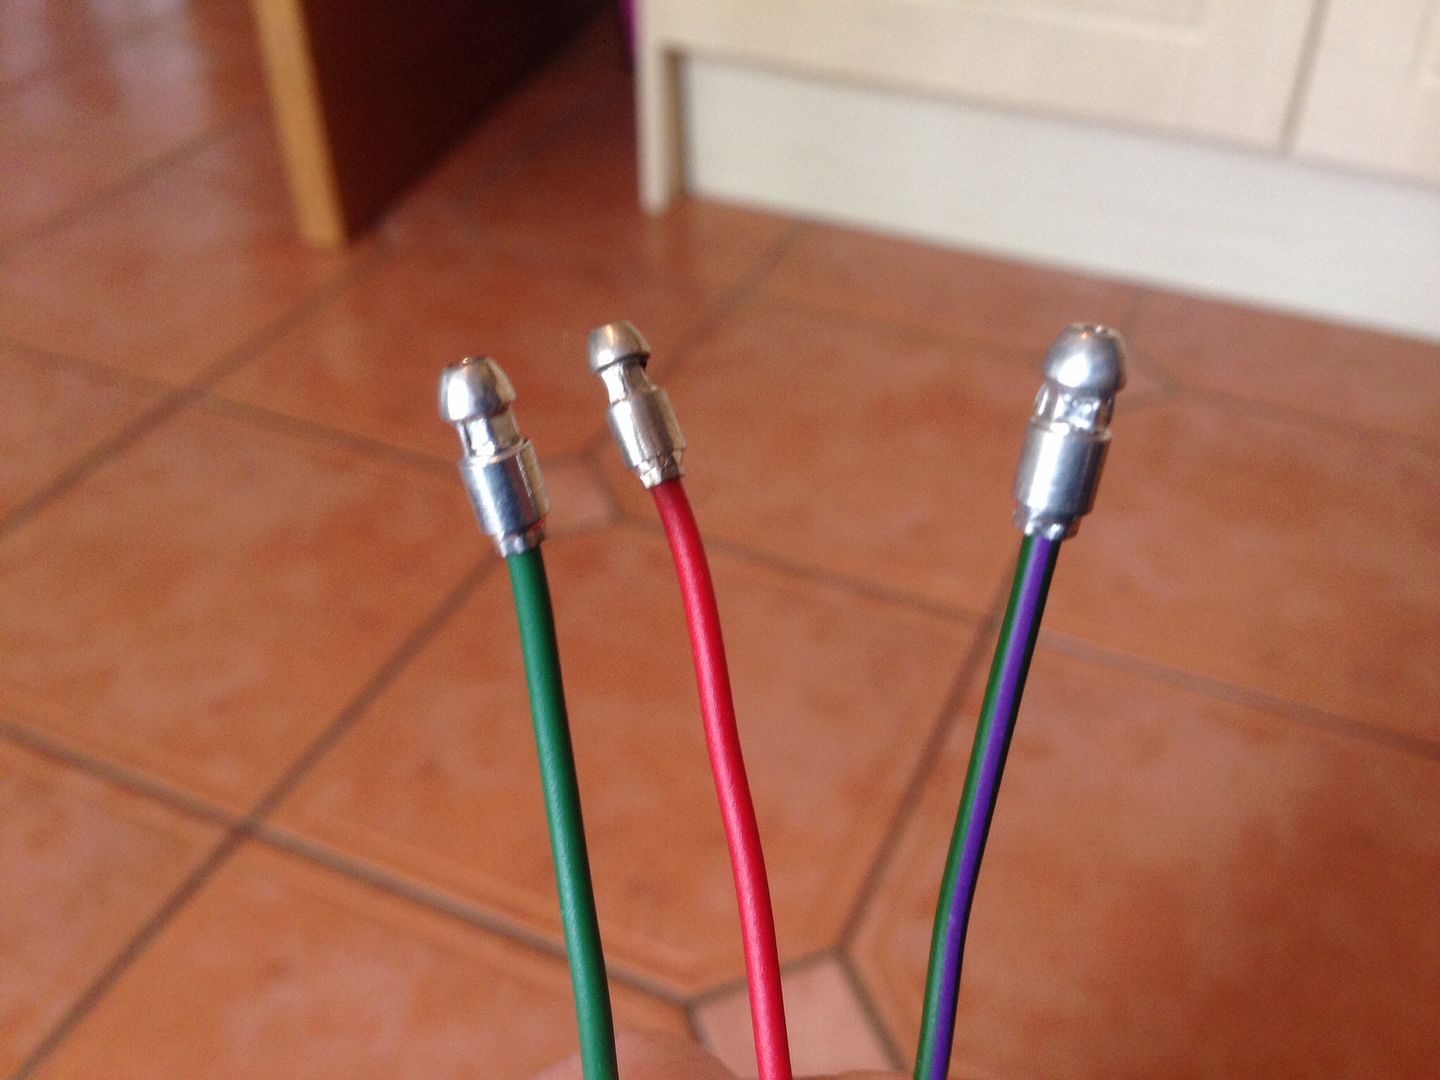
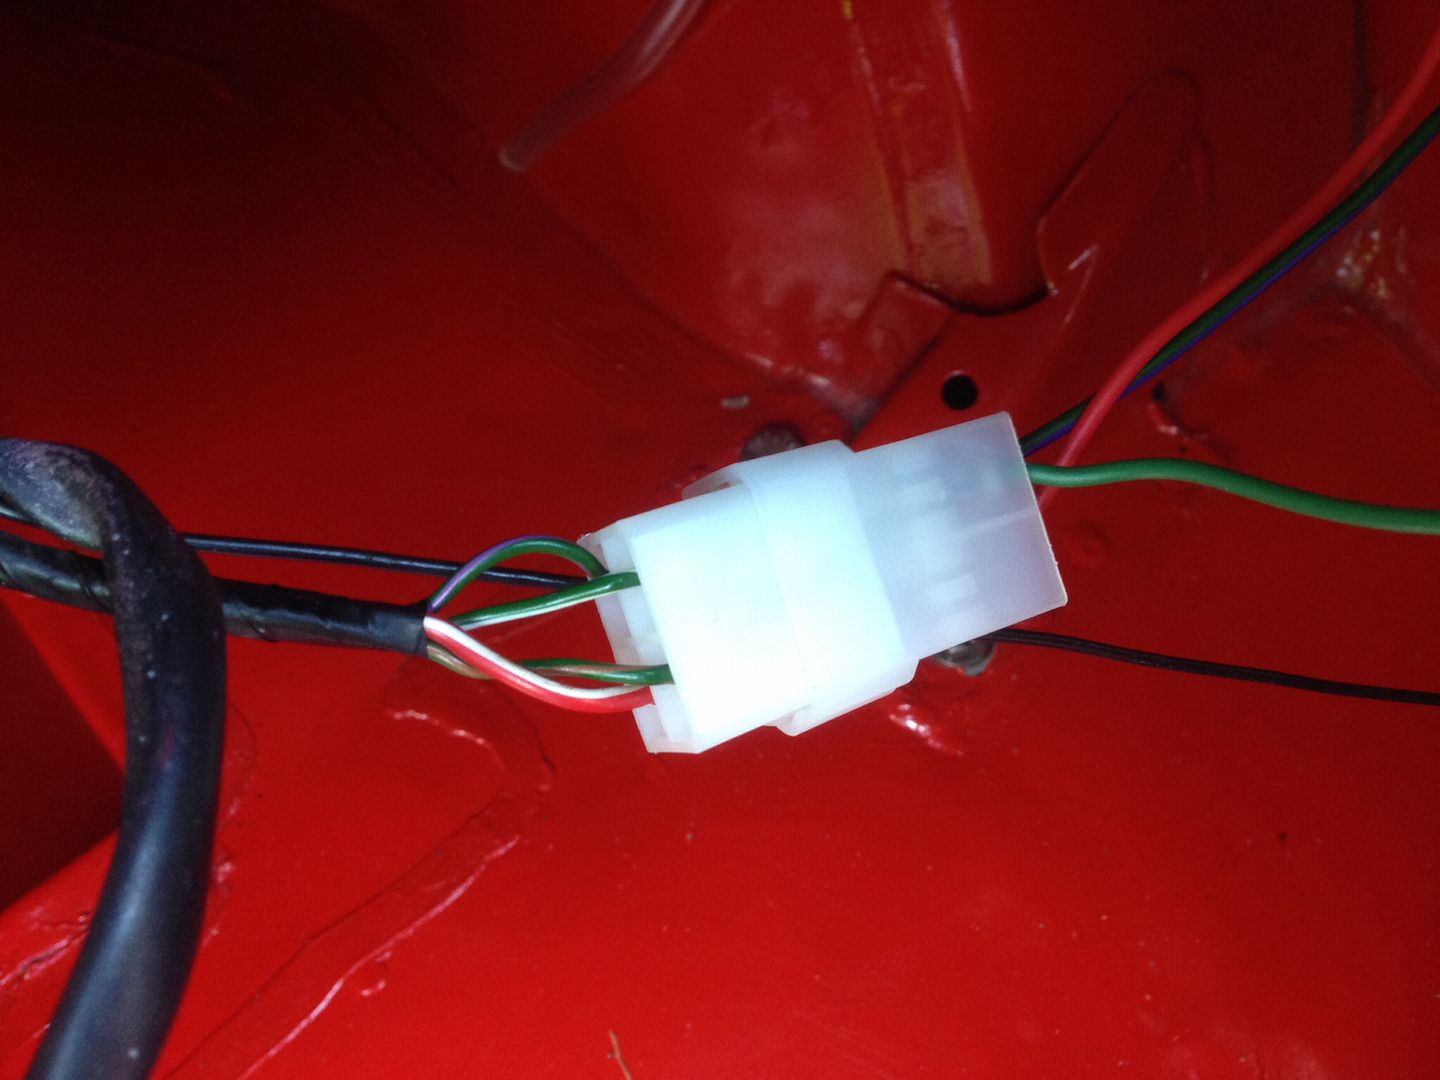
Now, with the tank ready to go in, that meant I had to get the rear lights wired up. As I'm fitting MK2 lights this means they won't fit into my current loom so I've had to change a few things. This is the rear light wiring, they're bullet connectors -

765f29623844348ad1707bdcd20e3663_zpse774

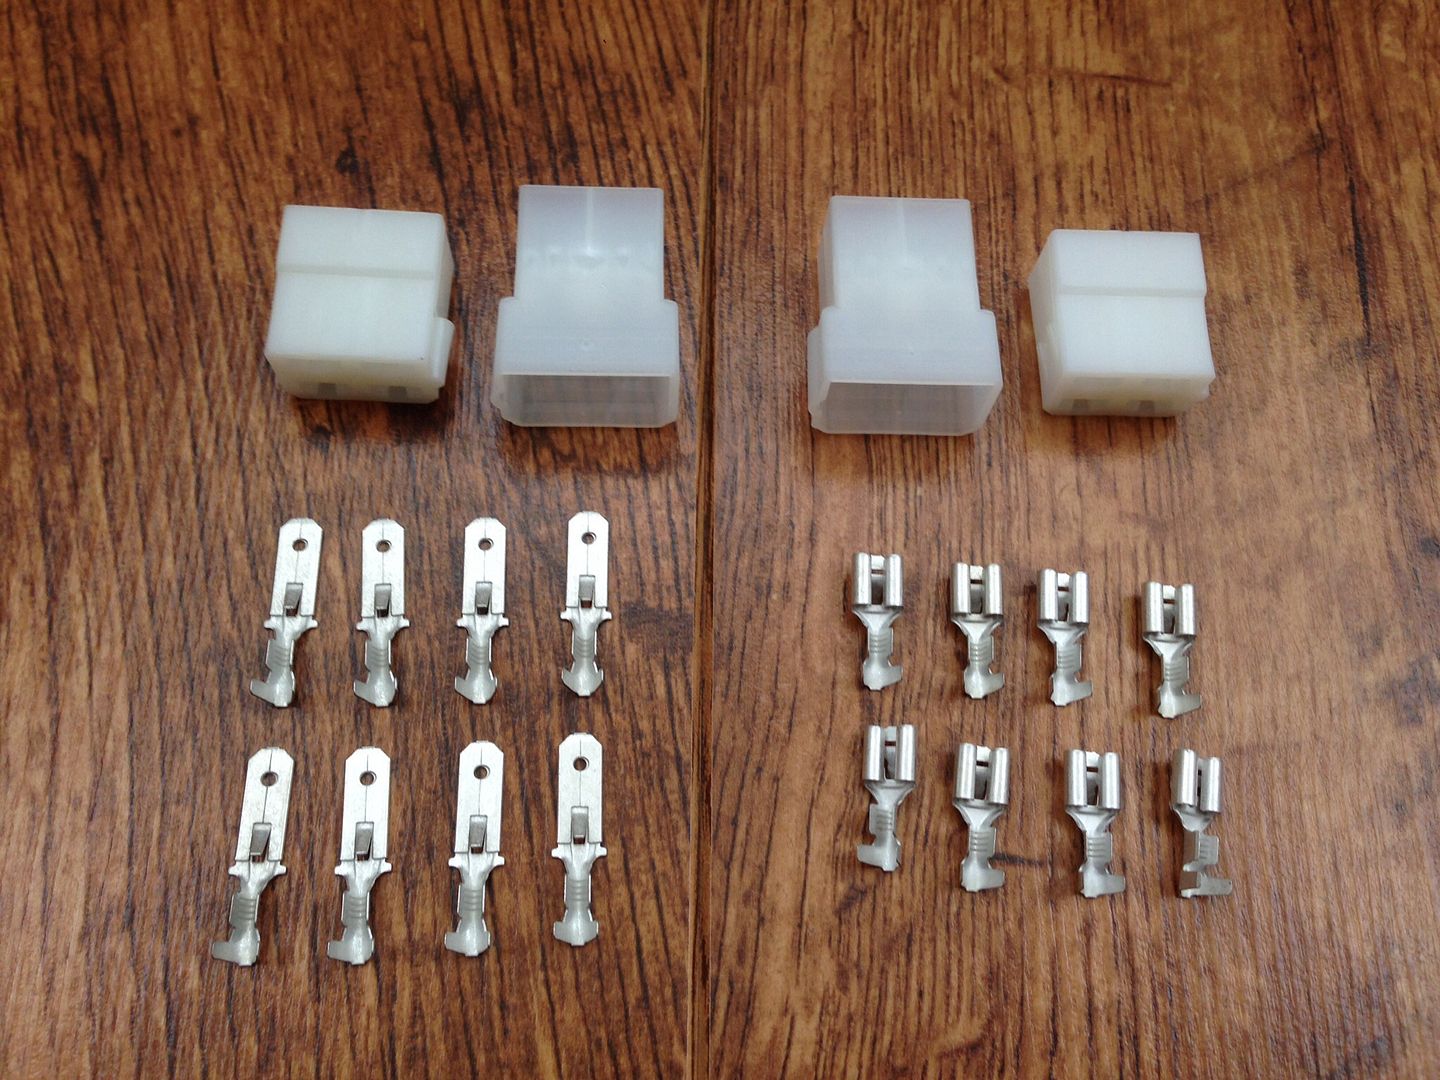
I cut those off and bought some male to female spade connector plugs to replace them -

a476dcd373ff1a8398f7e7b6dab625ea_zps4fde

So, I crimped the male spade end onto the rear light wiring -

fd185653ca724b496950347909cdb33c_zpsaa6f

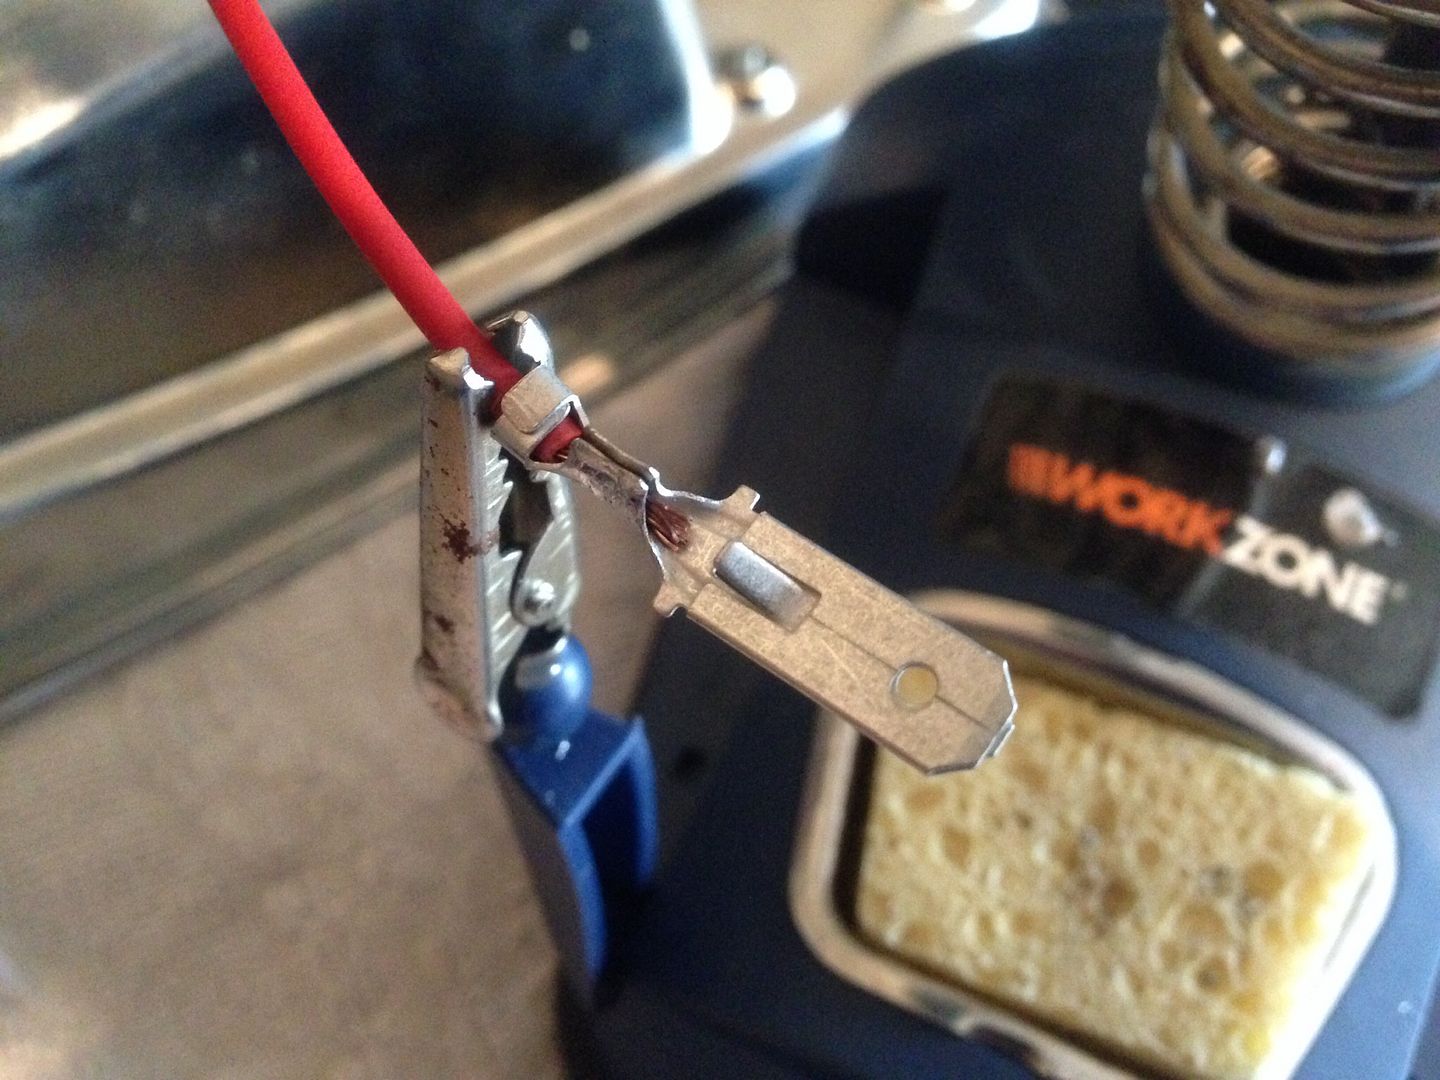
And then added some solder to enhance the strength and conductivity -

ef8f8bd134d875a3efe1a43ea119d4a2_zpsaf86

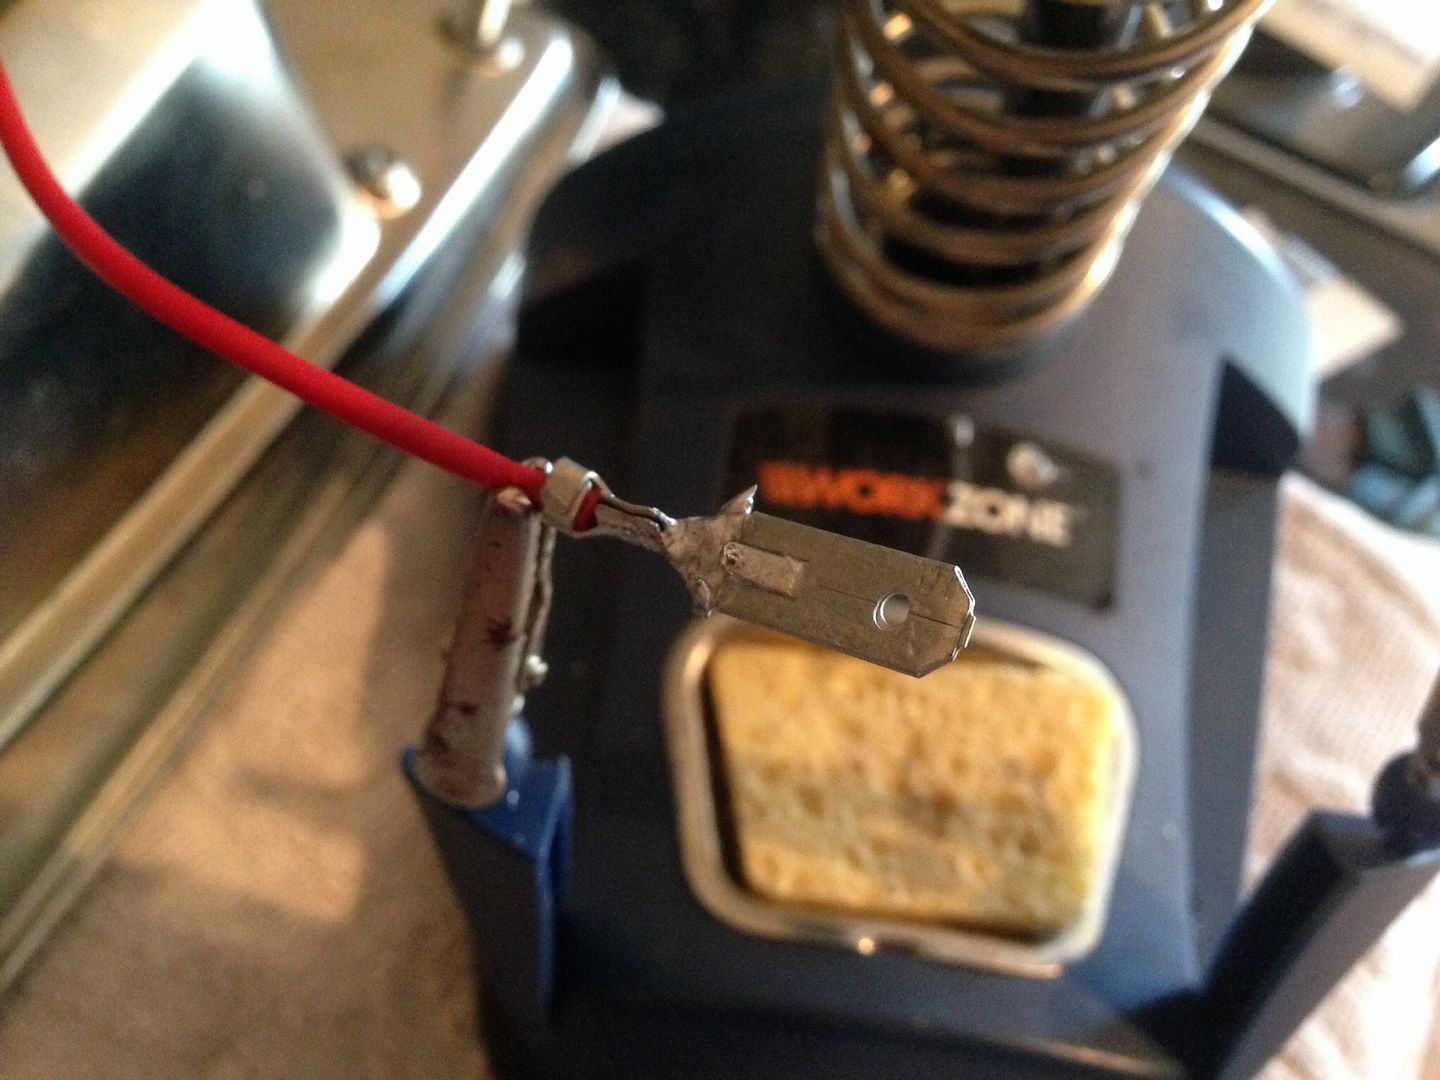
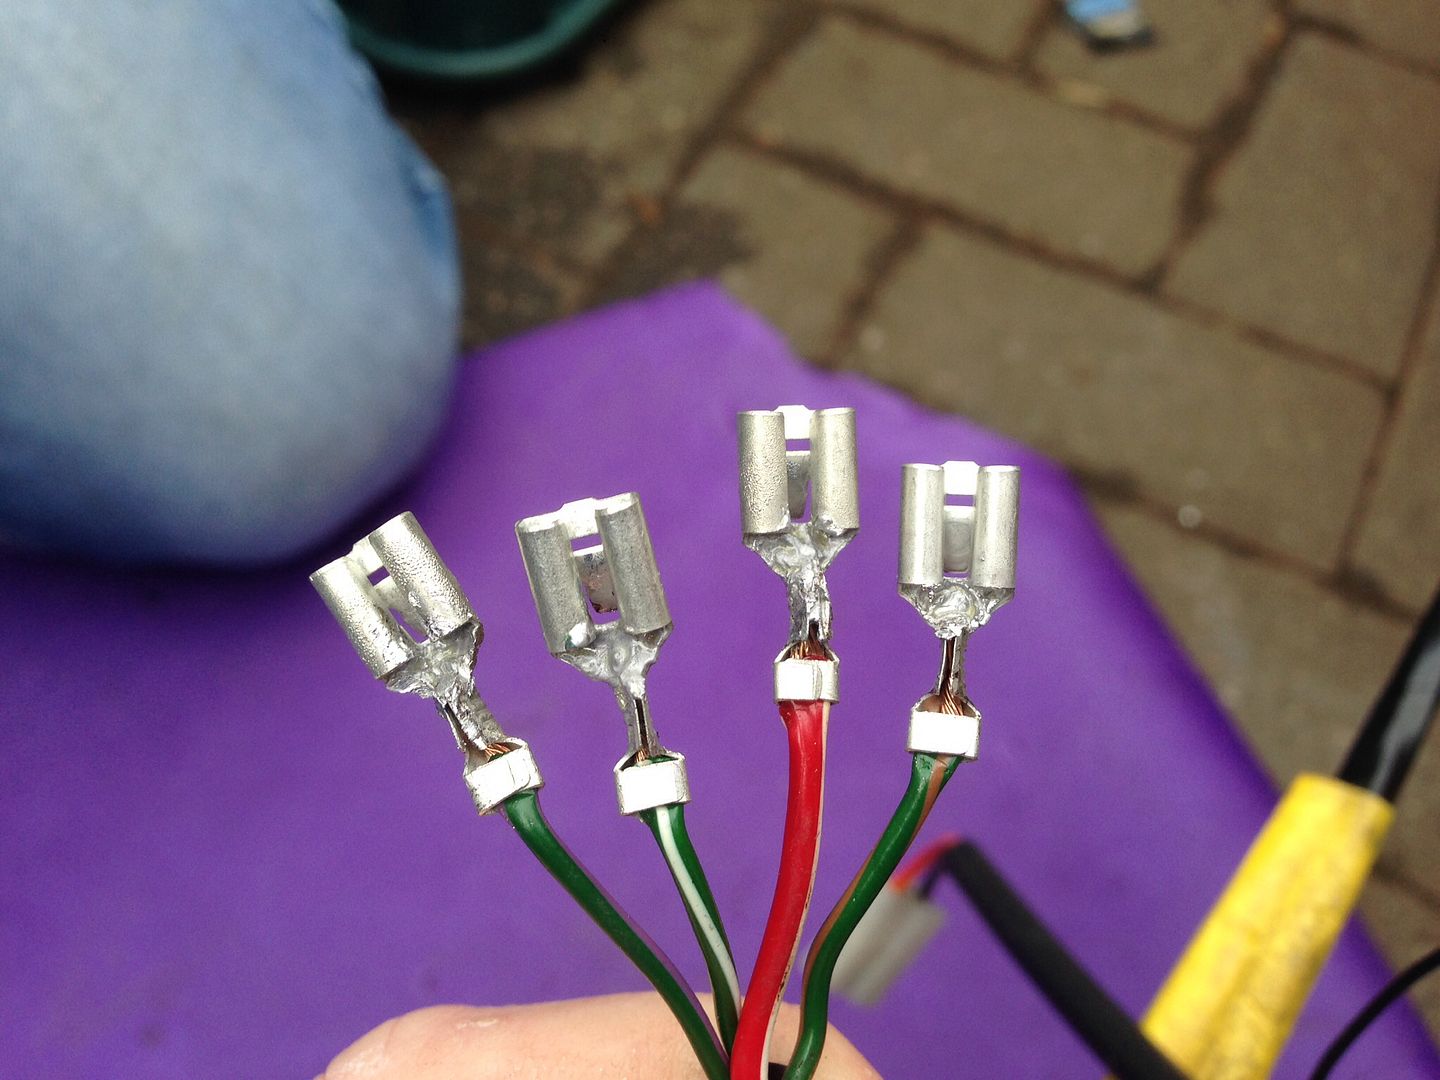
Done the same to the others wires on the rear lights and then went outside to repeat the procedure to the wiring on the loom. Snipped off the factory connector block, crimped on the female spade connector, and then soldered those as well -

6ad56b274a9f78358150572779782b24_zps51bd

Pushed the connectors into the plastic housings and then plugged them together -

19b8a7f9c127a601570c1d9c57ad089a_zpsec28

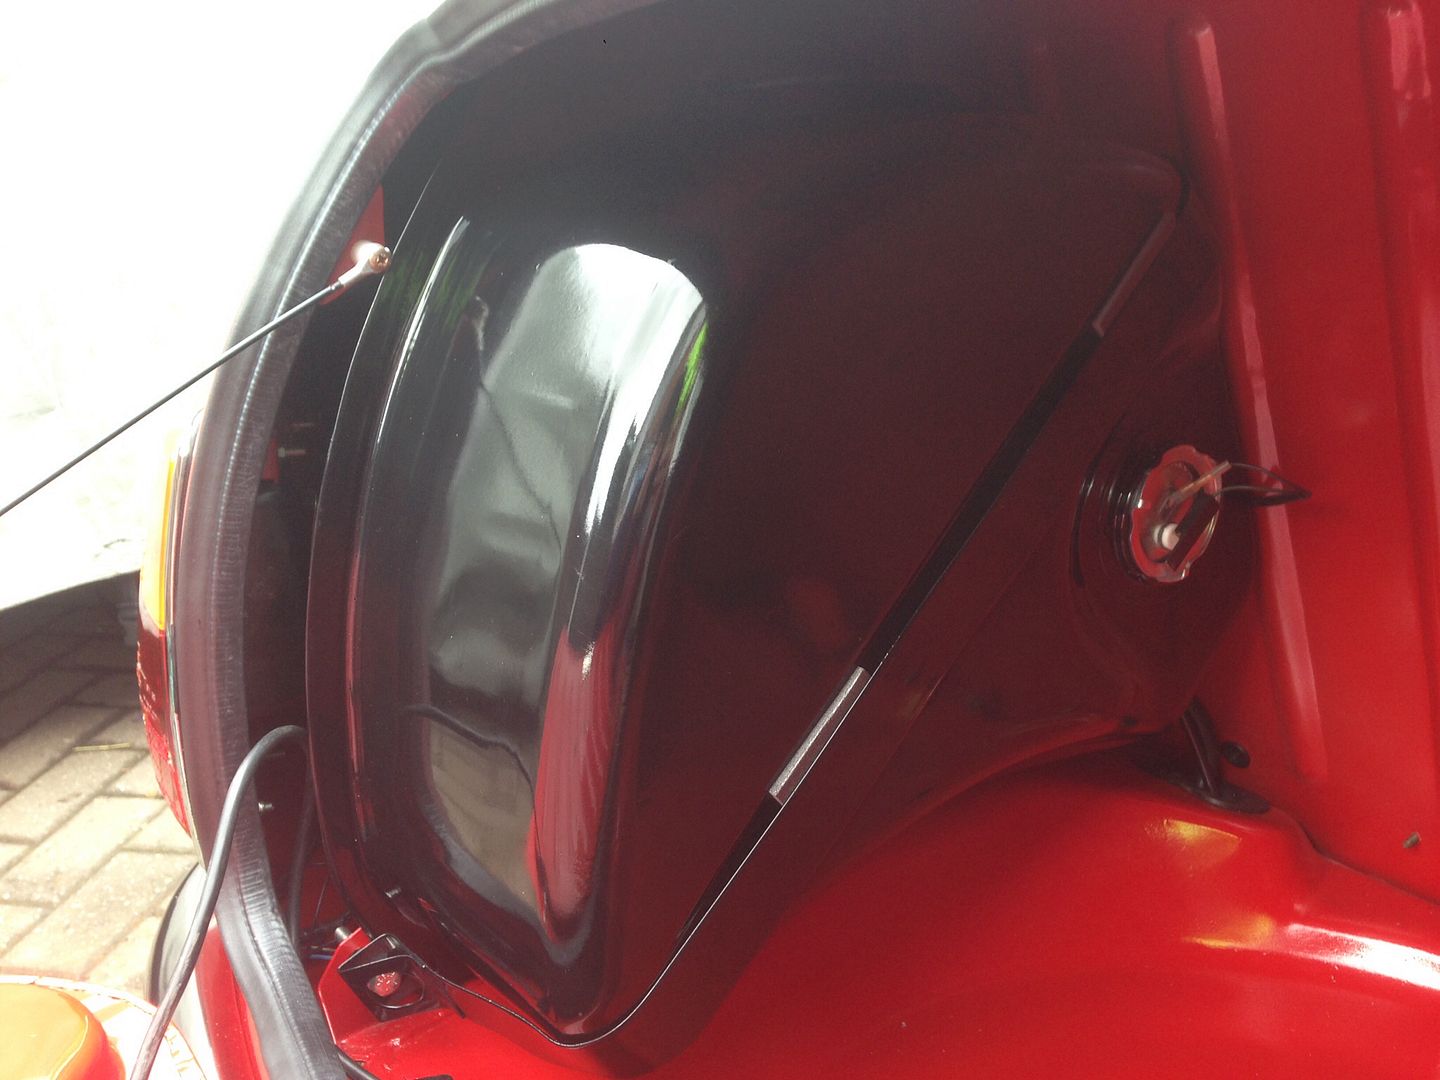
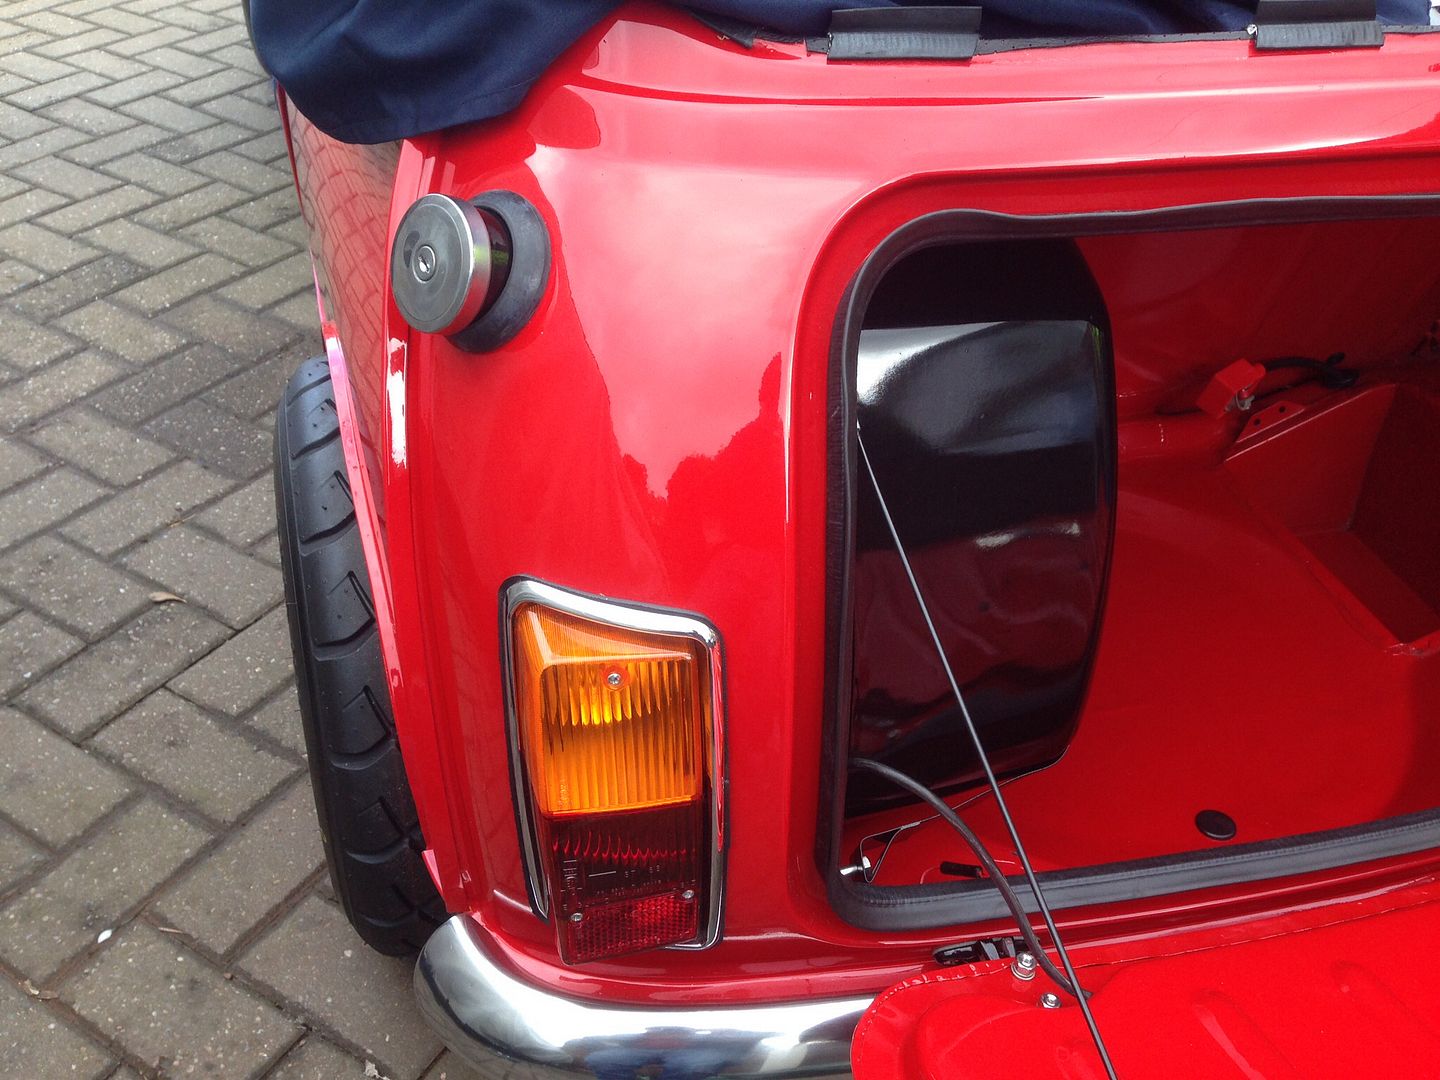
With that done we put the tank in, such an awkward job and not made any easier with the fear of damaging fresh paint. Anyway, we got it in eventually, I've replaced all of the securing nuts and bolts with stainless alternatives -

856d2b2fbdd415aa8dcd8a09a97cd27c_zps3c20

34d9a35b405290394a42f354100311ff_zps4841

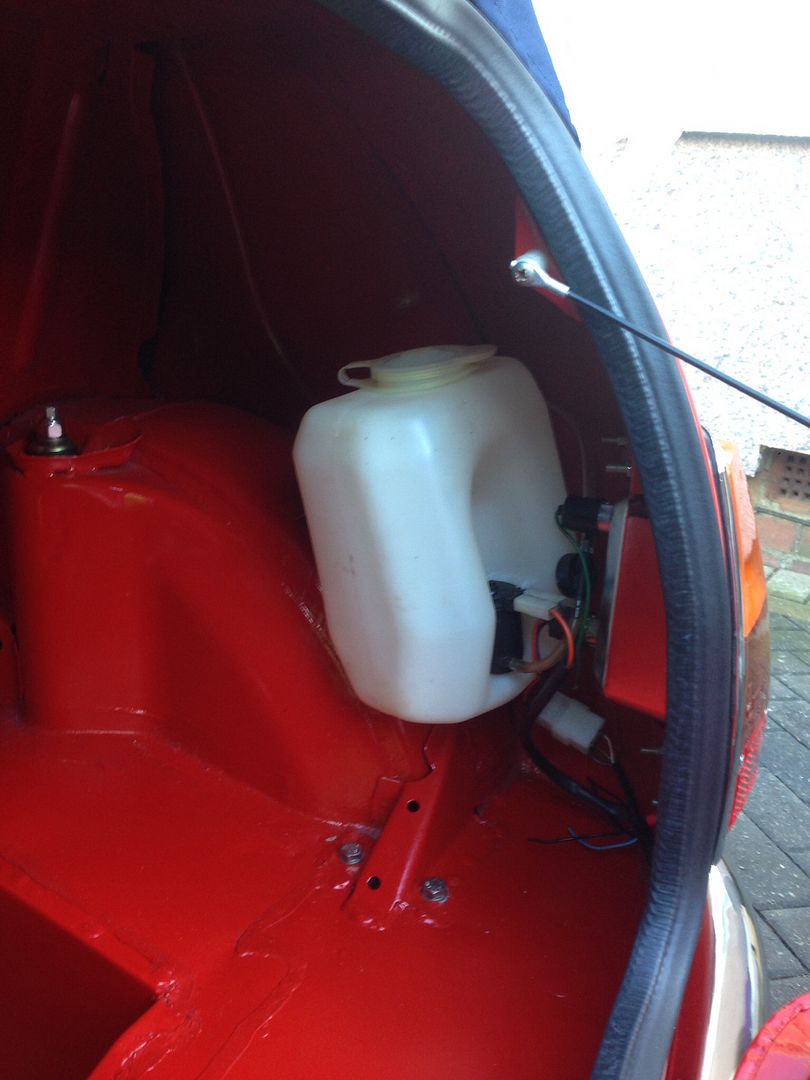
Washer bottle cleaned, back in and connected up -

2fb329e735c2ac7b68419f058a394541_zps7620

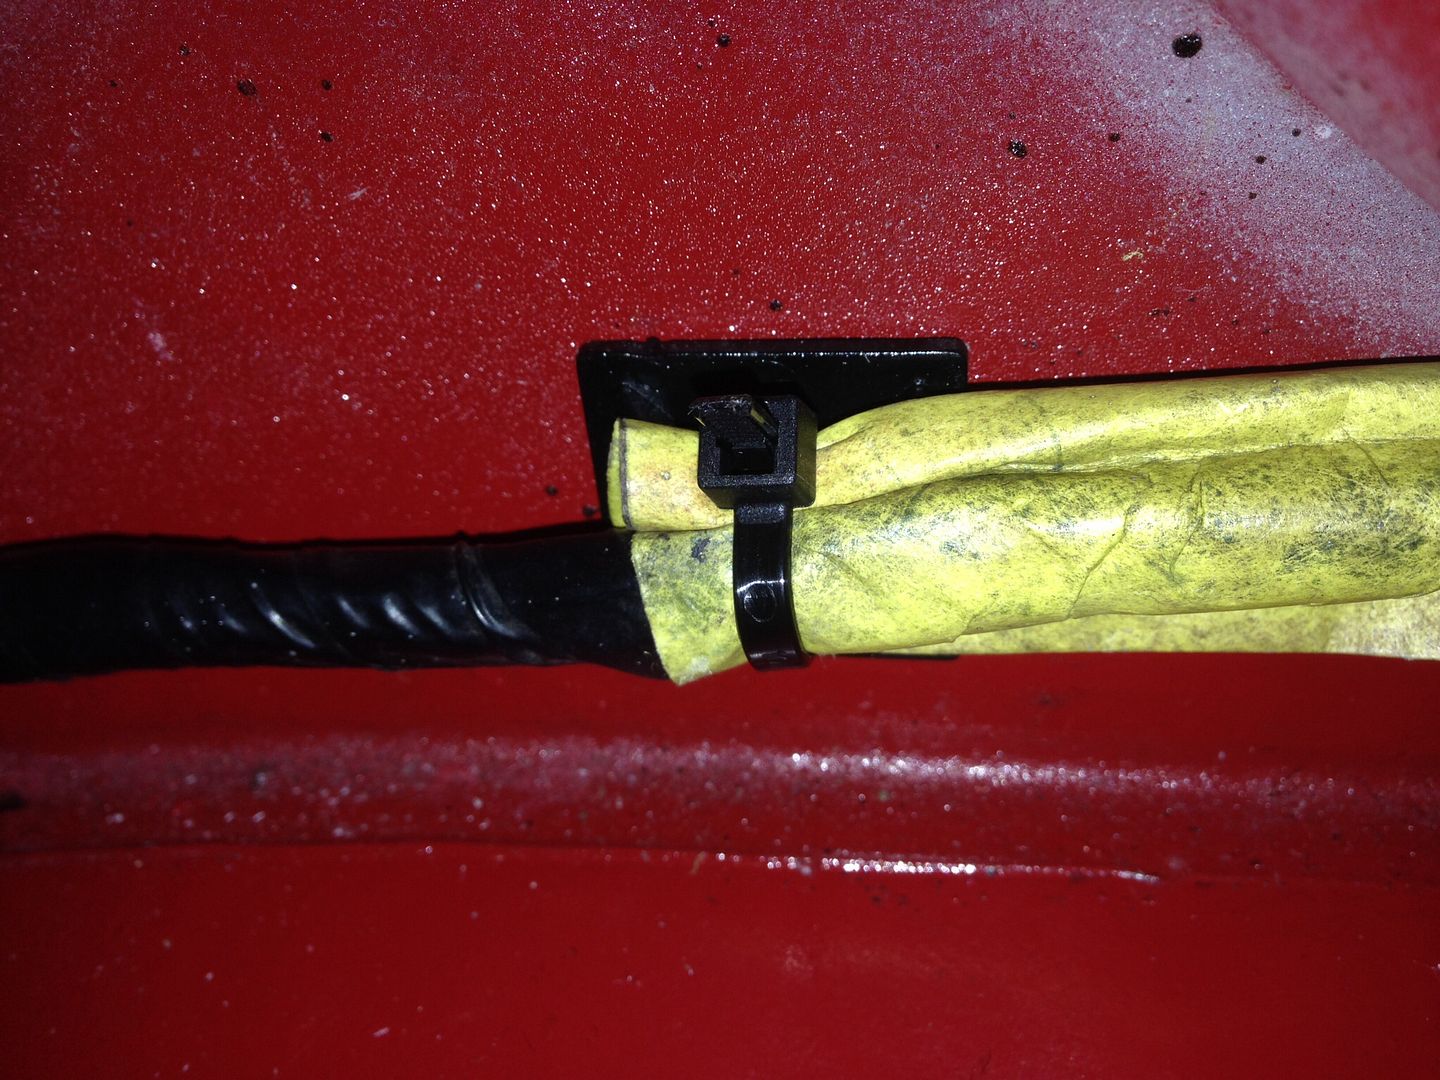
We also secured the loom to the boot floor using the zippy clip plastic blocks I bought -

3e655383b5f3b80d0ca5889aa866f074_zps2969

c214f3f9a65106addeed8da11a7b4b21_zpsc43b

Plumbed in the new braided fuel hose -

4710eb8983bcde1232188886960f67d0_zpsb601

4DC8355F-AE3E-448F-AC73-7129D174EBB1_zps

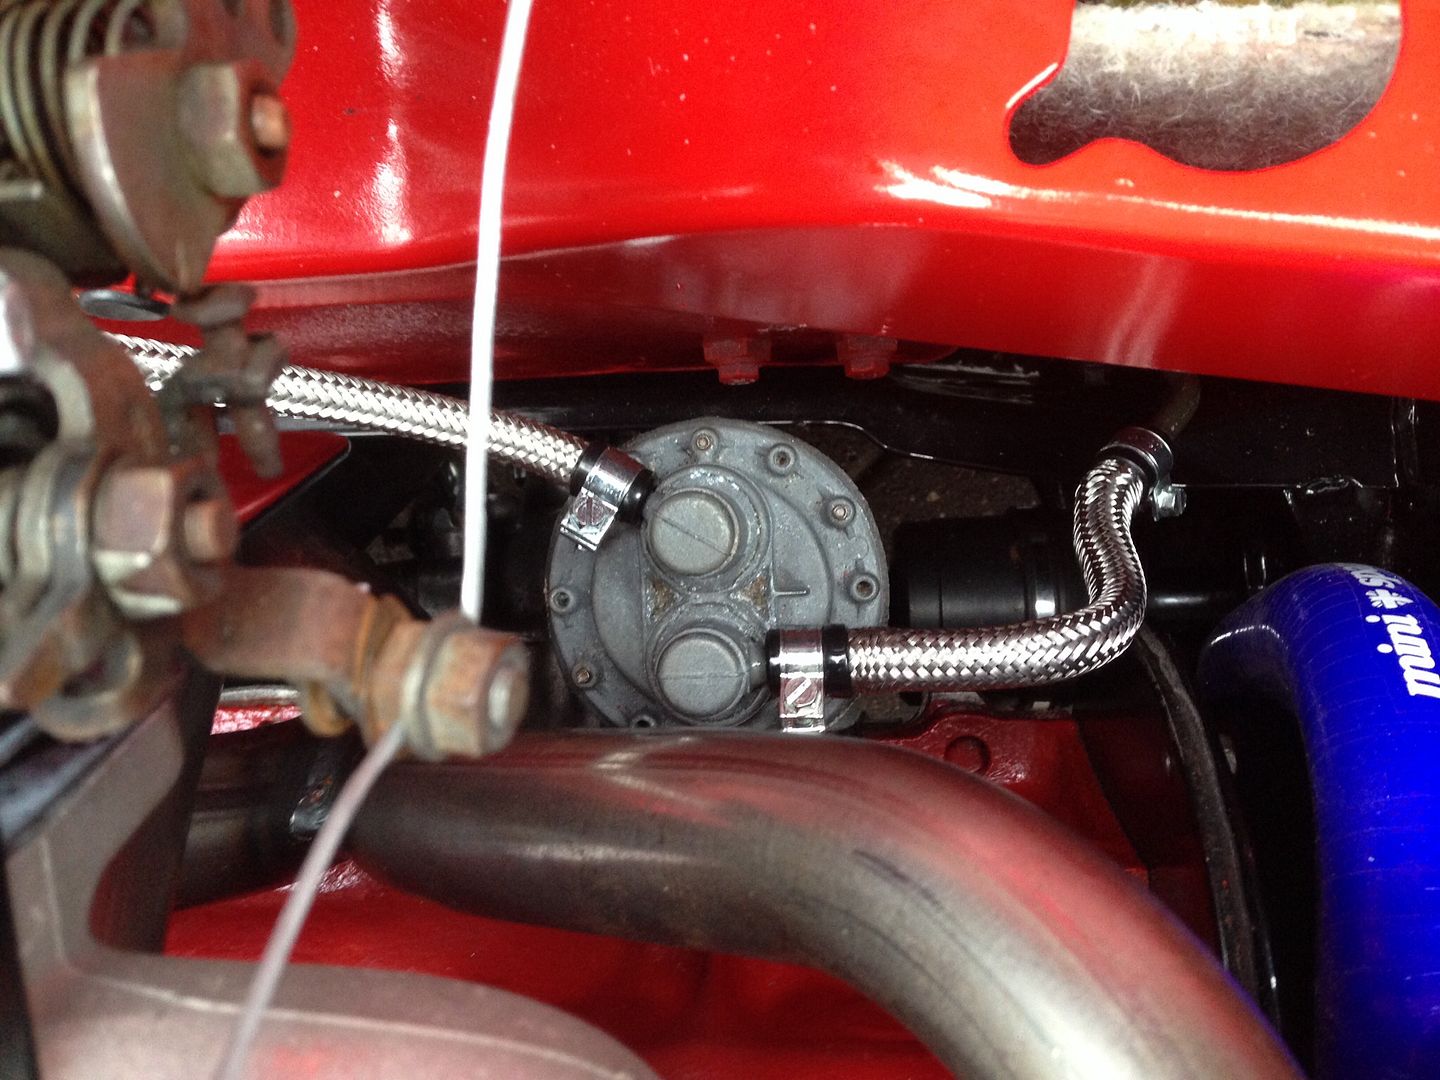
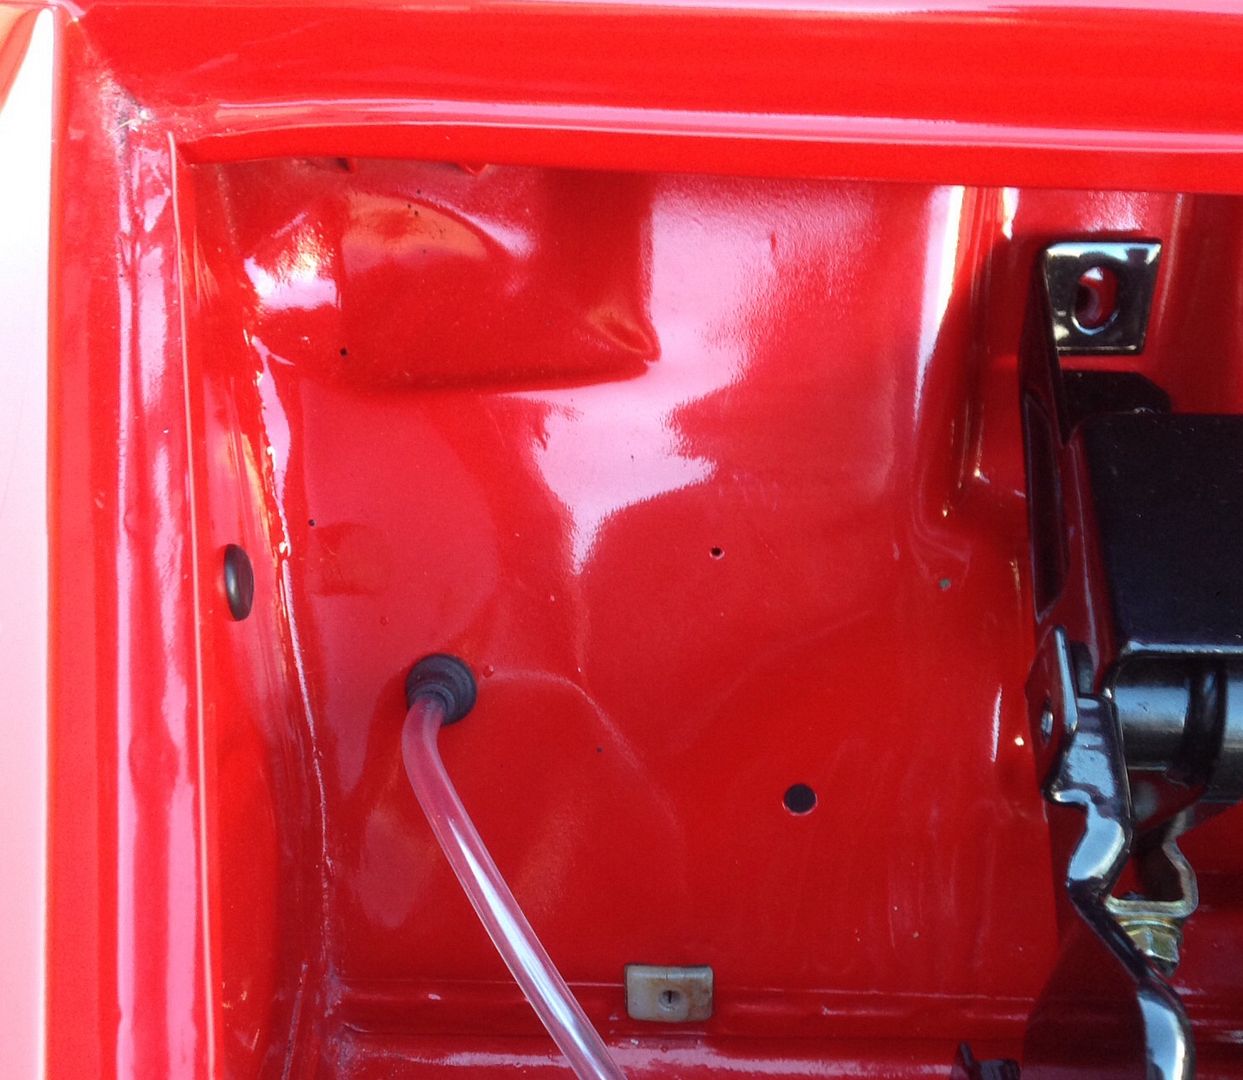
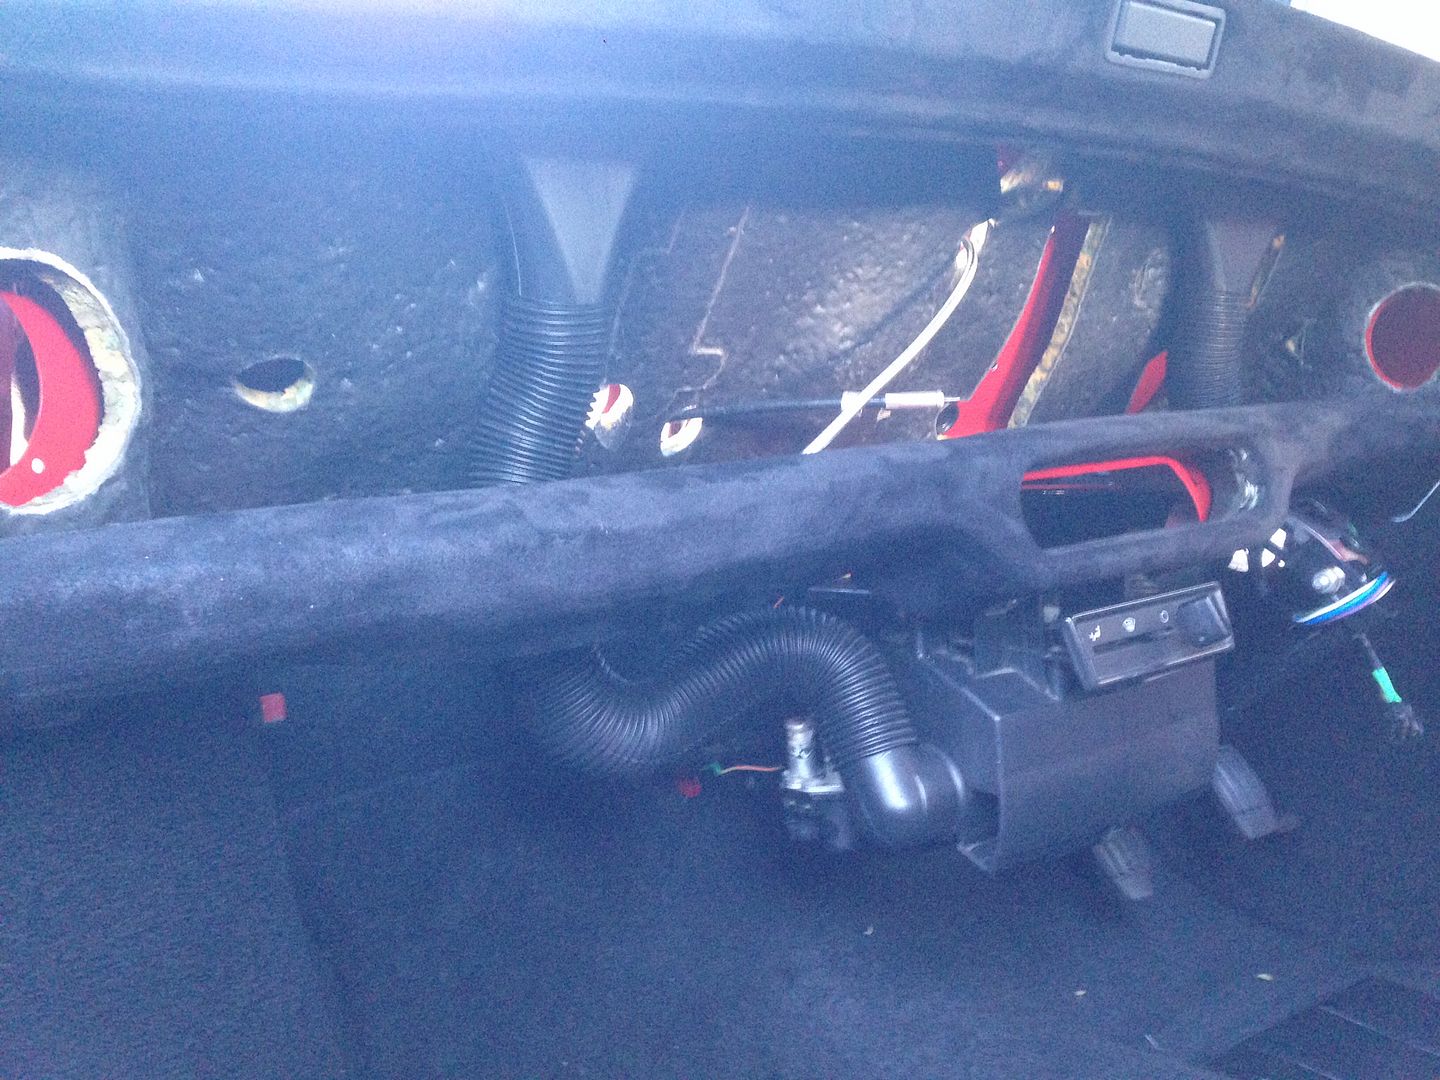
And also fitted the bulkhead sound deadening, as well as the braided oil hose and speedo cable you can see poking through -

902bf48d343f0cd291461290a483e0f7_zpsdc83

Finally, we fitted the pin that holds the clutch master cylinder and the clutch pedal together, managed to get it into this position with the aid of a pen magnet -

0690436ab8be7feb5fbed88690adc7f5_zps5784

And then using a hammer and a long flat head screw driver we tapped it home and slipped in the split pin. Looks/sounds pretty simple you'd think, it's everything but that believe me. NEVER AGAIN :lol:

Anyway, that's all the progress thus far, may crack on with refurbishing the main loom tomorrow.

Jay.

Edited by big-jay, 21 February 2015 - 11:41 PM.


#567 1590gilbert

1590gilbert

    On The Road

  • Noobies
  • PipPip
  • 47 posts
  • Location: chesterfield
  • Local Club: dcmoc

Posted 22 February 2015 - 07:55 PM

Where did you get the connectors from for the rear lights?

Love this build, its fantastic quality.

#568 Rocket.

Rocket.

    One Carb Or Two?

  • Members
  • PipPipPipPipPipPipPip
  • 1,441 posts
  • Location: UK

Posted 22 February 2015 - 08:32 PM

Attention to detail on this build is awesome especially for a first build ! Keep up the good work

#569 big-jay

big-jay

    Super Mini Mad

  • Members
  • PipPipPipPipPipPip
  • 518 posts
  • Location: Birmingham
  • Local Club: British Mini Club

Posted 22 February 2015 - 09:19 PM

Where did you get the connectors from for the rear lights?
Love this build, its fantastic quality.


Cheers bud,

I got them from here - http://www.ebay.co.u...=item45ea57dde8

Jay.

#570 big-jay

big-jay

    Super Mini Mad

  • Members
  • PipPipPipPipPipPip
  • 518 posts
  • Location: Birmingham
  • Local Club: British Mini Club

Posted 22 February 2015 - 09:19 PM

Attention to detail on this build is awesome especially for a first build ! Keep up the good work


Thanks mate !


Also tagged with one or more of these keywords: roundnose

2 user(s) are reading this topic

0 members, 2 guests, 0 anonymous users