Jump to content


Photo
- - - - -

Clutch Disengagement Issue - Cosworth Bda Mini

engine

  • Please log in to reply
16 replies to this topic

#1 cooperbloke

cooperbloke

    Passed Test

  • Noobies
  • PipPip
  • 33 posts
  • Location: Mildenhall

Posted 01 October 2026 - 10:15 AM

Good morning all. It's been a long time since I’ve posted in here, but I do constantly use it as a reference. The assembled knowledge base in this forum is amazing and sets it apart from others. Thank you.


With that, I would like some guidance myself now please. I have built a 1299cc Cosworth BDH ‘screamer’ on a modified remote-type Jack Knight dog box using an original one piece Gordon Allen steel crankshaft. Both the engine and the gearbox have been fully checked and rebuilt. Over the summer I’ve installed it my spaceframe Mini and now I’m struggling to get the clutch to fully disengage so I can cleanly select a gear. I know it’s a dog box so ‘on the move’ selection may need to be aggressive, but I can’t disengage the clutch to get first (or reverse) to get moving.


Here is a list of the equipment fitted and the efforts I’ve taken to get the clutch to disengage sufficiently. The Mini has an adjustable Tilton pedal box. The clutch pedal stop screws are set for maximum stroke.  This pedal box was working well with the previous A-series engine and rod-change 'box. The clutch arm, bearing carrier, both clutch arm clevis pins and the slave cylinder are new. I’ve fitted an adjustable clutch pushrod and it’s set so the CSC piston is fully retracted for maximum stroke. The throw-out nuts are temporarily backed out (so they have no influence on max clutch operation.) I’ve adjusted the clutch arm stop-bolt to have minimal clearance for maximum operation. I’ve bled the clutch – there’s no air in system. In fact, the clutch arm operates immediately with no ‘slop’.  I’ve spaced the bearing on the carrier away from the cover so there’s minimal clearance to the diaphragm bearing plate. There was originally a 9mm gap! 


The following do not have any bearing on clutch operation, but I found them interesting enough to share. The flywheel on the crank relies on the taper only – there is no flywheel keyway. The taper on the crank and in the flywheel centre are unique and not the same as a standard Mini taper. The arrangement does not have a ‘C’ washer or thrust plate for the primary gear. This unit was originally competitive in motorsport in Sweden ‘back in the day’. I bought in UK but had been fully dismantled.


My feeling is that the machined height of the three ears on the pressure plate may need to be adjusted, but I'm inclined to think it must have been correct at one point in time. I'm confident the parts I have are all original to this engine and 'box, but I can't be sure there was nothing missing...


Does anyone have any more suggestions? Happy to provide any additional photos if required.

Thank you in advance! 


Steve

Attached Files


Edited by cooperbloke, Yesterday, 03:45 PM.


#2 Spider

Spider

    Moved Into The Garage

  • Admin
  • PipPipPipPipPipPipPipPipPipPipPip
  • 15,865 posts
  • Location: NSW
  • Local Club: South Australian Moke Club

Posted 01 October 2026 - 11:02 AM

Lovely bit of kit !!

If I can suggest a starting point here, measure how much movement you are getting on the backing plate, plenty of places you can do that from given your set up. You need a minimum of 1.0 mm. When everything is new and tip top on a stock Mini, they get just on 1.5 mm. If you are running a paddle type Clutch Plate, you can get away with less.

This will help guide you where you need to look.

Given that you're essentially using the flywheel fit (it seems) on the taper to set the primary gear end float, it maybe that the primary gear is getting pinched.


#3 cooperbloke

cooperbloke

    Passed Test

  • Noobies
  • PipPip
  • 33 posts
  • Location: Mildenhall

Posted 01 October 2026 - 11:29 AM

Lovely bit of kit !!


Given that you're essentially using the flywheel fit (it seems) on the taper to set the primary gear end float, it maybe that the primary gear is getting pinched.


Thanks Spider! 


That is a very good suggestion. When I got it back, the machine shop had cleaned up the flywheel taper - it looked brand new. 

I wonder if they took sufficient material off that the flwheel is now fractionally closer and has indeed pinched the primary gear. Even the slightest pinch would cause it it to drag and give me the disengagement concerns I have.


Thank you my friend.  


#4 stoneface

stoneface

    Speeding Along Now

  • TMF+ Member
  • PipPipPipPipPip
  • 435 posts
  • Location: Surrey

Posted 01 October 2026 - 12:49 PM

Hi Steve,

Good to see you're making progress. You might remember me as I emailed you with oil pump and thrust bearing advice.

Although my mini is using a standard mini taper I too don't have the standard C and thrust washer.

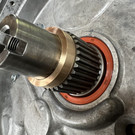
I have a bronze washer between the primary gear and inside face of the flywheel.

Thrust-Washer.jpg

The thickness of this bronze washer took me many hours to obtain with consistency.

I torqued the flywheel many times and set the primary end float with plasti-guage. It took many goes until I was happy that the end float would be as required when torqued up. It doesn't take much difference for the end float to be reduced.

The first engine of this type I built suffered primary drag which got worse as the engine warmed up and the thermal expansion reduced the end float.

Not saying this is your issue but worth considering.


Edited by stoneface, 01 October 2026 - 12:52 PM.


#5 cooperbloke

cooperbloke

    Passed Test

  • Noobies
  • PipPip
  • 33 posts
  • Location: Mildenhall

Posted 01 October 2026 - 03:23 PM

Hi Steve,

Good to see you're making progress. You might remember me as I emailed you with oil pump and thrust bearing advice.

Although my mini is using a standard mini taper I too don't have the standard C and thrust washer.

I have a bronze washer between the primary gear and inside face of the flywheel.

Thrust-Washer.jpg

The thickness of this bronze washer took me many hours to obtain with consistency.

I torqued the flywheel many times and set the primary end float with plasti-guage. It took many goes until I was happy that the end float would be as required when torqued up. It doesn't take much difference for the end float to be reduced.

The first engine of this type I built suffered primary drag which got worse as the engine warmed up and the thermal expansion reduced the end float.

Not saying this is your issue but worth considering.

Hello again 'Stoneface'! 


I certainly do remember you - your advice about 360 degree thrusts and oil return lines was invaluable during the build - thank you so much.

I feel I should have anticipated this primary gear issue, but now that both you and spider have suggested this possibility, it makes sense. 


Thank you. I'll let you know how it goes! 


#6 Spider

Spider

    Moved Into The Garage

  • Admin
  • PipPipPipPipPipPipPipPipPipPipPip
  • 15,865 posts
  • Location: NSW
  • Local Club: South Australian Moke Club

Posted 01 October 2026 - 05:03 PM

Hey Stoney, nice to see your face mate.


I have contemplated this issue of setting the primary gear end float a few times as I wanted to more away from the C Clip, granted with A Series Engines, and I * think * I came up with a method. An issue here seems to be getting a consistent fit of the flywheel on to the taper.thus leaving an inconstant depth for the primary gear endfloat.


Before fitting the gearbox, I fit up the flywheel, my method here for a long time is unconventional, but I've found it works well as fay as locking the flywheel to the taper, after doing the usual lapping in, I clean the tapers, then I put a lick of a very light oil on the taper (typically 3 in 1), then tighten down the flywheel, the oil film breaks down under the extreme pressure that's created and then the flywheel locks. You can get an idea just how tight here where I remove the flywheel, by going to Youtube and typing in 'LMC5080 DSCN1698 - hopefully that will land you on it. I can't seem to link it here, sorry.


For the C-less fit up, I'll fit and remove the flywheel a few times (3 - 4 usually does it) until I can get constant results, I measure for this on the step between the end of the crank and the outside face of the flywheel boss with a depth micrometer. I then turn up a flat 'setting' washer to that depth,jumping ahead here,  then later when doing a final fit, I'll use that setting washer as a gauge,and fit the flywheel on to that with the bolt in the normal way, then remove the washer,, fitting the standard keyway washer and bolt (with Loctite, no tab washer).  While at the stage of the build prior to fitting the gearbox, I'll set the primary gear endfloat and turn up a spacer piece to go between the inside of the flywheel and the primary gear, fit and test that for final end float.


#7 stoneface

stoneface

    Speeding Along Now

  • TMF+ Member
  • PipPipPipPipPip
  • 435 posts
  • Location: Surrey

Posted 01 October 2026 - 11:19 PM

Hi Spider,


That sounds very similar to my method although I didn't think to use a spacer washer to set the depth, great idea, I'm going to borrow that one.:)


I just measured the depth from the flywheel boss to the end of the crank with nut removed (depth micrometer) to make sure it was always going to a consistent depth on the taper.


I was using a new MED flywheel which I found takes a few goes before the flange settled in the same place.


I also used plasti-guage between the primary and washer to double check the end float. A bit overkill maybe but I wanted to be 100% sure since taking my engine out is not straight forward.


I spent many hours putting the flywheel on and off. I use the large guessworks puller which makes light work of removal although I do like those hydraulic pullers.


Definitely going to use the spacer washer idea and I have the depth written down in my notes so it's easy to make one to suit what I already have.


#8 Exminiman

Exminiman

    Starting My Mini Up

  • Noobies
  • Pip
  • 4 posts
  • Location: Berkshire

Posted 03 October 2026 - 09:11 PM

If it is the flywheel pinching the primary gear, could you remove some material from back of fly wheel?


Great car by the way, is it a BDH?


Edited by Exminiman, 03 October 2026 - 09:15 PM.


#9 stoneface

stoneface

    Speeding Along Now

  • TMF+ Member
  • PipPipPipPipPip
  • 435 posts
  • Location: Surrey

Posted 04 October 2026 - 12:14 PM

Yes you can remove material from the flywheel, or the spacer (if you have one) or the primary gear or thrust washer.


There are many ways to increase the end float but the challenging part is getting a consistent end float when you tighten the large flywheel bolt.


#10 cooperbloke

cooperbloke

    Passed Test

  • Noobies
  • PipPip
  • 33 posts
  • Location: Mildenhall

Posted Yesterday, 03:35 PM

If it is the flywheel pinching the primary gear, could you remove some material from back of fly wheel?


Great car by the way, is it a BDH?


Thanks! Yes, it is a BDH. Not sure why I said 'BDA'. It has a very short stroke crank. 

If I can ever get it in to gear (!) it should rev right round towards 10K.


#11 cooperbloke

cooperbloke

    Passed Test

  • Noobies
  • PipPip
  • 33 posts
  • Location: Mildenhall

Posted Yesterday, 03:42 PM

Lovely bit of kit !!

If I can suggest a starting point here, measure how much movement you are getting on the backing plate, plenty of places you can do that from given your set up. You need a minimum of 1.0 mm. When everything is new and tip top on a stock Mini, they get just on 1.5 mm. If you are running a paddle type Clutch Plate, you can get away with less.

This will help guide you where you need to look.

Given that you're essentially using the flywheel fit (it seems) on the taper to set the primary gear end float, it maybe that the primary gear is getting pinched.


Yes you can remove material from the flywheel, or the spacer (if you have one) or the primary gear or thrust washer.


There are many ways to increase the end float but the challenging part is getting a consistent end float when you tighten the large flywheel bolt.


Thanks. We have a plan. I've just ordered a dedicated hydraulic flywheel puller so once it's all apart again we can work out how much clearance is needed and have one machined accordingly. The shim on mine is very thin compared to your brass one Stoneface. And I too will be nicking the depth washer idea for consistent reassembly and endfloat. I love this forum!  :)

Attached Files


Edited by cooperbloke, Yesterday, 03:43 PM.


#12 GraemeC

GraemeC

    Crazy About Mini's

  • TMF+ Member
  • PipPipPipPipPipPipPipPipPipPip
  • 7,474 posts
  • Location: Carnforth

Posted Yesterday, 04:32 PM

I think you and I have talked about these cranks with no c-clip in the past Spider as I tooo find them a nightmare to get consistent results.

The depth washer sounds a good solution, however what is to stop you tightening the flywheel bolt just that little bit further when you swap out the depth washer for the keyed one? It would be harder to make, but a keyed washer with a build in depth stop would be nirvana!


What really irks me, is the idea of not having a c-washer has come about to solve a problem created with afternarket cranks. If these were designed/made better there is no issue with having the grooves for the clip


#13 Spider

Spider

    Moved Into The Garage

  • Admin
  • PipPipPipPipPipPipPipPipPipPipPip
  • 15,865 posts
  • Location: NSW
  • Local Club: South Australian Moke Club

Posted Yesterday, 09:01 PM

I think you and I have talked about these cranks with no c-clip in the past Spider as I tooo find them a nightmare to get consistent results.

The depth washer sounds a good solution, however what is to stop you tightening the flywheel bolt just that little bit further when you swap out the depth washer for the keyed one? It would be harder to make, but a keyed washer with a build in depth stop would be nirvana!


What really irks me, is the idea of not having a c-washer has come about to solve a problem created with afternarket cranks. If these were designed/made better there is no issue with having the grooves for the clip


It's a work in progress for me and yes, I had considered the issue of how tight do we do the Bolt up to on the last setting. On my last, I had the Bolt Torqued up to over 200 lb/ft to set it as I was going for a measurement, rather than a particular fastener torque, in this case I didn't measure the torque conventionally, it was 'until blue in the face'. Then after setting the depth, fit up the Key Washer and the bolt with loctite, torquing it to 150 lb/ft. When I strip it down next, I'll let you know if this has done the trick. I'm sure with how tight I have been able to tit the flywheels the last 15+ years, that after that initial fitting, the bolt could be left out.

<Edit: I think there's merit in your suggestion there Graeme of a Key Washer with a depth setter, for that matter, do we really need a Key'ed Washer there ? >


Edited by Spider, Today, 07:27 AM.


#14 stoneface

stoneface

    Speeding Along Now

  • TMF+ Member
  • PipPipPipPipPip
  • 435 posts
  • Location: Surrey

Posted Yesterday, 10:14 PM

Just to be clear my spacer is phosphor bronze not brass.

MED do a slot-less crank and they used to have a video of how they assemble and measured for the required spacer thickness. Not much different to how we've been doing it from memory. 

I can't find the video but their website gives a brief explanation and says they set their end float to 0.010" https://www.med-engi...-web-crankshaft


#15 cooperbloke

cooperbloke

    Passed Test

  • Noobies
  • PipPip
  • 33 posts
  • Location: Mildenhall

Posted Today, 04:16 PM

Just to be clear my spacer is phosphor bronze not brass.

MED do a slot-less crank and they used to have a video of how they assemble and measured for the required spacer thickness. Not much different to how we've been doing it from memory. 

I can't find the video but their website gives a brief explanation and says they set their end float to 0.010" https://www.med-engi...-web-crankshaft

Ah yes, thanks Stoneface. You even mentioned phosphor bronze in your first reply. Sorry for not paying attention!  I suspect a brass shim may not last too long. I'm not sure why mine is (or appears to be) aluminum or aluminium alloy, but if I have the opportunity to have a new shim made, I can make an informed decision then, thank you for the information. 


Sadly, being unfamiliar with the arrangement, I did not consider the importance or necessity of determining the primary gear end float during the dry build. It would have been so much easier then! I'll just have to work backwards.


Also tagged with one or more of these keywords: engine

3 user(s) are reading this topic

1 members, 2 guests, 0 anonymous users


    Gaz66